Android 中 Activity 的生命周期, 跳转和传参, 四种启动模式
1. Activity 的生命周期
package com.example.hello;

import androidx.appcompat.app.AppCompatActivity;

import android.os.Bundle;
import android.util.Log;

/**
 * 生命周期: onCreate --> onStart --> onResume --> onPause --> onStop --> onDestroy
 * 切换到后台再次进入在退出:
 * onCreate --> onStart --> onResume --> onPause --> onStop -->
 * onRestart --> onStart --> onResume --> onPause --> onStop --> onDestroy
 */
public class LiftCycleActivity extends AppCompatActivity {


    @Override
    protected void onCreate(Bundle savedInstanceState) {


        super.onCreate(savedInstanceState);
        setContentView(R.layout.activity_lift_cycle);
        Log.d("LiftCycle", "---onCreate---");
    }

    @Override
    protected void onStart() {


        super.onStart();
        Log.d("onStart", "---onStart---");
    }

    /**
     * 数据刷新等
     */
    @Override
    protected void onResume() {


        super.onResume();
        Log.d("onResume", "---onResume---");
    }

    /**
     * 后台切换回复等
     */
    @Override
    protected void onPause() {


        super.onPause();
        Log.d("onPause", "---onPause---");
    }

    @Override
    protected void onStop() {


        super.onStop();
        Log.d("onStop", "---onStop---");
    }

    @Override
    protected void onRestart() {


        super.onRestart();
        Log.d("onRestart", "---onRestart---");
    }

    @Override
    protected void onDestroy() {


        super.onDestroy();
        Log.d("onDestroy", "---onDestroy---");
    }


}

2. Activity 的跳转
由 AActivity 跳转到 BActivity
package com.example.hello.jump;

import androidx.annotation.Nullable;
import androidx.appcompat.app.AppCompatActivity;

import android.content.ComponentName;
import android.content.Intent;
import android.os.Bundle;
import android.view.View;
import android.widget.Button;

import com.example.hello.R;
import com.example.hello.util.ToastUtil;

public class AActivity extends AppCompatActivity {


    private Button btnJumpB;

    @SuppressWarnings("SpellCheckingInspection")
    @Override
    protected void onCreate(Bundle savedInstanceState) {


        super.onCreate(savedInstanceState);
        setContentView(R.layout.activity_a);
        btnJumpB = findViewById(R.id.btn_jump_b);
        btnJumpB.setOnClickListener(v -> {


            // 显式 1
            Intent intent = new Intent(AActivity.this, BActivity.class);
            startActivity(intent);

//            // 显式 2
//            Intent intent = new Intent();
//            intent.setClass(AActivity.this, BActivity.class);
//            startActivity(intent);

//            // 显式 3
//            Intent intent = new Intent();
//            intent.setClassName(AActivity.this, "com.example.hello.jump.BActivity");
//            startActivity(intent);

//            // 显式 4
//            Intent intent = new Intent();
//            intent.setComponent(new ComponentName(AActivity.this, "com.example.hello.jump.BActivity"));
//            startActivity(intent);

//            // 隐式
//            Intent intent = new Intent();
//            intent.setAction("android.intent.action.B");
//            startActivity(intent);
        });
    }

}
其中隐式的方法中 setAction 是在 AndroidManifest.xml 文件中设置.
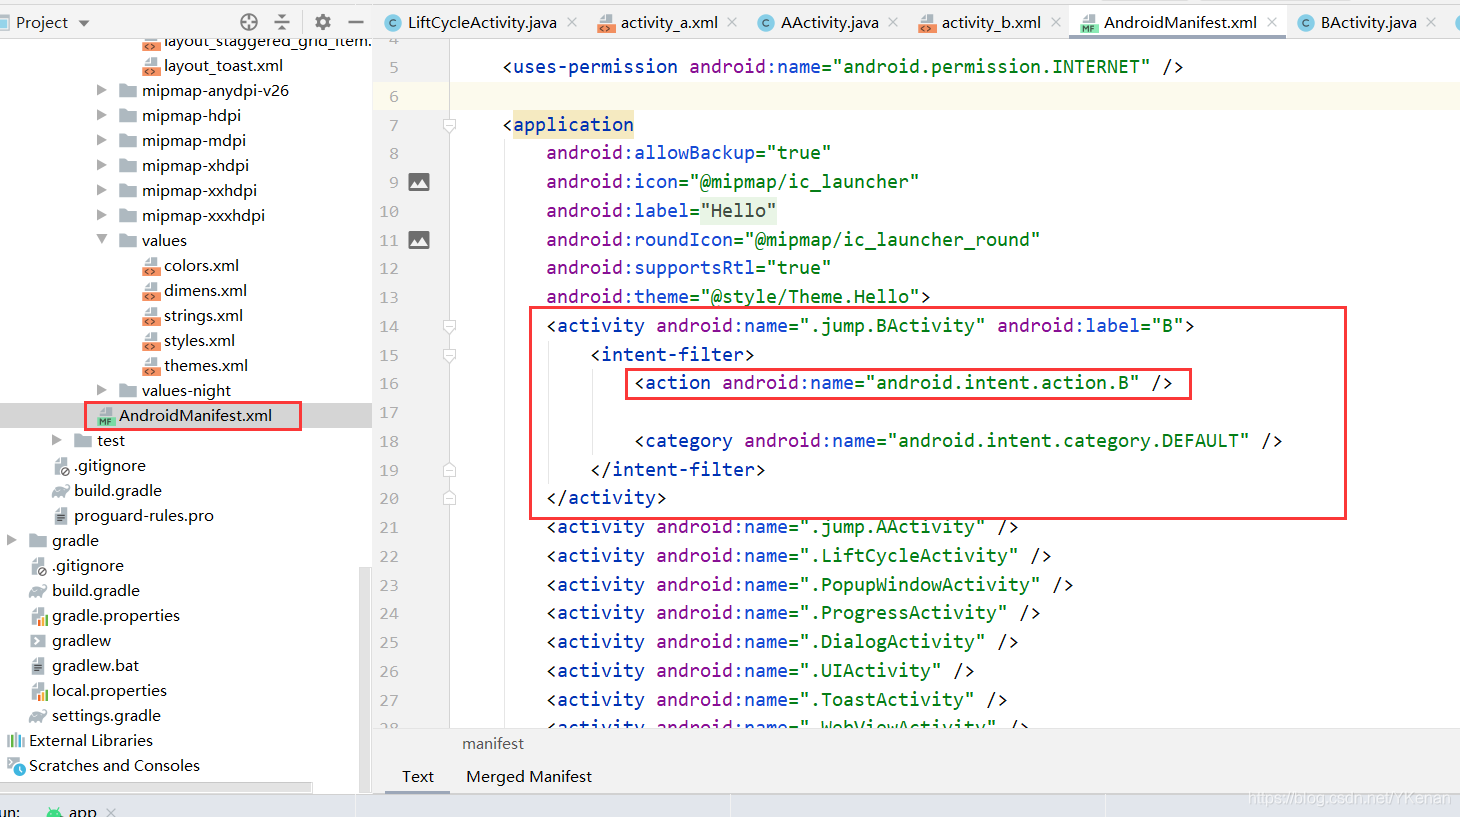
<activityandroid:name=".jump.BActivity" android:label="B">
	<intent-filter>
		<action android:name="android.intent.action.B" />

		<category android:name="android.intent.category.DEFAULT" />
	</intent-filter>
</activity>
3. Activity 的传参
AActivity 文件
package com.example.hello.jump;
import androidx.annotation.Nullable;
import androidx.appcompat.app.AppCompatActivity;
import android.content.ComponentName;
import android.content.Intent;
import android.os.Bundle;
import android.view.View;
import android.widget.Button;
import com.example.hello.R;
import com.example.hello.util.ToastUtil;
public class AActivity extends AppCompatActivity {
private Button btnJumpB;
@SuppressWarnings("SpellCheckingInspection")
@Override
protected void onCreate(Bundle savedInstanceState) {
super.onCreate(savedInstanceState);
setContentView(R.layout.activity_a);
btnJumpB = findViewById(R.id.btn_jump_b);
btnJumpB.setOnClickListener(v -> {
// 显式 1
Intent intent = new Intent(AActivity.this, BActivity.class);
Bundle bundle = new Bundle();
bundle.putString("name", "YKenan");
bundle.putInt("age", 25);
// 传参数
intent.putExtras(bundle);
// startActivity(intent);
// 0 为请求码, 用于判断返回.
startActivityForResult(intent, 0);
// // 显式 2
// Intent intent = new Intent();
// intent.setClass(AActivity.this, BActivity.class);
// startActivity(intent);
// // 显式 3
// Intent intent = new Intent();
// intent.setClassName(AActivity.this, "com.example.hello.jump.BActivity");
// startActivity(intent);
// // 显式 4
// Intent intent = new Intent();
// intent.setComponent(new ComponentName(AActivity.this, "com.example.hello.jump.BActivity"));
// startActivity(intent);
// // 隐式
// Intent intent = new Intent();
// intent.setAction("android.intent.action.B");
// startActivity(intent);
});
}
/**
* 处理返回的数据
*
* @param requestCode 自定义的请求 Code
* @param resultCode Activity.RESULT_OK 等的值
* @param data 返回的数据
*/
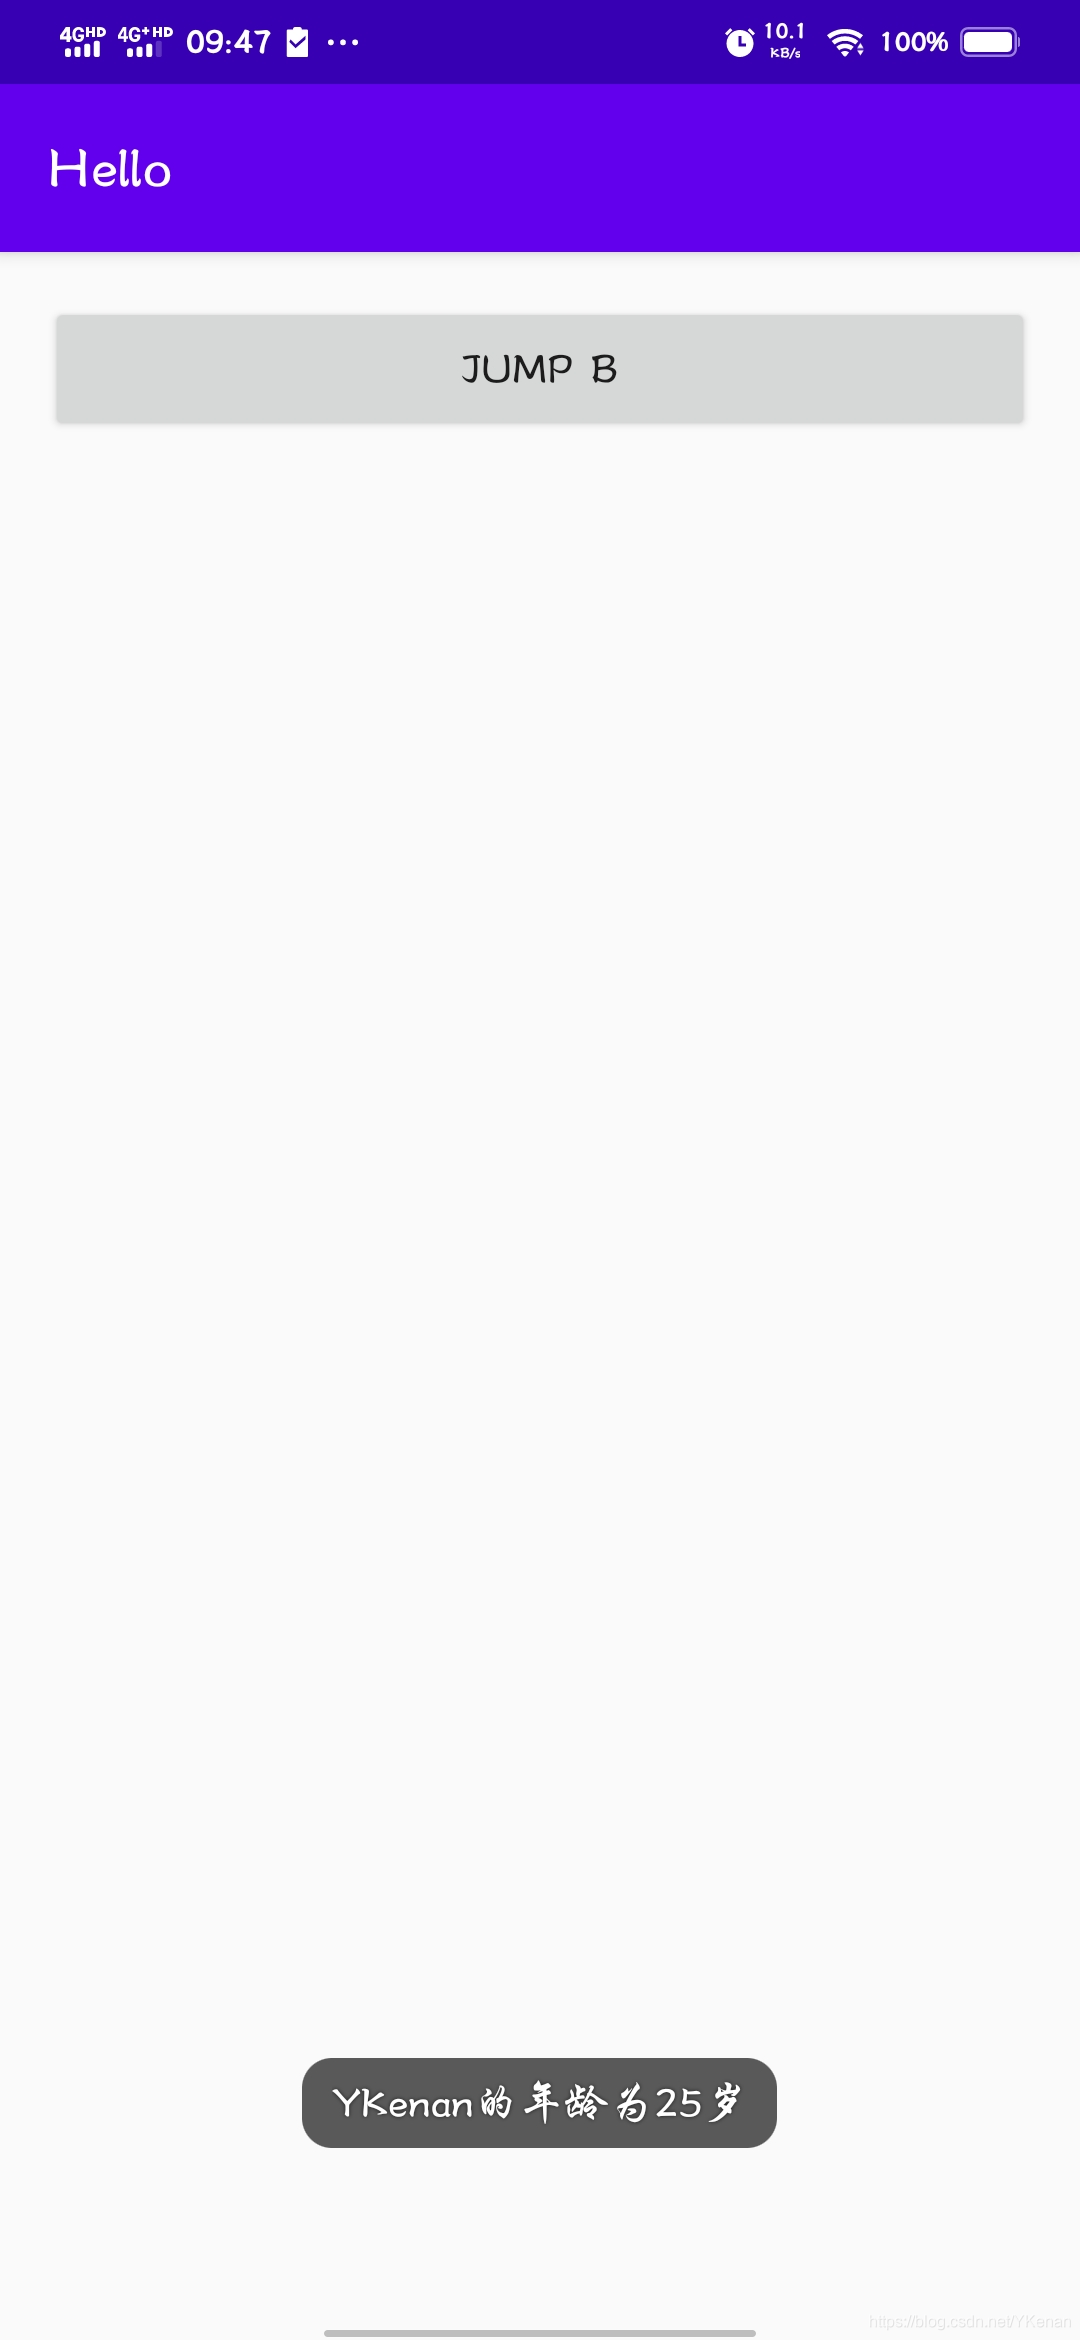
@Override
protected void onActivityResult(int requestCode, int resultCode, @Nullable Intent data) {
super.onActivityResult(requestCode, resultCode, data);
if (requestCode == 0 && resultCode == -1) {
ToastUtil.showShortToast(AActivity.this, data.getExtras().getString("con"));
}
}
}
<?xml version="1.0" encoding="utf-8"?>
<LinearLayout xmlns:android="http://schemas.android.com/apk/res/android"
    xmlns:app="http://schemas.android.com/apk/res-auto"
    xmlns:tools="http://schemas.android.com/tools"
    android:layout_width="match_parent"
    android:layout_height="match_parent"
    android:orientation="vertical"
    android:padding="15dp"
    tools:context=".jump.AActivity">

    <Button
        android:id="@+id/btn_jump_b"
        android:layout_width="match_parent"
        android:layout_height="wrap_content"
        android:text="@string/jumpB"/>

</LinearLayout>
BActivity 文件
package com.example.hello.jump;
import androidx.appcompat.app.AppCompatActivity;
import android.app.Activity;
import android.content.Intent;
import android.os.Bundle;
import android.view.View;
import android.widget.Button;
import android.widget.TextView;
import com.example.hello.R;
public class BActivity extends AppCompatActivity {
private TextView jumpTv;
private Button btnJumpA;
@Override
protected void onCreate(Bundle savedInstanceState) {
super.onCreate(savedInstanceState);
setContentView(R.layout.activity_b);
jumpTv = findViewById(R.id.jump_tv);
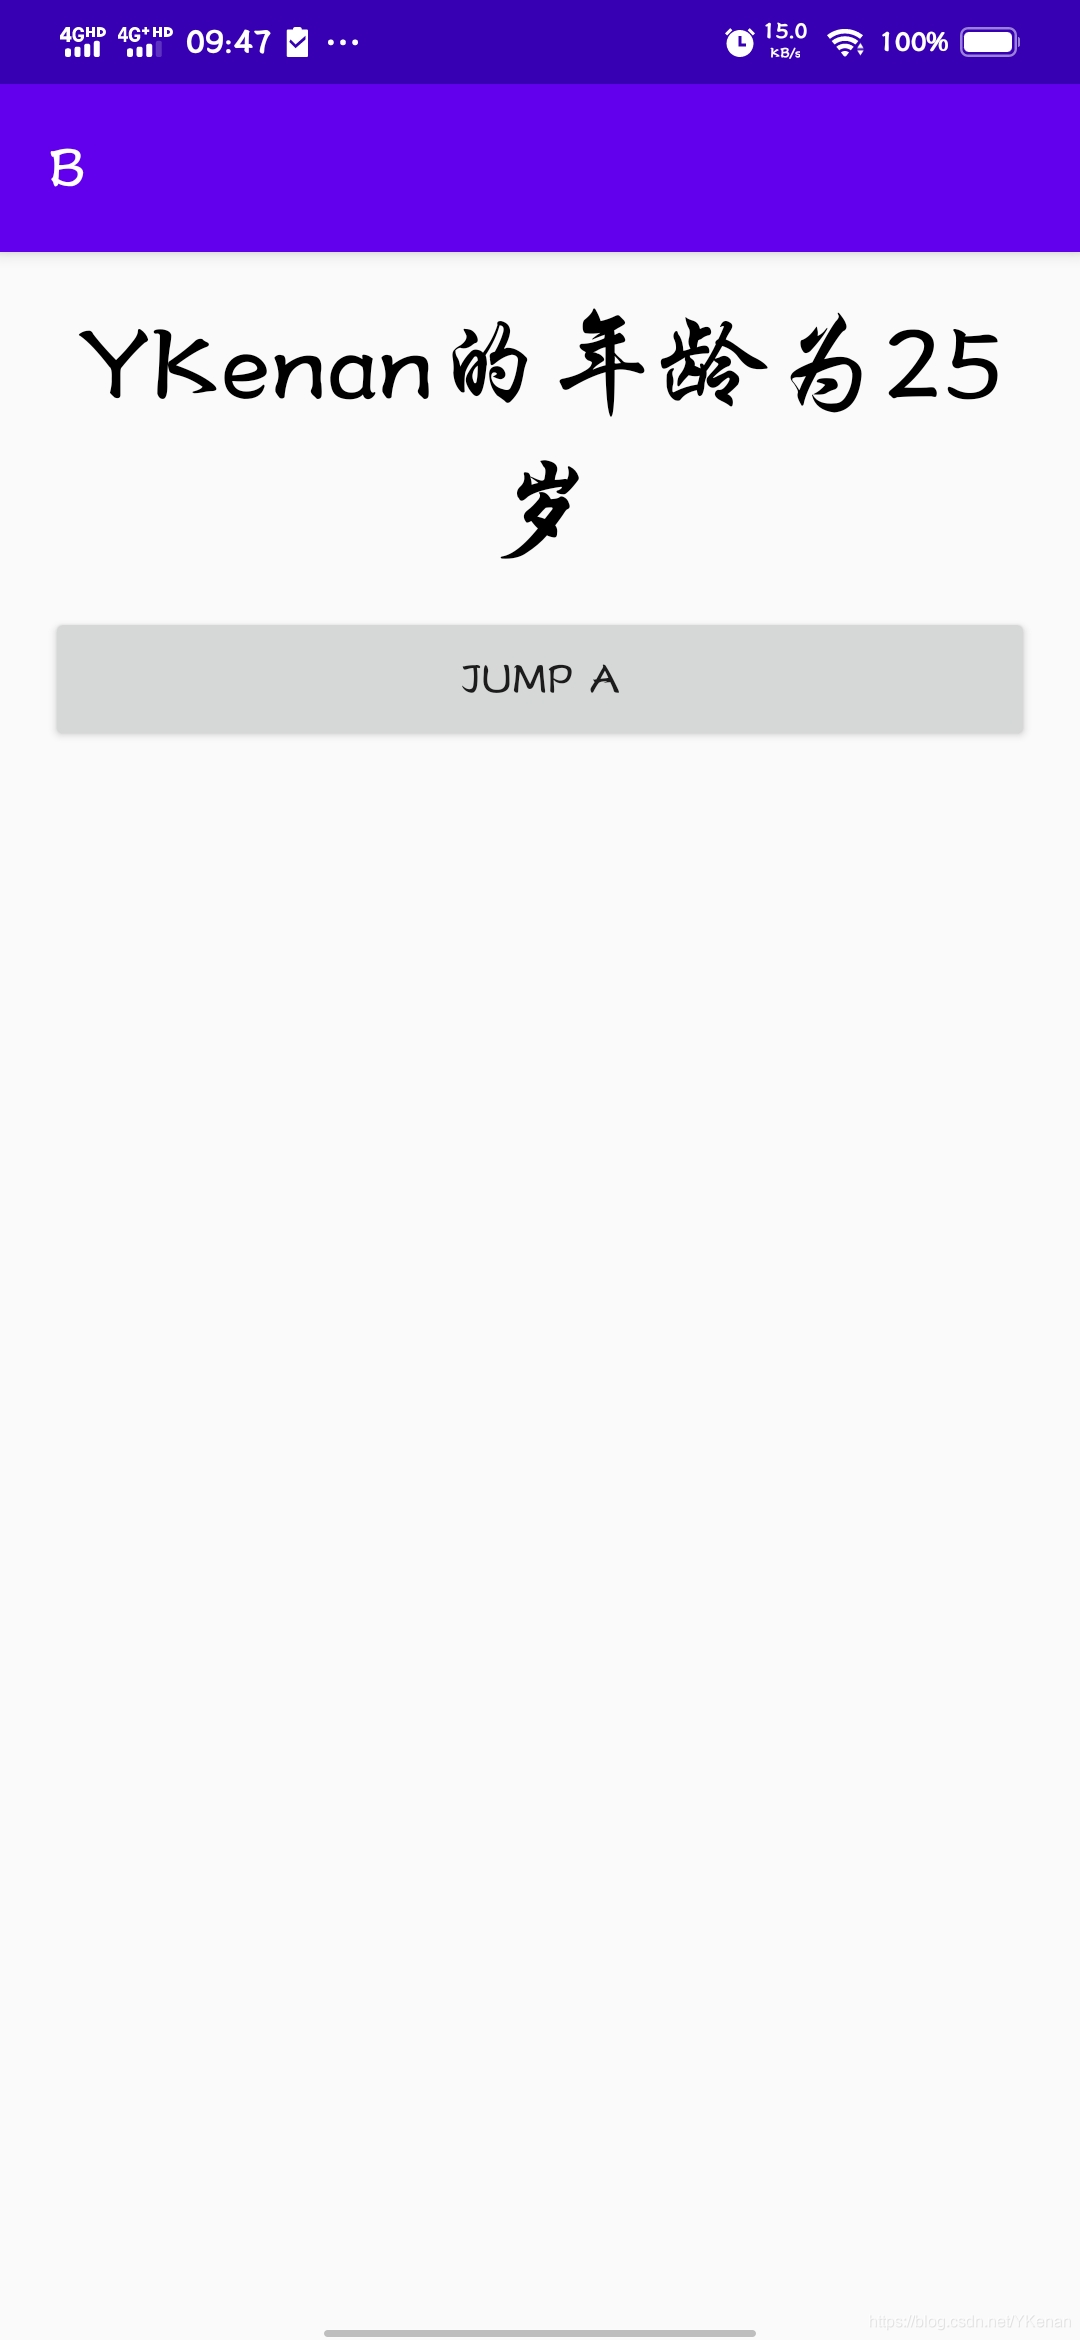
// 获取传递过来的参数
Bundle bundle = getIntent().getExtras();
String name = bundle.getString("name");
int age = bundle.getInt("age");
// 添加内容
String con = name + "的年龄为" + age + "岁";
jumpTv.setText(con);
// 返回 A
btnJumpA = findViewById(R.id.btn_jump_a);
btnJumpA.setOnClickListener(v -> {
Intent intent = new Intent();
Bundle bundle1 = new Bundle();
bundle1.putString("con", con);
intent.putExtras(bundle1);
setResult(Activity.RESULT_OK, intent);
// 关闭当前的页面
finish();
});
}
}
<?xml version="1.0" encoding="utf-8"?>
<LinearLayout xmlns:android="http://schemas.android.com/apk/res/android"
    xmlns:app="http://schemas.android.com/apk/res-auto"
    xmlns:tools="http://schemas.android.com/tools"
    android:layout_width="match_parent"
    android:layout_height="match_parent"
    android:orientation="vertical"
    android:padding="15dp"
    tools:context=".jump.BActivity">

    <TextView
        android:id="@+id/jump_tv"
        android:layout_width="match_parent"
        android:layout_height="wrap_content"
        android:gravity="center"
        android:text="@string/app_name"
        android:textColor="@color/black"
        android:textSize="35sp" />

    <Button
        android:id="@+id/btn_jump_a"
        android:layout_width="match_parent"
        android:layout_height="wrap_content"
        android:layout_marginTop="10dp"
        android:text="@string/jumpA" />

</LinearLayout>
4. Activity 的四种启动模式
Activity 的 android:launchMode 属性:
扫描二维码关注公众号,回复: 12474998 查看本文章
- standard: 标准模式, 默认.
1.1 Activity 是由任务栈管理的, 每启动一个 Activity, 就会被放入栈中, 按返回键, 就会从栈顶移除一个 Activity.
1.2 Standard 是默认的启动模式, 即标准模式. 每启动一个 Activity, 都会创建一个新的实例.
- singleTop: Task栈顶复用模式.
当要启动的目标 Activity 已经位于栈顶时, 不会创建新的实例, 会复用栈顶的 Activity, 并且其 onNewIntent() 万法会被姆用; 如宋曰 AclVily 不在栈顶, 则跟 Standard —样创建新的实例.
- singleTask: Task栈内复用模式.
在同一个任务栈中, 如果要启动的目标 Activity 已经在栈中, 则会复用该 Activity, 并调用其 onNewIntent() 方法, 并且该 Activity 上面的 Activity 会被清除; 如果栈中没有 ,则创建新的实例.
- singleInstance: 全局单例模式.
全局复用, 不管哪个 Task 栈, 只要存在目标 Activity, 就复用. 每个 Activity 占有一个新的 Task 栈.