每天一个jquery插件-动态照片墙
动态照片墙
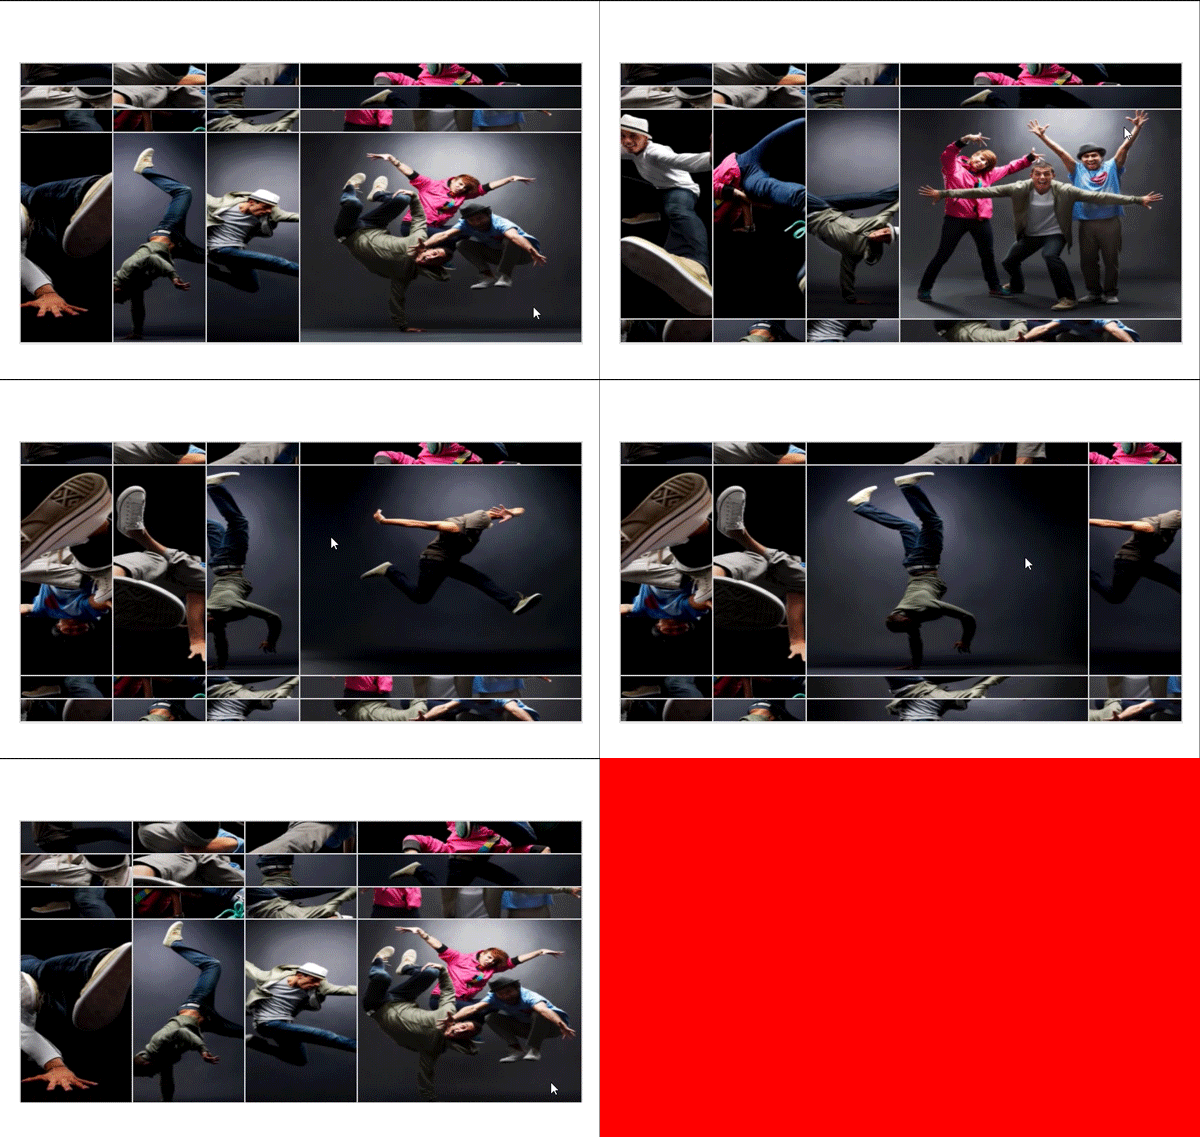
j接着昨天的动态栅格来的,成功模仿出了动态照片墙的效果,原理很简单
效果如下

html部分
<!DOCTYPE html>
<html>
	<head>
		<meta charset="utf-8">
		<title>动态的栅格</title>
		<script src="js/jquery-3.4.1.min.js"></script>
		<script src="js/dtdsg.js"></script>
		<link href="css/dtdsg.css" rel="stylesheet" type="text/css" />
		<style>
			#div{


				border: 1px solid lightgray;
				width: 800px;
				height: 400px;
				margin: 100px auto;
			}
		</style>
	</head>
	<body>
		<div id="div"></div>
	</body>
</html>
<script>
	var temp = dtdsg("div");
	temp.load();
</script>
css部分
*{


	margin: 0;
	padding: 0;
}
.fz{


}
.row{


	flex: 1;
	display: flex;
	height: 100px;
}
.line{


	flex: 1;
	border: 1px solid lightgray;
	background-position: center center;
	background-size:400px 300px ;
	min-width: 0;
}
js部分
var dtdsg = function(id){


	var $id = $("#"+id);
	$id.addClass("fz")
	var index = 0;
	for(var i = 0;i<4;i++){


		var $row =$("<div class='row' data-row='"+i+"'></div>")
		$row.appendTo($id);
		for(var j = 0;j<4;j++){


			index++;
			var $line =$("<div class='line' data-line='"+j+"' style='background-image:url(img/"+index+".jpg)'></div>")
			$line.appendTo($row)
		}
	}
	return{


		$id:$id,
		load:function(){


			var that = this;
			that.$id.find(".line").mouseenter(function(){


				var line = $(this).attr("data-line");
				var row  =$(this).parent().attr("data-row");
				//符合条件给样式,不符合条件还原
				that.$id.find(".row[data-row='"+row+"']").stop().animate({


					"height":"300px"
				},200)
				that.$id.find(".row[data-row!='"+row+"']").stop().animate({


					"height":"33px"
				},200)
				that.$id.find(".line[data-line='"+line+"']").stop().animate({


					"min-width":"400px"
				},200)
				that.$id.find(".line[data-line!='"+line+"']").stop().animate({


					"min-width":"0px"
				},200)
				//当鼠标移出界面,全部还原
				that.$id.mouseout(function(){


					that.$id.find(".row").stop().animate({


						"height":"100px"
					},200)
					that.$id.find(".line").stop().animate({


						"min-width":"0px"
					},200)
				})
			})
		}
	}
}
- 关于各种自适应的计算性的问题,因为我是写死的,所以这里不做讨论
- 然后图片的来源就是模仿目标的图片,把它当成背景图引入div之中,固定大小并且给上居中的定位,这样子就可以无论容器多大,背景图一直是固定大小且居中的,等容器达到目标尺寸之后就会展现出完全的图片了
- 关于动画的效果一开始我想通过class中写keyframes来控制,不过因为一开始row因为flex盒子对高度变化不明感所以动画中高度变化不连贯,我以为是没写对,又换了animate来直接控制属性,结果还是不行,后面想通了既然靠计算干脆row上面就不用flex盒子控制了,后面动画效果就没问题了。
- 完事,碎觉