有两种方式:
@注解版
新增依赖:
<dependency>
     <groupId>org.mybatis.spring.boot</groupId>
     <artifactId>mybatis-spring-boot-starter</artifactId>
     <version>2.1.2</version>
</dependency>
经典全局配置文件:
spring:
  datasource:
    driver-class-name: com.mysql.cj.jdbc.Driver
    url: jdbc:mysql://localhost:3306/springboot?useUnicode=true&characterEncoding=utf8&serverTimezone=UTC
    username: root
    password: 123456
准备实体类:
public class Department {

	private Integer id;
	private String departmentName;

    //省略构造器,get/set方法,省略toString方法
}
mapper层接口: 举例如下
//指定这是一个操作数据库的mapper
/*可以使用mapper的批量扫描注解 ,写在启动类上*/
//@Mapper
public interface DepartmentMapper {

    @Select("select * from department where id=#{id}")
    public Department getDeptById(Integer id);

    @Delete("delete from department where id=#{id}")
    public int deleteDeptById(Integer id);

    @Options(useGeneratedKeys = true,keyProperty = "id") //自动生成主键  并且指定对应属性
    @Insert("insert into department(department_name) values(#{departmentName})")
    public int insertDept(Department department);

    @Update("update department set department_name=#{departmentName} where id=#{id}")
    public int updateDept(Department department);
}
controller层:
@RestController
public class DeptController {
    @Autowired
    private  DepartmentMapper departmentMapper;

    @GetMapping("/dept/{id}")
    public Department getDepartment(@PathVariable("id") Integer id) {
        return departmentMapper.getDeptById(id);
    }

    @GetMapping("/dept")
    public Department insertDept(Department department) {
        departmentMapper.insertDept(department);
        return department;
    }
}
数据库的命名:

Java实体类的命名:

由于数据库的命名规范和Java不统一,所有需要始终驼峰命名配置
@Configuration
public class MybatisConfig {
    @Bean
    public ConfigurationCustomizer configurationCustomizer(){

        return  new ConfigurationCustomizer() {
            @Override
            public void customize(org.apache.ibatis.session.Configuration configuration) {
                /*配置使用驼峰命名规则*/
                configuration.setMapUnderscoreToCamelCase(true);
            }
        };
    }
}
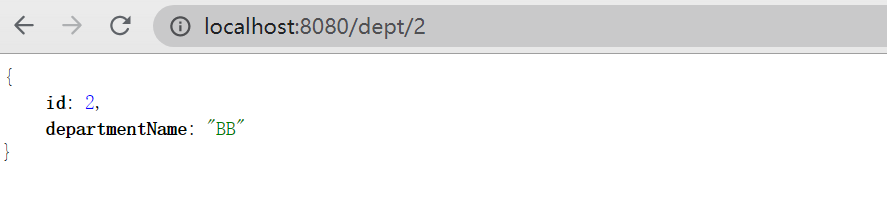
浏览器访问:
当mapper层接口较多时,可是使用@MapperScan注解加在住类上:
使用MapperScan批量扫描所有的Mapper接口;
@MapperScan(value = "com.xxx.xxx.mapper")
@SpringBootApplication
public class SpringBoot06DataMybatisApplication {

	public static void main(String[] args) {
		SpringApplication.run(SpringBoot06DataMybatisApplication.class, args);
	}
}
------------------------------------------------------------------------------------------
配置文件版:
文件结构 举例如下:

Mybatis的全局配置文件
<?xml version="1.0" encoding="UTF-8" ?>
    <!DOCTYPE configuration
    PUBLIC "-//mybatis.org//DTD Config 3.0//EN"
    "http://mybatis.org/dtd/mybatis-3-config.dtd">

<configuration>
    <!--设置驼峰命名映射-->
    <settings>
        <setting name= "mapUnderscoreToCamelCase" value="true"/>
    </settings>

</configuration>
xxxMapper.xml文件的配置:(很常见的那种)
<?xm1 version="1.0" encoding="UTF-8" ?>
< DOCTYPE mapper
PUBLIC "-//mybatis.org//DTD Mapper 3.0//EN"
"http://mybatis.org/dtd/mybatis-3-mapper.dtd">
<mapper namespace="com.atguigu.springboot.mapper.EmployeeMapper">

    <select id="getEmpById" resultType="com.atguigu.springboot.bean.Employee">
        SELECT * FROM employee WHERE id=#{id}
    </select>
</mapper>
为了使这两个文件生效,在application.yml中设置:
mybatis:
  config-location: classpath:mybatis/mybatis-config.xml   #指定全局配置文件的位置
  mapper-locations: classpath:mybatis/mapper/*.xml        #指定sql映射文件的位置
之后就可以写controller层的方法了
至此完成了一个Mybatis的配置文件版
更多使用参照