文章目录
1. Netty工作模型

- Netty抽象出两组线程池 BossGroup 专门负责接收客户端的连接, WorkerGroup 专门负责网络的读写
- BossGroup 和 WorkerGroup 类型都是 NioEventLoopGroup
- NioEventLoopGroup 相当于一个事件循环组, 这个组中含有多个事件循环 ,每一个事件循环是 NioEventLoop
- NioEventLoop 表示一个不断循环的执行处理任务的线程, 每个NioEventLoop 都有一个selector , 用于监听绑定在其上的socket的网络通讯
- NioEventLoopGroup 可以有多个线程, 即可以含有多个NioEventLoop
- 每个Boss NioEventLoop 循环执行的步骤有3步
– 轮询accept 事件
– 处理accept 事件 , 与client建立连接 , 生成NioScocketChannel , 并将其注册到某个worker NIOEventLoop 上的 selector
– 处理任务队列的任务 , 即 runAllTasks - 每个 Worker NIOEventLoop 循环执行的步骤
– 轮询read, write 事件
– 处理i/o事件, 即read , write 事件,在对应NioScocketChannel 处理
– 处理任务队列的任务 , 即 runAllTasks - 每个Worker NIOEventLoop 处理业务时,会使用pipeline(管道), pipeline 中包含了 channel , 即通过pipeline 可以获取到对应通道, 管道中维护了很多的 处理器
2. 通讯实例
2.1 引入依赖
这里使用4.x系列的版本,因为 5.x已经被官方放弃了,推荐的就是Netty 4

    <dependency>
      <groupId>io.netty</groupId>
      <artifactId>netty-all</artifactId>
      <version>4.1.58.Final</version>
    </dependency>
2.2 Server Handler
创建一个ServerHandler,用于接收客户端的连接、读写数据等事件,并做出相应的业务处理
public class SimpleServerHandler extends ChannelInboundHandlerAdapter {


    @Override
    public void channelRegistered(ChannelHandlerContext ctx) throws Exception {


        System.out.println(ctx.channel().remoteAddress() + " 触发事件:channelRegistered");
    }

    @Override
    public void channelActive(ChannelHandlerContext ctx) throws Exception {


        System.out.println(ctx.channel().remoteAddress() + " 触发事件:channelActive");
    }

    @Override
    public void channelUnregistered(ChannelHandlerContext ctx) throws Exception {


        System.out.println("客户端已退出:" + ctx.channel().remoteAddress());
    }

    @Override
    public void channelRead(ChannelHandlerContext ctx, Object msg) throws Exception {


        ByteBuf byteBuf = (ByteBuf)msg;
        System.out.println("收到客户端消息:" + byteBuf.toString(CharsetUtil.UTF_8));
    }

    @Override
    public void channelReadComplete(ChannelHandlerContext ctx) throws Exception {


        ChannelFuture channelFuture = ctx.writeAndFlush(Unpooled.copiedBuffer("hello client", CharsetUtil.UTF_8));
    }

    @Override
    public void exceptionCaught(ChannelHandlerContext ctx, Throwable cause)
            throws Exception {


        ctx.close();
    }
}
- channelRegistered:通道注册事件,客户端连接后,优先触发该事件
- channelActive:通道激活事件,顺序在channelRegistered之后
- channelUnregistered:通道取消注册事件,客户端断开连接后触发
- channelRead:读事件,通道有数据的时候(客户端写入数据)处罚
- channelReadComplete:读取完毕触发
- exceptionCaught:异常捕获
2.3 Server
创建服务端程序,包含两个线程组:
- boss:用于接收传入的连接
- worker:上一步的boss接收连接并将连接注册到worker,由worker进行IO事件监听并处理事件
此外,还需要创建一个ServerBootstrap对象,用于设置服务器配置的助手类。
最后,绑定端口号并启动。
示例代码如下:
public class SimpleServer {


    private static final int PORT = 6666;

    public static void main(String[] args) throws InterruptedException {


        //创建线程组:接收客户端连接
        NioEventLoopGroup bossGroup = new NioEventLoopGroup();
        //创建线程组:处理客户请求业务
        NioEventLoopGroup workerGroup = new NioEventLoopGroup();
        //服务启动配置
        ServerBootstrap serverBootstrap = new ServerBootstrap();
        serverBootstrap.group(bossGroup, workerGroup)       //指定2个线程组
                .channel(NioServerSocketChannel.class)      //使用NioServerSocketChannel作为服务端通讯的通道
                .option(ChannelOption.SO_BACKLOG, 128)          //设置线程队列中等待连接个数
                .childOption(ChannelOption.SO_KEEPALIVE, true)  //保持活动连接
                .childHandler(new ChannelInitializer<SocketChannel>() {


                    @Override
                    protected void initChannel(SocketChannel socketChannel) throws Exception {


                        //往pipeline添加handler处理类
                        socketChannel.pipeline().addLast(new SimpleServerHandler());
                    }
                });
        ChannelFuture future = serverBootstrap.bind(PORT).sync();
        System.out.println("服务已启动,端口号:" + PORT);

        future.channel().closeFuture().sync();  //异步
        bossGroup.shutdownGracefully();
        workerGroup.shutdownGracefully();
    }
}
2.4 Client Handler
效果跟上面的Server Handler差不多,不同的是这用于客户端,监听事件,处理事件
public class SimpleClientHandler extends ChannelInboundHandlerAdapter {


    //通道就绪事件
    @Override
    public void channelActive(ChannelHandlerContext ctx){


        ByteBuf byteBuf = Unpooled.copiedBuffer("channelActive event", CharsetUtil.UTF_8);
        ctx.writeAndFlush(byteBuf);
    }

    @Override
    public void channelRead(ChannelHandlerContext ctx, Object msg) throws Exception {


        ByteBuf byteBuf = (ByteBuf) msg;
        System.out.println("收到服务端消息:" + ((ByteBuf) msg).toString(CharsetUtil.UTF_8));
    }
}
2.5 Client
创建客户端程序
public class SimpleClient {
private static final int PORT = 6666;
public static void main(String[] args) throws Exception {
//线程组
NioEventLoopGroup group = new NioEventLoopGroup();
//启动配置
Bootstrap bootstrap = new Bootstrap();
bootstrap.group(group) //设置线程组
.channel(NioSocketChannel.class) //设置客户通道实现类
.handler(new ChannelInitializer<SocketChannel>() {
//创建一个通道初始化对象
@Override
protected void initChannel(SocketChannel ch) throws Exception {
ch.pipeline().addLast(new SimpleClientHandler()); //往pipeline添加自定义handler
}
});
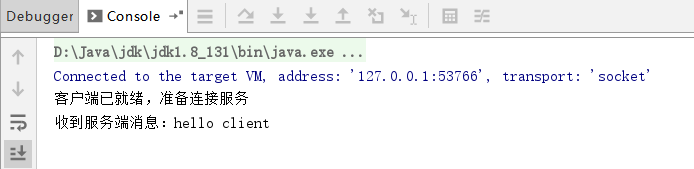
System.out.println("客户端已就绪,准备连接服务");
//连接服务端,同步阻塞
ChannelFuture future = bootstrap.connect("127.0.0.1", PORT).sync();
//关闭连接
future.channel().closeFuture().sync();
}
}
3. 测试
-
启动服务端程序

-
启动客户端程序