分别介绍Windows、centos、Ubuntu安装,apache配置介绍。
安装
Windows:下载二进制包解压,或者使用xampp工具安装
二进制包下载地址:
https://www.apachehaus.com/cgi-bin/download.plx
1.
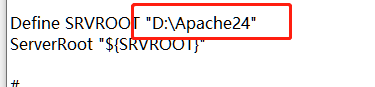
Unzip the Apache24 folder in the package zip file to the root
directory on any drive. This is the “ServerRoot” in the
config.Example: D:\Apache24
解压二进制包,将解压后的Apache24目录剪切到磁盘根目录,例如D:\Apache24。然后进入conf目录,修改httpd.conf中的变量地址,ServerRoot
2.
Open a command prompt window and cd to the \Apace24\bin folder on the
drive you unzipped the zip file to.To Start Apache in the command prompt type:
httpd.exe
进入D:\Apache24/bin目录,执行HTTP.exe,如果没有报错,打开浏览器访问http://localhost,能访问则表示部署成功
注意:启动apache可能会报这个错:apache——(OS 10048)通常每个套接字地址(协议/网络地址/端口)只允许使用一次。 :
AH00072: make_sock: could not bind to address [::]:443
这个错是443端口被占用,需要更改 D:\Apache24\conf\extra目录下,httpd-ahssl.conf和httpd-ssl.conf两个配置文件夹中的443端口,改成445或其他
3.虽然apache已经启动,但是还需要把apache注册成windows系统服务,进入apache的bin目录,执行:httpd -k install


httpd其他命令:

Stop Apache	 	           httpd -k stop
Restart Apache	           httpd -k restart
Uninstall Apache Service	httpd -k uninstall
Test Config Syntax	         httpd -t
Version Details	             httpd -V
Command Line Options List	 httpd -h
此安装采用Linux包管理工具apt和yum安装,如果需要安装指定的apache版本需要编译安装,编译安装查看之前的文章。apache可以动态扩展模块,如果不是需要太多定制内容,编译安装和包管理工具安装区别不是很大。
centos:
yum install httpd -y
apache基本管理:
状态管理:
systemctl start|stop|restart httpd.service
设置开机启动
systemctl enable httpd.service
设置开机不启动
systemctl disable httpd.service
目录结构:
/etc/httpd                  #服务目录
/etc/httpd/conf/httpd.conf  #配置文件(主配置文件)
/etc/httpd/conf.d/          #辅助配置文件夹
/var/www/html               #默认网站数据目录
/var/log/httpd/             #日志目录
查看版本
httpd -V
查看httpd加载的模块
httpd -M
apache模块路径
/etc/httpd/modules
安装apache产生了哪些文件
rpm -ql httpd
配置文件配置讲解:
主配置文件:httpd.conf
ServerRoot                     #服务所在目录路径
Listen 80                       #监听端口,可以同时监听多个端口
Listen ip:80                    #监听IP:80
ServerName www.example.com:80   #默认关闭的,打开,主机域名,没有域名的则为IP地址
Include conf.modules.d/*.conf   #导入模块配置文件夹下的所有配置文件
IncludeOptional conf.d/*.conf    #导入辅助配置文件,如果不导入,直接写在主配置文件也行
User apache
Group apache              #apache进程的用户及属组
ServerAdmin root@localhost       #配置管理员邮箱,当apache出现问题可以发邮件给管理员
DocumentRoot "/var/www/html"     #站点根目录
Directory
确定访问目录位置,标签配置。标签内是设置针对该目录的访问权限
<Directory "/var/www">
#访问路径的权限设置
    AllowOverride None
    # Allow open access:
    Require all granted
</Directory>
<Directory "/var/www/html">
    Options Indexes FollowSymLinks			# 访问时的展示形式,Indexes索引展示(显示文件目录,用作下载站点,否则把Indexs去掉)
    AllowOverride None									# 设置指令是否可以在.htaccess使用
    Require all granted									# 允许所有人访问
</Directory>
- Options 访问时展示形式
Options Indexes 当前目录下没有默认页面,就显示目录结构
Options FollowSymLinks 默认设置,允许访问符号链接
Options None 关闭- AllowOverride .htaccess文件中允许的指令类型
AllowOverride All 全部指令 AllowOverride None 默认值,不允许 AllowOverride directive-type
[directive-type] … 具体指令类型- Require 访问权限设置
Require all granted 无条件允许访问 Require all denied 无条件拒绝访问 Require method http-method [http-method] …
仅允许给定的HTTP方法访问
Require ip 10 172.20 192.168.2 指定ip地址范围的客户端可以访问
# 1. 去掉Indexes查看效果,注意改完配置后要重启http服务
<Directory "/var/www/html">
    Options FollowSymLinks
    AllowOverride None
    Require all granted
</Directory>

# 2. 去掉FollowSymLinks
<Directory "/var/www/html">
    Options None
    AllowOverride None
    Require all granted
</Directory>

# 3. 使用Require
<Directory "/var/www/html">
    Options None
    AllowOverride None
    Require all denied					# 无条件拒绝访问
</Directory>

<Directory "/var/www/html">
    Options None
    AllowOverride None
    Require method POST            # 仅允许post请求
</Directory>
IfModule
以特定模块存在与否为条件的处理指令
# 如果dir_module存在,执行DirectoryIndex
<IfModule dir_module>
    DirectoryIndex index.html                   # 站点默认展示页
</IfModule>
Files
包含适用于匹配文件名的指令
<Files ".ht*">
    Require all denied			  # 以.ht开头的文件拒绝提供访问
</Files>
ErrorLog
错误日志记录位置
ErrorLog "logs/error_log"
LogLevel
错误日志记录级别
LogLevel warn
错误级别选项
  水平    	描述
  emerg 	紧急情况 - 系统无法使用。
  alert 	必须立即采取行动。
  crit  	关键条件。
  error 	错误条件。
  warn  	警告条件。
  notice	正常但重要的情况。
  info  	基本信息
  debug 	调试级消息
IfModule log_config_module
访问日志配置模块
<IfModule log_config_module>
		# 访问日志3种格式: combined,common, combinedio
    LogFormat "%h %l %u %t \"%r\" %>s %b \"%{Referer}i\" \"%{User-Agent}i\"" combined
    LogFormat "%h %l %u %t \"%r\" %>s %b" common

    <IfModule logio_module>
      # You need to enable mod_logio.c to use %I and %O
      LogFormat "%h %l %u %t \"%r\" %>s %b \"%{Referer}i\" \"%{User-Agent}i\" %I %O" combinedio
    </IfModule>

    # 确定访问日志位置和使用哪种日志格式
    CustomLog "logs/access_log" combined
</IfModule>
日志格式说明
  标识            	含义
  %h            	客户端ip
  %l            	Remote User, 通常为一个减号(“-”);
  %u            	Remote user (from auth; may be bogus if return status (%s) is 401);非为登录访问时,其为一个减号;
  %t            	服务器收到请求时的时间;
  %r            	First line of request,即表示请求报文的首行;记录了此次请求的“方法”,“URL”以及协议版本;
  %>s           	响应状态码;
  %b            	响应报文的大小,单位是字节;不包括响应报文的http首部;
  %{

    Referer}i   	请求报文中首部“referer”的值;即从哪个页面中的超链接跳转至当前页面的;
  %{

    User-Agent}i	请求报文中首部“User-Agent”的值;即发出请求的应用程序;
IfModule alias_module
文档映射
<IfModule alias_module>
    #
    # Redirect: Allows you to tell clients about documents that used to
    # Example:
    # Redirect permanent /foo http://www.example.com/bar

    # Alias: Maps web paths into filesystem paths and is used to
    # Example:
    # Alias /webpath /full/filesystem/path

    # ScriptAlias: This controls which directories contain server scripts.
    ScriptAlias /cgi-bin/ "/var/www/cgi-bin/"   # cgi脚本映射,如果/var/www/cgi-bin/下有可执行脚本,客户端localhost/cgi-bin/脚本名称,即可执行/var/www/cgi-bin/下的脚本
</IfModule>
Redirect 外部重定向,跳转到其他网站
Alias 将url映射到文件系统个位置,调整到网站内其他目录
ScriptAlias 将url映射到CGI脚本,
AddDefaultCharset
响应内容的编码格式
AddDefaultCharset UTF-8
虚拟主机配置
虚拟主机指的是在单一机器上运行多个网站.
虚拟主机可以“基于IP”,即每个 IP 一个站点; 或者“基于域名”, 即每个 IP 多个站点。这些站点运行在同一物理服务器上。
1、基于域名
实践1,配置文件:/etc/httpd/conf.d/iplinux1.conf
<VirtualHost>
  DocumentRoot "/var/www/iplinux1/"
  ServerName www.iplinux1.org
  ErrorLog "iplinux1-error_log"
  TransferLog "iplinux1-access_log"
  <Directory "/var/www/html">
    Options Indexes FollowSymLinks
    AllowOverride None
    Require all granted
	</Directory>
</VirtualHost>

实践2,配置文件:/etc/httpd/conf.d/iplinux2.conf
<VirtualHost>
  DocumentRoot "/var/www/iplinux2/"
  ServerName www.iplinux2.org
  ErrorLog "ip2inux1-error_log"
  TransferLog "ip2inux1-access_log"
  <Directory "/var/www/html">
    Options Indexes FollowSymLinks
    AllowOverride None
    Require all granted
	</Directory>
2、基于ip
实践1,配置文件:/etc/httpd/conf.d/iplinux1.conf
<VirtualHost 172.16.99.251>
  DocumentRoot "/var/www/iplinux1/"
  ServerName www.iplinux1.org
  ErrorLog "iplinux1-error_log"
  TransferLog "iplinux1-access_log"
  <Directory "/var/www/html">
    Options Indexes FollowSymLinks
    AllowOverride None
    Require all granted
	</Directory>
</VirtualHost>

实践2,配置文件:/etc/httpd/conf.d/iplinux2.conf
<VirtualHost 172.16.99.252>
  DocumentRoot "/var/www/iplinux2/"
  ServerName www.iplinux2.org
  ErrorLog "ip2inux1-error_log"
  TransferLog "ip2inux1-access_log"
  <Directory "/var/www/html">
    Options Indexes FollowSymLinks
    AllowOverride None
    Require all granted
	</Directory>
</VirtualHost>
Ubuntu
sudo apt install apache2 -y
Ubuntu参考:https://blog.csdn.net/mashuai720/article/details/83030647