1.Nunjucks概述
在之前的例子中

直接在此处写html并不友好,这里需要使用模板引擎直接设置并响应整个html文件,并可以将后台数据绑定到模板中,在发送回客户端,本例选择Nunjucks模板引擎
2.在Koa框架下安装Nunjucks
- 安装koa-views(配置koa的模板引擎)
cnpm install --save koa-views
- 安装Nunjucks
cnpm install --save nunjucks
3.配置模板引擎
server.js
//导入koa模块
const Koa = require("koa");
//导入koa-router模块并执行
const router = require("koa-router")();
//导入koa-views 和 nunjucks
const views = require("koa-views");
const nunjucks = require("nunjucks");
//创建实例
const app = new Koa();

/*配置模板引擎
views 有两个参数
- 指定模板引擎的存放目录(在项目中新建该目录)
- 指定哪一个模板引擎

*/
app.use(views(__dirname+'/views',{

    map:{

    html:'nunjucks'}}));//将使用nunjucks模板引擎渲染以html为后缀的文件。

router.get('/',async (ctx)=>{


    //render 是异步操作,需要await 来保证预期执行顺序,同时传递变量名为greetings的数据,接受位置见index.html
    await ctx.render("index",{

    greetings:"hello my first model"});
})

app.use(router.routes());

app.listen(3000,()=>{


    console.log("server is running");
})
index.html
<!DOCTYPE html>
<html lang="en">
<head>
    <meta charset="UTF-8">
    <meta http-equiv="X-UA-Compatible" content="IE=edge">
    <meta name="viewport" content="width=device-width, initial-scale=1.0">
    <title>My WebSite</title>
</head>
<body>
    <!-- 使用{

    {变量名}},来接受服务器同变量名的数据 -->
    <h1>{

   {greetings}}</h1>
</body>
</html>
4.实现登录表单
目录结构:

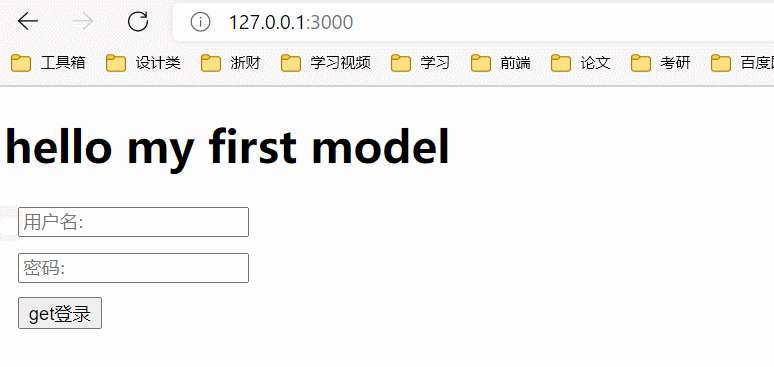
使用get方法效果:(注意url与post做对比)
使用post方法效果
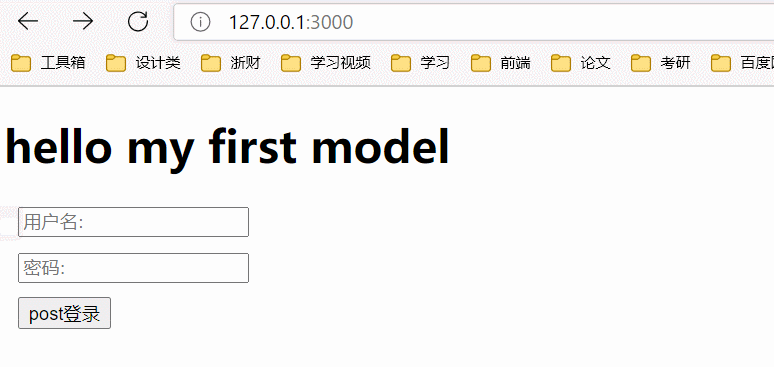
可以看到浏览器搜索栏的url是不一样的,get方法将数据显示,而post隐藏了数据。
index.html
<!DOCTYPE html>
<html lang="en">
<head>
    <meta charset="UTF-8">
    <meta http-equiv="X-UA-Compatible" content="IE=edge">
    <meta name="viewport" content="width=device-width, initial-scale=1.0">
    <title>My WebSite</title>
    <!-- 注意由于静态路由的使用,public是默认存在的
        对于koa框架下的web服务器,不要加/public
    -->
    <link rel="stylesheet" href="/css/index.css">
</head>
<body>
    <!-- 使用{

    {变量名}},来接受服务器同变量名的数据 -->
    <h1>{

   {greetings}}</h1>

    <!-- 使用get方法提交表单 -->
    <form action="/login">
        <!-- name:定义表单提交的数据字段 -->
        <p><input type="text" name="username" placeholder="用户名:"></p>
        <p><input type="password" name="password" placeholder="密码:"></p>
        <p><input type="submit" value="get登录"></p>
    </form>

    <!-- 使用post方法提交表单 -->
    <form action="/login" method="POST">
        <!-- name:定义表单提交的数据字段 -->
        <p><input type="text" name="username" placeholder="用户名:"></p>
        <p><input type="password" name="password" placeholder="密码:"></p>
        <p><input type="submit" value="post登录"></p>
    </form>

</body>
</html>
login.html
<!DOCTYPE html>
<html lang="en">
<head>
    <meta charset="UTF-8">
    <meta http-equiv="X-UA-Compatible" content="IE=edge">
    <meta name="viewport" content="width=device-width, initial-scale=1.0">
    <title>Login Page</title>
</head>
<body>
    <h1>hello this is the login page!</h1>
    <p>用户名:{

   {userNameInLogin}}</p>
    <p>密码:{

   {passWordInLogin}}</p>
</body>
</html>
server.js
//导入koa模块
const Koa = require("koa");
//导入koa-router模块并执行
const router = require("koa-router")();
//导入koa-views 和 nunjucks
const views = require("koa-views");
const nunjucks = require("nunjucks");
//导入koa-statics
const static = require("koa-static")
//导入koa-parser 解析post传递的数
const parser = require("koa-parser")

//创建实例
const app = new Koa();

//设置静态路由
app.use(static(__dirname+"/public"));

//可以解析post请求的参数
app.use(parser());

/*配置模板引擎
views 有两个参数
- 指定模板引擎的存放目录(在项目中新建该目录)
- 指定哪一个模板引擎

*/
app.use(views(__dirname+'/views',{

    map:{

    html:'nunjucks'}}));//将使用nunjucks模板引擎渲染以html为后缀的文件。

router.get('/',async (ctx)=>{


    //render 是异步操作,需要await 来保证预期执行顺序,同时传递变量名为greetings的数据,接受位置见index.html
    await ctx.render("index.html",{

    greetings:"hello my first model"});
});


//get方法实现表单——按下登录按钮后
router.get("/login",async (ctx,next)=>{


    // 接受数据
    let userName = ctx.query.username;
    let passWord = ctx.query.password;
    // console.log(userName,passWord);
    await ctx.render("login.html",{


        userNameInLogin:userName,
        passWordInLogin:passWord
    })
});

//post方法实现表单——按下登录按钮后
/*
由于post方法在url 中隐藏了数据
所以需要导入koa-parser 模块进行解析
*/
router.post("/login",async (ctx,next)=>{


    // 接受数据,这里由于是post方法,所以不用query使用request.body
    let userName = ctx.request.body.username;
    let passWord = ctx.request.body.password;
    await ctx.render("login.html",{


        userNameInLogin:userName,
        passWordInLogin:passWord
    })
});


app.use(router.routes());

app.listen(3000,()=>{


    console.log("server is running");
})