目标:Netty的自定义RPC,序列化协议为JSON,使用fastjson作为JSON框架,并根据RpcRequest实体作为通信协议,服务端需根据客户端传递过来的RpcRequest对象通过反射,动态代理等技术,最终能够执行目标方法,返回字符串"success"。
-
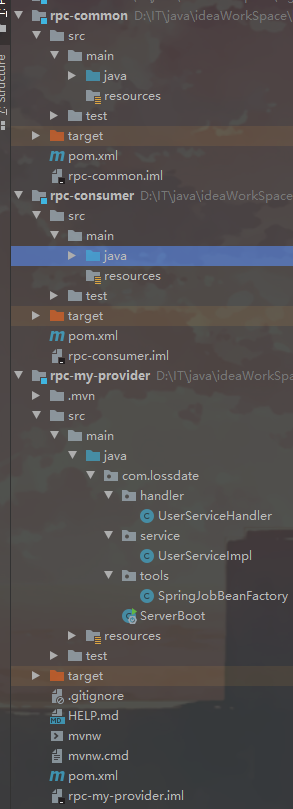
结构
分为三个模块:rpc-common 通用模块, rpc-consumer 客户端模块, rpc-my-provider客服端模块
-
rpc-common模块
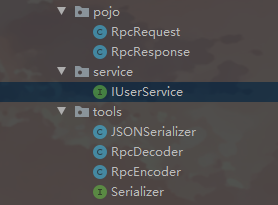
1)接口public interface IUserService { public RpcResponse sayHello(String msg); }2)JSON序列化工具
public interface Serializer {


    /**
     * java对象转换为二进制
     */
    byte[] serialize(Object object) throws IOException;

    /**
     * 二进制转换成java对象
     */
    <T> T deserialize(Class<T> clazz, byte[] bytes) throws IOException;
}
public class JSONSerializer implements Serializer { @Override public byte[] serialize(Object object) { return JSON.toJSONBytes(object); } @Override public <T> T deserialize(Class<T> clazz, byte[] bytes) { return JSON.parseObject(bytes, clazz); } }3)定义编码和解码
public class RpcEncoder extends MessageToByteEncoder {


    private Class<?> clazz;
    private Serializer serializer;

    public RpcEncoder(Class<?> clazz, Serializer serializer) {


        this.clazz = clazz;
        this.serializer = serializer;
    }

    @Override
    protected void encode(ChannelHandlerContext channelHandlerContext, Object msg, ByteBuf byteBuf) throws Exception {


        if (clazz != null && clazz.isInstance(msg)) {


            byte[] bytes = serializer.serialize(msg);
            byteBuf.writeInt(bytes.length);
            byteBuf.writeBytes(bytes);
        }
    }
}
public class RpcDecoder extends ByteToMessageDecoder { private Class<?> clazz; private Serializer serializer; public RpcDecoder(Class<?> clazz, Serializer serializer) { this.clazz = clazz; this.serializer = serializer; } @Override protected void decode(ChannelHandlerContext channelHandlerContext, ByteBuf byteBuf, List<Object> list) throws Exception { // Check if there are at least 4 bytes readable if (byteBuf.readableBytes() >= 4) { int readInt = byteBuf.readInt(); System.out.println("ByteToIntegerDecoder decode msg is " + readInt); byte[] bytes = new byte[readInt]; byteBuf.readBytes(bytes); Object deserialize = serializer.deserialize(clazz, bytes); list.add(deserialize); } } }4)定义Request和Response实体组件
public class RpcRequest {


    /**
     * 请求对象的ID
     */
    private String requestId;

    /**
     * 类名
     */
    private String className;

    /**
     * 方法名
     */
    private String methodName;

    /**
     * 参数类型
     */
    private Class<?>[] parameterTypes;

    /**
     * 入参
     */
    private Object[] parameters;


    public String getRequestId() {


        return requestId;
    }

    public void setRequestId(String requestId) {


        this.requestId = requestId;
    }

    public String getClassName() {


        return className;
    }

    public void setClassName(String className) {


        this.className = className;
    }

    public String getMethodName() {


        return methodName;
    }

    public void setMethodName(String methodName) {


        this.methodName = methodName;
    }

    public Class<?>[] getParameterTypes() {


        return parameterTypes;
    }

    public void setParameterTypes(Class<?>[] parameterTypes) {


        this.parameterTypes = parameterTypes;
    }

    public Object[] getParameters() {


        return parameters;
    }

    public void setParameters(Object[] parameters) {


        this.parameters = parameters;
    }
}
public class RpcResponse { private String responseId; private String resultMsg; private String result; public String getResponseId() { return responseId; } public void setResponseId(String responseId) { this.responseId = responseId; } public String getResultMsg() { return resultMsg; } public void setResultMsg(String resultMsg) { this.resultMsg = resultMsg; } public String getResult() { return result; } public void setResult(String result) { this.result = result; } @Override public String toString() { return "RpcResponse{" + "responseId='" + responseId + '\'' + ", resultMsg='" + resultMsg + '\'' + ", result='" + result + '\'' + '}'; } } -
rpc-consumer 客服端编写
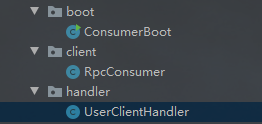
1)netty客户端的初始化及动态代理public class RpcConsumer { /** * 1.创建一个线程池对象 -- 它要处理我们自定义事件 */ private static ExecutorService executorService = Executors.newFixedThreadPool(Runtime.getRuntime().availableProcessors()); /** * 2.声明一个自定义事件处理器 UserClientHandler */ private static UserClientHandler userClientHandler; /** * 3.编写方法,初始化客户端 ( 创建连接池 bootStrap 设置bootstrap 连接服务器) */ public static void initClient() throws InterruptedException { //1) 初始化UserClientHandler userClientHandler = new UserClientHandler(); //2)创建连接池对象 NioEventLoopGroup group = new NioEventLoopGroup(); //3)创建客户端的引导对象 Bootstrap bootstrap = new Bootstrap(); //4)配置启动引导对象 bootstrap.group(group) //设置通道为NIO .channel(NioSocketChannel.class) //设置请求协议为TCP .option(ChannelOption.TCP_NODELAY, true) //监听channel 并初始化 .handler(new ChannelInitializer<SocketChannel>() { @Override protected void initChannel(SocketChannel socketChannel) throws Exception { //获取ChannelPipeline ChannelPipeline pipeline = socketChannel.pipeline(); //设置编码 pipeline.addLast(new RpcEncoder(RpcRequest.class, new JSONSerializer())); pipeline.addLast(new RpcDecoder(RpcResponse.class, new JSONSerializer())); //添加自定义事件处理器 pipeline.addLast(userClientHandler); } }); //5)连接服务端 bootstrap.connect("127.0.0.1", 8999).sync(); } /** * 4.编写一个方法,使用JDK的动态代理创建对象 * serviceClass 接口类型,根据哪个接口生成子类代理对象; providerParam : "UserService#sayHello#" */ public static Object createProxy(Class<?> serviceClass, final String providerParam) { return Proxy.newProxyInstance(Thread.currentThread().getContextClassLoader(), new Class[]{ serviceClass}, new InvocationHandler() { @Override public Object invoke(Object proxy, Method method, Object[] args) throws Throwable { //1)初始化客户端client if(userClientHandler == null) { initClient(); } //2)给UserClientHandler 设置param参数 RpcRequest rpcRequest = new RpcRequest(); rpcRequest.setRequestId(UUID.randomUUID().toString()); String[] classNameAndMethod = providerParam.split("#"); rpcRequest.setClassName(serviceClass.getName()); rpcRequest.setMethodName(classNameAndMethod[1]); rpcRequest.setParameters(args); rpcRequest.setParameterTypes(new Class[]{ String.class}); userClientHandler.setParam(rpcRequest); //3).使用线程池,开启一个线程处理处理call() 写操作,并返回结果 //4)return 结果 return executorService.submit(userClientHandler).get(); } }); } }2)自定义事件处理器
public class UserClientHandler extends ChannelInboundHandlerAdapter implements Callable {


    /**
     * 1.定义成员变量
     * context: 事件处理器上下文对象 (存储handler信息,写操作)
     * result: 记录服务器返回的数据
     * param: 记录将要返送给服务器的数据
     */
    private ChannelHandlerContext context;
    private RpcRequest param;
    private RpcResponse result;

    /**
     * 2.实现channelActive  客户端和服务器连接时,该方法就自动执行
     */
    @Override
    public void channelActive(ChannelHandlerContext ctx) throws Exception {


        this.context = ctx;
    }

    /**
     * 3.实现channelRead 当我们读到服务器数据,该方法自动执行
     */
    @Override
    public synchronized void channelRead(ChannelHandlerContext ctx, Object msg) throws Exception {


        result = (RpcResponse) msg;
        notify();
    }

    /**
     * 4.将客户端的数写到服务器
     */
    @Override
    public synchronized Object call() throws Exception {


        context.writeAndFlush(param);
        wait();
        return result;
    }

    /**
     * 5.设置参数的方法
     */
    public void setParam(RpcRequest param) {


        this.param = param;
    }
}
3)启动类, 向服务器发消息以及接收消息
public class ConsumerBoot { /** * 参数定义 */ private static final String PROVIDER_NAME = "UserService#sayHello#"; public static void main(String[] args) throws InterruptedException { //1.创建代理对象 IUserService userService = (IUserService) RpcConsumer.createProxy(IUserService.class, PROVIDER_NAME); //2.循环给服务器写数据 while (true) { System.out.println("客户端开始"); RpcResponse result = userService.sayHello("Hi I am Tom, I want to play a game with u !"); System.out.println("客服端返回:" + result.toString()); System.out.println("客户端结束"); //睡2s方便查看输出 Thread.sleep(2000); } } } -
rpc-my-provider 服务端编写
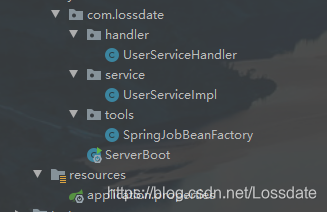
1)启动类服务器@ComponentScan(value="com.lossdate") @SpringBootApplication public class ServerBoot { public static void main(String[] args) throws InterruptedException { SpringApplication.run(ServerBoot.class, args); // 启动服务器 UserServiceImpl.startServer("127.0.0.1", 8999); } }2)netty客服端的初始化及返回客户端消息方法
扫描二维码关注公众号,回复: 12723279 查看本文章
@Service
public class UserServiceImpl implements IUserService {


    /**
     * 将来客户单要远程调用的方法
     */
    @Override
    public RpcResponse sayHello(String msg) {


        System.out.println("You ** **! -> " + msg);
        RpcResponse rpcResponse = new RpcResponse();
        rpcResponse.setResultMsg("服务器返回数据 : " + msg);
        rpcResponse.setResult("success");
        return rpcResponse;
    }

    /**
     * 创建一个方法启动服务器
     */
    public static void startServer(String ip, int port) throws InterruptedException {


        //1.创建两个线程池对象
        NioEventLoopGroup bossGroup = new NioEventLoopGroup();
        NioEventLoopGroup workGroup = new NioEventLoopGroup();

        //2.创建服务端的启动引导对象
        ServerBootstrap serverBootstrap = new ServerBootstrap();

        //3.配置启动引导对象
        serverBootstrap.group(bossGroup, workGroup)
                //设置通道为NIO
                .channel(NioServerSocketChannel.class)
                //创建监听channel
                .childHandler(new ChannelInitializer<NioSocketChannel>() {


                    @Override
                    protected void initChannel(NioSocketChannel nioSocketChannel) throws Exception {


                        //获取管道对象
                        ChannelPipeline pipeline = nioSocketChannel.pipeline();
                        //给管道对象pipeLine 设置编码
                        pipeline.addLast(new RpcEncoder(RpcResponse.class, new JSONSerializer()));
                        pipeline.addLast(new RpcDecoder(RpcRequest.class, new JSONSerializer()));

                        //把我们自定义的ChannelHander添加到通道中
                        pipeline.addLast(new UserServiceHandler());
                    }
                });

        //4.绑定端口
        serverBootstrap.bind(ip, port).sync();
    }
}
3)获取客户端传来的消息,并通过反射调用sayHello方法,最后将消息传给客户端。这里需要借助实现ApplicationContextAware接口获取Bean
public class UserServiceHandler extends ChannelInboundHandlerAdapter {


    /**
     * 当客户端读取数据时,该方法会被调用
     */
    @Override
    public void channelRead(ChannelHandlerContext ctx, Object msg) throws Exception {


        //注意:  客户端将来发送请求的时候会传递一个参数:  UserService#sayHello#Hi I am Tom, I want to play a game with u !
        RpcRequest rpcRequest = (RpcRequest) msg;
        System.out.println("服务端接收:" + rpcRequest.getRequestId());
        //通过反射获取class
        Class<?> aClass = Class.forName(rpcRequest.getClassName());
        //借助实现ApplicationContextAware接口获取Bean
        Object bean = SpringJobBeanFactory.getBean(aClass);
        //获取方法
        Method declaredMethod = aClass.getDeclaredMethod(rpcRequest.getMethodName(), rpcRequest.getParameterTypes());
        //invoke调用方法
        RpcResponse rpcResponse = (RpcResponse) declaredMethod.invoke(bean, rpcRequest.getParameters());

        //把调用实现类的方法获得的结果写到客户端
        rpcResponse.setResponseId(rpcRequest.getRequestId());
        ctx.writeAndFlush(rpcResponse);
    }
}
4)ApplicationContextAware获取Bean工具
@Component
public class SpringJobBeanFactory implements ApplicationContextAware {


    private static ApplicationContext applicationContext;

    @Override
    public void setApplicationContext(ApplicationContext applicationContext) throws BeansException {


        SpringJobBeanFactory.applicationContext = applicationContext;
    }

    public static ApplicationContext getApplicationContext() {


        return applicationContext;
    }

    @SuppressWarnings("unchecked")
    public static <T> T getBean(Class<T> name) throws BeansException {


        if (applicationContext == null){


            return null;
        }
        return (T)applicationContext.getBean(name);
    }
}