新手在写C++程序定义类的时候,可能会犯一个错误,就是在main函数文件里定义很多类,一个文件中包含很多函数,这样程序看起来很冗杂。今天总结一下如何在C++中使用头文件来定义一个类,并在另一个文件中进行引用。
部分基础知识
在一个C++程序中,有两种基础的文件
- 头文件(.h)【应该是head的缩写】
- 源文件(.cpp)【Cplusplus的缩写】
头文件中一般是声明类,包括类的成员,方法,还有函数原型,以及一些define等,但是不写出来具体的实现方法,而源文件主要是写类中声明的函数的具体实现方法。
我们最开始写一个helloword程序的时候会看到使用include来引入一个头文件,目标就是将头文件中的函数声明出来:
#include<iostream>

using namespace std;

int main()
{


	cout<<"HelloWorld"<<endl;
	return 0;
}
在C++中要使用cout等标准输入输出函数就必须包含iostrem这个头文件。
那我们如何声明一个头文件并进行引用呢?接下来我们根据一个具体的问题的实现来进行展示。
问题
定义一个复数类,复数类可以执行复数的加减乘除运算以及复数的求模显示等操作。
方法
首先我们定义一个头文件“Complex.h”,在这个文件中定义出复数类complex
#ifndef _Complex_H_
#define _Complex_H_

class complex
{


private:
	//私有变量实部与虚部
	double real, imag;
public:
	complex();//空的构造函数
	complex(double, double);//默认参数的构造函数
	void set(double, double);//设置函数
	double getReal();//获取实部函数
	double getImag();//获取虚部函数
	double module();//获取复数模的函数
	//复数加减乘除函数
	complex add(complex);
	complex decrease(complex);
	complex multiply(complex);
	complex divide(complex);
	//复数显示函数
	void show();
};

#endif
其中包含了成员变量,构造函数,成员函数等,在这个头文件中,我们不写函数们的具体实现方法。
注意开头的两句与结尾的一句
#ifndef <标识>
#define <标识>
类代码
#endif
其中ifndef是if not define的意思,是为了防止头文件的重复包含和编译,例如两个文件都包含了这个头文件,没有这句话可能就会导致重复编译。
另外,标识一般写成头文件的名字的全大写,同时将点改为下划线,并在前后加上下划线,例如我们的“Complex.h”头文件就写成_Complex_H_
定义完头文件,我们要新建一个源文件“Complex.cpp”来实现头文件里的每一个方法。源文件的名字与头文件的名字保持一致,并且在源文件中必须include头文件,如下
#include<stdio.h>
#include<cmath>
#include "Complex.h"

complex::complex()
{


	real = 0;
	imag = 0;
}

complex::complex(double a, double b)
{


	real = a;
	imag = b;
}

void complex::set(double a, double b)
{


	real = a;
	imag = b;
}

double complex::getReal()
{


	return real;
}

double complex::getImag()
{


	return imag;
}

double complex::module()
{


	return sqrt(real * real + imag * imag);
}

complex complex::add(complex a)
{


	double real = this->real + a.getReal();
	double imag = this->imag + a.getImag();
	return complex(real, imag);
}

complex complex::decrease(complex a)
{


	double real = this->real - a.getReal();
	double imag = this->imag - a.getImag();
	return complex(real, imag);
}

complex complex::multiply(complex C)
{


	double a, b, c, d;
	a = real;
	b = imag;
	c = C.real;
	d = C.imag;
	double real = (a * c - b * d);
	double imag = (b * c + a * d);
	return complex(real,imag);
}

complex complex::divide(complex C)
{


	double a, b, c, d;
	a = real;
	b = imag;
	c = C.real;
	d = C.imag;
	double real = (a * c + b * d) / (c * c + d * d);
	double imag = (b * c - a * d) / (c * c + d * d);
	return complex(real,imag);
}

void complex::show()
{


	if (imag >= 0)
	{


		printf("%.2f+%.2fi", real, imag);
	}
	else
	{


		printf("%.2f%.2fi", real, imag);
	}
	return;
}
定义完头文件以及源文件,我们就可以新建一个测试文件“main.cpp”来测试我们的头文件类是否成功。
在该文件中引入头文件“Complex.h”就可以调用其中的complex类了
#include "Complex.h"
#include<stdio.h>

int main()
{


	complex A;//验证默认构造函数
	printf("A为:"); A.show(); printf("\n");
	complex B(2,-1);//验证两个参数构造函数
	printf("B为:"); B.show(); printf("\n");
	A.set(3,5);//验证设置函数;
	printf("A为:"); A.show(); printf("\n");
	//验证模函数
	printf("A的模为:%.2f\n", A.module());
	//验证加减乘除
	complex C;
	C = A.add(B);
	printf("A+B为:"); C.show(); printf("\n");
	C = A.decrease(B);
	printf("A-B为:"); C.show(); printf("\n");
	C = A.multiply(B);
	printf("A*B为:"); C.show(); printf("\n");
	C = A.divide(B);
	printf("A/B为:"); C.show(); printf("\n");
	return 0;
}
此时的工程目录为

运行结果为
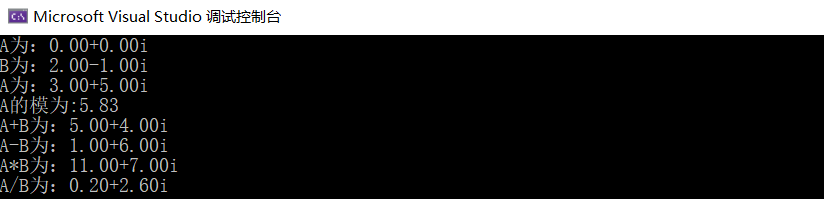
测试结果符合预期,说明该复数类构建成功,以后如果要使用复数计算的相关功能,就可以直接include这个头文件调用这个类了。
小提示:
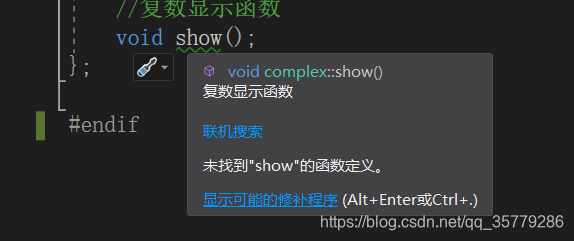
在最新的Visual studio开发环境中,定义头文件函数的时候,有的函数下会有绿色的波浪线,这是在提醒你这个函数没有具体的实现方法。
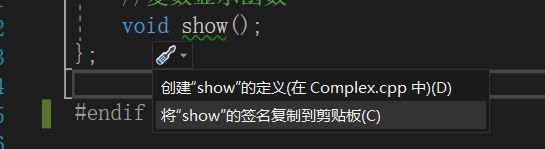
这时候点击“显示可能的修补程序”->“创建“xxx”的定义(在******.cpp中)”
就会自动在相应的cpp文件中写好相同的函数
以上