Windows下
首先下载nginx
http://nginx.org/en/download.html 下载稳定版本,以nginx/Windows-1.12.2为例,直接下载 nginx-1.12.2.zip
下载后直接放在某一文件夹下,我的是放在E:\nginx\nginx-1.12.2

启动nginx

查看nginx成否启动
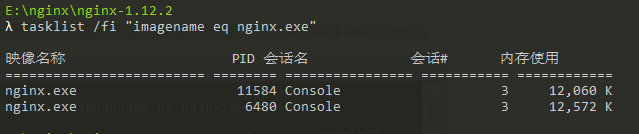
这里nginx的启动就完成了。
下面我们需要绑定tomcat去访问
这里指的是多个tomcat的多个项目用nginx代理
1.启动本地两个tomcat的服务,端口分别为8080,8070
2.修改nginx的配置文件
直接贴出
主要是在
  server {
        listen       80;
        server_name  localhost;

        #charset koi8-r;

        #access_log  logs/host.access.log  main;

        location / {
            root   html;
            index  index.html index.htm;
        }


		location /stplan{
               proxy_pass http://localhost:8080;
               proxy_set_header           Host $host;
               proxy_set_header  X-Real-IP  $remote_addr;
               proxy_set_header           X-Forwarded-For $proxy_add_x_forwarded_for;
               index  index.html index.htm;
       }

        location /Techproject {
               proxy_pass http://localhost:8070;
               proxy_set_header           Host $host;
               proxy_set_header  X-Real-IP  $remote_addr;
               proxy_set_header           X-Forwarded-For $proxy_add_x_forwarded_for;
               index  index.html index.htm;
       }


        #error_page  404              /404.html;

        # redirect server error pages to the static page /50x.html
        #
        error_page   500 502 503 504  /50x.html;
        location = /50x.html {
            root   html;
        }

        # proxy the PHP scripts to Apache listening on 127.0.0.1:80
        #
        #location ~ \.php$ {
        #    proxy_pass   http://127.0.0.1;
        #}

        # pass the PHP scripts to FastCGI server listening on 127.0.0.1:9000
        #
        #location ~ \.php$ {
        #    root           html;
        #    fastcgi_pass   127.0.0.1:9000;
        #    fastcgi_index  index.php;
        #    fastcgi_param  SCRIPT_FILENAME  /scripts$fastcgi_script_name;
        #    include        fastcgi_params;
        #}

        # deny access to .htaccess files, if Apache's document root
        # concurs with nginx's one
        #
        #location ~ /\.ht {
        #    deny  all;
        #}
    }
location/stplan的配置代表访问localhost/stplan会直接代理到
localhost:8080/stplan
location/TechProject同理
3.配置完成,重新启动nginx
这里有两种方式
更改配置文件的重新加载
在cmd下执行
cd E:\nginx\nginx-1.12.2

nginx -s reload
或者重启启动(先关闭在启动)
如果使用cmd命令窗口启动nginx,关闭cmd窗口是不能结束nginx进程的,可使用两种方法关闭nginx

(1)输入nginx命令  nginx -s stop(快速停止nginx)  或  nginx -s quit(完整有序的停止nginx)

(2)使用taskkill   taskkill /f /t /im nginx.exe


start nginx
这样就可以了。
测试过了,OK