上一篇:Android 天气APP(二十九)壁纸设置、图片查看、图片保存
运行效果图

前言
说实话也蛮久没有更新这个天气APP了,原因主要是没有什么好的更新的因素和新的功能。当这两者都具备时才有了这一篇文章。首先是和风天气更新的新的分钟级降水API,这个是可以提供给开发者免费调用的。话不多说了,进入正文。
正文
平时工作之余有空我就会去看看博客和GitHub上有没有问题,也会去看看和风天气API的数据访问量,因为我知道有很多开发者也会直接运行我的代码或者是安装APK去使用。
这个是会根据API Key来记录请求次数的。然后我就看到了和风偷偷地更新了一个分钟级降水API,应该就是近段时间更新的,这个说实话做的不够地道,你既然更新了新的API那么应该告诉平台的开发者,让他们去使用,顺便给你们找出问题。两全其美,好了,我的废话已经很多了。下面进入正文。
一、新增分钟级降水API
这个分钟级降水的API测试地址如下:
https://devapi.qweather.com/v7/minutely/5m?location=113.92942,22.53122&key=d4a619bfe3244190bfa84bb468c14316
随便用一个浏览器打开你就会看到这样的返回数据,如下图所示。

这个API和其他的API略有不同,需要使用经纬度作为请求参数,并且经度和纬度的值用英文逗号分隔开,经度在前,纬度在后,如果你不按照这个方式来的话,就会出现报错400、403之类的。key就没有什么好说的了,就用自己的就可以了。
下面先通过这个返回值生成一个数据实体Bean再说。
在bean包下新建一个MinutePrecResponse类,里面的代码如下
package com.llw.goodweather.bean;

import java.util.List;

/**
 * 分钟级降水 V7
 * @author llw
 */
public class MinutePrecResponse {


    /**
     * code : 200
     * updateTime : 2020-12-02T10:00+08:00
     * fxLink : http://hfx.link/1
     * summary : 未来两小时无降水
     * minutely : [{"fxTime":"2020-12-02T10:00+08:00","precip":"0.0","type":"rain"},{"fxTime":"2020-12-02T10:05+08:00","precip":"0.0","type":"rain"},{"fxTime":"2020-12-02T10:10+08:00","precip":"0.0","type":"rain"},{"fxTime":"2020-12-02T10:15+08:00","precip":"0.0","type":"rain"},{"fxTime":"2020-12-02T10:20+08:00","precip":"0.0","type":"rain"},{"fxTime":"2020-12-02T10:25+08:00","precip":"0.0","type":"rain"},{"fxTime":"2020-12-02T10:30+08:00","precip":"0.0","type":"rain"},{"fxTime":"2020-12-02T10:35+08:00","precip":"0.0","type":"rain"},{"fxTime":"2020-12-02T10:40+08:00","precip":"0.0","type":"rain"},{"fxTime":"2020-12-02T10:45+08:00","precip":"0.0","type":"rain"},{"fxTime":"2020-12-02T10:50+08:00","precip":"0.0","type":"rain"},{"fxTime":"2020-12-02T10:55+08:00","precip":"0.0","type":"rain"},{"fxTime":"2020-12-02T11:00+08:00","precip":"0.0","type":"rain"},{"fxTime":"2020-12-02T11:05+08:00","precip":"0.0","type":"rain"},{"fxTime":"2020-12-02T11:10+08:00","precip":"0.0","type":"rain"},{"fxTime":"2020-12-02T11:15+08:00","precip":"0.0","type":"rain"},{"fxTime":"2020-12-02T11:20+08:00","precip":"0.0","type":"rain"},{"fxTime":"2020-12-02T11:25+08:00","precip":"0.0","type":"rain"},{"fxTime":"2020-12-02T11:30+08:00","precip":"0.0","type":"rain"},{"fxTime":"2020-12-02T11:35+08:00","precip":"0.0","type":"rain"},{"fxTime":"2020-12-02T11:40+08:00","precip":"0.0","type":"rain"},{"fxTime":"2020-12-02T11:45+08:00","precip":"0.0","type":"rain"},{"fxTime":"2020-12-02T11:50+08:00","precip":"0.0","type":"rain"},{"fxTime":"2020-12-02T11:55+08:00","precip":"0.0","type":"rain"}]
     * refer : {"sources":["Weather China"],"license":["no commercial use"]}
     */

    private String code;
    private String updateTime;
    private String fxLink;
    private String summary;
    private ReferBean refer;
    private List<MinutelyBean> minutely;

    public String getCode() {


        return code;
    }

    public void setCode(String code) {


        this.code = code;
    }

    public String getUpdateTime() {


        return updateTime;
    }

    public void setUpdateTime(String updateTime) {


        this.updateTime = updateTime;
    }

    public String getFxLink() {


        return fxLink;
    }

    public void setFxLink(String fxLink) {


        this.fxLink = fxLink;
    }

    public String getSummary() {


        return summary;
    }

    public void setSummary(String summary) {


        this.summary = summary;
    }

    public ReferBean getRefer() {


        return refer;
    }

    public void setRefer(ReferBean refer) {


        this.refer = refer;
    }

    public List<MinutelyBean> getMinutely() {


        return minutely;
    }

    public void setMinutely(List<MinutelyBean> minutely) {


        this.minutely = minutely;
    }

    public static class ReferBean {


        private List<String> sources;
        private List<String> license;

        public List<String> getSources() {


            return sources;
        }

        public void setSources(List<String> sources) {


            this.sources = sources;
        }

        public List<String> getLicense() {


            return license;
        }

        public void setLicense(List<String> license) {


            this.license = license;
        }
    }

    public static class MinutelyBean {


        /**
         * fxTime : 2020-12-02T10:00+08:00
         * precip : 0.0
         * type : rain
         */

        private String fxTime;
        private String precip;
        private String type;

        public String getFxTime() {


            return fxTime;
        }

        public void setFxTime(String fxTime) {


            this.fxTime = fxTime;
        }

        public String getPrecip() {


            return precip;
        }

        public void setPrecip(String precip) {


            this.precip = precip;
        }

        public String getType() {


            return type;
        }

        public void setType(String type) {


            this.type = type;
        }
    }
}
然后进入到ApiService中,准备添加API接口,这时我发现了一个问题,那就是和风的请求地址都变了


我记得这里之前是heweather。为什么现在改成了qweather。吓得我赶紧去运行一手,看我原来的地址还能不能访问,好在虚惊一场,原来的地址还能够访问,那么和风为什么要改请求地址呢。难道原来的地址会转到这个新的地址吗?我的猜测目前是这样的。
打开ServiceGenerator,而我要改动的也就只有这两处而已。

改成qweather即可。改完之后我运行了一下和之前也没有什么区别,看来这次的更新是很有必要的。不然到时候之前地址访问不了,肯定很多问题会出现的,估计要被叼。
下面在ApiService中添加新的接口。
	/**
     * 分钟级降水 最近两小时内
     *
     * @param location 经纬度拼接字符串,使用英文逗号分隔,经度在前纬度在后
     * @return
     */
    @GET("/v7/minutely/5m?key=" + API_KEY)
    Call<MinutePrecResponse> getMinutePrec(@Query("location") String location);
二、修改布局
从上面的API得知想要获取数据,就必须拿到经纬度。而获取经纬度有两种方式:① 通过百度定位获取。② 通过和风天气的城市搜索获取。
这里我们使用第二种方式来获取经纬度,那么就是在搜索城市的返回值中拿到经纬度之后去请求分钟级降水的的接口,获取数据之后显示出来。因此我这里先改变一下activity_main.xml。
增加的布局代码如下:
					<!--分钟级降水-->
                    <LinearLayout
                        android:layout_width="match_parent"
                        android:layout_height="wrap_content"
                        android:layout_marginTop="8dp"
                        android:paddingLeft="20dp"
                        android:paddingRight="20dp">

                        <TextView
                            android:id="@+id/tv_precipitation"
                            android:layout_width="0dp"
                            android:layout_weight="1"
                            android:layout_height="wrap_content"
                            android:drawableLeft="@mipmap/icon_weather_prec"
                            android:drawablePadding="4dp"
                            android:text="降水预告"
                            android:textColor="@color/white"
                            android:textSize="@dimen/sp_12" />
                        <!--查看更多降水信息-->
                        <TextView
                            android:gravity="center_vertical"
                            android:id="@+id/tv_prec_more"
                            android:layout_width="wrap_content"
                            android:layout_height="wrap_content"
                            android:text="查看详情"
                            android:drawableRight="@mipmap/icon_more_blue_small"
                            android:textColor="@color/blue_more"
                            android:textSize="@dimen/sp_12" />
                    </LinearLayout>

                    <!--降水详情列表-->
                    <androidx.recyclerview.widget.RecyclerView
                        android:visibility="gone"
                        android:paddingTop="@dimen/dp_8"
                        android:id="@+id/rv_prec_detail"
                        android:paddingLeft="@dimen/dp_12"
                        android:paddingRight="@dimen/dp_12"
                        android:layout_width="match_parent"
                        android:layout_height="wrap_content"/>

                    <!--分隔线 增加UI效果-->
                    <View
                        android:layout_width="match_parent"
                        android:layout_height="1dp"
                        android:layout_marginLeft="20dp"
                        android:layout_marginTop="8dp"
                        android:layout_marginRight="20dp"
                        android:alpha="0.1"
                        android:background="@color/white" />
增加位置如下图所示

那么既然有列表自然也要有item了。所以在layout新建一个item_prec_detail_list.xml布局,里面的代码如下:
<?xml version="1.0" encoding="utf-8"?>
<LinearLayout xmlns:android="http://schemas.android.com/apk/res/android"
    android:layout_width="wrap_content"
    android:layout_height="match_parent"
    android:gravity="center_horizontal"
    android:paddingLeft="@dimen/dp_8"
    android:paddingRight="@dimen/dp_8"
    android:orientation="vertical">

    <!--时间-->
    <TextView
        android:id="@+id/tv_time"
        android:layout_marginTop="@dimen/dp_8"
        android:layout_width="wrap_content"
        android:layout_height="wrap_content"
        android:text="上午10:00"
        android:textColor="#FFF"
        android:textSize="@dimen/sp_12" />

    <TextView
        android:id="@+id/tv_precip_info"
        android:layout_width="wrap_content"
        android:layout_height="match_parent"
        android:layout_marginTop="@dimen/dp_8"
        android:layout_marginBottom="@dimen/dp_8"
        android:gravity="center"
        android:text="0.1  雨"
        android:textColor="#FFF"
        android:textSize="@dimen/sp_12" />
</LinearLayout>
显示的地方有了下面就是要去MainActivity中实现具体的业务逻辑了。不过在此之前还需要增加一个方法。内容很简单,因为我之后要使用GridLayoutManager,同时也要让RecyclerView横向滚动,因此我设置高度为占满父布局高度。
三、增加适配器
有布局了,然后就是写列表的适配器了,不然数据怎么填充进去呢?在adapter包下新建一个MinutePrecAdapter,里面的代码如下:
package com.llw.goodweather.adapter;

import androidx.annotation.Nullable;

import com.chad.library.adapter.base.BaseQuickAdapter;
import com.chad.library.adapter.base.BaseViewHolder;
import com.llw.goodweather.R;
import com.llw.goodweather.bean.MinutePrecResponse;
import com.llw.goodweather.utils.DateUtils;
import com.llw.goodweather.utils.WeatherUtil;

import java.util.List;

/**
 * 分钟级降水列表适配器
 * @author llw
 */
public class MinutePrecAdapter extends BaseQuickAdapter<MinutePrecResponse.MinutelyBean, BaseViewHolder> {


    public MinutePrecAdapter(int layoutResId, @Nullable List<MinutePrecResponse.MinutelyBean> data) {


        super(layoutResId, data);
    }

    @Override
    protected void convert(BaseViewHolder helper, MinutePrecResponse.MinutelyBean item) {


        String time = DateUtils.updateTime(item.getFxTime());
        //时间
        helper.setText(R.id.tv_time, WeatherUtil.showTimeInfo(time) + time);
        String type = null;
        if("rain".equals(item.getType())){


            type = "雨";
        }else if("snow".equals(item.getType())){


            type = "雪";
        }
        helper.setText(R.id.tv_precip_info,item.getPrecip()+"   "+type);
    }
}
四、增加网络请求与回调
现在布局和准备工作都做好了,然后进入WeatherContract,写一个请求接口的方法和回调,在里面增加如下代码
		/**
         * 分钟级降水
         *
         * @param location 经纬度拼接字符串,使用英文逗号分隔,经度在前纬度在后
         */
        public void getMinutePrec(String location) {


            ApiService service = ServiceGenerator.createService(ApiService.class, 3);
            service.getMinutePrec(location).enqueue(new NetCallBack<MinutePrecResponse>() {


                @Override
                public void onSuccess(Call<MinutePrecResponse> call, Response<MinutePrecResponse> response) {


                    if (getView() != null) {


                        getView().getMinutePrecResult(response);
                    }
                }

                @Override
                public void onFailed() {


                    if (getView() != null) {


                        getView().getWeatherDataFailed();
                    }
                }
            });
        }
返回的方法
		//分钟级降水
        void getMinutePrecResult(Response<MinutePrecResponse> response);
增加的位置如下图所示


五、控件初始化、数据请求和返回
然后回到MainActivty,你会发现有报错,先不用管它,先初始化一些数据和类。
	@BindView(R.id.tv_precipitation)
    TextView tvPrecipitation;//降水预告
    @BindView(R.id.tv_prec_more)
    TextView tvPrecMore;//降水详情
    @BindView(R.id.rv_prec_detail)
    RecyclerView rvPrecDetail;//分钟级降水列表
通过butterknife绑定控件,然后
	private List<MinutePrecResponse.MinutelyBean> minutelyList = new ArrayList<>();//分钟级降水数据列表
    private MinutePrecAdapter mAdapterMinutePrec;//分钟级降水适配器

    private boolean state = false;//分钟级降水数据 收缩状态  false 收缩  true 展开
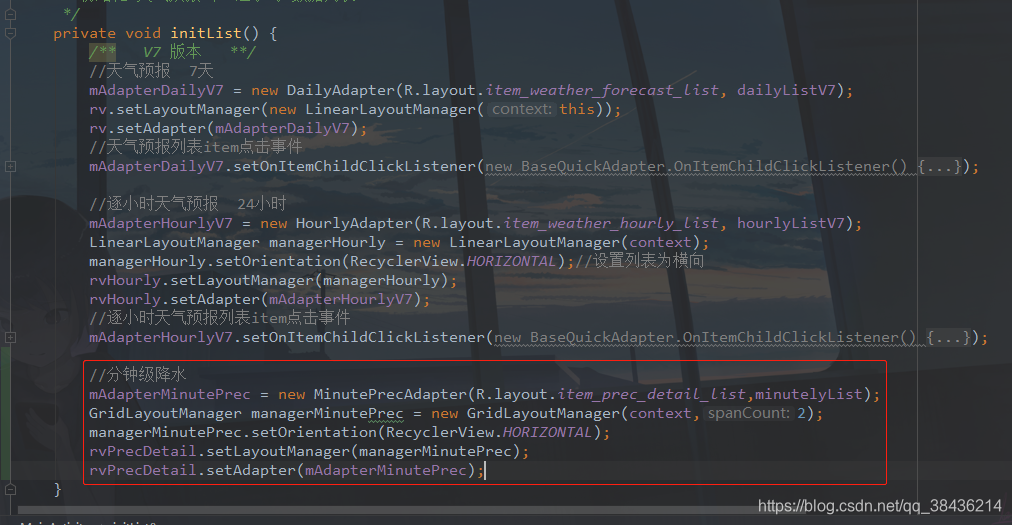
然后在initList方法中,对刚才定义的变量进行实例化。
		//分钟级降水
        mAdapterMinutePrec = new MinutePrecAdapter(R.layout.item_prec_detail_list,minutelyList);
        GridLayoutManager managerMinutePrec = new GridLayoutManager(context,2);
        managerMinutePrec.setOrientation(RecyclerView.HORIZONTAL);
        rvPrecDetail.setLayoutManager(managerMinutePrec);
        rvPrecDetail.setAdapter(mAdapterMinutePrec);
添加位置如下图所示
最后就是在接口返回中进行数据赋值了。
重写getMinutePrecResult方法。
	/**
     * 分钟级降水返回
     * @param response
     */
    @Override
    public void getMinutePrecResult(Response<MinutePrecResponse> response) {


        dismissLoadingDialog();//关闭加载弹窗
        checkAppVersion();//检查版本信息
        if(response.body().getCode().equals(Constant.SUCCESS_CODE)) {


            tvPrecipitation.setText(response.body().getSummary());
            if(response.body().getMinutely()!=null && response.body().getMinutely().size()>0){


                minutelyList.clear();
                minutelyList.addAll(response.body().getMinutely());
                mAdapterMinutePrec.notifyDataSetChanged();
            }else {


                ToastUtils.showShortToast(context, "分钟级降水数据为空");
            }
        }else {


            ToastUtils.showShortToast(context, CodeToStringUtils.WeatherCode(response.body().getCode()));
        }
    }
现在你的这个MainActivity页面就不会报错了。
不过这个时候你运行你会发现你看不到这个列表,那是因为我隐藏了。既然是隐藏的,那么就需要一个开关了控制它的显示才行,于是可以在onViewClick方法中增加一个id.


这里通过点击的方式来控制这个列表的显示和隐藏了,而很明显这个显示和隐藏我还加了动画效果,否则就会显得很突兀。这里注意这个state的全局变量,它的初始值是false,也就是不显示,当我第一次点击时,它会进行判断,会进入else中。这时候通过动画展开这个布局,展开之后设置为true,而此时你再点击时就会进入if中,然后就会收缩布局,之后又把值设置为false。
OK,这个逻辑就讲清楚了,下面来看看那这个动画的方法吧。
六、动画展开收缩效果
之前在mvplibrary中的utils包下建了一个AnimationUtil动画工具类。那么现在新增加两个方法
	/**
     * 展开动画
     * @param view 需要展开的View
     * @param textView 修改文本
     */
    public static void expand(final View view, final TextView textView) {


        //视图测量 传入容器的宽高测量模式
        view.measure(ViewGroup.LayoutParams.MATCH_PARENT, ViewGroup.LayoutParams.WRAP_CONTENT);
        //获取视图的测量高度
        final int viewHeight = view.getMeasuredHeight();
        //设置布局参数高度
        view.getLayoutParams().height = 0;
        //视图显示
        view.setVisibility(View.VISIBLE);
        textView.setText("收起详情");

        Animation animation = new Animation() {


            /**
             * 重写动画更新函数
             * @param interpolatedTime 补插时间 计算动画进度
             * @param t
             */
            @Override
            protected void applyTransformation(float interpolatedTime, Transformation t) {


                if (interpolatedTime == 1) {


                    //动画已完成
                    view.getLayoutParams().height = ViewGroup.LayoutParams.WRAP_CONTENT;
                } else {


                    //正在进行中
                    view.getLayoutParams().height = (int) (viewHeight * interpolatedTime);
                }
                view.requestLayout();
            }
        };
        animation.setDuration(600);
        //设置插值器,即动画改变速度
        animation.setInterpolator(new LinearOutSlowInInterpolator());
        view.startAnimation(animation);
    }

    /**
     * 收缩动画
     * @param view 需要收缩的View
     * @param textView 修改文本
     */
    public static void collapse(final View view,final TextView textView) {


        view.measure(ViewGroup.LayoutParams.MATCH_PARENT, ViewGroup.LayoutParams.WRAP_CONTENT);
        final int viewHeight = view.getMeasuredHeight();

        Animation animation = new Animation() {


            @Override
            protected void applyTransformation(float interpolatedTime, Transformation t) {


                if (interpolatedTime == 1) {


                    view.setVisibility(View.GONE);
                    textView.setText("查看详情");
                } else {


                    view.getLayoutParams().height = viewHeight - (int) (viewHeight * interpolatedTime);
                    view.requestLayout();
                }
            }
        };
        animation.setDuration(600);
        animation.setInterpolator(new LinearOutSlowInInterpolator());
        view.startAnimation(animation);
    }
这里的展开和收缩用的是补间动画,通过动画的运行时间和变化轨迹来操作,interpolatedTime == 1则表示动画运行完成了,else中表示动画进行中,进行时需要不断的变更视图的高度,然后之后重新绘制,以此达到动画的效果。
animation.setInterpolator(new LinearOutSlowInInterpolator());
这个设置表示动画的运行模式。它还有其他的的一些模式,不过我进过测试之后,最喜欢这个模式,感兴趣的自行去尝试。
七、运行GIF效果图
好了,到了现在代码就写完了,那么来看看运行效果吧。
本来我是想放一个高清一点的GIF的,但是超过了5M就不行,所以只能看这个模糊的了。
文末
说到这里也就是这篇博客的结束了,其实挺感慨的,这个天气APP从我刚开始写大概是3月份,现在已经到了12月了,时间过得真快呀。其实代码就像一个朋友一样,你对它花的时间越多,它就对你越熟悉,而当你冷落它之后,你再回来它还在这里,只不过你需要重新认识熟悉一下了。好在代码是讲道理,每一个报错都会有原因,挺感慨的。重新认识一下,你好!我是初学者,请多指教。山高水长,后会有期~
源码地址:Good Weather 欢迎 Star 和 Fork
联系邮箱 [email protected]