1、前言
在实际项目中,我们不仅需要实现应用的功能,也需要考虑整个应用的性能问题。当大量用户访问相同数据时,对数据库是个很大的考验。这时候如果使用数据缓存技术了,同样的数据就不需要通过访问数据库获取处理,在应用层面就可以拿到缓存数据,可以减轻数据库的压力、同时也能提高数据的响应速度。
那么在Spring Boot中提供哪些缓存支持呢?
Spring Framework中提供了对缓存数据的支持,核心是通过在方法中应用缓存方法,然后根据缓存中的已有可用信息来减少大量的执行次数。Spring Boot自动携带了缓存的基础配置,我们只需要使用注解@EnableCaching即可开启缓存功能。
举例说明;
import org.springframework.cache.annotation.Cacheable;
import org.springframework.stereotype.Component;

@Component
public class MathService {


	@Cacheable("piDecimals")
	public int computePiDecimal(int i) {


		// ...
	}

}
上述的举例是,缓存一个需要复杂计算的计算方法,那么具体是怎么执行的呢?
在computePiDecimal方法执行之前,会查找piDecimals的缓存,并从中取匹配i这个参数,如果数据存在,立刻把数据返回给调用者,然后这个方法computePiDecimal并不会执行。否则执行方法,在返回数据给调用者之前就更新数据到缓存中。
如果没有添加指定的缓存库,Spring Boot自动配置了一个简单的Simple Provider,通过concurrent maps保存缓存数据。比如上面的piDecimals缓存,当缓存存在时,调用方法时,会通过simple provider 直接返回。simple provider 不建议应用于正式生产环境,如果只是测试熟悉缓存技术还是不错的。
2、CacheManager缓存分类
Spring 定义 CacheManager 和 Cache 接口用来统一不同的缓存技术。例如 JCache、 EhCache、 Hazelcast、 Guava、 Redis 等。在使用 Spring 集成 Cache 的时候,我们需要注册实现的 CacheManager 的 Bean。Spring Boot 默认使用的是 SimpleCacheConfiguration,即使用 ConcurrentMapCacheManager 来实现的缓存。
CacheManager是专门用来缓存管理器,管理各种缓存组件的;
针对不同的缓存技术,实现了不同的 CacheManager ,Spring 定义了下表所示的 CacheManager:
| CacheManager | 描述 |
|---|---|
| SimpleCacheManager | 使用简单的 Collection 来存储缓存,主要用于测试 |
| ConcurrentMapCacheManager | 使用 ConcurrentMap 来存储缓存 |
| NoOpCacheManager | 仅测试用途,不会实际缓存数据 |
| EhCacheCacheManager | 使用 EhCache 作为缓存技术 |
| GuavaCacheManager | 使用 Google Guava 的 GuavaCache 作为缓存技术 |
| HazelcastCacheManager | 使用 Hazelcast 作为缓存技术 |
| JCacheCacheManager | 支持 JCache(JSR-107) 标准的实现作为缓存技术,如 ApacheCommonsJCS |
| RedisCacheManager | 使用 Redis 作为缓存技术 |
缓存接口有以下分类:
- Generic
- JCache (JSR-107) (EhCache 3, Hazelcast, Infinispan, and others)
- EhCache 2.x
- Hazelcast
- Infinispan
- Couchbase
- Redis
- Caffeine
- Simple
详细列举,请进入Spring Boot Cache
我们在这里将只讲解Simple和Redis,Simple用于测试,Redis用于实际用途。其他的平时不多用,可以自行了解。
3、具体实现
3.1、自定义是否开启缓存
是否开启缓存,有两种方法:
方法一:
在不同环境的配置文件中如application-dev.yml、application-test.yml、application-prod.yml,修改 spring.cache.type = none;
spring:
  cache:
  	type: none
方法二:
自定义配置
application.yml
## 开启数据缓存
caching:
  enabled: true
com.scaffold.test.config.CacheConfig
缓存配置文件
@Configuration
@EnableCaching
//配置文件读取是否启用此配置
@ConditionalOnProperty(prefix = "caching", name = "enabled", havingValue = "true")
public class CacheConfig {


}
3.2、simpleCacheManage
3.2.1、概要介绍
simpleCacheManage 基于ConcurrentHashMap 实现,不依赖其他库,如果增加了注解@EnableCaching,默认开启缓存,可以通过设置cache-names限制缓存列表
设置缓存列表
application.yml
spring:
  cache:
  	type: simple
  	cache-names: cache1,cache2
或者
增加配置文件 cacheConfig
@Configuration
public class CacheConfig {


   @Bean
   public CacheManager cacheManager() {


       return new ConcurrentMapCacheManager("cache1", "cache2");
   }
}
maven依赖
<!-- cache 依赖 -->
<dependency>
    <groupId>org.springframework.boot</groupId>
    <artifactId>spring-boot-starter-cache</artifactId>
</dependency>
注意:所有的注解是加到实现类方法上的
| 注解 | 描述 |
|---|---|
| @Cacheable | 在方法执行前 Spring 先查看缓存中是否有数据,若有,则直接返回缓存数据;若无数据,调用方法将方法返回值放入缓存中 |
| @CachePut | 无论怎样,都会将方法的返回值放到缓存中。 |
| @CacheEvict | 将一条或多条数据从缓存中删除 |
| @Caching | 可以通过 @Caching 注解组合多个注解策略在一个方法 |
@Cacheable、@CachePut、@CacheEvict 都有 value 属性,指定的是要使用的缓存名称;key 属性指定的是数据在缓存中存储的键。
3.2.2、代码实现
配置类
package com.scaffold.test.config;

import org.springframework.boot.autoconfigure.condition.ConditionalOnProperty;
import org.springframework.cache.CacheManager;
import org.springframework.cache.annotation.EnableCaching;
import org.springframework.cache.concurrent.ConcurrentMapCacheManager;
import org.springframework.context.annotation.Bean;
import org.springframework.context.annotation.Configuration;

import java.time.Duration;

/**
 * 缓存配置文件
 * 配置文件读取是否启用此配置
 * @author alex
 */
@Configuration
@EnableCaching
@ConditionalOnProperty(prefix = "caching", name = "enabled", havingValue = "true")
public class CacheConfig {


    @Bean
    public CacheManager cacheManager() {


        return new ConcurrentMapCacheManager("cacheData");
    }
  }
实体类
com.scaffold.test.entity.Student
package com.scaffold.test.entity;

import lombok.Data;
import lombok.EqualsAndHashCode;

import java.io.Serializable;

/**
 * @author alex wong
 */
@Data
@EqualsAndHashCode(callSuper = false)
public class Student implements Serializable {


    private static final long serialVersionUID=1L;

    private int id;

    private String name;

    private Integer age;

}
service层
com.scaffold.test.service.StudentService
package com.scaffold.test.service;

import com.scaffold.test.entity.Student;
import com.baomidou.mybatisplus.extension.service.IService;

import java.util.List;

/**
 * <p>
 * 服务类
 * </p>
 *
 * @author alex wong
 */
public interface StudentService extends IService<Student> {


    List<Student> findAll();

    Student findStudent(Student student);

    Student testStudent(String text);

    void deleteStudent(Student student);

    void saveStudent(Student student);

}
service实现类
com.scaffold.test.service.StudentService
package com.scaffold.test.service.impl;

import com.baomidou.mybatisplus.extension.service.impl.ServiceImpl;
import com.scaffold.test.entity.Student;
import com.scaffold.test.mapper.StudentMapper;
import com.scaffold.test.service.StudentService;
import lombok.extern.slf4j.Slf4j;
import org.springframework.cache.annotation.CacheEvict;
import org.springframework.cache.annotation.CachePut;
import org.springframework.cache.annotation.Cacheable;
import org.springframework.stereotype.Service;

import javax.annotation.Resource;
import java.util.List;

/**
 * <p>
 *  服务实现类
 * </p>
 *
 * @author alex wong
 */

@Slf4j
@Service
public class StudentServiceImpl extends ServiceImpl<StudentMapper, Student> implements StudentService {


    @Resource
    private StudentMapper studentMapper;

    @Override
    @Cacheable(value = "cacheData")
    public List<Student> findAll(){


        return studentMapper.selectAll();
    }

    /**
     * 缓存查询数据
     * @Cacheable 缓存数据到缓存 student 中
     * 其中缓存名称为 student 数据的 key 是 student 的 id
     * @param student s
     * @return
     */
    @Override
    @Cacheable(value = "cacheData", key = "#student.id")
    public Student findStudent(Student student) {


        log.warn("增加了student为{}的数据缓存", student);
        int id = student.getId();
        if(id == 0){


            return null;
        }
        return studentMapper.findStudent(student);
    }

    /**
     * 删除缓存
     * @CacheEvict 从缓存 student 中删除
     * 其中缓存名称为 student 数据的 key 是 student 的 id
     * @param student s
     */
    @Override
    @CacheEvict(value = "cacheData", key = "#student.id")
    public void deleteStudent(Student student) {


        log.warn("删除了student为{}的数据缓存", student);
    }

    /**
     * @CachePut 缓存新增的或更新的数据到缓存
     * 其中缓存名称为 student 数据的 key 是 student 的 id
     * @param student
     */
    @Override
    @CachePut(value = "cacheData", key = "#student.id")
    public void saveStudent(Student student) {


        log.warn("保存了id、key 为{}的数据缓存", student);
        studentMapper.insertStudent(student);
    }


    @Override
    @Cacheable(value = "cacheData", key = "#text")
    public Student testStudent(String text) {


        System.out.println("test" + text);
        Student student = new Student();
        student.setName(text);
        return student;
    }
}
dao层(data access object数据访问层)
com.scaffold.test.mapper.StudentMapper
package com.scaffold.test.mapper;

import com.baomidou.mybatisplus.core.mapper.BaseMapper;
import com.scaffold.test.entity.Student;

import java.util.List;

/**
 * <p>
 * Mapper 接口
 * </p>
 *
 * @author alex wong
 */
public interface StudentMapper extends BaseMapper<Student> {


    List<Student> selectAll();

    Student findStudent(Student student);

    int insertStudent(Student student);
}
src/main/resources/mapper/StudentMapper.xml
<?xml version="1.0" encoding="UTF-8"?>
<!DOCTYPE mapper PUBLIC "-//mybatis.org//DTD Mapper 3.0//EN" "http://mybatis.org/dtd/mybatis-3-mapper.dtd">
<mapper namespace="com.scaffold.test.mapper.StudentMapper">

    <!-- 通用查询映射结果 -->
    <resultMap id="BaseResultMap" type="com.scaffold.test.entity.Student">
        <result column="id" property="id"/>
        <result column="name" property="name"/>
        <result column="age" property="age"/>
    </resultMap>

    <!-- 通用查询结果列 -->
    <sql id="Base_Column_List">
        id,
        name, age
    </sql>

    <sql id="Where_Condition">
        <where>
            <if test="id != null and id != ''">
                id=#{id}
            </if>
            <if test="name != null and name != ''">
                and name=#{name}
            </if>
            <if test="age != null and age != ''">
                and age=#{age}
            </if>
        </where>
    </sql>

    <insert id="insertStudent">
        insert student
        (id, name, age)
        values
        (#{id}, #{name}, #{age})
    </insert>

    <select id="selectAll" resultMap="BaseResultMap">
        select * from student
    </select>

    <select id="findStudent" resultType="com.scaffold.test.entity.Student">
        select * from student
        <include refid="Where_Condition"></include>
    </select>
</mapper>
sql
SET NAMES utf8mb4;
SET FOREIGN_KEY_CHECKS = 0;

-- ----------------------------
-- Table structure for student
-- ----------------------------
DROP TABLE IF EXISTS `student`;
CREATE TABLE `student` (
  `id` int(11) NOT NULL,
  `name` varchar(255) CHARACTER SET utf8mb4 COLLATE utf8mb4_0900_ai_ci NOT NULL,
  `age` int(11) DEFAULT NULL,
  PRIMARY KEY (`id`)
) ENGINE=InnoDB DEFAULT CHARSET=utf8mb4 COLLATE=utf8mb4_0900_ai_ci;

-- ----------------------------
-- Records of student
-- ----------------------------
INSERT INTO `student` VALUES (1, '1', 2323);
INSERT INTO `student` VALUES (2, '2', 2323);
INSERT INTO `student` VALUES (3, '3', 2323);

SET FOREIGN_KEY_CHECKS = 1;
Controller层
com.scaffold.test.controller.StudentController
package com.scaffold.test.controller;


import com.scaffold.test.entity.Student;
import com.scaffold.test.service.StudentService;
import org.springframework.beans.factory.annotation.Autowired;
import org.springframework.web.bind.annotation.GetMapping;
import org.springframework.web.bind.annotation.RequestMapping;
import org.springframework.web.bind.annotation.RequestParam;
import org.springframework.web.bind.annotation.RestController;

import java.util.List;

/**
 * <p>
 *  前端控制器
 * </p>
 *
 * @author alex wong
 */
@RestController
@RequestMapping("/student")
public class StudentController {


    @Autowired
    private StudentService studentService;

    @GetMapping("list")
    public List<Student> getAll(){


        return studentService.findAll();
    }

    @GetMapping("add")
    public void addStudent(Student student){


        studentService.saveStudent(student);
    }

    @GetMapping("find")
    public Student findStudent(Student student){


        return studentService.findStudent(student);
    }

    @GetMapping("delete")
    public void deleteStudent(Student student){


        studentService.deleteStudent(student);
    }

    @GetMapping("test")
    public Student test(@RequestParam String text){


        return studentService.testStudent(text);
    }
}
接下来测试一下缓存
@Cacheable
在方法执行前 Spring 先查看缓存中是否有数据,若有,则直接返回缓存数据;若无数据,调用方法将方法返回值放入缓存中;
第一次执行日志:

第二次执行日志:

日志没有增加,说明没有查询数据库;
我们添加Debuger,测试下方法有没有执行?

结果findStudent方法并没有执行,说明数据全部取自缓存。
其他方法测试:
@CacheEvict
将一条或多条数据从缓存中删除
添加实现类方法
 @Override
 @CacheEvict(value = "cacheData")
 	public void deleteStudent(Student student) {


 	log.warn("删除了student为{}的数据缓存", student);
 }
添加控制器路由
@GetMapping("delete")
public void deleteStudent(Student student){


    studentService.deleteStudent(student);
}


删除缓存后,再次查询会查询Sql库;
@CachePut
缓存新增的或更新的数据到缓存
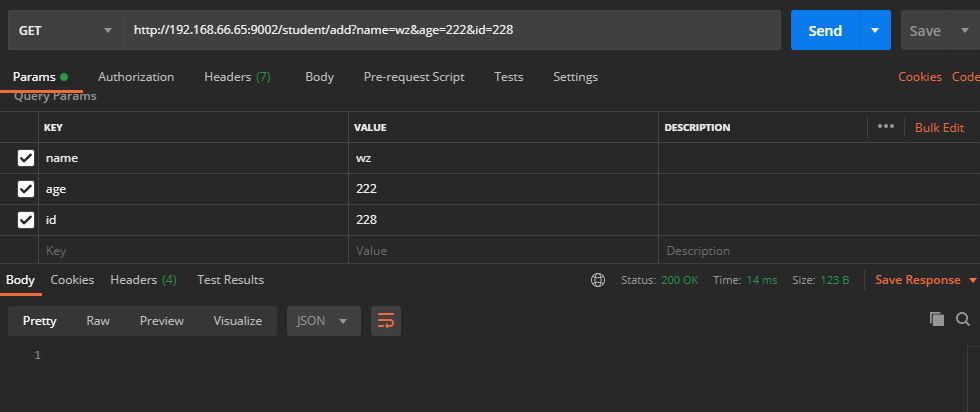
新增数据
/**
     * @CachePut 缓存新增的或更新的数据到缓存
     * 其中缓存名称为 student 数据的 key 是 student 的 id
     * @param student
     */
    @Override
    @CachePut(value = "cacheData", key = "#student.id")
    public void saveStudent(Student student) {


        log.warn("保存了id、key 为{}的数据缓存", student);
        studentMapper.insertStudent(student);
    }
@GetMapping("add")
public void addStudent(Student student){


	studentService.saveStudent(student);
}
先插入一条数据到数据库
这条数据会被立马缓存起来

测试缓存数据,看到并没有查询数据库
无sql执行,说明从缓存里面成功拿到了数据


然后删除缓存,重新获取,正确的结果应该是有Sql查询;
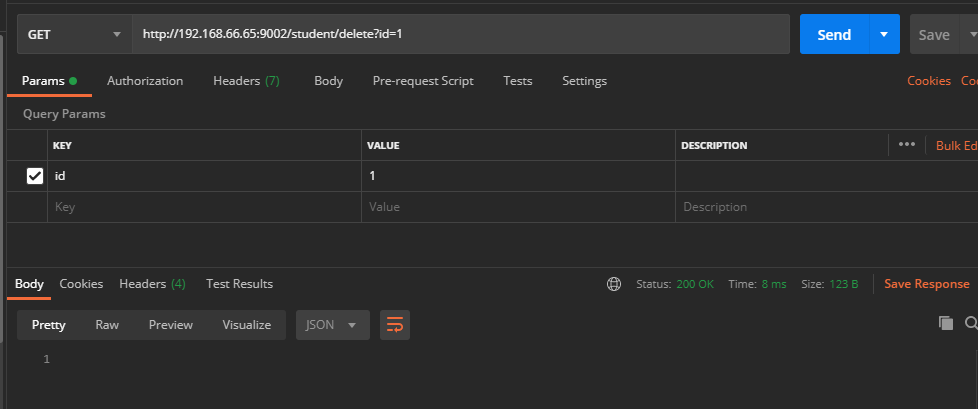
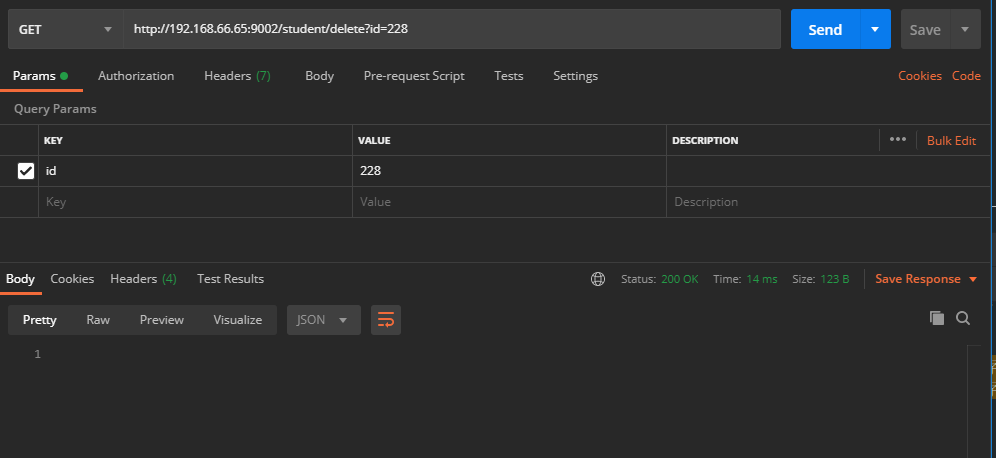
postman访问 http://192.168.66.65:9002/student/delete?id=228 删除了id=288的缓存
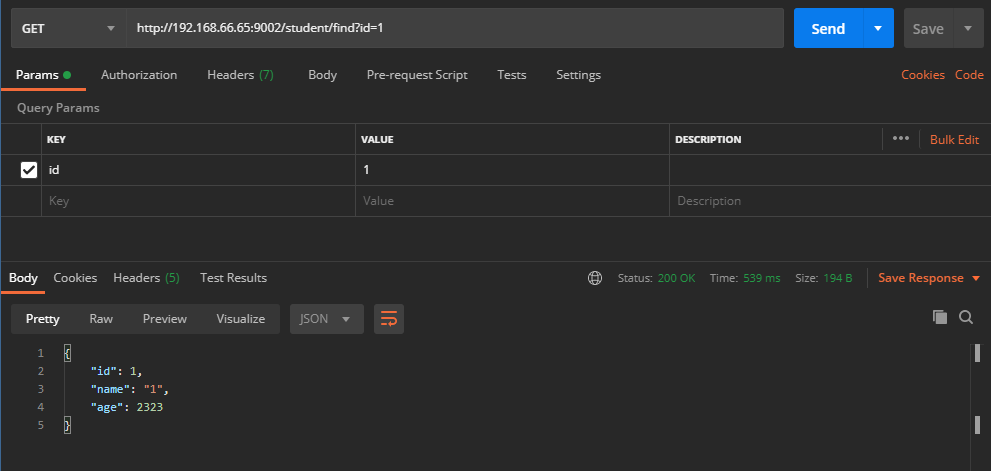
postman访问 http://192.168.66.65:9002/student/find?id=228 重新查询数据库获取数据


这个流程走下来,三个缓存方法,各自对应的功能都被验证成功。
缺点:
缓存数据并不持久,如果当前的服务关闭重启了,所有的缓存数据都会丢失了。
3.3、RedisCacheManage
在实际项目中,大多使用是Redis数据库,把所有的缓存数据存储在Redis中。
并且可以设置缓存的存活时间,超过一定时间后,自动获取最新数据。
缓存的方法同上, 不再赘述。
配置文件
server:
  port: 9002

spring:
  redis:
    # Redis服务器地址
    host: 127.0.0.1
    # Redis服务器连接端口
    port: 6379
    # Redis服务器连接密码(默认为空)
    password:
    # 连接超时时间(毫秒)
    timeout: 0
    jedis:
      pool:
        # 连接池最大连接数(使用负值表示没有限制)
        max-active: 8
        # 连接池最大阻塞等待时间(使用负值表示没有限制)
        max-wait: -1
        # 连接池中的最大空闲连接
        max-idle: 8
        # 连接池中的最小空闲连接
        min-idle: 0
    # Redis数据库索引(默认为0)
    database: 0
  # 缓存数据
#  cache:
##    type: simple
#    type: redis
#    cache-names: cacheData
#    redis:
#      time-to-live: 600000
#      use-key-prefix: false
#      cache-null-values: off
#      key-prefix: test
<!-- redisson 分布锁  -->
<dependency>
    <groupId>org.redisson</groupId>
    <artifactId>redisson</artifactId>
    <version>3.13.3</version>
</dependency>
修改配置文件 cacheConfig
package com.scaffold.test.config;

import org.springframework.boot.autoconfigure.condition.ConditionalOnProperty;
import org.springframework.cache.annotation.EnableCaching;
import org.springframework.context.annotation.Configuration;

/**
 * 缓存配置文件
 * 配置文件读取是否启用此配置
 * @author alex
 */
@Configuration
@EnableCaching
@ConditionalOnProperty(prefix = "caching", name = "enabled", havingValue = "true")
public class CacheConfig {


//    @Bean
//    public CacheManager cacheManager() {


//        return new ConcurrentMapCacheManager("cacheData");
//    }

}
RedisConf添加
CacheManage配置
package com.scaffold.test.config;

import com.fasterxml.jackson.annotation.JsonAutoDetect;
import com.fasterxml.jackson.annotation.PropertyAccessor;
import com.fasterxml.jackson.databind.ObjectMapper;
import org.redisson.Redisson;
import org.redisson.api.RedissonClient;
import org.redisson.codec.JsonJacksonCodec;
import org.redisson.config.Config;
import org.springframework.cache.CacheManager;
import org.springframework.context.annotation.Bean;
import org.springframework.context.annotation.Configuration;
import org.springframework.data.redis.cache.RedisCacheConfiguration;
import org.springframework.data.redis.cache.RedisCacheManager;
import org.springframework.data.redis.connection.RedisConnectionFactory;
import org.springframework.data.redis.core.RedisTemplate;
import org.springframework.data.redis.serializer.Jackson2JsonRedisSerializer;
import org.springframework.data.redis.serializer.RedisSerializationContext;
import org.springframework.data.redis.serializer.RedisSerializer;
import org.springframework.data.redis.serializer.StringRedisSerializer;

import javax.annotation.Resource;
import java.time.Duration;

@Configuration
public class RedisConfig {


    @Resource
    private RedisTemplate<String, Object> redisTemplate;

    /**
     * 单机模式
     */
    @Bean
    RedissonClient RedissonSingle() {


        Config config = new Config();
        config.setCodec(new JsonJacksonCodec())
                .useSingleServer()
                .setAddress("redis://localhost:6379");
        return Redisson.create(config);
    }

    @Bean
    public RedisTemplate<String, Object> setRedisTemplate() {


        // 使用 Jackson2JsonRedisSerialize 替换默认序列化
        Jackson2JsonRedisSerializer jackson2JsonRedisSerializer = new Jackson2JsonRedisSerializer(Object.class);
        ObjectMapper objectMapper = new ObjectMapper();
        objectMapper.setVisibility(PropertyAccessor.ALL, JsonAutoDetect.Visibility.ANY);
        objectMapper.enableDefaultTyping(ObjectMapper.DefaultTyping.NON_FINAL);
        jackson2JsonRedisSerializer.setObjectMapper(objectMapper);
        // 字符串序列化
        RedisSerializer stringSerializer = new StringRedisSerializer();
        redisTemplate.setKeySerializer(stringSerializer);
        // value 使用 Jackson2JsonRedisSerialize 序列化
        redisTemplate.setValueSerializer(jackson2JsonRedisSerializer);
        redisTemplate.setHashKeySerializer(stringSerializer);
        redisTemplate.setHashValueSerializer(stringSerializer);
        return redisTemplate;
    }

    private Duration timeToLive = Duration.ofSeconds(600);

    @Bean
    public CacheManager cacheManager(RedisConnectionFactory factory) {


        // RedisSerializer<String> redisSerializer = new StringRedisSerializer();
        // 解决从redis数据缓存value使用Jackson2JsonRedisSerialize序列化
        Jackson2JsonRedisSerializer jackson2JsonRedisSerializer = new Jackson2JsonRedisSerializer(Object.class);

        //解决查询缓存转换异常的问题
        ObjectMapper om = new ObjectMapper();
        om.setVisibility(PropertyAccessor.ALL, JsonAutoDetect.Visibility.ANY);
        om.enableDefaultTyping(ObjectMapper.DefaultTyping.NON_FINAL);
        jackson2JsonRedisSerializer.setObjectMapper(om);

        // 配置序列化(解决乱码的问题)
        RedisCacheConfiguration config = RedisCacheConfiguration.defaultCacheConfig()
                // 设置缓存的存活时间
                .entryTtl(timeToLive)
                // 设置缓存名字的前缀
                .prefixCacheNameWith("test")
                // 禁止缓存名字的前缀
                .disableKeyPrefix()
                // 序列化value数据
                .serializeValuesWith(RedisSerializationContext.SerializationPair.fromSerializer(jackson2JsonRedisSerializer))
                // 禁止缓存 Null 数据
                .disableCachingNullValues();

        RedisCacheManager cacheManager = RedisCacheManager.builder(factory).cacheDefaults(config).build();
        return cacheManager;
    }
}
一般情况,可以在配置中,修改配置,我们这里增加配置文件全权控制的原因是,需要格式化存储的数据,否则看到的不是JSON格式的数据。
以上配置等同于以下配置:
  spring:
    cache:
      type: redis
      cache-names: cacheData
      redis:
        time-to-live: 600000
        use-key-prefix: false
        cache-null-values: off
        key-prefix: test
其余代码同 3.2.2,切换缓存方式,只需要更改配置即可。
接下来让我们测试一下Redis存储缓存数据。
postman访问 http://192.168.66.65:9002/student/find?id=228
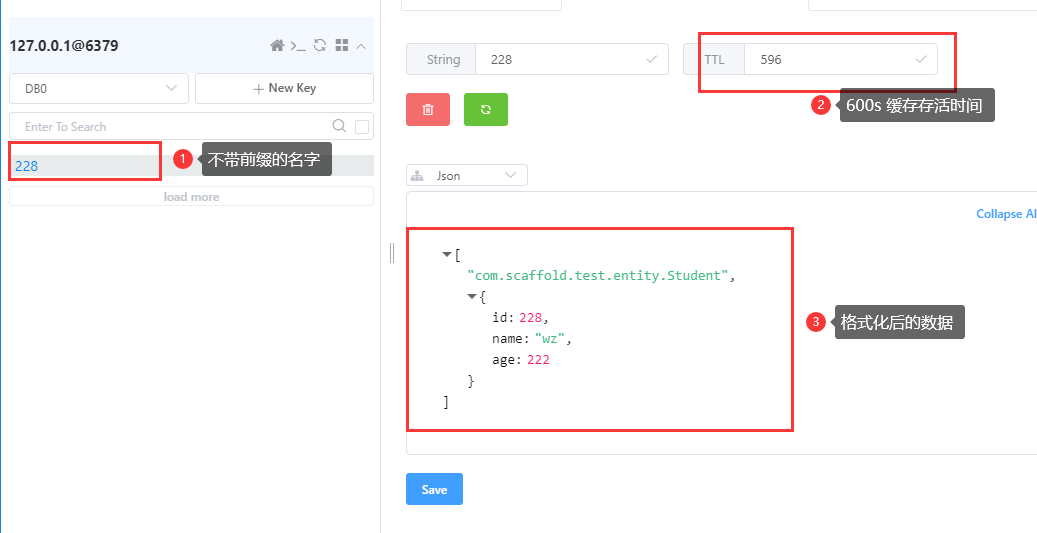
在600s的时间范围内,即使重启项目,依然能否获取到缓存数据。
.prefixCacheNameWith(“test”)

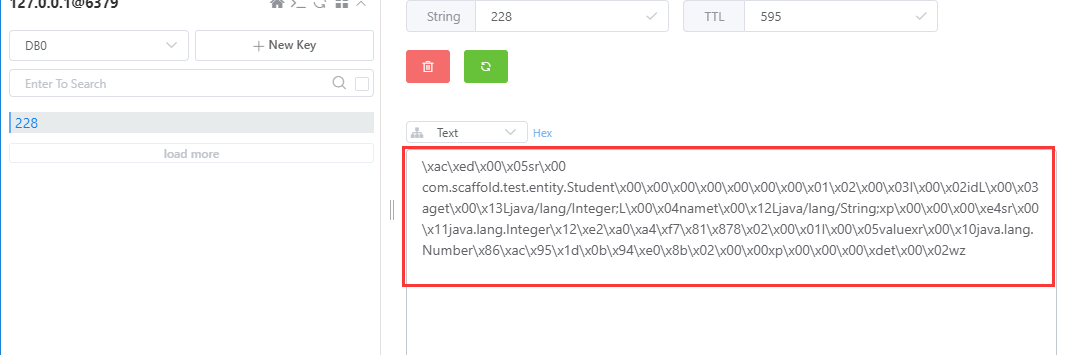
移除序列化的代码
.serializeValuesWith(RedisSerializationContext.SerializationPair.fromSerializer(jackson2JsonRedisSerializer))
删除缓存
postman 访问 http://192.168.66.65:9002/student/delete?id=228
删除redis中的缓存数据
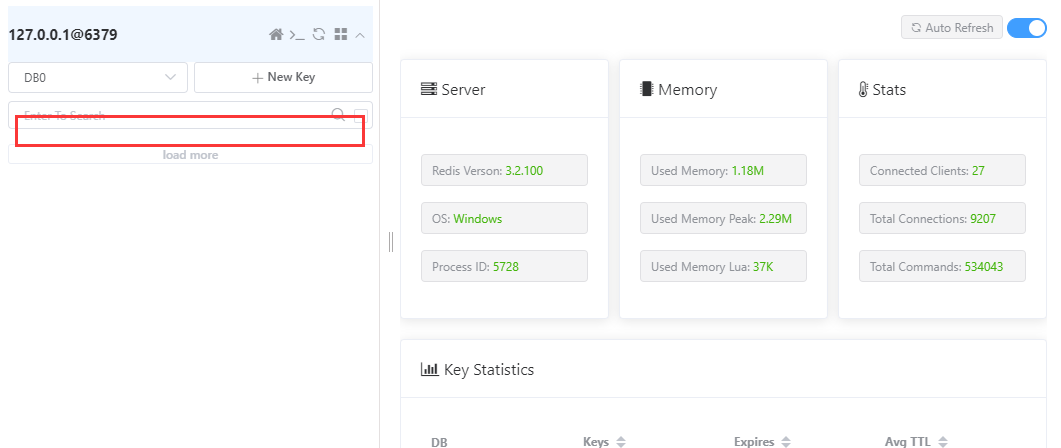
删除成功
4、总结
以上就是简单的数据缓存案例,Springboot集成Redis缓存是比较常用的。其他缓存方法这里不再说明。