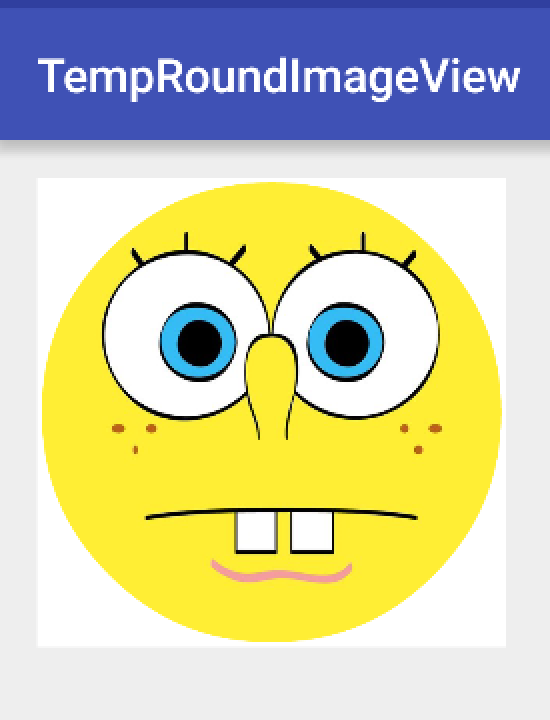
在Android开发中,圆形图片是很常见的,例如淘宝的宝贝,QQ的联系人头像等都是圆形的图片,
但是Android原生的ImageView又不能显示圆形的图片,这就需要我们自己去实现一个圆形图了
一、自定义View实现圆形图
1.1继承ImageView
import android.content.Context;
import android.graphics.Bitmap;
import android.graphics.Canvas;
import android.graphics.Paint;
import android.graphics.PorterDuff;
import android.graphics.PorterDuffXfermode;
import android.graphics.Rect;
import android.util.AttributeSet;
import android.widget.ImageView;

/**
 * Created by ChenFengYao on 16/3/15.
 */
public class RoundImageView extends ImageView {
    private Paint paint;

    public RoundImageView(Context context) {
        super(context);
        paint  = new Paint();//初始化画笔对象
    }

    public RoundImageView(Context context, AttributeSet attrs) {
        super(context, attrs);
        paint  = new Paint();//初始化画笔对象
    }

    public RoundImageView(Context context, AttributeSet attrs, int defStyleAttr) {
        super(context, attrs, defStyleAttr);
        paint  = new Paint();//初始化画笔对象
    }
}
继承ImageView复写其中的构造方法,并在构造方法里对画笔对象进行初始化
1.2复写onDraw方法
 @Override
    protected void onDraw(Canvas canvas) {
        Drawable drawable = getDrawable();
        if (null != drawable) {
            Bitmap bitmap = ((BitmapDrawable) drawable).getBitmap();
            //核心代码
            Bitmap b = getCircleBitmap(bitmap);
            paint.reset();
            canvas.drawBitmap(b,0,0,paint);
        } else {
            super.onDraw(canvas);
        }
    }
onDraw方法即图片绘制的时候系统所调用的方法,在该方法内部首先去判断是否设置了图片的src,如果能拿到改View设置的图片,则将它转换成圆形图片,如果没有设置的话,则不做任何操作,直接调用父类的onDraw方法
1.2getCircleBitmap
private Bitmap getCircleBitmap(Bitmap bitmap){
        Bitmap output = Bitmap.createBitmap(bitmap.getWidth(),
                bitmap.getHeight(), Bitmap.Config.ARGB_8888);
        Canvas canvas = new Canvas(output);
        Rect rect = new Rect(0,0,bitmap.getWidth(),bitmap.getHeight());
        paint.setAntiAlias(true);
        canvas.drawCircle(bitmap.getWidth() / 2, bitmap.getHeight() / 2, bitmap.getHeight() / 2, paint);
        paint.setXfermode(new PorterDuffXfermode(PorterDuff.Mode.SRC_IN));
        canvas.drawBitmap(bitmap, rect, rect, paint);//将图片画出来
        return output;
}
这是获取圆形图的方法,目的是将我们自定义的View中的图片,转化成圆形的Bitmap,这里需要Canvas对象,首先画一个圆形的底层,再在其上放上我们的图片,通过设置画笔的paint的Xfermode属性,该属性是用来设置前后图层的显示关系的,这是设置Mode.SRC_IN,的意思是输出的范围是底层图形的范围,而显示的内容是上层的内容
1.2.1paint.setXfermode()

| PorterDuff.Mode.CLEAR |
所绘制不会提交到画布上。 |
| PorterDuff.Mode.SRC |
显示上层绘制图片 |
| PorterDuff.Mode.DST |
显示下层绘制图片 |
| PorterDuff.Mode.SRC_OVER
扫描二维码关注公众号,回复:
12903978 查看本文章

|
正常绘制显示,上下层绘制叠盖 |
| PorterDuff.Mode.DST_OVER |
上下层都显示。下层居上显示 |
| PorterDuff.Mode.SRC_IN |
取两层绘制交集。显示上层 |
| PorterDuff.Mode.DST_IN |
取两层绘制交集。显示下层 |
| PorterDuff.Mode.SRC_OUT |
取上层绘制非交集部分 |
| PorterDuff.Mode.DST_OUT |
取下层绘制非交集部分 |
| PorterDuff.Mode.SRC_ATOP |
取下层非交集部分与上层交集部分 |
| PorterDuff.Mode.DST_ATOP |
取上层非交集部分与下层交集部分 |
| PorterDuff.Mode.XOR |
取两层绘制非交集。两层绘制非交集 |
| PorterDuff.Mode.DARKEN |
上下层都显示。变暗 |
| PorterDuff.Mode.LIGHTEN |
上下层都显示。变亮 |
| PorterDuff.Mode.MULTIPLY |
取两层绘制交集 |
| PorterDuff.Mode.SCREEN |
上下层都显示 |
1.2.2Canvas
1.3测试
<com.lanou.chenfengyao.temproundimageview.RoundImageView
        android:layout_width="wrap_content"
        android:layout_height="wrap_content"
        android:src="@mipmap/test_img"/>
1.4 添加功能
<resources>
    <declare-styleable name="RoundImageView">
        <attr name="is_round" format="boolean" />
    </declare-styleable>
</resources>private boolean isRound;public RoundImageView(Context context, AttributeSet attrs, int defStyleAttr) {
super(context, attrs, defStyleAttr);
paint = new Paint();//初始化画笔对象
TypedArray typedArray = context.obtainStyledAttributes(attrs, R.styleable.RoundImageView);
isRound = typedArray.getBoolean(R.styleable.RoundImageView_is_round, true);
}public RoundImageView(Context context) {
this(context, null);
}
public RoundImageView(Context context, AttributeSet attrs) {
this(context, attrs, 0);
} @Override
protected void onDraw(Canvas canvas) {
Drawable drawable = getDrawable();
if (null != drawable && isRound) {
Bitmap bitmap = ((BitmapDrawable) drawable).getBitmap();
//核心代码
Bitmap b = getCircleBitmap(bitmap);
paint.reset();
canvas.drawBitmap(b, 0, 0, paint);
b.recycle();
} else {
super.onDraw(canvas);
}
}<span style="font-family: Arial, Helvetica, sans-serif; background-color: rgb(255, 255, 255);">测试一下,我们将我们的组件的is_round属性改成false看看效果</span><RelativeLayout xmlns:android="http://schemas.android.com/apk/res/android"
xmlns:tools="http://schemas.android.com/tools"
android:layout_width="match_parent"
android:layout_height="match_parent"
xmlns:app="http://schemas.android.com/apk/res-auto"
android:paddingBottom="@dimen/activity_vertical_margin"
android:paddingLeft="@dimen/activity_horizontal_margin"
android:paddingRight="@dimen/activity_horizontal_margin"
android:paddingTop="@dimen/activity_vertical_margin"
tools:context="com.lanou.chenfengyao.temproundimageview.MainActivity">
<com.lanou.chenfengyao.temproundimageview.RoundImageView
android:layout_width="wrap_content"
android:layout_height="wrap_content"
android:src="@mipmap/test_img"
app:is_round="false"/>
</RelativeLayout>
public void setIsRound(boolean isRound) {
        this.isRound = isRound;
        invalidate();
    }
可以看到 我们的图片可以通过Java代码来动态的切换正常模式和圆形图片啦
二、使用Fresco显示圆形图片
compile 'com.facebook.fresco:fresco:0.9.0+'Fresco.initialize(this);<com.facebook.drawee.view.SimpleDraweeView
fresco:roundAsCircle = "true"
fresco:actualImageScaleType="centerInside"
fresco:roundingBorderColor="@color/colorAccent"
fresco:roundingBorderWidth="1dp"
android:layout_width="match_parent"
android:layout_height="match_parent"
fresco:backgroundImage="@mipmap/test_img"/>xmlns:fresco="http://schemas.android.com/apk/res-auto"
可以看到出现了圆形图片,并且还有1dp的红色边框
2.1一些坑
三、利用sharp做圆形图
<shape
    android:innerRadius="0dp"
    android:shape="ring"
    android:thicknessRatio="1"
    android:useLevel="false"
    xmlns:android="http://schemas.android.com/apk/res/android">

    <solid android:color="@android:color/transparent" />

    <stroke
        android:width="68dp"
        android:color="#FFFFFFFF" />
</shape><layer-list xmlns:android="http://schemas.android.com/apk/res/android">
<item android:drawable="@mipmap/test_img" />
<item android:drawable="@drawable/circle" />
</layer-list><ImageView
android:layout_width="wrap_content"
android:layout_height="wrap_content"
android:src="@drawable/round_layers"/>
实际上,该方法的原理就是在正常的ImageView上再叠加了一个白色的环形图形,这样显示的效果就是圆形图片了.但是缺点也是显而易见的,即需要手动的调节环形的粗细,比较难控制
