- 1.配置好Spring
https://blog.csdn.net/qq_31897241/article/details/103196610
建第一个类
package com.cl.spring;

public class HelloWorld {
	String name;

	public String getName() {
		return name;
	}

	public void setName(String name) {
		this.name = name;
	}
	public void Hello() {
		System.out.println("hello"+name);
	}
}
建第二个类
package com.cl.spring;

public class Main {
	public static void main(String[] args) {
		HelloWorld helloworld=new HelloWorld();
		helloworld.setName("xiaozi ");
		helloworld.Hello();
	}
}
两个类的运行结果为:hellonihao
代替上面俩方法
- 右击src,新建

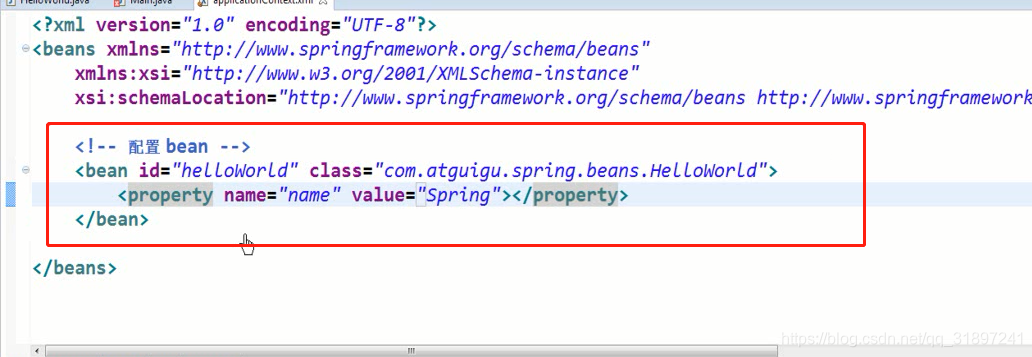
起名叫applicationContext.xml - 在里面编写如下代码就能代替上new和赋值
- id为类的对象。property为赋值
- 在main方法中写如下图调用,运行即可。
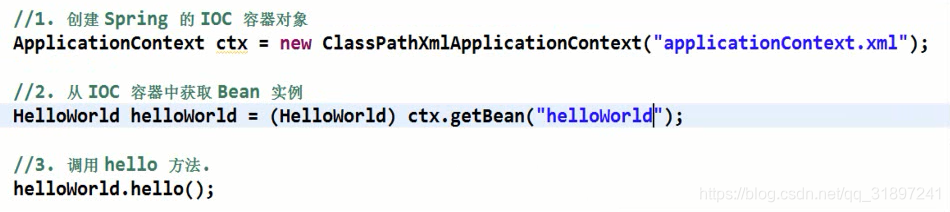
代码如下:
		 ApplicationContext ctx=new ClassPathXmlApplicationContext("pplicationContext.xml");
		 HelloWorld helloworld=(HelloWorld) ctx.getBean("helloworld");
		 helloworld.Hello();
通过注解配置Bean
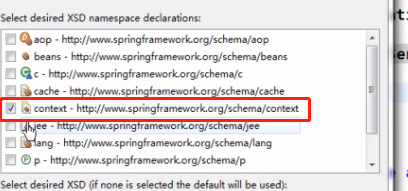
- 新建xml配置文件时导入context命名空间。
<!-- 制定SpringIOC容器扫描的包 -->
<!-- 会扫描该包下所有的声明bean的注解,并且自动装配bean -->
<context:component-scan base-package="com.beans"></context:component-scan>
- 声明bean的注解可以自动装配有以下的bean
- @Autowire:装配具有兼容类型的bean。可以放在构造器,字段,一切方法上面。让其变为一个bean
- @Resource
- @inject
@Component:标注一个普通的组件类
@Controller:标注一个控制器组件
@Service:标注一个业务逻辑组件
@Repository:标注Dao层的