本笔记主要目的是练习CSS 并无其它用途
W3CHOOL:https://www.w3school.com.cn/index.html
CSS 指层叠样式表 (Cascading Style Sheets)
样式定义如何显示 HTML 元素
样式通常存储在样式表中
把样式添加到 HTML 4.0 中,是为了解决内容与表现分离的问题
外部样式表可以极大提高工作效率
外部样式表通常存储在 CSS 文件中
多个样式定义可层叠为一
一、基础
1.内部样式表:可以在 head 部分通过 <style> 标签定义内部样式表
<!DOCTYPE html>
<html>
<head>
<meta charset="utf-8">
<title>标题</title>
<style>
p{
	color:red;    /*颜色为红色*/
	text-align:center;    /*居中*/
}
</style>
</head>

<body>
<p>这个段落采用CSS样式化。</p>
</body>
</html>
2.外部样式表:使用外部样式表,你就可以通过更改一个文件来改变整个站点的外观
<!DOCTYPE html>
<html>
<head>
<meta charset="utf-8">
<!--引入CSS文件-->
<link rel="stylesheet" type="text/css" href="./csstest1.css" >
<title>标题</title>
</head>

<body>
<p>这个段落采用CSS样式化。</p>
</body>
</html>
ceetest1.css
p{
	color:red;    /*颜色为红色*/
	text-align:center;    /*居中*/
}
3.内联样式
由于要将表现和内容混杂在一起,内联样式会损失掉样式表的许多优势。请慎用这种方法
<!DOCTYPE html>
<html>
<head>
<meta charset="utf-8">
<title>标题</title>
</head>
<body>
<p style="color:red; text-align:center; "> <!--颜色为红色, 居中-->
这个段落采用CSS样式化。
</p>
</body>
</html> 
4.多重样式
如果某些属性在不同的样式表中被同样的选择器定义,那么属性值将从更具体的样式表中被继承过来。
例如,外部样式表拥有针对 h3 选择器的三个属性:
h3 {
    color: red;
    text-align: left;
    font-size: 8pt;
}
而内部样式表拥有针对 h3 选择器的两个属性:
h3 {
    text-align:right;
    font-size:20pt;
}
假如拥有内部样式表的这个页面同时与外部样式表链接,那么 h3 得到的样式是:
h3{
    color: red;
    text-align: right;
    font-size: 20pt;
}
多重样式优先级如下:
内联样式)Inline style > (内部样式)Internal style sheet >(外部样式)External style sheet > 浏览器默认样式
1.CSS语法
1.1.选择器的分组
你可以对选择器进行分组,这样,被分组的选择器就可以分享相同的声明。用逗号将需要分组的选择器分开。
h1,h2,h3,h4,h5,h6
{
  color: green;    /*所有的标题元素都是绿色的*/
}
1.2.继承及其问题
根据 CSS,子元素从父元素继承属性。但是它并不总是按此方式工作。看看下面这条规则:
body{
     font-family: Verdana, sans-serif;/*body元素将使用Verdana字体*/
}
通过 CSS 继承,子元素将继承最高级元素(在本例中是 body)所拥有的属性(这些子元素诸如 p, td, ul, ol, ul, li, dl, dt,和 dd)。不需要另外的规则,所有 body 的子元素都应该显示 Verdana 字体,子元素的子元素也一样。并且在大部分的现代浏览器中,也确实是这样的。
但是在那个浏览器大战的血腥年代里,这种情况就未必会发生,那时候对标准的支持并不是企业的优先选择。比方说,Netscape 4 就不支持继承,它不仅忽略继承,而且也忽略应用于 body 元素的规则。IE/Windows 直到 IE6 还存在相关的问题,在表格内的字体样式会被忽略。我们又该如何是好呢?
- 友善地对待Netscape 4
幸运地是,你可以通过使用我们称为 "Be Kind to Netscape 4" 的冗余法则来处理旧式浏览器无法理解继承的问题。
body {
     font-family: Verdana, sans-serif;
}

p, td, ul, ol, li, dl, dt, dd {
     font-family: Verdana, sans-serif;
}
4.0 浏览器无法理解继承,不过他们可以理解组选择器。这么做虽然会浪费一些用户的带宽,但是如果需要对 Netscape 4 用户进行支持,就不得不这么做。
- 继承是一个诅咒吗?
如果你不希望 "Verdana, sans-serif" 字体被所有的子元素继承,又该怎么做呢?比方说,你希望段落的字体是 Times。没问题。创建一个针对 p 的特殊规则,这样它就会摆脱父元素的规则:
body{
    font-family: Verdana, sans-serif;/*使用Verdana字体*/
}

td, ul, ol, ul, li, dl, dt, dd{
    font-family: Verdana, sans-serif;/*使用Verdana字体*/
}

p{    /*创建一个针对 p 的特殊规则*/
    font-family: Times, "Times New Roman", serif;/*使用Times字体*/
}
2.派生选择器
通过依据元素在其位置的上下文关系来定义样式,你可以使标记更加简洁。
在 CSS1 中,通过这种方式来应用规则的选择器被称为上下文选择器 (contextual selectors),这是由于它们依赖于上下文关系来应用或者避免某项规则。在 CSS2 中,它们称为派生选择器,但是无论你如何称呼它们,它们的作用都是相同的。
派生选择器允许你根据文档的上下文关系来确定某个标签的样式。通过合理地使用派生选择器,我们可以使 HTML 代码变得更加整洁。
<link rel="stylesheet" type="text/css" href="./csstest1.css" >
<p>The strongly emphasized word in this paragraph is<strong>red</strong>.</p>
<h2>This subhead is also red.</h2>
<h2>The strongly emphasized word in this subhead is<strong>blue</strong>.</h2>
strong {
	color: red;
}
h2 {
	color: red;
}
h2 strong {
	color: blue;
}
3.id和class选择器
相同的class属性值,可以在html中出现多次。id属性值在页面中只能出现一次。
一个class的属性可以有多个值,也就是说一个标签可以有多个类。 建议尽量使用类选择器。 什么时候使用id选择器: 当能确定当前页面中标签只会出现一次,这时候可以使用id选择器。 如果不能保证相同的作用的标签在页面中只出现一次,那么这时候就选择使用类选择器。
3.1.id选择器
id 选择器以 "#" 来定义。 id 属性只能在每个 HTML 文档中出现一次。ID属性不要以数字开头,数字开头的ID在 Mozilla/Firefox 浏览器中不起作用。
#blue{ color: blue } /*所有id为blue的 HTML 元素均为蓝色*/下面的 HTML 代码中,id 属性为 red 的 p 元素显示为红色,而 id 属性为 green 的 p 元素显示为绿色。
<link rel="stylesheet" type="text/css" href="./csstest1.css" >
<h1 id="blue"> This heading   </h1>
<p id="blue">  This paragraph </p>
3.2.class(类)选择器
类选择器以一个点号显示, 可以在多个元素中使用。类名的第一个字符不能使用数字!无法在 Mozilla 或 Firefox 中起作用
csstest1.css
.center { color: blue } /*所有拥有 center 类的 HTML 元素均为蓝色*/在下面的 HTML 代码中,h1 和 p 元素都有 center 类。这意味着两者都将遵守 ".center" 选择器中的规则。
<link rel="stylesheet" type="text/css" href="./csstest1.css" >
<h1 class="center"> This heading   </h1>
<p class="center" > This paragraph </p>
3.3.id 选择器和派生选择器
#sidebar p {
	font-style: italic;
	text-align: right;
	margin-top: 0.5em;
}
上面的样式只会应用于出现在 id 是 sidebar 的元素内的段落。这个元素很可能是 div 或者是表格单元,尽管它也可能是一个表格或者其他块级元素。它甚至可以是一个内联元素,比如 <em></em> 或者 <span></span>,不过这样的用法是非法的,因为不可以在内联元素 <span> 中嵌入 <p> (如果你忘记了原因,请参阅 XHTML:网站重构)。
一个选择器,多种用法
即使被标注为 sidebar 的元素只能在文档中出现一次,这个 id 选择器作为派生选择器也可以被使用很多次:
#sidebar p {
	font-style: italic;   /*文本字体样式 斜体*/
	text-align: right;    /* 文本向右对齐*/
	margin-top: 0.5em;    /*元素的上外边距 0.5em=8px*/
}

#sidebar h2 {
	font-size: 1em;       /*字体大小 1em=16px*/
	font-weight: normal;  /*字体粗细 正常*/
	font-style: italic;   /*文本字体样式 斜体*/
	margin: 0;            /*上下边界 0*/
	line-height: 1.5;     /*行高 1.5*/
	text-align: right;    /* 文本向右对齐*/
}
在这里,与页面中的其他 p 元素明显不同的是,sidebar 内的 p 元素得到了特殊的处理,同时,与页面中其他所有 h2 元素明显不同的是,sidebar 中的 h2 元素也得到了不同的特殊处理。
3.4.class 也可被用作派生选择器:
.fancy td {
	color: #f60;        /*字体颜色 橙色*/
	background: #666;   /*背景 灰色*/
}
在上面这个例子中,类名为 fancy 的更大的元素内部的表格单元都会以灰色背景显示橙色文字。(名为 fancy 的更大的元素可能是一个表格或者一个 div)
元素也可以基于它们的类而被选择:
td.fancy {
	color: #f60;
	background: #666;
}
在上面的例子中,类名为 fancy 的表格单元将是带有灰色背景的橙色。
<td
class="fancy"
>
你可以将类 fancy 分配给任何一个表格元素任意多的次数。那些以 fancy 标注的单元格都会是带有灰色背景的橙色。那些没有被分配名为 fancy 的类的单元格不会受这条规则的影响。还有一点值得注意,class 为 fancy 的段落也不会是带有灰色背景的橙色,当然,任何其他被标注为 fancy 的元素也不会受这条规则的影响。这都是由于我们书写这条规则的方式,这个效果被限制于被标注为 fancy 的表格单元(即使用 td 元素来选择 fancy 类)。
4.属性选择器
4.1.对带有指定属性的 HTML 元素设置样式。
可以为拥有指定属性的 HTML 元素设置样式,而不仅限于 class 和 id 属性。
注释:只有在规定了 !DOCTYPE 时,IE7 和 IE8 才支持属性选择器。在 IE6 及更低的版本中,不支持属性选择。
<html>
<style type="text/css">
[title]{ color:red; }
</style>

<h2 title="Hello"> Hello </h2>
<a title="world" > world </a>
</html>
下面的例子为包含指定值的 title 属性的所有元素设置样式。适用于由空格分隔的属性值:
<html>
<style type="text/css">
[title~=hello]{ color:red; }
</style>

<h2 title="hello world">Hello world</h2>
<p title="student hello">Hello students!</p>
</html>
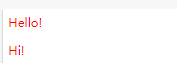
下面的例子为带有包含指定值的 lang 属性的所有元素设置样式。适用于由连字符分隔的属性值:
<html>
<style type="text/css">
[lang|=en]{ color:red; }
</style>

<p lang="en"> Hello! </p>
<p lang="en-us"> Hi! </p>
</html>
4.2.属性选择器在为不带有 class 或 id 的表单设置样式时特别有用:
<html>
<style>
input[type="text"]{
  width:200px;				/*宽度 200px*/
  display:block;			/*显示 块*/
  margin-bottom:10px;		/*上下边界 10px*/
  background-color:yellow;	/*背景 黄色*/
  font-family: Verdana, Arial;/*无衬线字体*/
}
input[type="button"]{
  width:120px;
  margin-left:35px;	/*左边界 35px*/
  display:block;
  font-family: Verdana, Arial;
}
</style>

<form  name="input"  action=""      method="get">
<input type="text"   name="Name"    value="Bill"  size="20">
<input type="text"   name="Name"    value="Gates" size="20">
<input type="button" value="Example Button">
</form>
</html>

CSS 选择器参考手册
| 选择器 | 描述 |
|---|---|
| [attribute] | 用于选取带有指定属性的元素。 |
| [attribute=value] | 用于选取带有指定属性和值的元素。 |
| [attribute~=value] | 用于选取属性值中包含指定词汇的元素。 |
| [attribute|=value] | 用于选取带有以指定值开头的属性值的元素,该值必须是整个单词。 |
| [attribute^=value] | 匹配属性值以指定值开头的每个元素。 |
| [attribute$=value] | 匹配属性值以指定值结尾的每个元素。 |
| [attribute*=value] | 匹配属性值中包含指定值的每个元素。 |
二、样式
1.样式
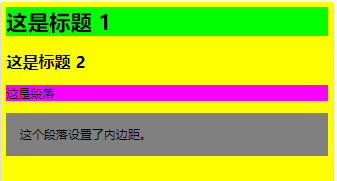
1.1.背景色 可以使用 background-color 属性为元素设置背景色
<html>
<head>
<style type="text/css">
body {background-color: yellow}
h1 {background-color: #00ff00}
h2 {background-color: transparent}
p {background-color: rgb(250,0,255)}
p.no2 {background-color: gray; padding: 20px;}
</style>
</head>
<body>
<h1>这是标题 1</h1>
<h2>这是标题 2</h2>
<p>这是段落</p>
<p class="no2">这个段落设置了内边距。</p>
</body>
</html>
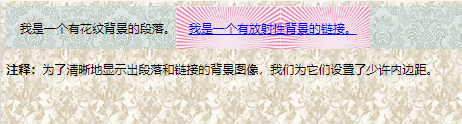
1.2.背景图像 需要使用 background-image 属性。
<html>
<style type="text/css">
body {background-image:url(/i/image.gif);}
</style>
</html>
<html>
<style type="text/css">
body {background-image:url(/i/eg_bg_04.gif);}
p.flower {background-image: url(/i/eg_bg_03.gif); padding: 20px;}
a.radio {background-image: url(/i/eg_bg_07.gif);  padding: 20px;}
</style>

<p class="flower">我是一个有花纹背景的段落。<a href="#" class="radio">我是一个有放射性背景的链接。</a></p>
<p><b>注释:</b>为了清晰地显示出段落和链接的背景图像,我们为它们设置了少许内边距。</p>
</html>
1.3.需要在页面上对背景图像进行平铺,可以使用 background-repeat 属性。
<html>
<style type="text/css">
body{
    background-image:
    url(./images/image.png);
    background-repeat: repeat-x /*水平平铺*/
}
</style>
</html>

1.4.百分数值
<html>
<style type="text/css">
body
{
  background-image:url('./images/image.png');
  background-repeat:no-repeat;
  background-attachment:fixed;
  background-position:5% 5% ; /*百分数值,或者长度值:5px 5px*/
}
</style>
<p><b>提示:</b>您需要把 background-attachment 属性设置为 "fixed",才能保证该属性在 Firefox 和 Opera 中正常工作。</p>
</html>

1.5.背景关联
如果文档比较长,那么当文档向下滚动时,背景图像也会随之滚动。当文档滚动到超过图像的位置时,图像就会消失。
您可以通过 background-attachment 属性防止这种滚动。通过这个属性,可以声明图像相对于可视区是固定的(fixed),因此不会受到滚动的影响:
background-attachment:fixed2.文本
<html>
<style type="text/css">
h1   { color:blue;background-color:yellow }/*字体蓝色;背景黄色*/
body { color:red }              /*红色字体*/
p.ex { color:rgb(0,0,255) }     /*字体蓝色*/
h2   { letter-spacing: 0.3em } /*字符间距1em*/
h3   { word-spacing: 30px; }   /*单词间距30px*/

</style>

<h1> 这是 heading 1 </h1>
<p> 该段落的文本是红色的。在 body 选择器中定义了 </p>
<p class="ex">该段落定义了 class="ex"。该段落中的文本是蓝色的。</p>
<h2> This is header 2 </h2>
<h3> This is header 3 </h3>
</html>

2.1.文本缩进 text-indent 属性
p{ text-indent: 5em; }注意:一般来说,可以为所有块级元素应用 text-indent,但无法将该属性应用于行内元素,图像之类的替换元素上也无法应用 text-indent 属性。不过,如果一个块级元素(比如段落)的首行中有一个图像,它会随该行的其余文本移动。
<html>
<style type="text/css">
p { text-indent: 1em }  /*1em=16px=0.564cm*//*或者:10% */
</style>
<p>
这是段落中的一些文本。这是段落中的一些文本。这是段落中的一些文本。
这是段落中的一些文本。这是段落中的一些文本。这是段落中的一些文本。
这是段落中的一些文本。这是段落中的一些文本。这是段落中的一些文本。
</p>
</html>
2.2.水平对齐text-align 属性
<html>
<style type="text/css">
h1 {text-align: center}
h2 {text-align: left}
h3 {text-align: right}
</style>

<h1>这是标题 1</h1>
<h2>这是标题 2</h2>
<h3>这是标题 3</h3>
</html>
2.3.行间距
<html>
<style type="text/css">
p.numeric   { line-height: 1   }
p.Percentage{ line-height: 200% }
p.Pixel     { line-height: 50px }
</style>
<p class="numeric">
    numeric=1<br>
    numeric=1
</p>
<p class="Percentage">
    Percentage=200%<br>
    Percentage=200%
</p>
<p class="Pixel">
    Pixel=50px<br>
    Pixel=50px
</p>
</html>

2.4.禁止文本折行
<html>
<style type="text/css">
p{ white-space: nowrap	/*禁止文本折行*/}
</style>
<p>
禁止文本折行 white-space: nowrap  禁止文本折行 white-space: nowrap  禁止文本折行 white-space: nowrap
禁止文本折行 white-space: nowrap  禁止文本折行 white-space: nowrap  禁止文本折行 white-space: nowrap
</p>
</html>
2.5.字体示例
<html>
<style type="text/css">
p.a { font-family:"Times New Roman",cursive,Serif } /*cursive草书字体*/
p.b { font-family:Arial,Verdana,Sans-serif }        /*无衬线的字体*/
h1  { font-size: 50%  }      /*字体尺寸*/
h2  { font-size: 150% }      /*字体尺寸*/
p.c { font-style:normal }    /*字体风格 正常*/
p.d { font-style:italic }    /*字体风格 斜体*/
p.e { font-variant: small-caps }/*以小型大写字体或者正常字体显示文本。*/
p.f { font-weight: normal } /*字体粗细 标准*/
p.g { font-weight: 900 }    /*字体粗细 900*/
</style>
<p class="a"> This is a paragraph, cursive草书字体 </p>
<p class="b"> This is a paragraph, 无衬线的字体  </p>
<h1> This is header,字体尺寸50%, font-size: 50%   </h1>
<h2> This is header,字体尺寸150%,font-size: 150%  </h2>
<p class="c"> This is a paragraph, 字体风格正常 normal. </p>
<p class="d"> This is a paragraph, 字体风格斜体 italic. </p>
<p class="e"> This is a paragraph,字体的异体. </p>
<p class="f"> This is a paragraph,字体粗细 标准,font-weight: normal </p>
<p class="g"> This is a paragraph,字体粗细 900,font-weight: 900 </p>
</html>

CSS 文本属性
| 属性 | 描述 |
|---|---|
| color | 设置文本颜色 |
| direction | 设置文本方向。 |
| line-height | 设置行高。 |
| letter-spacing | 设置字符间距。 |
| text-align | 对齐元素中的文本。 |
| text-decoration | 向文本添加修饰。 |
| text-indent | 缩进元素中文本的首行。 |
| text-shadow | 设置文本阴影。CSS2 包含该属性,但是 CSS2.1 没有保留该属性。 |
| text-transform | 控制元素中的字母。 |
| unicode-bidi | 设置文本方向。 |
| white-space | 设置元素中空白的处理方式。 |
| word-spacing | 设置字间距。 |
3.链接
链接的样式,可以用任何CSS属性(如颜色,字体,背景等)。text-decoration 属性大多用于去掉链接中的下划线:
a:link - 正常,未访问过的链接
a:visited - 用户已访问过的链接
a:hover - 当用户鼠标放在链接上时
a:active - 链接被点击的那一刻
3.1.背景色 background-color ;去掉下划线 text-decoration ;
<html>
<style>
a.text-decoration:link    {text-decoration:none;}      /*未访问链接 */
a.text-decoration:visited {text-decoration:none;}      /*已访问链接 */
a.text-decoration:hover   {text-decoration:underline;} /*鼠标移动到链接上 */
a.text-decoration:active  {text-decoration:underline;} /*鼠标点击时 */
/*文本修饰*/
a.color:link    {color:#000000;}   /* 未访问链接:黑色 */
a.color:visited {color:#00FF00;}   /* 已访问链接:绿色 */
a.color:hover   {color:#FF00FF;}   /* 鼠标移动到链接上:粉色 */
a.color:active  {color:#0000FF;}   /* 鼠标点击时:蓝色 */
/*背景色*/
a.background-color:link    {background-color:#B2FF99;} /*未访问链接:青色 */
a.background-color:visited {background-color:#6e9e20;} /*已访问链接:深青色*/
a.background-color:hover   {background-color:#FF704D;} /*鼠标移动到链接上:橙色*/
a.background-color:active  {background-color:#8c2bb3;} /*鼠标点击:紫色*/
/*字体尺寸*/
a.FontSize:link    {color:#ff0000;}
a.FontSize:visited {color:#0000ff;}
a.FontSize:hover   {font-size:150%;}
</style>

<p><a class=text-decoration  href="./app.html" target="_blank"> 普通的链接 text-decoration </a></p>
<p><a class=color            href="./app.html" target="_blank"> 有颜色的链接 color </a></p>
<p><a class=background-color href="./app.html" target="_blank"> 背景色的链接 background-color </a></p>
<p><a class=FontSize         href="./app.html" target="_blank"> 改变尺寸的 FontSize </a></p>
</html>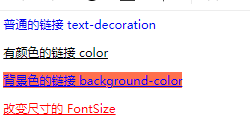
3.2.有方框的链接
<!DOCTYPE html>
<html>
<head>
<style>
a:link,a:visited {
    display:block;
    font-weight:bold;
    font-size:14px;
    font-family:Verdana, Arial, Helvetica, sans-serif;
    color:#111fe9;
    background-color:#98bf21;
    width:120px;
    text-align:center;
    padding:4px;
    text-decoration:none;
}
a:hover,a:active {
    background-color:#7A991A;
}
</style>
</head>
<body>
<a href="../views/index.html" target="_blank">有方框的链接</a>
</body>
</html>
![]()
4.CSS列表
- 无序列表 ul - 列表项标记用特殊图形(如小黑点、小方框等)
- 有序列表 ol - 列表项的标记有数字或字母
-
<html>
<style>
ul.a {list-style-type:circle;}      /*无序列表空心黑点*/
ul.b {list-style-type:square;}      /*无序列表黑点*/
ol.c {list-style-type:upper-roman;} /*有序列表实例abc*/
ol.d {list-style-type:lower-alpha;} /*有序列表实例Ⅰ Ⅱ Ⅲ*/
ul.e {list-style-image:url('./images/image.png');}  /*无序列表 图片*/
</style>
<p>无序列表空心黑点、黑点:</p>
<ul class="a">
  <li>Coffee</li>
  <li>Tea</li>
  <li>Coca Cola</li>
</ul>
<ul class="b">
  <li>Coffee</li>
  <li>Tea</li>
  <li>Coca Cola</li>
</ul>
<p>有序列表实例abc、 Ⅰ Ⅱ Ⅲ:</p>
<ol class="c">
  <li>Coffee</li>
  <li>Tea</li>
  <li>Coca Cola</li>
</ol>
<ol class="d">
  <li>Coffee</li>
  <li>Tea</li>
  <li>Coca Cola</li>
</ol>
<p>无序列表图片:</p>
<ul class="e">
  <li>Coffee</li>
  <li>Tea</li>
  <li>Coca Cola</li>
</ul>
</html>
5.表格
5.1.表格边框
如需在 CSS 中设置表格边框,请使用 border 属性
<html>
<style type="text/css">
    table,th,td { border:1px solid blue; }  /*为 table、th 以及 td 设置了蓝色边框:*/
</style>
<body>
    <table>
    <tr>
        <th>Firstname</th>  <th>Lastname</th>
    </tr>
    <tr>
        <td>Bill</td>       <td>Gates</td>
    </tr>
    <tr>
        <td>Steven</td>     <td>Jobs</td>
    </tr>
    </table>
</body>
</html>

    table { border-collapse: collapse; }    /*折叠成一个单一的边框 */
table,th,td { border:1px solid blue; } /*为 table、th 以及 td 设置了蓝色边框:*/ 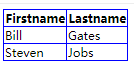
    table,td,th { border:1px solid black; }
    table{ width:70%; }     /*宽度70%  */
    th{ height:50px; }      /*高度50px */
    td{ text-align:right; } /*文字右对齐*/
    td { height:50px; vertical-align:bottom; }  /*高度50px,底部对齐*/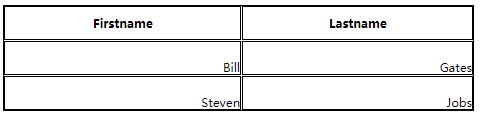
    table,td,th { border:1px solid green; }     /*边界:1px ,边框颜色 绿色 */
    th { color:rgb(194, 240, 161); background-color:green; }  /* th元素的文本和背景颜色:*/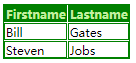
三、框模型
CSS 框模型 (Box Model) 规定了元素框处理元素内容、内边距、边框 和 外边距 的方式。
Margin(外边距) - 清除边框外的区域,外边距是透明的。
Border(边框) - 围绕在内边距和内容外的边框。
Padding(内边距) - 清除内容周围的区域,内边距是透明的。
Content(内容) - 盒子的内容,显示文本和图像。

1.框模型概述
<html>
<style>
div.ax {
    background-color: lightgrey;
    width: 300px;
    border: 25px solid green;
    padding: 25px;
    margin: 25px;
}
div.ex {
    width:220px;
    padding:10px;
    border:5px solid gray;
    margin:0px;
}
</style>
<div class=ax> 这里是盒子内的实际内容。有 25px 内间距,25px 外间距、25px 绿色边框。</div>

<img src="./images/image.png" width="250" height="250" />
<div class="ex"> 上面的图片是250 px宽。 这个元素的总宽度也是250 px。</div>
</html> 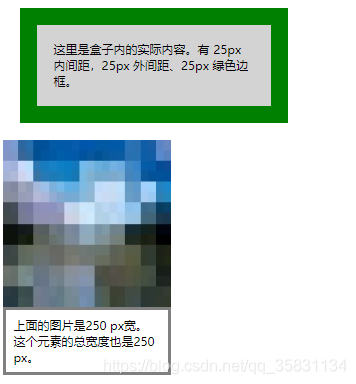
2.内边距
<html>
<head>
<style type="text/css">
    td.test1 { padding: 1cm }         /*相等内边距1cm*/
    td.test2 { padding: 0.5cm 2.5cm } /*上下内边距1cm,左右内边距2cm*/
    td.test3 { padding-bottom: 2cm }  /*下内边距2cm*/
</style>
</head>

<body>
<table border="1">
    <tr>
        <td class="test1">
            这个表格单元的每个边拥有相等的内边距。
        </td>
    </tr>
</table>

<table border="1">
    <tr>
        <td class="test2">
            这个表格单元的上和下内边距是 0.5cm,左和右内边距是 2.5cm。
        </td>
    </tr>
</table>

<table border="1">
    <tr>
        <td class="test3">
            这个表格单元拥有下内边距2cm。
        </td>
    </tr>
</table>

</body>
</html>
3.CSS边框
元素的边框 (border) 是围绕元素内容和内边距的一条或多条线。
CSS border 属性允许你规定元素边框的样式、宽度和颜色。
<html>
<head>
<style type="text/css">
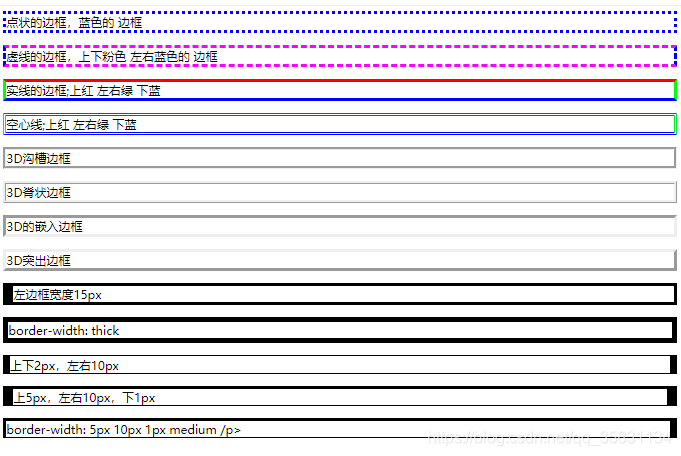
p.dotted {border-style: dotted; border-color: #0000ff } /*点状;蓝色*/
p.dashed {border-style: dashed; border-color: rgb(250,0,255) blue}/*虚线;上下粉色 左右蓝色*/
p.solid {border-style: solid; border-color: red #00ff00 blue }/*实线;上红 左右绿 下蓝*/
p.double {border-style: double; border-color: red rgb(9, 230, 53) blue }/*空心线;上红 左右绿 下蓝*/
p.groove {border-style: groove; } /*3D沟槽边框*/
p.ridge {border-style: ridge; } /*3D脊边框*/
p.inset {border-style: inset; } /*3D的嵌入边框*/
p.outset {border-style: outset; } /*3D突出边框*/
p.one {border-style: solid; border-left-width: 15px} /*左边框宽度15px*/
p.two {border-style: solid; border-width: thick}
p.three{border-style: solid; border-width: 2px 10px} /*上下2px,左右10px*/
p.four {border-style: solid; border-width: 5px 15px 1px} /*上5px,左右10px,下1px*/
p.five {border-style: solid; border-width: 5px 10px 1px medium}
</style>
</head>
<body>
<p class="dotted"> 点状的边框,蓝色的 边框 </p>
<p class="dashed"> 虚线的边框,上下粉色 左右蓝色的 边框 </p>
<p class="solid"> 实线的边框;上红 左右绿 下蓝 </p>
<p class="double"> 空心线;上红 左右绿 下蓝 </p>
<p class="groove"> 3D沟槽边框 </p>
<p class="ridge"> 3D脊状边框 </p>
<p class="inset"> 3D的嵌入边框 </p>
<p class="outset"> 3D突出边框 </p>
<p class="one"> 左边框宽度15px </p>
<p class="two"> border-width: thick </p>
<p class="three"> 上下2px,左右10px </p>
<p class="four"> 上5px,左右10px,下1px </p>
<p class="five"> border-width: 5px 10px 1px medium /p>
</body>
</html>
CSS 边框属性
| 属性 | 描述 |
|---|---|
| border | 简写属性,用于把针对四个边的属性设置在一个声明。 |
| border-style | 用于设置元素所有边框的样式,或者单独地为各边设置边框样式。 |
| border-width | 简写属性,用于为元素的所有边框设置宽度,或者单独地为各边边框设置宽度。 |
| border-color | 简写属性,设置元素的所有边框中可见部分的颜色,或为 4 个边分别设置颜色。 |
| border-bottom | 简写属性,用于把下边框的所有属性设置到一个声明中。 |
| border-bottom-color | 设置元素的下边框的颜色。 |
| border-bottom-style | 设置元素的下边框的样式。 |
| border-bottom-width | 设置元素的下边框的宽度。 |
| border-left | 简写属性,用于把左边框的所有属性设置到一个声明中。 |
| border-left-color | 设置元素的左边框的颜色。 |
| border-left-style | 设置元素的左边框的样式。 |
| border-left-width | 设置元素的左边框的宽度。 |
| border-right | 简写属性,用于把右边框的所有属性设置到一个声明中。 |
| border-right-color | 设置元素的右边框的颜色。 |
| border-right-style | 设置元素的右边框的样式。 |
| border-right-width | 设置元素的右边框的宽度。 |
| border-top | 简写属性,用于把上边框的所有属性设置到一个声明中。 |
| border-top-color | 设置元素的上边框的颜色。 |
| border-top-style | 设置元素的上边框的样式。 |
| border-top-width | 设置元素的上边框的宽度。 |
4.外边距 margin 属性
围绕在元素边框的空白区域是外边距。设置外边距会在元素外创建额外的“空白”。
<html>
<head>
<style type="text/css">
    p.one   {margin-left: 200px}         /*距离左边200px*/
    p.two   {margin-top:   5em}         /*距离左边5em*/
    p.margin {margin: 5cm 15cm 5cm 5cm}  /*上右下左:5cm 15cm 5cm 5cm*/
</style>
</head>
<body>
<p class="one"> 距离左边200px </p>
<p class="two"> 距离上边5em </p>
<p class="margin">上:5cm; 右:15cm;下:5cm;左:5cm;</p>
</body>
</html>

5.外边距合并
外边距合并指的是,当两个垂直外边距相遇时,它们将形成一个外边距。合并后的外边距的高度等于两个发生合并的外边距的高度中的较大者。
<html>
<head>
<style type="text/css">
* {
  margin:0;
  padding:0;
  border:0;
}
#d1 {
  width:100px;
  height:100px;
  margin-top:20px;
  margin-bottom:20px;
  background-color:red;
}
#d2 {
  width:100px;
  height:100px;
  margin-top:10px;
  background-color:blue;
}
/*--------------------------------------------------*/
* {
  margin:0;
  padding:0;
  border:0;
}
#outer {
  width:100px;
  height:100px;
  background-color:red;
  margin-top:20px;
}
#inner {
  width:50px;
  height:50px;
  background-color:blue;
  margin-top:10px;
}
</style>
</head>
<body>
<p>请注意,两个 div 之间的外边距是 20px,而不是 30px(20px + 10px)。</p>
<div id="d1">  </div>
<div id="d2">  </div>

<p>注释:请注意,如果不设置 div 的内边距和边框,那么内部 div 的上外边距将与外部 div 的上外边距合并(叠加)。</p>
<div id="outer">
    <div id="inner">
    </div>
</div>
</body>
</html>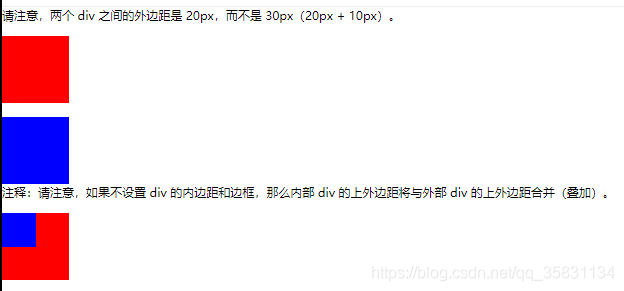
6. Display(显示) 与 Visibility(可见性)
<!DOCTYPE html>
<html>
<head>
<style>
    h4.hidden {visibility:hidden;}  /*实例中的隐藏标题仍然占用空间*/
    h2.hidden {display:none;}       /*实例中的隐藏标题不占用空间*/
    li{display:inline;}             /*链接列表水平显示*/
    /*如何使用表的collapse属性*/
    table, th, td { border: 1px solid black; }
    tr.collapse   { visibility: collapse; }
</style>
</head>

<body>
<h4>这是一个可见标题</h4>
<h4 class="hidden">这是一个隐藏标题</h4>
<p>注意, 实例中的隐藏标题仍然占用空间。</p>
<p>------------------------------------------------------</p>
<h2>这是一个可见标题</h2>
<h2 class="hidden">这是一个隐藏标题</h2>
<p>注意, 实例中的隐藏标题不占用空间。</p>
<p>------------------------------------------------------</p>
<p>链接列表水平显示:</p>
<ul>
<li><a href="/html/" target="_blank"> HTML </a></li>
<li><a href="/css/" target="_blank"> CSS </a></li>
<li><a href="/js/" target="_blank"> JavaScript </a></li>
<li><a href="/xml/" target="_blank"> XML </a></li>
</ul>
<p>------------------------------------------------------</p>
<span> one-111 </span>
<span> two-222 </span>
<p>------------------------------------------------------</p>
<table>
    <tr>
      <th> 如何使用 </th>
      <th> 表的  </th>
    </tr>
    <tr>
      <td> collapse  </td>
      <td> 属性</td>
    </tr>
    <tr class="collapse">
      <td> Lois   </td>
      <td> Griffin</td>
    </tr>
</table>

</body>
</html>
CSS从入门到放弃 练习笔记(1):https://blog.csdn.net/qq_35831134/article/details/109591224