一、搭建环境
打开IDEA,创建一个不使用骨架的Maven项目,打开pom.xml,导入springFreamwork和Junit依赖:
<dependencies>
    <!-- https://mvnrepository.com/artifact/junit/junit -->
    <dependency>
        <groupId>junit</groupId>
        <artifactId>junit</artifactId>
        <version>4.12</version>
        <scope>test</scope>
    </dependency>
    <!-- https://mvnrepository.com/artifact/org.springframework/spring-webmvc -->
    <dependency>
        <groupId>org.springframework</groupId>
        <artifactId>spring-webmvc</artifactId>
        <version>5.2.12.RELEASE</version>
    </dependency>
</dependencies>
创建User的实体类:
package com.wzq.pojo;

public class User {


    private String name;
    private int age;

    public User() {


    }

    public User(String name, int age) {


        this.name = name;
        this.age = age;
    }

    public String getName() {


        return name;
    }

    public void setName(String name) {


        this.name = name;
    }

    public int getAge() {


        return age;
    }

    public void setAge(int age) {


        this.age = age;
    }

    @Override
    public String toString() {


        return "User{" +
                "name='" + name + '\'' +
                ", age=" + age +
                '}';
    }
}
创建Userbean.xml文件:
<?xml version="1.0" encoding="UTF-8"?>
<beans xmlns="http://www.springframework.org/schema/beans"
       xmlns:xsi="http://www.w3.org/2001/XMLSchema-instance"
       xsi:schemaLocation="http://www.springframework.org/schema/beans
        https://www.springframework.org/schema/beans/spring-beans.xsd">

</beans>
无参构造器是默认的,不讨论他,下面全都是关于有参构造器注入的
二、使用构造器注入的三种方式
1、通过数组下标创建【不建议使用】
打开Userbean.xml:
<?xml version="1.0" encoding="UTF-8"?>
<beans xmlns="http://www.springframework.org/schema/beans"
       xmlns:xsi="http://www.w3.org/2001/XMLSchema-instance"
       xsi:schemaLocation="http://www.springframework.org/schema/beans
        https://www.springframework.org/schema/beans/spring-beans.xsd">

    <!-- 第一种方式:数组下标 -->
    <bean id="user" class="com.wzq.pojo.User">
        <constructor-arg index="0" value="wzq"/>
        <constructor-arg index="1" value="18"/>
    </bean>
</beans>
通过<constructor-arg>标签,使用数组下标创建
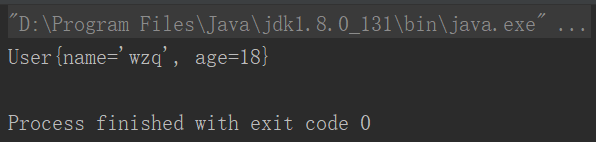
测试:
import com.wzq.pojo.Student;
import com.wzq.pojo.User;
import org.junit.Test;
import org.springframework.context.ApplicationContext;
import org.springframework.context.support.ClassPathXmlApplicationContext;

public class MyTest {


    @Test
    public void Test(){


        ApplicationContext context = new ClassPathXmlApplicationContext("Userbean.xml");
        User user = context.getBean("user", User.class);
        System.out.println(user.toString());
    }
}
需要注意的是:使用下标的方式,需要与pojo类元素声明的顺序保持一致,所以不建议使用
2、通过类型创建【不建议使用】
打开Userbean.xml:
<?xml version="1.0" encoding="GBK"?>
<beans xmlns="http://www.springframework.org/schema/beans"
       xmlns:xsi="http://www.w3.org/2001/XMLSchema-instance"
       xsi:schemaLocation="http://www.springframework.org/schema/beans
        https://www.springframework.org/schema/beans/spring-beans.xsd">

    <!-- 第二种:通过类型创建,不建议使用     -->
    <bean id="user" class="com.wzq.pojo.User">
        <constructor-arg type="java.lang.String" value="wzq" />
        <constructor-arg type="java.lang.Integer" value="18" />
    </bean>
</beans>
测试:
需要注意的是:如果有多个String类型的就会报错!非常不建议用这种方式搞!
3、通过参数名创建【建议使用】
打开Userbean.xml:
<?xml version="1.0" encoding="GBK"?>
<beans xmlns="http://www.springframework.org/schema/beans"
       xmlns:xsi="http://www.w3.org/2001/XMLSchema-instance"
       xsi:schemaLocation="http://www.springframework.org/schema/beans
        https://www.springframework.org/schema/beans/spring-beans.xsd">

    <!-- 第三种:直接通过参数名来设置 -->
    <bean id="user" class="com.wzq.pojo.User">
        <constructor-arg name="name" value="wzq"/>
        <constructor-arg name="age" value="18"/>
    </bean>

</beans>
测试:
这种方式可以通过属性名字实现依赖注入!推荐使用!