(一)简介
使用SpringBoot;
1)、创建SpringBoot应用,选中我们需要的模块;
2)、SpringBoot已经默认将这些场景配置好了,只需要在配置文件中指定少量配置就可以运行起来
3)、自己编写业务代码;
自动配置原理?
这个场景SpringBoot帮我们配置了什么?能不能修改?能修改哪些配置?能不能扩展?xxx
xxxxAutoConfiguration:帮我们给容器中自动配置组件;
xxxxProperties:配置类来封装配置文件的内容;
(二)SpringBoot对静态资源的映射规则
这里解决的问题是我的前端页面的代码应该放到哪里
所有的对webMvc的自动配置在WebMvcAuotConfiguration这个类下
     protected void addResourceHandlers(ResourceHandlerRegistry registry) {


            super.addResourceHandlers(registry);
            if (!this.resourceProperties.isAddMappings()) {


                logger.debug("Default resource handling disabled");
            } else {


                ServletContext servletContext = this.getServletContext();
                this.addResourceHandler(registry, "/webjars/**", "classpath:/META-INF/resources/webjars/");
                this.addResourceHandler(registry, this.mvcProperties.getStaticPathPattern(), (registration) -> {


                    registration.addResourceLocations(this.resourceProperties.getStaticLocations());
                    if (servletContext != null) {


                        registration.addResourceLocations(new Resource[]{

    new ServletContextResource(servletContext, "/")});
                    }

                });
            }
        }
1、所有 /webjars/** ,都去 classpath:/META-INF/resources/webjars/ 找资源;
2、"/**" 访问当前项目的任何资源,都去(静态资源的文件夹)找映射
"classpath:/META-INF/resources/",
"classpath:/resources/",
"classpath:/static/",
"classpath:/public/"
"/":当前项目的根路径
localhost:8080/abc === 去静态资源文件夹里面找abc
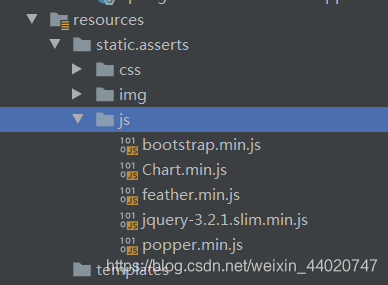 我这里想要访问静态资源的Chart.min.js
启动服务后,在地址栏输入http://localhost:8080/asserts/js/Chart.min.js既可以访问。
3、欢迎页; 静态资源文件夹下的所有index.html页面;被"/**"映射;
        @Bean
        public WelcomePageHandlerMapping welcomePageHandlerMapping(ApplicationContext applicationContext, FormattingConversionService mvcConversionService, ResourceUrlProvider mvcResourceUrlProvider) {


            WelcomePageHandlerMapping welcomePageHandlerMapping = new WelcomePageHandlerMapping(new TemplateAvailabilityProviders(applicationContext), applicationContext, this.getWelcomePage(), this.mvcProperties.getStaticPathPattern());
            welcomePageHandlerMapping.setInterceptors(this.getInterceptors(mvcConversionService, mvcResourceUrlProvider));
            welcomePageHandlerMapping.setCorsConfigurations(this.getCorsConfigurations());
            return welcomePageHandlerMapping;
        }
这啥意思呢?就是他会去找index页面当为首页
首先在resource下创建public目录,之后再public目录下新建index.html
直接输入http://localhost:8080/就可以访问。
4、所有的 **/favicon.ico 都是在静态资源文件下找;
这里就是改变最左端的图标。

(三)模板引擎
SpringBoot推荐的Thymeleaf;
语法更简单,功能更强大;
1、引入thymeleaf;
导入相关的包
		<dependency>
			<groupId>org.springframework.boot</groupId>
			<artifactId>spring-boot-starter-thymeleaf</artifactId>
          	2.1.6
		</dependency>
切换thymeleaf版本
<properties>
		<thymeleaf.version>3.0.9.RELEASE</thymeleaf.version>
		<!-- 布局功能的支持程序  thymeleaf3主程序  layout2以上版本 -->
		<!-- thymeleaf2   layout1-->
		<thymeleaf-layout-dialect.version>2.2.2</thymeleaf-layout-dialect.version>
  </properties>
2、Thymeleaf使用和语法
2.1Thymeleaf如何使用呢?很简单
只要我们把HTML页面放在classpath:/templates/,thymeleaf就能自动渲染;
@ConfigurationProperties(prefix = "spring.thymeleaf")
public class ThymeleafProperties {


	private static final Charset DEFAULT_ENCODING = Charset.forName("UTF-8");

	private static final MimeType DEFAULT_CONTENT_TYPE = MimeType.valueOf("text/html");

	public static final String DEFAULT_PREFIX = "classpath:/templates/";

	public static final String DEFAULT_SUFFIX = ".html";
  	//
使用:
1、导入thymeleaf的名称空间
<html lang="en" xmlns:th="http://www.thymeleaf.org">
实现步骤
- 在resource目录下创建templates目录
- 在templates目录下创建success.html
- 在controller中编写success
    @RequestMapping("success")
    public String success(Map<String,Object> map){


        map.put("hello","你好");
        return "success";

    }
- 在页面输入localhost:8080/success访问
实现过程中的问题:
- Thymeleaf导入失败,或者报错。解决办法参考https://blog.csdn.net/weixin_44664095/article/details/103616670这篇博文
- controller中最上面的注解是@Controller,而不是@RestController。写错了就访问不到。
2.2语法规则
-
th:text:改变当前元素里面的文本内容
-
语法有很多,眼花缭乱,下面实现几个功能抛砖引玉
实现功能:
//取值
<div th:text="${hello}">这是显示欢迎信息</div>
<hr/>
//转义取值
<div th:utext="${hello}"></div>
<hr/>
<取遍历值>
<div th:text="user" th:each="user:${users}"></div>
<h4>
    <span th:each="users"> [[${

    user}]]</span>

</h4>
(四)springMvc自动配置原理
4.1自动配置
这里还是很复杂,等看完springMVC再过来了解(p32)
4.2SpringMVC自动扩展
SpringBoot对SpringMVC的自动配置不需要了,所有都是我们自己配置;所有的SpringMVC的自动配置都失效了
我们需要在配置类中添加@EnableWebMvc即可;
//使用WebMvcConfigurerAdapter可以来扩展SpringMVC的功能
@EnableWebMvc
@Configuration
public class MyMvcConfig extends WebMvcConfigurerAdapter {


    @Override
    public void addViewControllers(ViewControllerRegistry registry) {


       // super.addViewControllers(registry);
        //浏览器发送 /atguigu 请求来到 success
        registry.addViewController("/atguigu").setViewName("success");
    }
}
原理:
为什么@EnableWebMvc自动配置就失效了;
1)@EnableWebMvc的核心
@Import(DelegatingWebMvcConfiguration.class)
public @interface EnableWebMvc {
2)、
@Configuration
public class DelegatingWebMvcConfiguration extends WebMvcConfigurationSupport {
3)、
@Configuration
@ConditionalOnWebApplication
@ConditionalOnClass({

     Servlet.class, DispatcherServlet.class,
		WebMvcConfigurerAdapter.class })
//容器中没有这个组件的时候,这个自动配置类才生效
@ConditionalOnMissingBean(WebMvcConfigurationSupport.class)
@AutoConfigureOrder(Ordered.HIGHEST_PRECEDENCE + 10)
@AutoConfigureAfter({

     DispatcherServletAutoConfiguration.class,
		ValidationAutoConfiguration.class })
public class WebMvcAutoConfiguration {
4)、@EnableWebMvc将WebMvcConfigurationSupport组件导入进来;
5)、导入的WebMvcConfigurationSupport只是SpringMVC最基本的功能;
(五)CRUD实现
5.1默认访问页面
我们将程序运行之后,首先访问的是肯定是个登录页面。那么如何实现呢?
有两种实现方法:
- 在contorller中添加映射
通过localhost:8080或者localhost:8080/index进行访问
public class HelloWorldController {


    //在controller中采用映射来访问首页,但这样写每一个页面都要在controller中添加,所以在config中改变
    @RequestMapping({

    "/","index.html"})
    public String index(){


        return "index";
    }
- 编写配置文件,使用mvc的方式进行重新配置
创建config来进行编写相关的配置文件
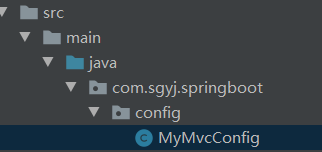
@Configuration
public class MyMvcConfig implements WebMvcConfigurer {


    //所有的WebMvcConfigurerAdapter组件都会一起起作用
    @Bean//将组件注册在容器中
    public WebMvcConfigurer webMvcConfigurer(){


        WebMvcConfigurer webMvcConfigurer=new WebMvcConfigurer() {


            @Override
            public void addViewControllers(ViewControllerRegistry registry) {


                registry.addViewController("/").setViewName("login");
                registry.addViewController("/index.html").setViewName("login");
            }
        };
        return webMvcConfigurer;
    }
}
5.2国际化的实现
在登录页面,我想既有中文登录页面,也有英文登录页面
实现步骤
- 编写国际化配置文件
在reosorce目录下面创建i18n目录
创建三个配置文件:这三个文件的意思分别是,默认、英文、中文页面时显示什么。
如果发现中文显示乱码,进入setting中的FileEncoding中将转为ascii码的选项选上。

- 上面是通过浏览器语言设置来切换国际化,接下来我们实现点击一个中文与英文的按钮来切换国际化
通过浏览器语言设置来切换国际化的原理
在webMvcAutoConfiguration中有一个默认的区域信息解析器。如果我们自己没有配置区域信息解析器,默认的就是根据请求头带来的区域信息获取locale进行国际化。
现在我们想要使用自己的区域信息解析器。
 @Bean
        @ConditionalOnMissingBean(
            name = {

    "localeResolver"}
        )
        public LocaleResolver localeResolver() {


            if (this.webProperties.getLocaleResolver() == org.springframework.boot.autoconfigure.web.WebProperties.LocaleResolver.FIXED) {


                return new FixedLocaleResolver(this.webProperties.getLocale());
            } else if (this.mvcProperties.getLocaleResolver() == org.springframework.boot.autoconfigure.web.servlet.WebMvcProperties.LocaleResolver.FIXED) {


                return new FixedLocaleResolver(this.mvcProperties.getLocale());
            } else {


                AcceptHeaderLocaleResolver localeResolver = new AcceptHeaderLocaleResolver();
                Locale locale = this.webProperties.getLocale() != null ? this.webProperties.getLocale() : this.mvcProperties.getLocale();
                localeResolver.setDefaultLocale(locale);
                return localeResolver;
            }
        }
- 上面讲完原理,现在来构造区域信息解析器
首先创建一个component包,这个包下面创建MylocaleResolver类
流程:
首先从页面获取一个l值,就是是英文还是中文http://localhost:8080/index.html?l=en_US
如果值非空(l=en_US),那么就将其按照_分割
最终返回区域信息
package com.sgyj.springboot.component;

import org.springframework.util.StringUtils;
import org.springframework.web.servlet.LocaleResolver;

import javax.servlet.http.HttpServletRequest;
import javax.servlet.http.HttpServletResponse;
import java.util.Locale;

//在连接上携带居于信息

public class MyLocaleResolver implements LocaleResolver {


    @Override
    public Locale resolveLocale(HttpServletRequest httpServletRequest) {


        String l=httpServletRequest.getParameter("l");
        Locale locale = Locale.getDefault();
        if(!StringUtils.isEmpty(l)){


            String split[]=l.split("_");
            locale=new Locale(split[0],split[1]);

        }
        return locale;
    }

    @Override
    public void setLocale(HttpServletRequest httpServletRequest, HttpServletResponse httpServletResponse, Locale locale) {


    }
}
编写时遇到的问题
在编写时,遇到指针为空异常。
java.lang.NullPointerException: null
	at com.sgyj.springboot.component.MyLocaleResolver.resolveLocale(MyLocaleResolver.java:18) ~[classes/:na]
检查之后发现,是MyLocalResolver中判断字符串是否为空的参数写成了"l",正确写法应该是l
5.3登录页面
开发期间模板引擎页面修改以后,要实时生效
1)、禁用模板引擎的缓存
# 禁用缓存
spring.thymeleaf.cache=false
2)、页面修改完成以后ctrl+f9:重新编译;
登陆错误消息的显示
<p style="color: red" th:text="${msg}" th:if="${not #strings.isEmpty(msg)}"></p>
4)、拦截器进行登陆检查
拦截器
/**
 * 登陆检查,
 */
public class LoginHandlerInterceptor implements HandlerInterceptor {


    //目标方法执行之前
    @Override
    public boolean preHandle(HttpServletRequest request, HttpServletResponse response, Object handler) throws Exception {


        Object user = request.getSession().getAttribute("loginUser");
        if(user == null){


            //未登陆,返回登陆页面
            request.setAttribute("msg","没有权限请先登陆");
            request.getRequestDispatcher("/index.html").forward(request,response);
            return false;
        }else{


            //已登陆,放行请求
            return true;
        }

    }

    @Override
    public void postHandle(HttpServletRequest request, HttpServletResponse response, Object handler, ModelAndView modelAndView) throws Exception {


    }

    @Override
    public void afterCompletion(HttpServletRequest request, HttpServletResponse response, Object handler, Exception ex) throws Exception {


    }
}
注册拦截器
  //所有的WebMvcConfigurerAdapter组件都会一起起作用
    @Bean //将组件注册在容器
    public WebMvcConfigurerAdapter webMvcConfigurerAdapter(){


        WebMvcConfigurerAdapter adapter = new WebMvcConfigurerAdapter() {


            @Override
            public void addViewControllers(ViewControllerRegistry registry) {


                registry.addViewController("/").setViewName("login");
                registry.addViewController("/index.html").setViewName("login");
                registry.addViewController("/main.html").setViewName("dashboard");
            }

            //注册拦截器
            @Override
            public void addInterceptors(InterceptorRegistry registry) {


                //super.addInterceptors(registry);
                //静态资源;  *.css , *.js
                //SpringBoot已经做好了静态资源映射
                registry.addInterceptor(new LoginHandlerInterceptor()).addPathPatterns("/**")
                        .excludePathPatterns("/index.html","/","/user/login");
            }
        };
        return adapter;
    }
学了三天的springboot,了解了springboot的一些基本配置,自动配置原理等。在实际进行开发的过程中,发现许多基础知识完全没接触过。比如登录过程中的cookie,session等内容,还有转发重定向等知识的忘记。Spring中的注解机制,springMVC基本就没了解过原理。
其实学这几天的springboot,我并不是想要真正的彻底搞懂他,就是想检验一下自己知识的广度。现在已经检验出来了。接下来就是重回java基础,javaweb,SSM框架。
雄关漫道真如铁,而今迈步从头越。继续努力吧!