文章目录
一、组件自定义事件_绑定
1. props 实现(复习)
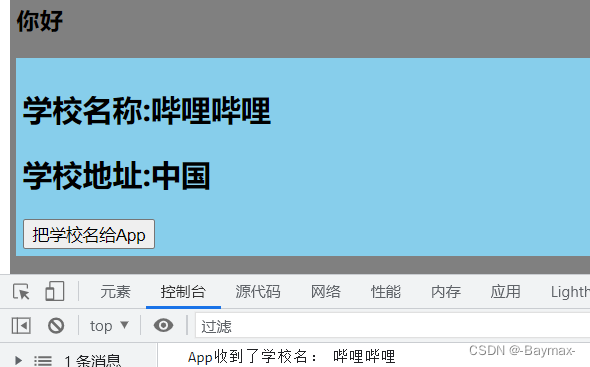
通过父组件给子组件传递函数类型的 props 实现:子给父传递数据
- 在父组件
App.vue中定义getSchoolName()用来接收从子组件传过来的值。- 在子组件
School.vue中定义props: ['getSchoolName'],接收父组件给子组件传递函数。- 在子组件
School.vue的 methods 方法中把值传给父组件。
School.vue
	<template>
	  <div class="demo2">
	    <h2>学校名称:{

    {

     name }}</h2>
	    <h2>学校地址:{

    {

     address }}</h2>
	    <button @click="sendSchoolName">把学校名给App</button>
	  </div>
	</template>

	<script>
	export default {


	  name: "SchoolName",
	  props: ["getSchoolName"],
	  data() {


	    return {


	      name: "哔哩哔哩",
	      address: "中国",
	    };
	  },
	  methods: {


	    sendSchoolName() {


	      this.getSchoolName(this.name);
	    },
	  },
	};
	</script>
App.vue
	<template>
	  <div class="demo">
	    <h3>{

    {

     msg }}</h3>
	    <!-- 通过父组件给子组件传递函数类型的props实现:子给父传递数据 -->
	    <School :getSchoolName="getSchoolName" />
	  </div>
	</template>

	<script>
	// 引入组件
	import School from "./components/School.vue";
	import Student from "./components/Student.vue";
	export default {


	  name: "App",
	  components: {

     School, Student },
	  data() {


	    return {


	      msg: "你好",
	    };
	  },
	  methods: {


	    getSchoolName(name) {


	      console.log("App收到了学校名:", name);
	    }
	  }
	};
	</script>
2. 自定义事件实现(使用 @)
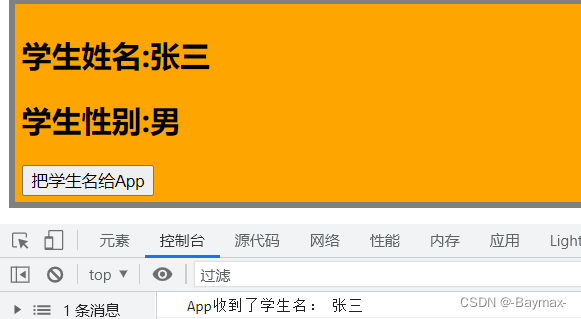
通过父组件给子组件绑定一个自定义事件实现:子给父传递数据
(使用@)
- 在父组件
App.vue中自定义事件@atguigu绑定到Student组件上。- 在子组件
Student.vue中通过this.$emit("atguigu", xxx)触发该事件。- 可以传参,在
App组件中可以以形参的方式(...params)接收并输出。
Student.vue
	<template>
	  <div class="demo1">
	    <h2>学生姓名:{

    {

     name }}</h2>
	    <h2>学生性别:{

    {

     sex }}</h2>
	    <button @click="sendStudentName">把学生名给App</button>
	  </div>
	</template>

	<script>
	export default {


	  name: "StudentName",
	  data() {


	    return {


	      name: "张三",
	      sex: "男",
	    };
	  },
	  methods: {


	    sendStudentName() {


	      // 触发Student组件实例上的atguigu事件
	      this.$emit("atguigu", this.name, 666);
	    },
	  },
	};
	</script>
App.vue
	<template>
	  <div class="demo">
	    <h3>{

    {

     msg }}</h3>
	    <!-- 通过父组件给子组件绑定一个自定义事件实现:子给父传递数据 (第一种写法:使用@)-->
	    <Student @atguigu="getStudentName"/>
	</template>

	<script>
	import School from "./components/School.vue";
	import Student from "./components/Student.vue";
	export default {


	  name: "App",
	  components: {

     School, Student },
	  data() {


	    return {


	      msg: "你好",
	    };
	  },
	  methods: {


	    getStudentName(name, ...params) {


	      console.log("App收到了学生名:", name, params);
	    }
	  }
	};
	</script>

3. 自定义事件实现(使用 ref)
通过父组件给子组件绑定一个自定义事件实现:子给父传递数据
(使用ref)。
- 在
Student标签中通过ref = student给组件注册引用信息(相当于 id 的替代者)。- 在钩子函数中,通过
this.$refs.student.$on('atguigu', xxx)绑定自定义事件。(ref 打标识,$refs 获取)vm.$on(event, callback)用于监听当前实例上的自定义事件,事件可以由vm.$emit触发。- 如果把
$on改成$once则只触发一次。- 可以给添加
setTimeout()执行异步任务。
Student.vue 不变
App.vue
	<template>
	  <div class="demo">
	    <h3>{

    {

     msg }}</h3>
	    <!-- 通过父组件给子组件绑定一个自定义事件实现:子给父传递数据 (第二种写法:使用ref)-->
	    <Student ref="student" />
	  </div>
	</template>

	<script>
	import School from "./components/School.vue";
	import Student from "./components/Student.vue";
	export default {


	  name: "App",
	  components: {

     School, Student },
	  data() {


	    return {


	      msg: "你好",
	    };
	  },
	  methods: {


	    getStudentName(name){


	        console.log('App收到了学生名:', name);
	    }
	  },
	  mounted() {


	    this.$refs.student.$on("atguigu", this.getStudentName); //绑定自定义事件
	    // this.$refs.student.$once("atguigu", this.getStudentName); //绑定自定义事件(一次性)
	  },
	};
3s 后触发绑定的自定义事件(三秒之后点击才会输出内容)
	setTimeout(() => {


		this.$refs.student.$on('atguigu', this.getStudentName)
	}, 3000)
二、组件自定义事件_解绑
1. 解绑一个 / 多个自定义事件
语法:
this.$off('xxx')
语法:
this.$off(['xxx', 'xx'])
<template>
<div class="demo1">
<h2>学生姓名:{
{
name }}</h2>
<h2>学生性别:{
{
sex }}</h2>
<button @click="sendStudentName">把学生名给App</button>
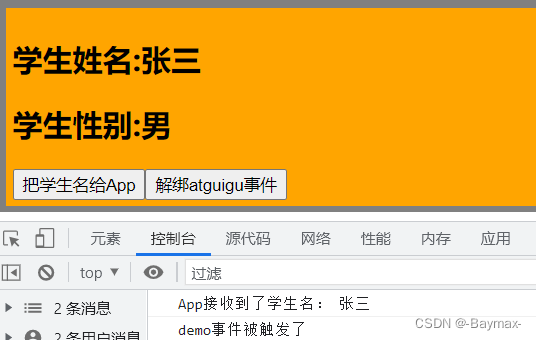
<button @click="unbind">解绑atguigu事件</button>
</div>
</template>
<script>
export default {
name: "StudentName",
data() {
return {
name: "张三",
sex: "男",
};
},
methods: {
sendStudentName(){
this.$emit('atguigu', this.name)
},
unbind(){
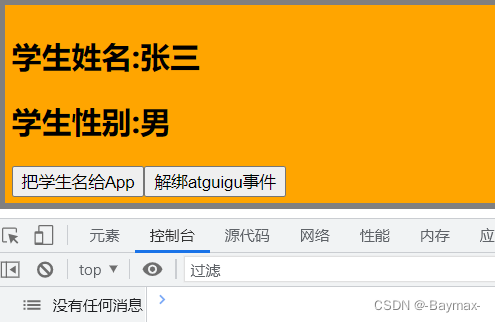
this.$off('atguigu') //解绑一个自定义事件
this.$off(['atguigu','demo']) //解绑多个自定义事件
}
}
};
	<template>
	  <div class="demo">
	    <h3>{

    {

     msg }}</h3>
	    <Student @atguigu="getStudentName" @demo="m1" />
	  </div>
	</template>

	<script>
	// 引入组件
	import School from "./components/School.vue";
	import Student from "./components/Student.vue";
	export default {


	  name: "App",
	  components: {

     School, Student },
	  data() {


	    return {


	      msg: "你好",
	    };
	  },
	  methods: {


	    getStudentName(name) {


	      console.log("App接收到了学生名:", name);
	    },
	    m1() {


	      console.log("demo事件被触发了");
	    },
	  }
	};
	</script>
点击把学生名给 App
点击解绑 atguigu 事件后再点击把学生名给 App
三、总结 — 组件的自定义事件
1. 组件自定义事件是什么?
一种组件间通信的方式,适用于:子组件 => 父组件
2. 使用场景
A 是父组件,B 是子组件,B 想给 A 穿数据,那么就要在 A 中给 B 绑定自定义事件(
事件的回调在 A 中)。
3. 绑定自定义事件(两种方式)
- 第一种方式,在父组件中
	<Demo @atguigu="test" />
	//或者
	<Demo v-on:atguigu="test" />
- 第二种方式,在父组件中
	<Demo ref="demo" />
	...
	mounted() {


		this.$refs.demo.$on("atguigu", this.test)
	}
若想让自定义事件只能触发一次,可以使用
once修饰符,或$once方法
4. 触发自定义事件
this.$emit('atguigu', 数据)
5. 解绑自定义事件
	this.$off('atguigu') //解绑一个自定义事件
	this.$off(['atguigu', 'demo']) //解绑多个自定义事件
6. 如何在组件上绑定原生的DOM事件
组件上也可以绑定原生DOM事件,需要使用
native修饰符
如果不加native则会被认为是自定义事件
<Demo @click.native='test' />
7. 注意事项
在通过
this.$refs.xxx.$on('atguigu', 回调)绑定自定义事件中,回调要么配置在 methods 中,要么用箭头函数,否则 this 指向会出问题。
不积跬步无以至千里 不积小流无以成江海