目录
这个是thymeleaf在pom中添加的依赖(一口气吃不成个胖子)
本文是本人以前笔记,如果说是在掘金上看到的话没错,还是本人程程呀 的个人主页 - 动态 - 掘金 只有这一个。如果有哪里不对的话欢迎各位大佬指出问题,本人是一个小白。
上一篇文章链接为:MySQL笔记下_程程呀是小白的博客-CSDN博客 ,本篇是连接自动配置和 thymeleaf模板引擎_程程呀是小白的博客-CSDN博客。
如果是springboot的话请看springboot创建项目_程程呀是小白的博客-CSDN博客 ,这个是从头开始的还没有学完springboot,一起学习呀!!!!
这个是thymeleaf在pom中添加的依赖(一口气吃不成个胖子)
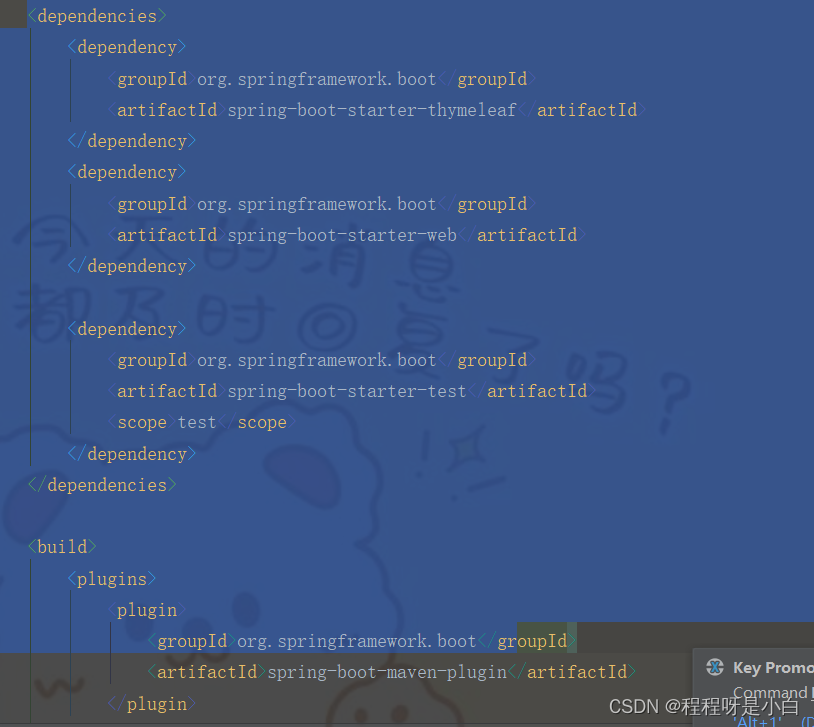
这是代码块
<dependencies>
<dependency>
<groupId>org.springframework.boot</groupId>
<artifactId>spring-boot-starter-thymeleaf</artifactId>
</dependency>
<dependency>
<groupId>org.springframework.boot</groupId>
<artifactId>spring-boot-starter-web</artifactId>
</dependency>

<dependency>
<groupId>org.springframework.boot</groupId>
<artifactId>spring-boot-starter-test</artifactId>
<scope>test</scope>
</dependency>
</dependencies>
使用thymeleaf上传( 一个照片)
首先先写配置虚拟机

代码块如下
@Configuration
public class TextThymeleaf implements WebMvcConfigurer {
//配置虚拟机
@Override
public void addResourceHandlers(ResourceHandlerRegistry registry){
//upload/**对外开放的路径
//addResourceHandlers()配置资源路径,指向资源所在的真实路径
registry.addResourceHandler("/upload/**").addResourceLocations("file:E:\\wy/");
}
}
编写controller层代码
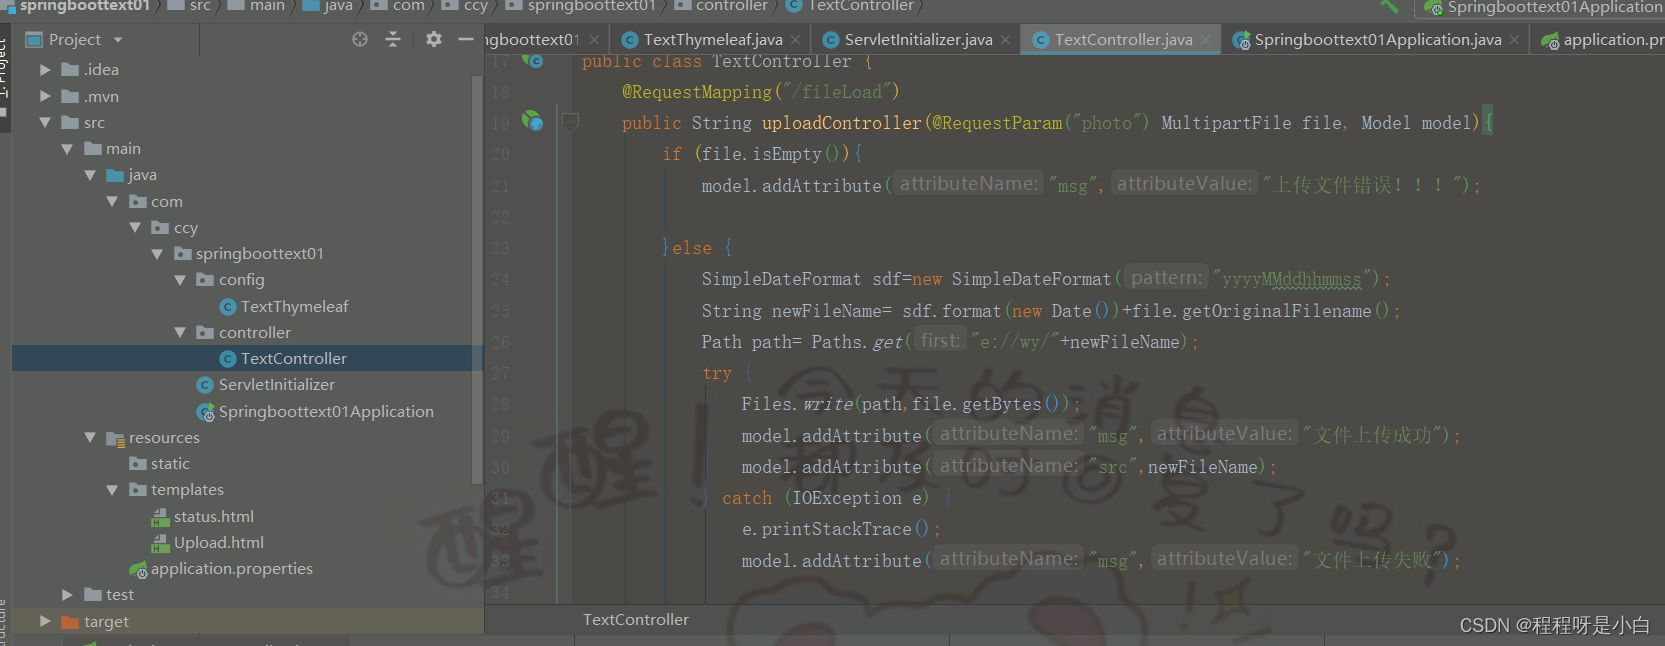
代码块如下
@Controller
public class TextController {
@RequestMapping("/fileLoad")
public String uploadController(@RequestParam("photo") MultipartFile file, Model model){
if (file.isEmpty()){
model.addAttribute("msg","上传文件错误!!!");

}else {
SimpleDateFormat sdf=new SimpleDateFormat("yyyyMMddhhmmss");
String newFileName= sdf.format(new Date())+file.getOriginalFilename();
Path path= Paths.get("e://wy/"+newFileName);
try {
Files.write(path,file.getBytes());
model.addAttribute("msg","文件上传成功");
model.addAttribute("src",newFileName);
} catch (IOException e) {
e.printStackTrace();
model.addAttribute("msg","文件上传失败");

}

}
return "status";
}
}
在resource的templates文件中添加
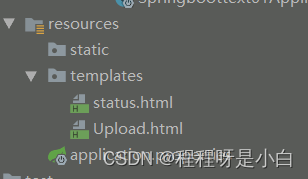
第一个文件内容
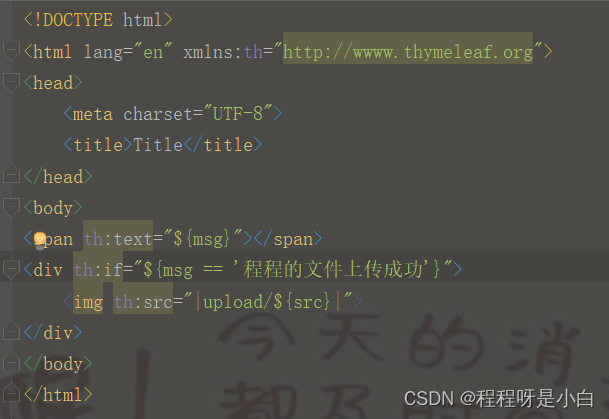
代码块如下
<!DOCTYPE html>
<html lang="en" xmlns:th="http://wwww.thymeleaf.org">
<head>
<meta charset="UTF-8">
<title>Title</title>
</head>
<body>
<span th:text="${msg}"></span>
<div th:if="${msg == '程程的文件上传成功'}">
<img th:src="|upload/${src}|">
</div>
</body>
</html>
第二个文件
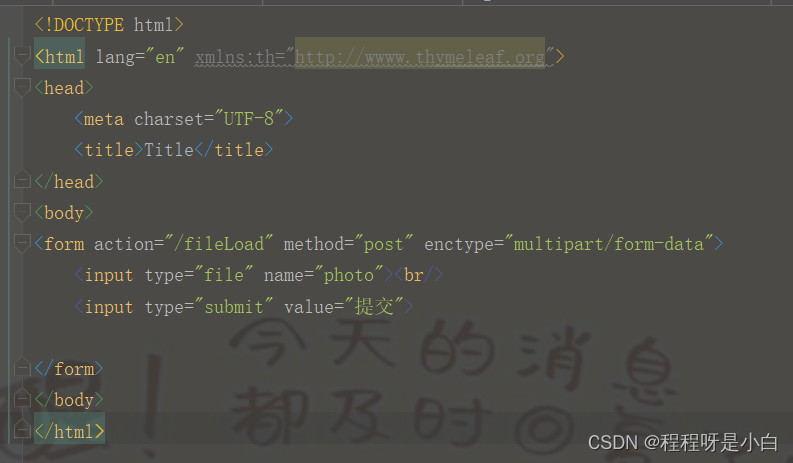
代码块如下:
<!DOCTYPE html>
<html lang="en" xmlns:th="http://wwww.thymeleaf.org">
<head>
<meta charset="UTF-8">
<title>Title</title>
</head>
<body>
<form action="/fileLoad" method="post" enctype="multipart/form-data">
<input type="file" name="photo"><br/>
<input type="submit" value="提交">
</form>
</body>
</html>
在application.properties文件内容
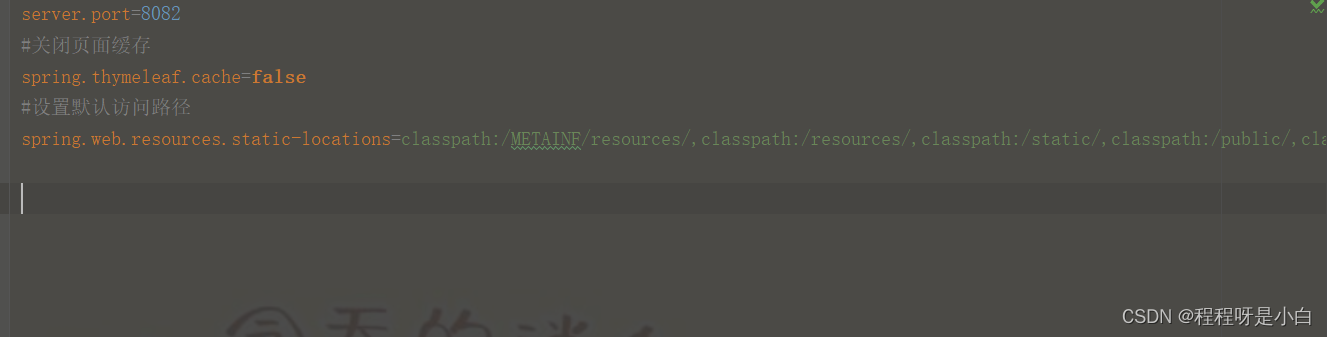
代码块如下:
server.port=8082
#关闭页面缓存
spring.thymeleaf.cache=false
#设置默认访问路径
spring.web.resources.static-locations=classpath:/METAINF/resources/,classpath:/resources/,classpath:/static/,classpath:/public/,classpath:/templates/
测试
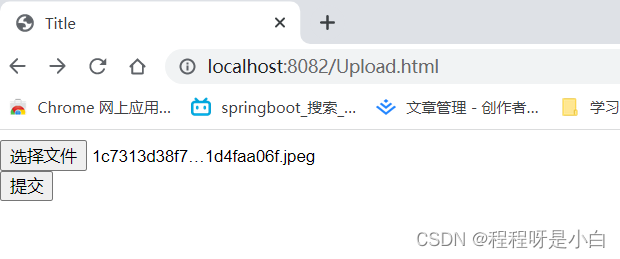
结果
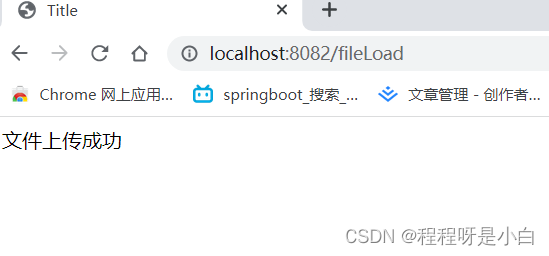
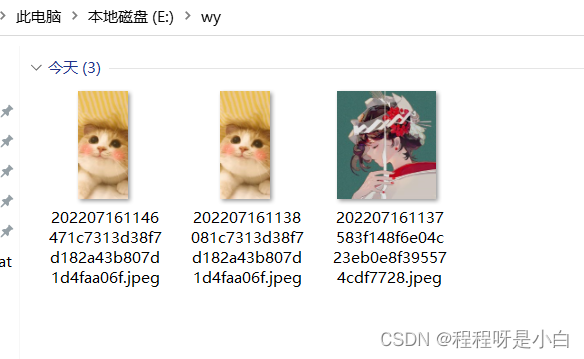
在文件中(可以有重复的)
本文是本人以前笔记,如果说是在掘金上看到的话没错,还是本人程程呀 的个人主页 - 动态 - 掘金 只有这一个。如果有哪里不对的话欢迎各位大佬指出问题,本人是一个小白。
上一篇文章链接为:MySQL笔记下_程程呀是小白的博客-CSDN博客 ,本篇是连接自动配置和 thymeleaf模板引擎_程程呀是小白的博客-CSDN博客。
如果是springboot的话请看springboot创建项目_程程呀是小白的博客-CSDN博客 ,这个是从头开始的还没有学完springboot,一起学习呀!!!!