1、开发第个Spring Boot应用
创建POM
因为是3.0.0-M1版本,是程碑版本,不是正式发布版,需要从Spring提的Maven仓库中才能下载到3.0.0-M1版本的依赖包,需要在pom.xml件中单独指定仓库地址。
如果使的是正式版,是不需要加下这段配置的
<!-- jar包的仓库地址-->
 <repositories>
 ? ? ? ?<repository>
 ? ? ? ? ? ?<id>spring-snapshots</id>
 ? ? ? ? ? ?<url>https://repo.spring.io/snapshot</url>
 ? ? ? ? ? ?<snapshots><enabled>true</enabled></snapshots>
 ? ? ? ?</repository>
 ? ? ? ?<repository>
 ? ? ? ? ? ?<id>spring-milestones</id>
 ? ? ? ? ? ?<url>https://repo.spring.io/milestone</url>
 ? ? ? ?</repository>
 ? ?</repositories>
 <!-- maven插件的仓库地址 -->
 ? ?<pluginRepositories>
 ? ? ? ?<pluginRepository>
 ? ? ? ? ? ?<id>spring-snapshots</id>
 ? ? ? ? ? ?<url>https://repo.spring.io/snapshot</url>
 ? ? ? ?</pluginRepository>
 ? ? ? ?<pluginRepository>
 ? ? ? ? ? ?<id>spring-milestones</id>
 ? ? ? ? ? ?<url>https://repo.spring.io/milestone</url>
 ? ? ? ?</pluginRepository>
 ? ?</pluginRepositories>
另外还要在pom.xml件中,添加Spring Boot所提供的pom.xml。
 <parent>
 ? ? ? ?<groupId>org.springframework.boot</groupId>
 ? ? ? ?<artifactId>spring-boot-starter-parent</artifactId>
 ? ? ? ?<version>3.0.0-M1</version>
 ? ?</parent>
关于这个parent的作,后续课程中会介绍。
添加依赖
最后添加个开发web应的starter依赖
<dependencies>
 ? ?<dependency>
 ? ? ? ?<groupId>org.springframework.boot</groupId>
 ? ? ? ?<artifactId>spring-boot-starter-web</artifactId>
 ? ?</dependency>
</dependencies>
写代码
在写代码之前,请注意,我现在的JDK8,也许你也是。
创建个类,类名随便取,我的叫MyApplication,包路径为com.zhouyu
package com.zhouyu;
import org.springframework.boot.SpringApplication;
import org.springframework.boot.autoconfigure.EnableAutoConfiguration;
import org.springframework.web.bind.annotation.RequestMapping;
import org.springframework.web.bind.annotation.RestController;
@RestController
@EnableAutoConfiguration
public class MyApplication {
 ? ?@RequestMapping("/")
 ? ?String home() {
 ? ? ? ?return "Hello World!";
 ? }
 ? ?public static void main(String[] args) {
 ? ? ? ?SpringApplication.run(MyApplication.class, args);
 ? }
}
然后,运main法。
我这报错了:

因为Spring Boot 3的是Spring 6,Spring 6需要JDK17。
所以,我们要在IDEA中配上JDK17,JDk17的安装没什么特殊的,和JDK8的安装样,就不在笔记浪费篇幅了。
上JDK17之后,再次运main法,就能正常启动我们的第个Spring Boot应程序了,并且会看到如下志:
"C:Program FilesJavajdk-17.0.1injava.exe" "-javaagent:C:Program
FilesJetBrainsIntelliJ IDEA 2021.1.3libidea_rt.jar=64855:C:Program
FilesJetBrainsIntelliJ IDEA 2021.1.3in" -Dfile.encoding=UTF-8 -
classpath D:IdeaProjectsZhouyuSpringBootTeacher	argetclasses;C:Userszhouyu.m2
epositoryorgspringframework
ootspring-boot-starter-web.0.0-M1spring-boot-starter-web-3.0.0-
M1.jar;C:Userszhouyu.m2
epositoryorgspringframeworkootspringboot-starter.0.0-M1spring-boot-starter-3.0.0-
M1.jar;C:Userszhouyu.m2
epositoryorgspringframeworkootspringboot.0.0-M1spring-boot-3.0.0-
M1.jar;C:Userszhouyu.m2
epositoryorgspringframeworkootspringboot-autoconfigure.0.0-M1spring-boot-autoconfigure-3.0.0-
M1.jar;C:Userszhouyu.m2
epositoryorgspringframeworkootspringboot-starter-logging.0.0-M1spring-boot-starter-logging-3.0.0-
M1.jar;C:Userszhouyu.m2
epositorychqoslogbacklogbackclassic.2.10logback-classic1.2.10.jar;C:Userszhouyu.m2
epositorychqoslogbacklogbackcore.2.10logback-core1.2.10.jar;C:Userszhouyu.m2
epositoryorgslf4jslf4japi.7.33slf4j-api1.7.33.jar;C:Userszhouyu.m2
epositoryorgapachelogginglog4jlog4jto-slf4j.17.1log4j-to-slf4j2.17.1.jar;C:Userszhouyu.m2
epositoryorgapachelogginglog4jlog4japi.17.1log4j-api2.17.1.jar;C:Userszhouyu.m2
epositoryorgslf4jjul-toslf4j.7.33jul-to-slf4j1.7.33.jar;C:Userszhouyu.m2
epositoryjakartaannotationjakarta.anno
tation-api.0.0jakarta.annotation-api2.0.0.jar;C:Userszhouyu.m2
epositoryorgspringframeworkspringcore.0.0-M2spring-core-6.0.0-
M2.jar;C:Userszhouyu.m2
epositoryorgspringframeworkspringjcl.0.0-M2spring-jcl-6.0.0-
M2.jar;C:Userszhouyu.m2
epositoryorgyamlsnakeyaml.30snakeyaml1.30.jar;C:Userszhouyu.m2
epositoryorgspringframeworkootspringboot-starter-json.0.0-M1spring-boot-starter-json-3.0.0-
M1.jar;C:Userszhouyu.m2
epositorycomasterxmljacksoncorejacksondatabind.13.1jackson-databind2.13.1.jar;C:Userszhouyu.m2
epositorycomasterxmljacksoncorejack
son-annotations.13.1jackson-annotations2.13.1.jar;C:Userszhouyu.m2
epositorycomasterxmljacksoncorejack
son-core.13.1jackson-core2.13.1.jar;C:Userszhouyu.m2
epositorycomasterxmljacksondatatype
jackson-datatype-jdk8.13.1jackson-datatype-jdk8-
2.13.1.jar;C:Userszhouyu.m2
epositorycom asterxmljacksondatatype
jackson-datatype-jsr310.13.1jackson-datatype-jsr310-
16
2.13.1.jar;C:Userszhouyu.m2
epositorycom asterxmljacksonmoduleja
ckson-module-parameter-names.13.1jackson-module-parameter-names2.13.1.jar;C:Userszhouyu.m2
epositoryorgspringframeworkootspring
-boot-starter-tomcat.0.0-M1spring-boot-starter-tomcat-3.0.0-
M1.jar;C:Userszhouyu.m2
epositoryorgapache omcatembed omcatembed-core.0.16 omcat-embed-core10.0.16.jar;C:Userszhouyu.m2
epositoryorgapache omcatembed omcat
-embed-el.0.16 omcat-embed-el10.0.16.jar;C:Userszhouyu.m2
epositoryorgapache omcatembed omcat
-embed-websocket.0.16 omcat-embed-websocket10.0.16.jar;C:Userszhouyu.m2
epositoryorgspringframeworkspringweb.0.0-M2spring-web-6.0.0-
M2.jar;C:Userszhouyu.m2
epositoryorgspringframeworkspringbeans.0.0-M2spring-beans-6.0.0-
M2.jar;C:Userszhouyu.m2
epositoryorgspringframeworkspringwebmvc.0.0-M2spring-webmvc-6.0.0-
M2.jar;C:Userszhouyu.m2
epositoryorgspringframeworkspringaop.0.0-M2spring-aop-6.0.0-
M2.jar;C:Userszhouyu.m2
epositoryorgspringframeworkspringcontext.0.0-M2spring-context-6.0.0-
M2.jar;C:Userszhouyu.m2
epositoryorgspringframeworkspringexpression.0.0-M2spring-expression-6.0.0-M2.jar
com.zhouyu.MyApplication
. ? ____ ? ? ? ? ?_ ? ? ? ? ? ?__ _ _
/\ / ’ __ _ () __ __ _
( ( )__ | '_ | ‘| | ’ / ` |
/ ?)| |)| | | | | || (| | ) ) ) )
?’ || .__|| ||| |, | / / / /
=========||==============|/=///_/
:: Spring Boot :: ? ? ? ? ? ? (v3.0.0-M1)
2022-03-16 20:43:21.849 ?INFO 17520 — [ ? ? ? ? ? main]
com.zhouyu.MyApplication ? ? ? ? ? ? ? ? : Starting MyApplication using
Java 17.0.1 on DESKTOP-P9KHN97 with PID 17520
(D:IdeaProjectsZhouyuSpringBoot-Teacher argetclasses started by
zhouyu in D:IdeaProjectsZhouyuSpringBoot-Teacher)
2022-03-16 20:43:21.852 ?INFO 17520 — [ ? ? ? ? ? main]
com.zhouyu.MyApplication ? ? ? ? ? ? ? ? : No active profile set, falling
back to default profiles: default
2022-03-16 20:43:23.257 ?INFO 17520 — [ ? ? ? ? ? main]
o.s.b.w.embedded.tomcat.TomcatWebServer : Tomcat initialized with
port(s): 8080 (http)
2022-03-16 20:43:23.271 ?INFO 17520 — [ ? ? ? ? ? main]
o.apache.catalina.core.StandardService ? : Starting service [Tomcat]
2022-03-16 20:43:23.272 ?INFO 17520 — [ ? ? ? ? ? main]
org.apache.catalina.core.StandardEngine : Starting Servlet engine:
[Apache Tomcat/10.0.16]
2022-03-16 20:43:23.406 ?INFO 17520 — [ ? ? ? ? ? main] o.a.c.c.C.
[Tomcat].[localhost].[/] ? ? ? : Initializing Spring embedded
WebApplicationContext
2022-03-16 20:43:23.409 ?INFO 17520 — [ ? ? ? ? ? main]
w.s.c.ServletWebServerApplicationContext : Root WebApplicationContext:
initialization completed in 1472 ms
2022-03-16 20:43:24.147 ?INFO 17520 — [ ? ? ? ? ? main]
o.s.b.w.embedded.tomcat.TomcatWebServer : Tomcat started on port(s):
8080 (http) with context path ‘’
2022-03-16 20:43:24.164 ?INFO 17520 — [ ? ? ? ? ? main]
com.zhouyu.MyApplication ? ? ? ? ? ? ? ? : Started MyApplication in 2.934
seconds (JVM running for 3.532)
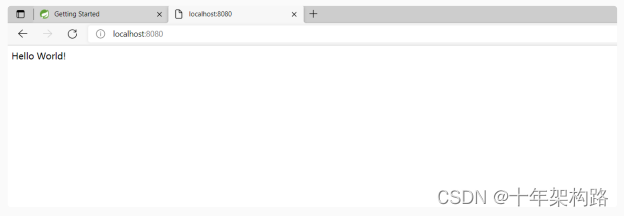
因为我们创建的是个Web程,从志中,我们可以发现Spring Boot默认使了Tomcat,并绑定了8080端。
此时打开浏览器访问localhost:8080,就可以访问到我们在上所定义的controller,注意配置的路径为“/”,所以直接通过localhost:8080就可以访问home法。
 @RequestMapping("/")
 ? ?String home() {
 ? ? ? ?return "Hello World!";
 ? }
创建可执Jar包
在实际产环境中,我们是需要把应程序程打成个Jar去运的,Spring Boot也给我们提供了个创建可执Jar包的插件,只需要在pom.xml加上以下配置即可
<build>
 ? ?<plugins>
 ? ? ? ?<plugin>
 ? ? ? ? ? ?<groupId>org.springframework.boot</groupId>
 ? ? ? ? ? ?<artifactId>spring-boot-maven-plugin</artifactId>
 ? ? ? ?</plugin>
 ? ?</plugins>
</build>
然后再执maven的package命令就可以打包了,不过般建议先执clean命令进清空,再执其他命令。
执完package命令后,就会在本项程中的target件夹出现所打出来的Jar包。
此时就可以运java命令来执这个Jar包

执的效果就相当于运main法。
2、Spring Boot中的Starters
Spring Boot中的starter是Spring Boot的神器之,Spring Boot提了很多的starter,每个starter其实就是个pom.xml件。
如在我们项的pom.xml件中,我们依赖了
<dependency>
?<groupId>org.springframework.boot</groupId>
?<artifactId>spring-boot-starter-web</artifactId>
</dependency>
这段相当于我们的程依赖了spring-boot-starter-web,但是我们并没有指定具体的version,那到底依赖的是哪个版本的spring-boot-starter-web呢?
这就是由控制的。
<parent>
 <groupId>org.springframework.boot</groupId>
 <artifactId>spring-boot-starter-parent</artifactId>
 <version>3.0.0-M1</version>
</parent>
这段代码是在给我们的程指定了个程,那这个程在哪呢?
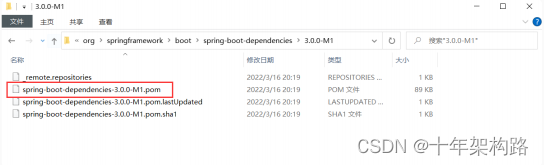
Maven会先从本地仓库根据groupId和artifactId看是否有匹配的Jar包,如果没有就会进下载,如在我电脑的.m2中就已经有了
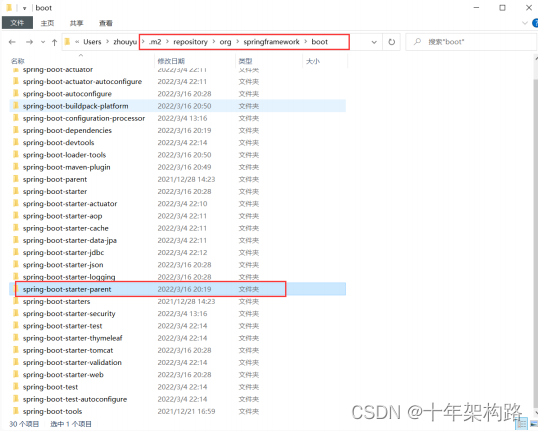
这个件夹就是我们项程的程,我们的项可以直接程中所提供的。
那程中有什么东呢?
其实就是个pom件。
所以,在我们的项中,只要加上
<parent>
 <groupId>org.springframework.boot</groupId>
 <artifactId>spring-boot-starter-parent</artifactId>
 <version>3.0.0-M1</version>
</parent>
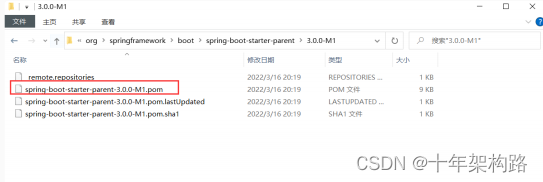
这段代码,就相当于引了spring-boot-starter-parent-3.0.0-M1.pom这个pom件。
在spring-boot-starter-parent-3.0.0-M1.pom中有很对内容,其中最重要的是:
<parent>
 ? ?<groupId>org.springframework.boot</groupId>
 ? ?<artifactId>spring-boot-dependencies</artifactId>
 ? ?<version>3.0.0-M1</version>
 ?</parent>
 ?<artifactId>spring-boot-starter-parent</artifactId>
 ?<packaging>pom</packaging>
 ?<name>spring-boot-starter-parent</name>
 ?<description>Parent pom providing dependency and plugin management for
applications built with Maven</description>
 ?<properties>
 ? ?<java.version>17</java.version>
 ? ?<resource.delimiter>@</resource.delimiter>
 ? ?<maven.compiler.source>${java.version}</maven.compiler.source>
 ? ?<maven.compiler.target>${java.version}</maven.compiler.target>
 ? ?<project.build.sourceEncoding>UTF-8</project.build.sourceEncoding>
 ? ?<project.reporting.outputEncoding>UTF8</project.reporting.outputEncoding>
 ?</properties>
指定了个程,以及些properties,如java.version为17也就是,我们项的程为spring-boot-starter-parent-3.0.0-M1,它的程为springboot-dependencies
同样,我们可以在Maven仓库中找到spring-boot-dependencies
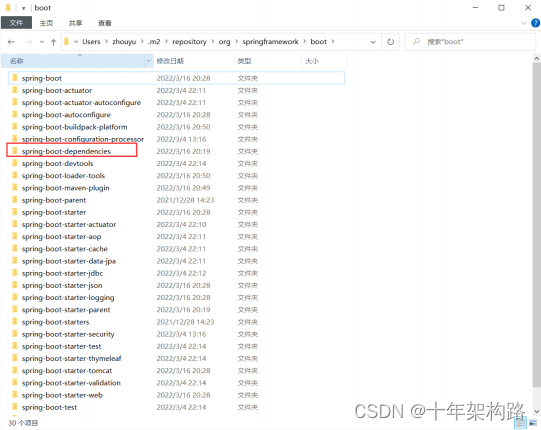
进看看spring-boot-dependencies是什么?
其实也就是个pom件,但是这个件的内容就常常关键,因为它管理了Spring Boot默认持的所有依赖以及对应的版本。
就是因为了有了这个pom件,在我们项的pom件中,如果想要某个依赖,只要这个依赖在spring-boot-dependencies-3.0.0-M1.pom中提供了,那你就可以不写版本,就相当于的SpringBoot给你提供的版本。
回到我们的项,所以我们可以不写version。
那spring-boot-starter-web这个starter有什么呢?
先我们知道,这个依赖表示,我们是个Spring Boot的web程,正常来说,搭建个web程,是要依赖很多东的,如tomcat,spring-web,spring-webmvc等等依赖,这就是spring-bootstarter-web的作,spring-boot-starter-web的作就是帮我们提前把我们要开发个web应的依赖都写好了,我们只要依赖spring-boot-starter-web,就相当于了依赖其他很多相关的依赖。
Spring Boot真的很贴。
除开web场景,还有很多其他场景也是类似的,所以Spring Boot默认提供了很多starter,具体可以看官的统计:https://docs.spring.io/spring-boot/docs/3.0.0-
M1/reference/html/using.html#using.build-systems.starters
值得注意的是,Spring Boot官虽然提供了很多starter,但是有时可能仍然需要第三来来实现个starter并提供出来,对于这种情况,Spring Boot是有规范的,Spring Boot官默认提供的starter命名格式为 spring-boot-starter-* ,第三实现的starter的命名格式为 *-spring-boot
-starter 。
3、Spring Boot中的配置类
在Spring中,我们可以使XML的式来对Spring进配置,也可以通过Java Config(也就是类+注解)的式进配置,在Spring Boot中也是样的。
我们可以通过@ImportResource注解来导个XML件作为Spring的配置件
@EnableAutoConfiguration
@ImportResource("spring.xml")
public class MyApplication {
 ? ?public static void main(String[] args) {
 ? ? ? ?SpringApplication.run(MyApplication.class, args);
 ? }
}

@RestController
public class UserController {
 ? ?@Autowired
 ? ?private UserService userService;
 ? ?@RequestMapping("/")
 ? ?String home() {
 ? ? ? ?return userService.test();
 ? }
}


public class UserService {
 ? ?public String test() {
 ? ? ? ?return "hello world, nice";
 ? }
}

<?xml version="1.0" encoding="UTF-8"?>
<beans xmlns="http://www.springframework.org/schema/beans"
 ? xmlns:xsi="http://www.w3.org/2001/XMLSchema-instance"
 ? xsi:schemaLocation="http://www.springframework.org/schema/beans
 ? https://www.springframework.org/schema/beans/spring-beans.xsd">
 <bean id="userService" class="com.zhouyu.service.UserService" />
 <bean id="userController" class="com.zhouyu.controller.UserController"
/>
</beans>
我们也可以通过@Import+@Configuration+@Bean来进等价替换掉XML的形式
@Configuration
public class AppConfig {
 ? ?@Bean
 ? ?public UserService userService(){
 ? ? ? ?return new UserService();
 ? }
 ? ?@Bean
 ? ?public UserController userController(){
 ? ? ? ?return new UserController();
 ? }
}


@Import(AppConfig.class)
@EnableAutoConfiguration
public class MyApplication {
 ? ?public static void main(String[] args) {
 ? ? ? ?SpringApplication.run(MyApplication.class, args);
 ? }
}
当然,我们可以直接让MyApplication成为个配置类,这样就不额外添加个AppConfig类了。
@EnableAutoConfiguration
@Configuration
public class MyApplication {
 ? ?@Bean
 ? ?public UserService userService(){
 ? ? ? ?return new UserService();
 ? }
 ? ?@Bean
 ? ?public UserController userController(){
 ? ? ? ?return new UserController();
 ? }
 ? ?public static void main(String[] args) {
 ? ? ? ?SpringApplication.run(MyApplication.class, args);
 ? }
}
配置类的作除开可以通过@Bean来定义Bean之外,也可以配置扫描路径,如:
@EnableAutoConfiguration
@Configuration
@ComponentScan("com.zhouyu")
public class MyApplication {
 ? ?public static void main(String[] args) {
 ? ? ? ?SpringApplication.run(MyApplication.class, args);
 ? }
}
1
这样就不需要@Bean了,但是得在类上加上@Component注解来定义Bean
扫描过程中,除开可以扫描到@Component、@Service、@Controller、@RestController等注解之外,也能扫描到@Configuration
也就是我们可以在扫描路径下定义其他的配置类。
另外,由于MyApplication类所在包就是com.zhouyu,所以我们可以直接这么写:
@EnableAutoConfiguration
@Configuration
@ComponentScan
public class MyApplication {
 ? ?public static void main(String[] args) {
 ? ? ? ?SpringApplication.run(MyApplication.class, args);
 ? }
}
此时扫描路径就是@ComponentScan注解所在的类的包路径。
此时MyApplication就存在三个注解:
@EnableAutoConfiguration
@Configuration
@ComponentScan
在Spring Boot中,提供了个注解来替代这三个注解,这个注解就是@SpringBootApplication
所以代码就可以改成
@SpringBootApplication
public class MyApplication {
 ? ?public static void main(String[] args) {
 ? ? ? ?SpringApplication.run(MyApplication.class, args);
 ? }
}
所以,这个经典的写法,它表示了什么意思呢
1. 定义了MyApplication类是个配置类
2. 定义了扫描路径,就是MyApplication所在的包路径
3. 加了@EnableAutoConfiguration,那这个注解表示什么意思呢?翻译下就是开启动配置
接下来就来看看什么是动配置
4、Spring Boot中的动配置
Spring Boot动配置会根据项中所添加的依赖进动配置,如我们项中添加了
<dependency>
 <groupId>org.springframework.boot</groupId>
 <artifactId>spring-boot-starter-web</artifactId>
</dependency>
这个依赖中,间接添加了
<dependency>
 ? ? ?<groupId>org.springframework.boot</groupId>
 ? ? ?<artifactId>spring-boot-starter</artifactId>
 ? ? ?<version>3.0.0-M1</version>
 ? ? ?<scope>compile</scope>
 ? ?</dependency>
 <dependency>
 ? ? ?<groupId>org.springframework.boot</groupId>
 ? ? ?<artifactId>spring-boot-starter-tomcat</artifactId>
 ? ? ?<version>3.0.0-M1</version>
 ? ? ?<scope>compile</scope>
 ? ?</dependency>
 ? ?<dependency>
 ? ? ?<groupId>org.springframework</groupId>
 ? ? ?<artifactId>spring-web</artifactId>
 ? ? ?<version>6.0.0-M2</version>
 ? ? ?<scope>compile</scope>
 ? ?</dependency>
 ? ?<dependency>
 ? ? ?<groupId>org.springframework</groupId>
 ? ? ?<artifactId>spring-webmvc</artifactId>
 ? ? ?<version>6.0.0-M2</version>
 ? ? ?<scope>compile</scope>
 ? ?</dependency>
我们知道,我们在搭建Spring MVC程时,除开要假如spring-web,spring-webmvc等依赖包之外,最复杂的就是还要进很多额外的配置
那在Spring Boot中,这些配置在哪呢?
注意,在我们项中引的spring-boot-starter-web中,引了spring-boot-starter,这个
引了spring-boot-autoconfigure
在spring-boot-autoconfigure依赖中存在个件spring.factories,这个件中记录了各种各样的
*****AutoConfiguration类,这些动配置类(其实就是配置类)就是来进动配置的。
那这个spring.factories件中所记录的动配置类,是什么时候效的呢,这就是
@EnableAutoConfiguration注解的作,只有加了这个注解,那这些动配置类才会效,因为
@EnableAutoConfiguration注解会去寻找spring.factories件,并解析内容,所以能解析出来动配置类,并进步对配置类进解析。
如在spring.factories件中存在个DispatcherServletAutoConfiguration,很明显是来对
DispatcherServlet进动配置的,具体的细节,我们暂时就不深了,本节课只需体理解动配置的作。
动配置并不是去帮助我们配置扫描路径之类的,是针对各种各样的场景,Spring Boot已经给我们配置好了本来是我们需要配置的些Bean以及些参数。
5、Spring Boot中的条件注解
只动配置类中,通常能看到很多条件注解(如@ConditionalOnClass、@ConditionalOnBean),这是因为,如果我们要Spring Boot的动配置功能,就会加上@EnableAutoConfiguration注解,从就会将解析spring.factories件中的所有动配置类,但是在个项中并不是所有动配置类都要使到。
如我不需要到MVC,那么WebMvcAutoConfiguration就没什么,如我不Jta,那
JtaAutoConfiguration也就没什么,没的配置类,就不要让Spring去解析它。
条件注解就来实现这种控制的。
如WebMvcAutoConfiguration上就有
@ConditionalOnWebApplication(type = Type.SERVLET)
@ConditionalOnClass({Servlet.class, DispatcherServlet.class,
WebMvcConfigurer.class})
@ConditionalOnMissingBean({WebMvcConfigurationSupport.class})
- @ConditionalOnWebApplication(type = Type.SERVLET),表示WebMvcAutoConfiguration只有在应类型是SERVLET类型是才效
- @ConditionalOnClass({Servlet.class, DispatcherServlet.class, WebMvcConfigurer.class}),表示只有在项以及依赖中存在这三个类时,WebMvcAutoConfiguration才效
- @ConditionalOnMissingBean({WebMvcConfigurationSupport.class}),表示只有Spring容器中没有WebMvcConfigurationSupport.class类型的Bean时,WebMvcAutoConfiguration才效
所以总结下,WebMvcAutoConfiguration效的条件是:当前应类型是SERVLET类型的Web项,并且项的classpath中存在Servlet.class, DispatcherServlet.class, WebMvcConfigurer.class三个,并且项的Spring容器中没有WebMvcConfigurationSupport.class类型的Bean。
我们现在并不需要去理解为什么是这么个条件,我们先来看看Spring Boot中到底有多少种这些条件注解,分别表示什么意思。
1. ConditionalOnBean:是否存在某个某类或某个名字的Bean
2. ConditionalOnMissingBean:是否缺失某个某类或某个名字的Bean
3. ConditionalOnSingleCandidate:是否符合指定类型的Bean只有个
4. ConditionalOnClass:是否存在某个类
5. ConditionalOnMissingClass:是否缺失某个类
6. ConditionalOnExpression:指定的表达式返回的是true还是false
7. ConditionalOnJava:判断Java版本
8. ConditionalOnJndi:JNDI指定的资源是否存在
9. ConditionalOnWebApplication:当前应是个Web应
10. ConditionalOnNotWebApplication:当前应不是个Web应
11. ConditionalOnProperty:Environment中是否存在某个属性
12. ConditionalOnResource:指定的资源是否存在
13. ConditionalOnWarDeployment:当前项是不是以War包部署的式运
14. ConditionalOnCloudPlatform:是不是在某个云平台上
6、Spring Boot中的spring.factories
在我们的项中,我们定义的配置类,我们然可以扫描到它,但是如果某个配置类不在我们的扫描范围内,该怎么办呢?
此时就可以利spring.factories机制,可以在spring.factories中指定想添加的配置类,并可以使
-
@AutoConfigureAfter(BppConfig.class):表示本配置类要在BppConfig解析之后才解析
-
@AutoConfigureBefore(BppConfig.class):表示本配置类要在BppConfig解析之前才解析
-
@AutoConfigureOrder(1):直接数字定义顺序
@Configuration
@AutoConfigureOrder(2)
public class AppConfig {
? ?@Bean
? ?public OrderService orderService(){
? ? ? ?return new OrderService();
? }
}@Configuration
@AutoConfigureOrder(2)
public class AppConfig {
? ?@Bean
? ?public OrderService orderService(){
? ? ? ?return new OrderService();
? }
}
META-INF/spring.factories
org.springframework.boot.autoconfigure.EnableAutoConfiguration=
com.zhouyu.AppConfig,
com.zhouyu.BppConfig
注意,上的上个能排序的注解,只能针对spring.factories中的配置类进排序,如果配置类是我们扫描出来的,则这三个注解效,且如果是扫描出来的使@Order或者Ordered接来排序也是没有的,因为Spring的扫描中根本就不会进排序。
7、Spring Boot中的属性绑定
我们可以使@Value(“${xxx}”)的式来获取properties中的属性值。
如果properties件的名字是application.properties,那就不需要@PropertySource注解,如果不
是,就需要@PropertySource(“zhouyu.properties”)
在Spring Boot提供了种更便的式来获取properties件中的属性值。
如我们@Value,在UserService得写遍所有的@Value,可能在其他Service也得写遍
@Component
public class UserService {
 ? ?@Value("${username}")
 ? ?private String username;
 ? ?@Value("${password}")
 ? ?private String password;
 ? ?public String test() {
 ? ? ? ?return username + ":" + password;
 ? }
}
现在Spring Boot,我们可以
@ConfigurationProperties
@Component
public class MyProperties {
 ? ?private String username;
 ? ?private String password;
 ? ?// setter getter
}
在UserService中,把MyProperties当作个Bean即可
@Component
public class UserService {
 ? ?@Autowired
 ? ?private MyProperties myProperties;
 ? ?public String test() {
 ? ? ? ?return myProperties.getUsername() + ":" +
myProperties.getPassword();
 ? }
}
在Spring Boot身的源码中,通常不会在MyProperties上加@Component,是在配置类上加上
@EnableConfigurationProperties(MyProperties.class)
@Configuration
@ConditionalOnClass(MyApplication.class)
@EnableConfigurationProperties(MyProperties.class)
public class AppConfig {
}
这样,就可以控制只有在符合指定的条件时,才会使得MyProperties成为Bean
另外还可以使@ConfigurationPropertiesScan来进扫描
@SpringBootApplication
@ConfigurationPropertiesScan("com.zhouyu.service")
public class MyApplication {
 ? ?public static void main(String[] args) {
 ? ? ? ?SpringApplication.run(MyApplication.class, args);
 ? }
}
这样,照样可以是MyProperties效。
有时,如果我们想利我们的properties来构造第三提供的Bean,那就可以利
@Bean+@ConfigurationProperties
8、Spring Boot中的外部配置
Spring Boot虽然会动给我们做些配置,当有些配置肯定是得我们来配的,如数据库的连接地
址,户名,密码等。
我们可以通过Java properties files, YAML files, environment variables, and command-line
arguments来进配置。
application.properties中配置
password=zhouyu123456
UserService类是这么写:
@Component
@ConfigurationProperties
public class UserService {
 ? ?private String password;
 ? ?public String test() {
 ? ? ? ?return password;
 ? }
 ? ?// setter getter
}
最后userName属性就为zhouyu。
删掉application.properties件,新建application.yml
password: zhouyu123456yml
重启项,得到的是zhouyu123456yml
如果同时存在application.properties和application.yml,application.properties的优先级更
假如在JVM环境变量中配置,如果是通过java命令运,就是-Dpassword=zhouyu123456jvm

最后password取到的值为JVM环境变量中的值
我们在操作系统的环境变量中设置,设置完IDEA重启才能效

最后结果仍然是JVM环境变量中的值,那如果把JVM中的环境变量中配置的删除掉,就能获取掉操作系统环境变量中所配置的值了
所以,JVM环境变量优先级 > 操作系统环境变量 > application.properties > application.yml
还可以通过命令参数来设置值
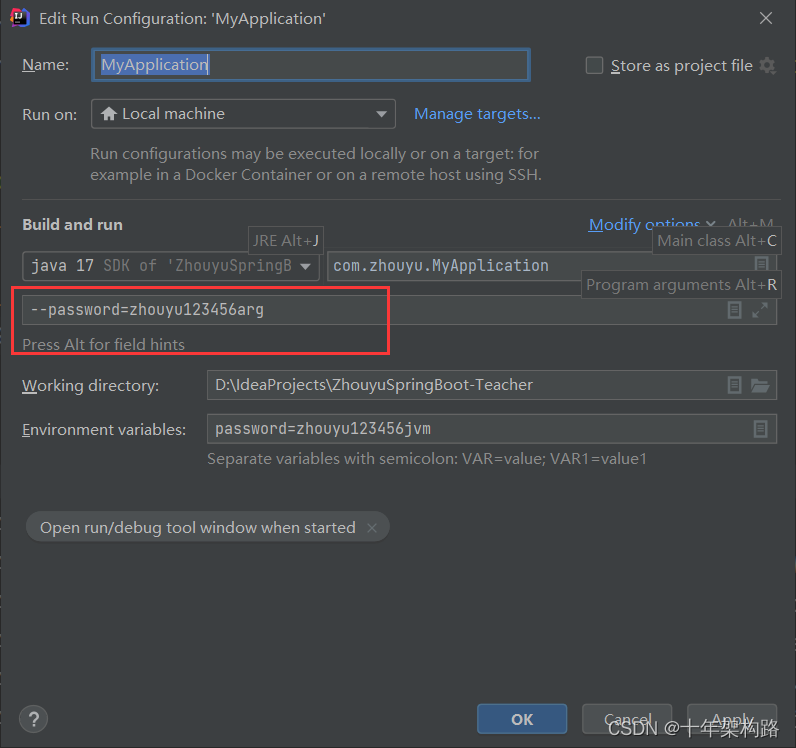
相当于:java -jar ZhouyuSpringBoot-Teacher-1.0-SNAPSHOT.jar --password=1111
这种式的优先级于JVM环境变量优先级
所以
命令参数 > VM环境变量优先级 > 操作系统环境变量 > application.properties > application.yml
除了这种配置参数之外,还有很多其他式,优先级从低到为:
1. SpringBoot默认值,通过SpringApplication.setDefaultProperties所设置的
2. 在@Configuration配置类上通过@PropertySource注解引的properties件,注意在Spring容 器刷新之前这种配置是不会效的,所以通过这种式所配置的loggin.*,spring.main.*的配 置项在容器启动过程中是不会效的。
3. Config data
a. 同个Jar包内的application.properties和YAML
b. 同个Jar包内的application-{profile}.properties and YAML
c. jar包外的application.properties and YAML
d. jar包外的application-{profile}.properties and YAML
4. 操作系统环境变量
5. JVM环境变量
6. ServletContext初始化参数
7. ServletConfig初始化参数
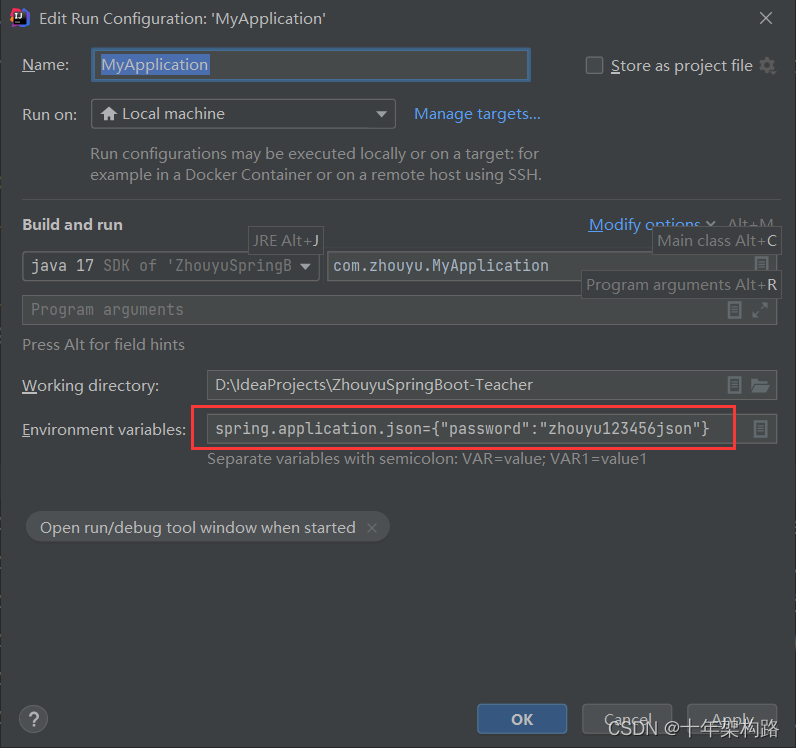
8. 嵌在环境变量中的内JSON,如Dspring.application.json=‘{“password”:“zhouyu123456json”}’
9. 命令参数
10. 测试环境
11. Devtools全局设置
对于application.properties and application.yaml件,Spring Boot会(优先级从低到):
1. 先从classpath下找
a. classpath根录
b. classpath下的config录
2. 应启动时的当前录
a. 当前录
b. 当前录下的/config录
c. /config录下的录(这个录名字随便叫,只要有application.properties and
application.yaml件就可以)
默认会找名字叫做application的件,我们可以通过–spring.config.name=myproject换个名字
9、Spring Boot中的Profiles
Spring Boot持某个Bean、某个配置类、某个@ConfigurationProperties在某个特定环境下才效。
如
@SpringBootApplication
public class MyApplication {
 ? ?@Bean
 ? ?@Profile("dev")
 ? ?public UserService userServiceDev(){
 ? ? ? ?return new UserService("zhouyudev");
 ? }
 ? ?@Bean
 ? ?@Profile("prod")
 ? ?public UserService userServiceProd(){
 ? ? ? ?return new UserService("zhouyuprod");
 ? }
 ? ?public static void main(String[] args) {
 ? ? ? ?SpringApplication.run(MyApplication.class, args);
 ? }
}


public class UserService {
 ? ?private String password;
 ? ?public UserService(String password) {
 ? ? ? ?this.password = password;
 ? }
 ? ?public String test() {
 ? ? ? ?return password;
 ? }
}
application.properties:
spring.profiles.active=prod
此时userServiceProd效。
我们可以通过其他各种式来配置spring.profiles.active。
我们还可以
@ConfigurationProperties
@Profile("dev")
@Component
public class UserService {
 ? ?private String password;
 ? ?public String test() {
 ? ? ? ?return password;
 ? }
 ? ?public String getPassword() {
 ? ? ? ?return password;
 ? }
 ? ?public void setPassword(String password) {
 ? ? ? ?this.password = password;
 ? }
}
application.properties:
password=zhouyu
application-dev.properties:
password=zhouyudev
application-prod.properties:
password=zhouyuprod
通过命令的式指定profile:

我们可以在properties件中定义个profile groups
spring.profiles.group.production[0]=proddb
spring.profiles.group.production[1]=prodmq
这样可以通过–spring.profiles.active=production,来激活proddb和prodmq这两种profile
10、Spring Boot中的志
日志格式
默认的志格式为
2022-03-21 14:09:30.465 ?INFO 15156 --- [ ? ? ? ? ? main]
com.zhouyu.MyApplication ? ? ? ? ? ? ? ? : No active profile set, falling
back to default profiles: default
2022-03-21 14:09:32.133 ?INFO 15156 --- [ ? ? ? ? ? main]
o.s.b.w.embedded.tomcat.TomcatWebServer : Tomcat initialized with
port(s): 8080 (http)
2022-03-21 14:09:32.141 ?INFO 15156 --- [ ? ? ? ? ? main]
o.apache.catalina.core.StandardService ? : Starting service [Tomcat]
2022-03-21 14:09:32.141 ?INFO 15156 --- [ ? ? ? ? ? main]
org.apache.catalina.core.StandardEngine : Starting Servlet engine:
[Apache Tomcat/10.0.16]
2022-03-21 14:09:32.251 ?INFO 15156 --- [ ? ? ? ? ? main] o.a.c.c.C.
[Tomcat].[localhost].[/] ? ? ? : Initializing Spring embedded
WebApplicationContext
2022-03-21 14:09:32.251 ?INFO 15156 --- [ ? ? ? ? ? main]
w.s.c.ServletWebServerApplicationContext : Root WebApplicationContext:
initialization completed in 1717 ms
2022-03-21 14:09:32.834 ?INFO 15156 --- [ ? ? ? ? ? main]
o.s.b.w.embedded.tomcat.TomcatWebServer : Tomcat started on port(s):
8080 (http) with context path ''
2022-03-21 14:09:32.834 ?INFO 15156 --- [ ? ? ? ? ? main]
com.zhouyu.MyApplication ? ? ? ? ? ? ? ? : Started MyApplication in 2.917
seconds (JVM running for 3.373)
- 期和时间:精确到毫秒
- 志级别:ERROR, WARN, INFO, DEBUG, or TRACE
- 进程ID
- — 分隔符
- 线程名
- Logger名:通常就是类名(经常是缩写)
- 志消息
控制台打印
默认志配置在会将消息回显到控制台。默认情况下,会记录 ERROR 级别、WARN 级别和 INFO 级别的消息。可以通过使 --debug 在启动应程序时启调试模式。
也可以在application.properties配置debug=true
调试模式下会打印更多的信息。
文件输出
默认情况下Spring Boot只会把志输出到控制台,不会写到件中。我们可以在
application.properties中配置logging.file.name或logging.file.path指定志件路径,从可以额外
的将志写件中。
logging.file.name
logging.file.path
描述
仅在控制台打印
具体的某个件
名称可以是某个具体路径,或者
相对于当前录的某个件
具体的某个录
写到指定录下的spring.log
志件达到10MB时就会rotate,默认会记录ERROR、WARN、INFO级别的志。
11、Spring Boot中的异步和任务调度
如果我们没有配置个Executor的Bean,Spring Boot会默认给我们配置个具有合理默认值的
ThreadPoolTaskExecutor,来在@EnableAsync时进异步执。
默认线程池会使8个核线程,并可以根据负载增和收缩,可以通过spring.task.execution.*进配置,如:
spring.task.execution.pool.max-size=16
spring.task.execution.pool.queue-capacity=100
spring.task.execution.pool.keep-alive=10s
默认情况下在@EnableScheduling时会配置个ThreadPoolTaskScheduler,这个线程池默认只会有个线程,可以通过spring.task.scheduling*来进配置,如:
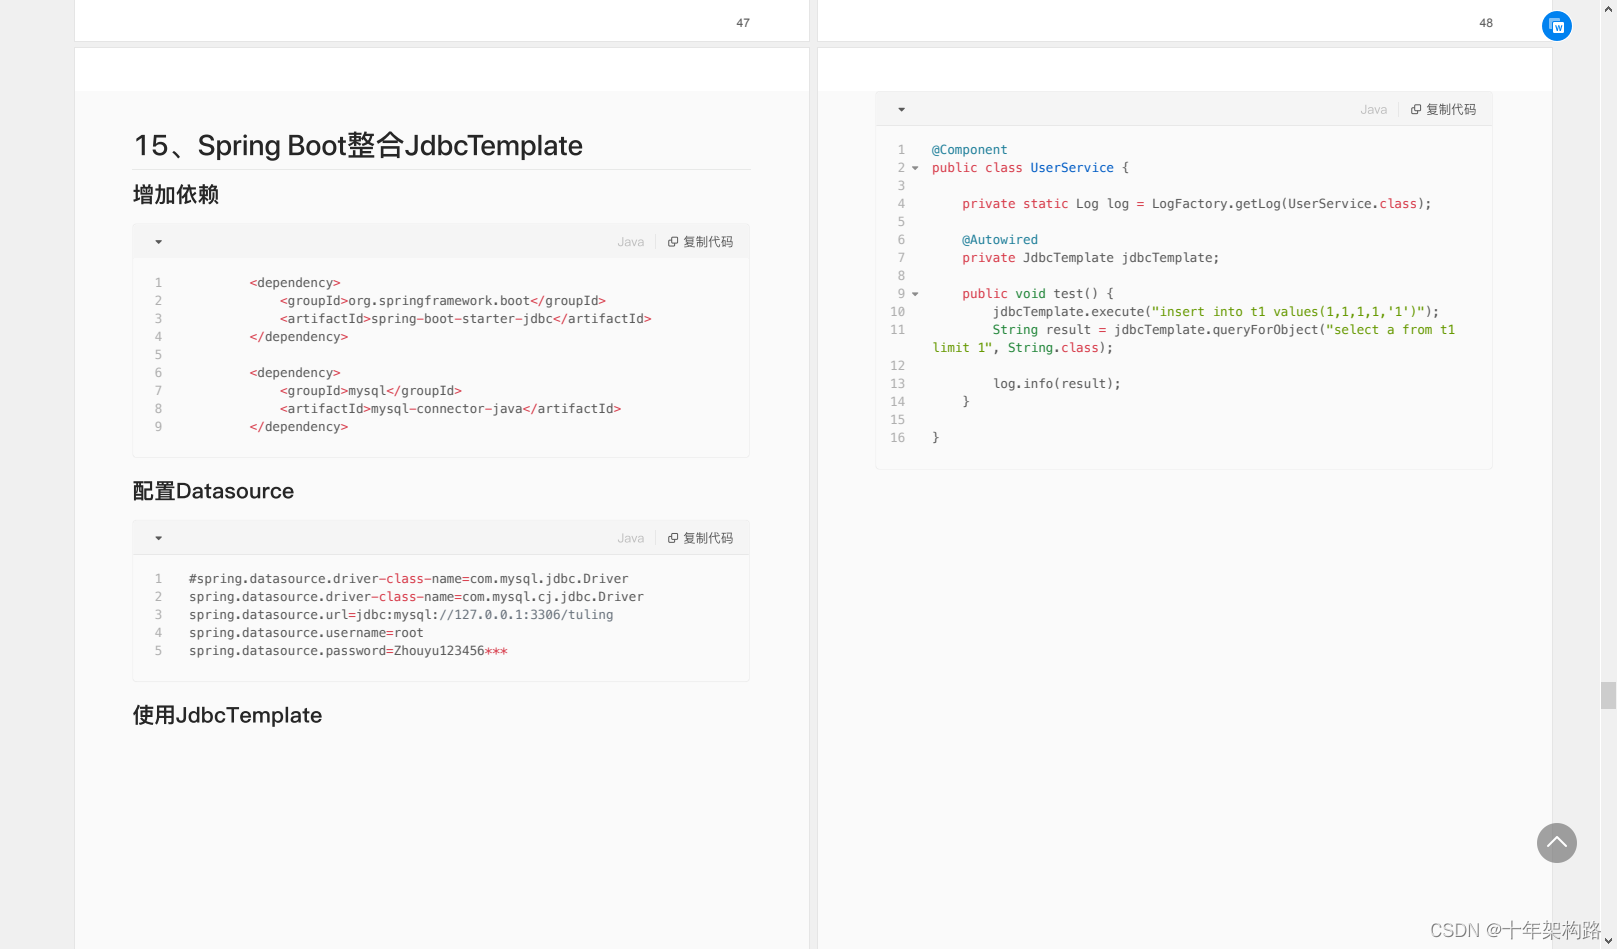
spring.task.scheduling.thread-name-prefix=schedulingspring.task.scheduling.pool.size=2
@Component
public class UserService {
 ? ?private static Log log = LogFactory.getLog(UserService.class);
 ? ?@Async
 ? ?public void test() {
 ? ? ? ?log.info("test");
 ? }
}


debug=true
spring.task.execution.threadNamePrefix=zhouyu
可以利TaskExecutorBuilder来快速的定义个线程池,利部分默认值。
@Bean
 ? ?public ThreadPoolTaskExecutor taskExecutor(TaskExecutorBuilder
builder){
 ? ? ? ?ThreadPoolTaskExecutor taskExecutor = builder.build();
 ? ? ? ?taskExecutor.setThreadNamePrefix("zhouyu123--");
 ? ? ? ?return taskExecutor;
 ? }
12、Spring Boot中的SpringApplicationRunListener
SpringApplicationRunListener
public interface SpringApplicationRunListener {
 /**
 * 应?刚启动时调?.
 */
 default void starting() {
 }
 /**
 * Environment准备好之后调?
 */
 default void environmentPrepared(ConfigurableEnvironment environment)
{
 }
 /**
 * 创建完ApplicationContext对象后调?
 */
 default void contextPrepared(ConfigurableApplicationContext context)
{
 }
 /**
 * 将Main类注册为BeanDefinition之后调?
 */
 default void contextLoaded(ConfigurableApplicationContext context) {
 }
 /**
 * ApplicationContext完成了刷新,应?已经启动,但是CommandLineRunner和
ApplicationRunner还没调?
 */
 default void started(ConfigurableApplicationContext context) {
 }
 /**
 * CommandLineRunner和ApplicationRunner调?完
 */
 default void running(ConfigurableApplicationContext context) {
 }
 /**
 * 容器启动出现异常后调?
 */
default void failed(ConfigurableApplicationContext context, Throwable
exception) {
 }
}
13、ApplicationRunner和CommandLineRunner
这两个接只有定义上有点区别,在功能和执时机上都样。
public interface CommandLineRunner {
 void run(String... args) throws Exception;
}

public interface ApplicationRunner {
 void run(ApplicationArguments args) throws Exception;
}
可以发现,区别在于run法所接收的参不同,所以这的重点就是ApplicationArguments表示什么。
定义个ZhouyuApplicationRunner:
@Component
public class ZhouyuApplicationRunner implements ApplicationRunner {
 @Override
 public void run(ApplicationArguments args) throws Exception {
 System.out.println("nonOptionArgs: " + args.getNonOptionArgs());
 System.out.println("optionNames: " + args.getOptionNames());
 for (String sourceArg : args.getSourceArgs()) {
 System.out.println("sourceArg: " + sourceArg);
 }
 }
}
启动Spring Boot时,增加下参数
@SpringBootApplication
public class Main {
 public static void main(String[] args) {
 SpringApplication.run(Main.class, "--k1=v1", "--k2=v2", "t3",
"t4");
 }
}
runner中打印的结果为:
nonOptionArgs: [t3, t4]
optionNames: [k1, k2]
sourceArg: --k1=v1
sourceArg: --k2=v2
sourceArg: t3
sourceArg: t4
可以发现,加了"–"的都是option, 没有加的就是nonOption,sourceArg就是原始的参数。
CommandLineRunner中接收的就是sourceArg
14、Spring Boot中的@WebServlet注解
我们知道,在个Java Web应中,我们可以通过@WebServlet来定义个Servlet,Tomcat会负责扫描项中哪些类上添加了@WebServlet,从把相对应的Servlet对象添加到Tomcat中去。
但是在Spring Boot中,我们除开照样可以通过@WebServlet来定义个Servlet之外,还需要额外在配置类上添加个@ServletComponentScan注解,顾名思义,这个注解是负责去扫描Servlet的。
也就是在Spring Boot时,@WebServlet的扫描作从Tomcat中转移到了Spring Boot。
那底层是如何作的呢?
ServletRegistrationBean
先我们得学习下ServletRegistrationBean,很明显,这个是个Bean,这个Bean可以来注册Servlet。
我们可以通过BeanDefinition来定义个ServletRegistrationBean,并指定我们想要注册的Servlet,如:
BeanDefinitionBuilder builder =
BeanDefinitionBuilder.rootBeanDefinition(ServletRegistrationBean.class);
builder.addPropertyValue("initParameters", servlet的初始化参数);
builder.addPropertyValue("loadOnStartup", loadOnStartup的值);
builder.addPropertyValue("name", servlet的名字);
builder.addPropertyValue("servlet", servlet对象);
builder.addPropertyValue("urlMappings", servlet的urlMappings);
registry.registerBeanDefinition(name, builder.getBeanDefinition()); // 把
BeanDefinition注册到Spring容器中
那ServletRegistrationBean是如何作的呢?
ServletRegistrationBean继承了ServletContextInitializer接,ServletContextInitializer是Spring
Boot所提供的个函数式接。
在Spring Boot启动流程中,会成个TomcatStarter对象,TomcatStarter实现了
ServletContainerInitializer接,注意,这个接是Servlet规范中所定义的接。
- ServletContextInitializer:这是Spring Boot定义的
- ServletContainerInitializer:这是Servlet规范定义的
并且Tomcat在启动之前会把TomcatStarter添加到Tomcat中去,从Tomcat在启动过程中,就会调ServletContainerInitializer接的onStartup()法,也就是会执TomcatStarter的onStartup()法。
TomcatStarter的onStartup()法会从Spring容器中找到所有的ServletContextInitializer类型的
Bean,然后循环执ServletContextInitializer的onStartup(ServletContext servletContext)法,从
就会执到某个ServletRegistrationBean的onStartup()。
ServletRegistrationBean的onStartup法就会把所拥有的Servlet对象添加到ServletContext中去,从完成了Servlet的添加的。
@ServletComponentScan
@ServletComponentScan注解的作就是去指定路径下扫描@WebServlet,扫描到了成
ServletRegistrationBean。
核是会使个ClassPathScanningCandidateComponentProvider来进扫描,这个类并不是Spring Boot中的,是Spring Framework中的,Spring Boot只是利它,当然Spring Boot会做些设置,如向ClassPathScanningCandidateComponentProvider中添加IncludeFilter。
如会添加三个IncludeFilter:
1. new AnnotationTypeFilter(WebServlet.class);
2. new AnnotationTypeFilter(WebFilter.class);
3. new AnnotationTypeFilter(WebListener.class);
就是有了这三个Filter,扫描时才能扫描到这三个注解,并成对应的BeanDefinition,如:
1. @WebServlet对应ServletRegistrationBean
2. @WebFilter对应FilterRegistrationBean
3. @WebListener对应ServletListenerRegistrationBean
总结
Spring Boot启动时:
1. 先扫描@WebServlet,成ServletRegistrationBean
2. 向Tomcat中添加TomcatStarter
3. 启动Tomcat时执TomcatStarter的onStartup()
4. 从执ServletRegistrationBean的onStartup(ServletContext servletContext)
5. 从将Servlet对象注册到Tomcat中
Ps:由于篇幅限制,笔记无法全部为大家展示出来,就以截图主要内容的形式让大家参考啦,需要完整版的小伙伴可以**点击这里即可获取到文章中的文档,资料
!**


先自我介绍一下,小编13年上师交大毕业,曾经在小公司待过,去过华为OPPO等大厂,18年进入阿里,直到现在。深知大多数初中级java工程师,想要升技能,往往是需要自己摸索成长或是报班学习,但对于培训机构动则近万元的学费,着实压力不小。自己不成体系的自学效率很低又漫长,而且容易碰到天花板技术停止不前。因此我收集了一份《java开发全套学习资料》送给大家,初衷也很简单,就是希望帮助到想自学又不知道该从何学起的朋友,同时减轻大家的负担。添加下方名片,即可获取全套学习资料哦