1、Vue下载安装步骤的详细教程(亲测有效) 1_水w的博客-CSDN博客
2、Vue下载安装步骤的详细教程(亲测有效) 2 安装与创建默认项目_水w的博客-CSDN博客
3、基于vscode开发vue项目的详细步骤教程_水w的博客-CSDN博客
本篇是在基于vscode创建SpringBoot项目,连接postgresql数据库 2 更简单_水w的博客-CSDN博客
的基础上,开始的。
为了保证浏览器的安全,不同源的客户端脚本在没有明确授权的情况下,不能读写对方资源,称为同源策略,同源策略是浏览器安全的基石。
同源策略 (Sameoriginpolicy) 是一种约定,它是浏览器最核心也最基本的安全功能
所谓同源(即指在同一个域)就是两个页面具有相同的协议 (protocol),主机(host) 和端口号 (port)一个请求url的协议、域名、端口三者之间任意一个与当前页面url不同即为跨域,此时无法读取非同源网页的 Cookie,无法向非同源地址发送 AJAX 请求
目录
四、实现前后端连接
0 前提
如有需要,可以移步到本篇开头的那几篇博客,都是按照开发和学习顺序一步一步写的。
需要创建一个vue项目。
1 修改main.js文件
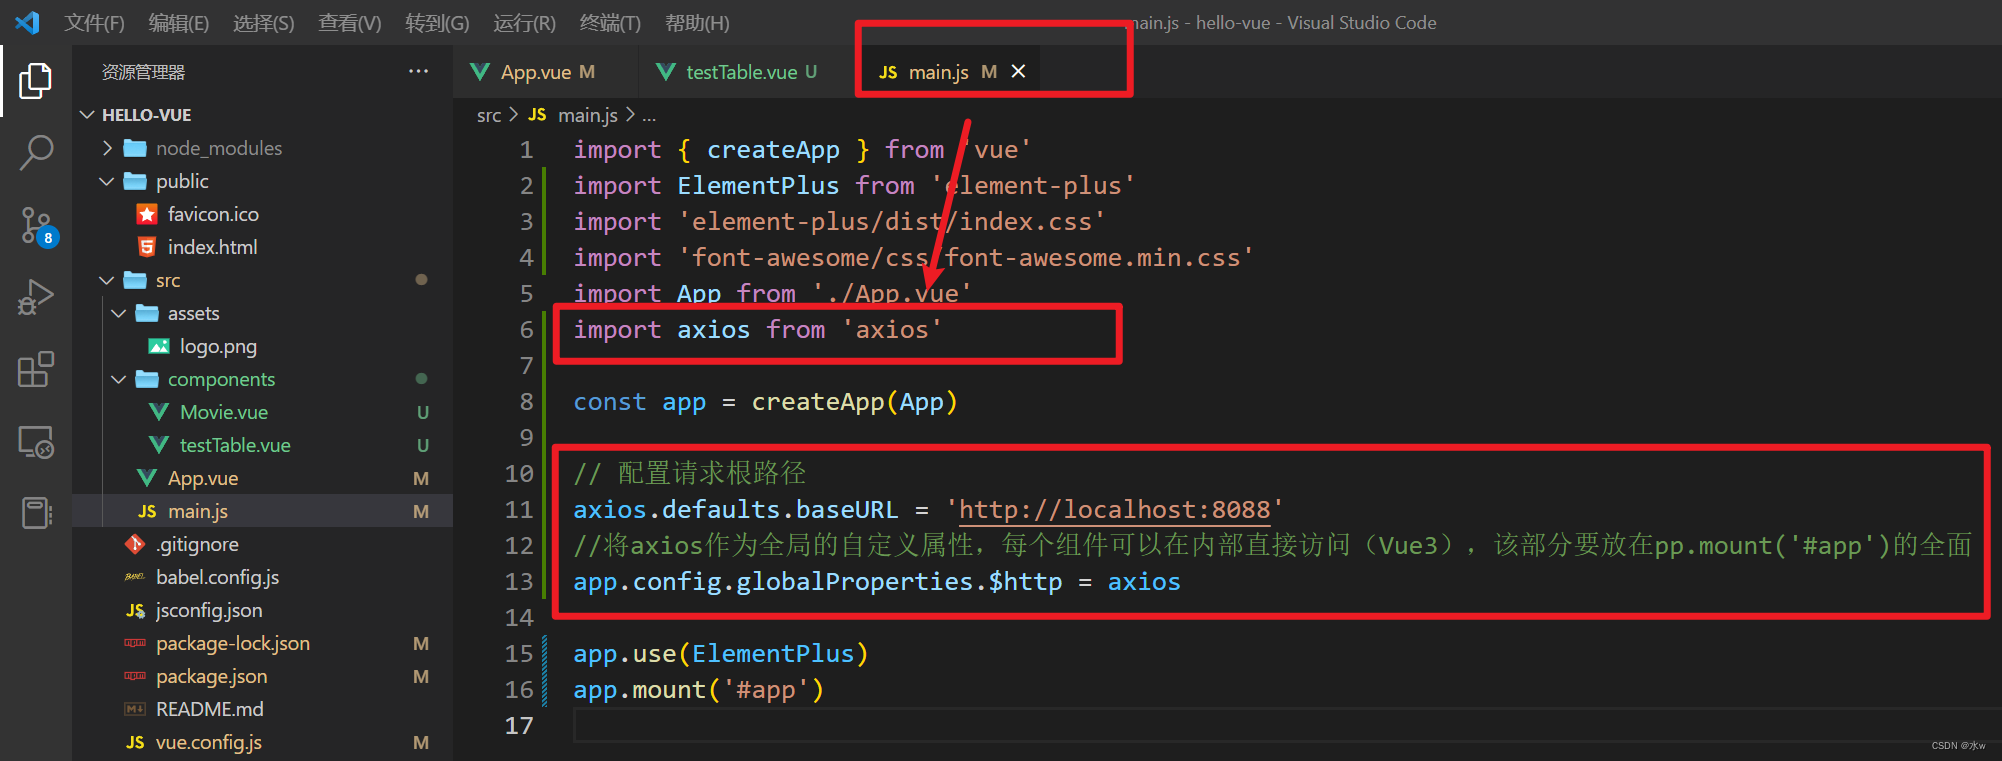
全部代码为:
import { createApp } from 'vue'
import ElementPlus from 'element-plus'
import 'element-plus/dist/index.css'
import 'font-awesome/css/font-awesome.min.css'
import App from './App.vue'
import axios from 'axios'
const app = createApp(App)
// 配置请求根路径
axios.defaults.baseURL = 'http://localhost:8088'
//将axios作为全局的自定义属性,每个组件可以在内部直接访问(Vue3),该部分要放在pp.mount('#app')的全面
app.config.globalProperties.$http = axios
app.use(ElementPlus)
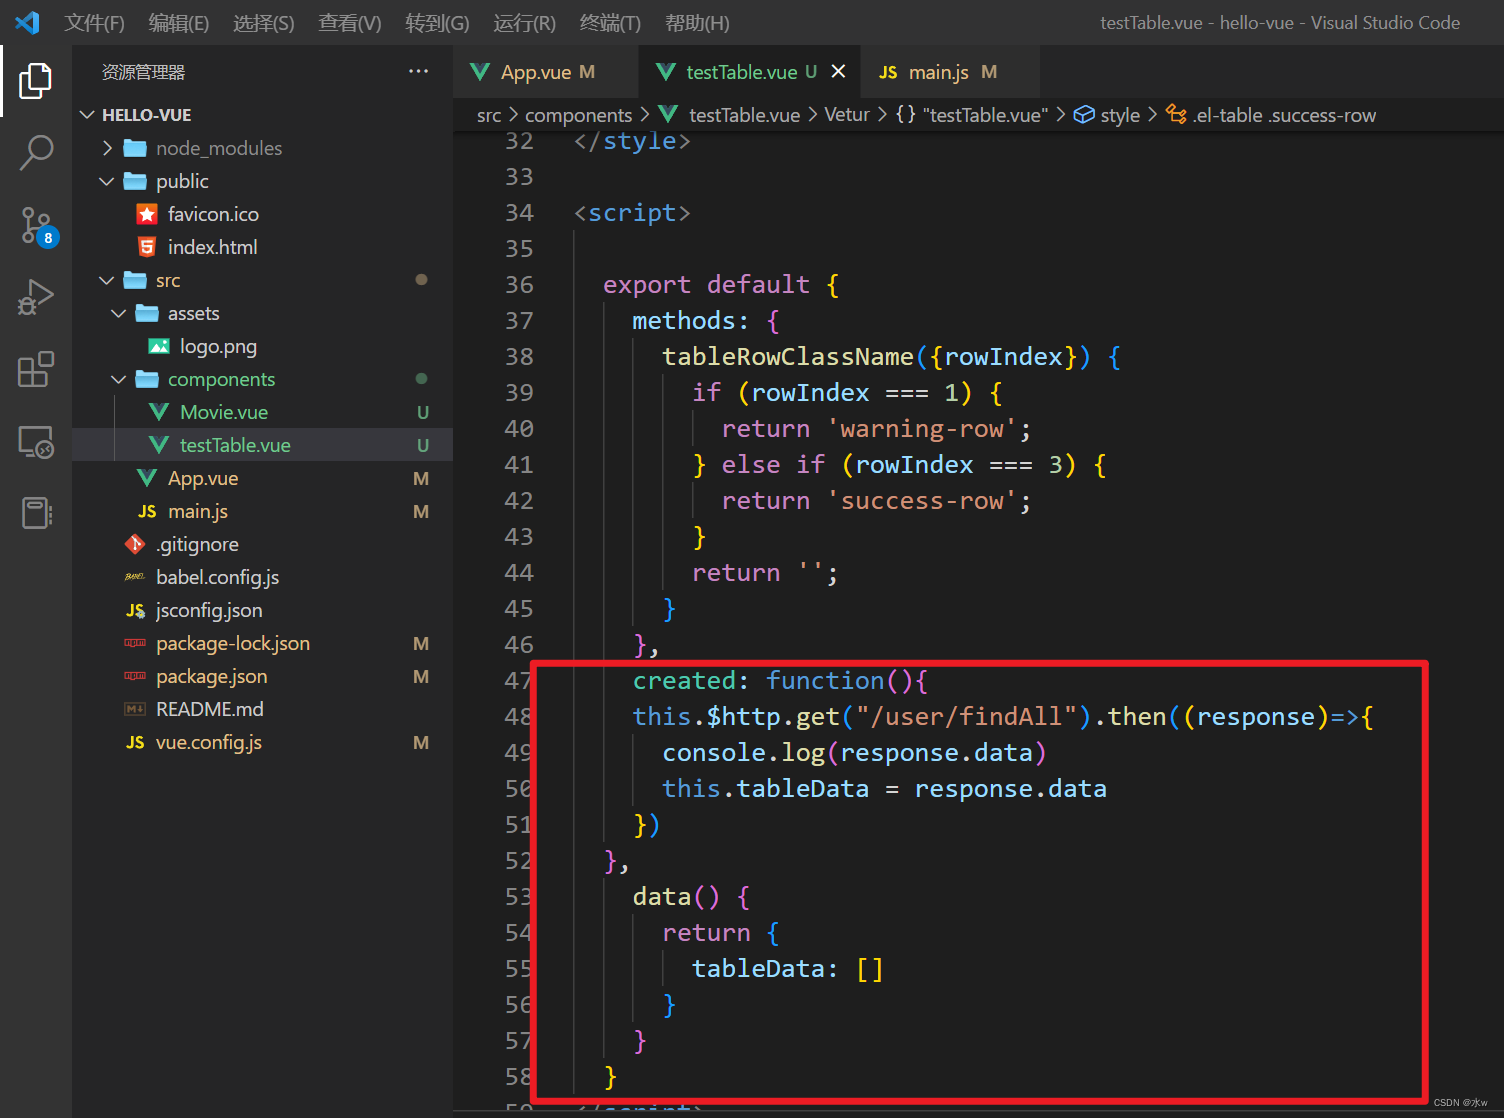
app.mount('#app')2 修改TestTable.vue
修改两处,

全部代码为:
<template>
  <el-table
    :data="tableData"
    style="width: 100%"
    :row-class-name="tableRowClassName">
    <el-table-column
      prop="id"
      label="日期"
      width="180">
    </el-table-column>
    <el-table-column
      prop="username"
      label="姓名"
      width="180">
    </el-table-column>
    <el-table-column
      prop="password"
      label="密码">
    </el-table-column>
  </el-table>
  <i class="fa fa-camera-retro"></i> fa-camera-retro
</template>

<style>
  .el-table .warning-row {
    background: oldlace;
  }

  .el-table .success-row {
    background: #f0f9eb;
  }
</style>

<script>

  export default {
    methods: {
      tableRowClassName({rowIndex}) {
        if (rowIndex === 1) {
          return 'warning-row';
        } else if (rowIndex === 3) {
          return 'success-row';
        }
        return '';
      }
    },
    created: function(){
    this.$http.get("/user/findAll").then((response)=>{
      console.log(response.data)
      this.tableData = response.data
    })
  },
    data() {
      return {
        tableData: []
      }
    }
  }
</script>
3 App.vue
全部代码为:
<template>
  <img alt="Vue logo" src="./assets/logo.png">
  <Movie v-for="movie in movies" :key="movie.id" :title="movie.title" :rating="movie.rating"></Movie>
  <testTable></testTable>
</template>

<script>
import Movie from './components/Movie.vue'
import testTable from './components/testTable.vue'


export default {
  name: 'App',
  data:function(){
    return {
      movies:[
        {id:1, title:"金刚狼1", rating:8.7},
        {id:2, title:"金刚狼2", rating:8.8},
        {id:3, title:"金刚狼3", rating:8.9}
      ]
    }
  },
  created: function(){
    console.log("组件被创建了")
  },
  components: {
    Movie,
    testTable
  }
}
</script>

<style>
#app {
  font-family: Avenir, Helvetica, Arial, sans-serif;
  -webkit-font-smoothing: antialiased;
  -moz-osx-font-smoothing: grayscale;
  text-align: center;
  color: #2c3e50;
  margin-top: 60px;
}

</style>
5 Movie.vue
<template>
  <div>
    <h1>{

   { title }}</h1>
    <h2>{

   { rating }}</h2>
  </div>


</template>

<script>
export default {
  name: 'helloHello',
  props: ["title", "rating"],
  data:function(){
    return {

    }
  },
  created: function(){
    console.log("Movie组件被创建了")
  },
  mounted: function(){
    console.log("Movie组件被挂载完毕")
  },
}
</script>

<style>

</style>
6 测试
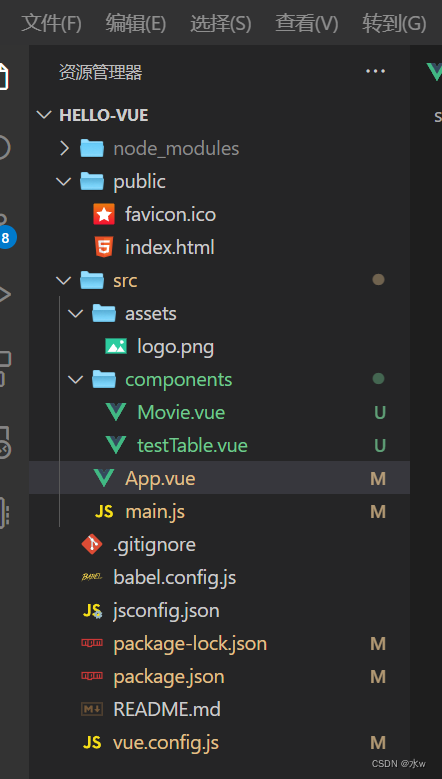
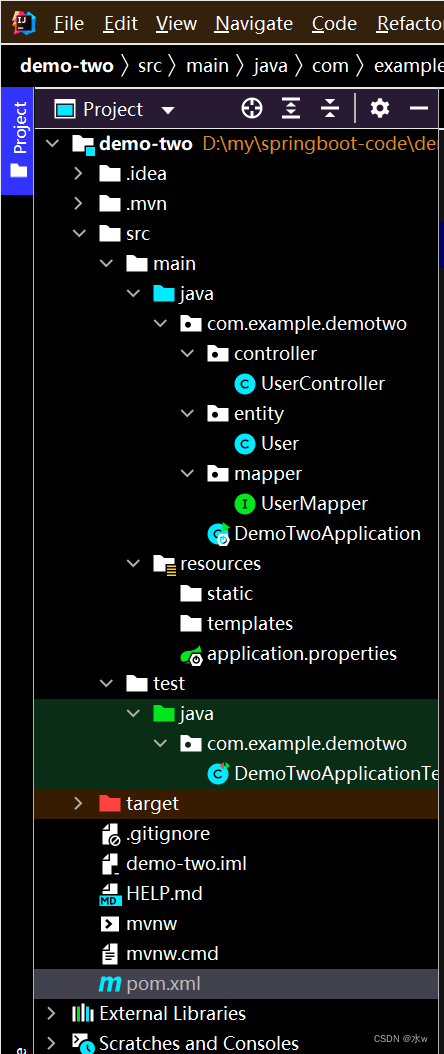
目前,前端和后端的目录结构,分别如下所示:
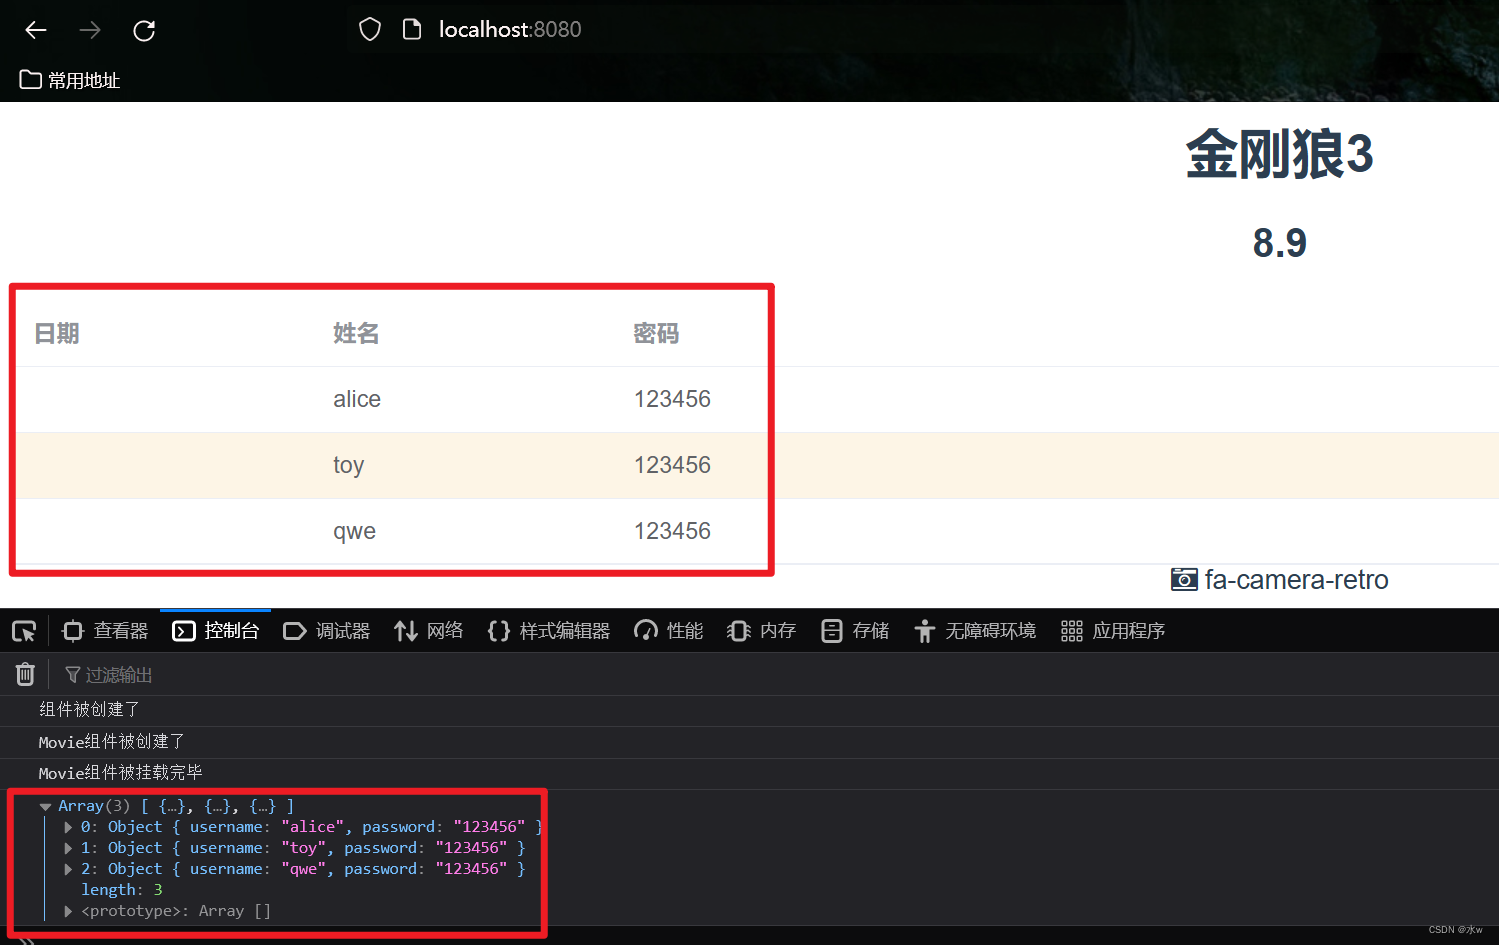
浏览器访问http://localhost:8080/,返回查询到的json格式的数据,说明成功了。
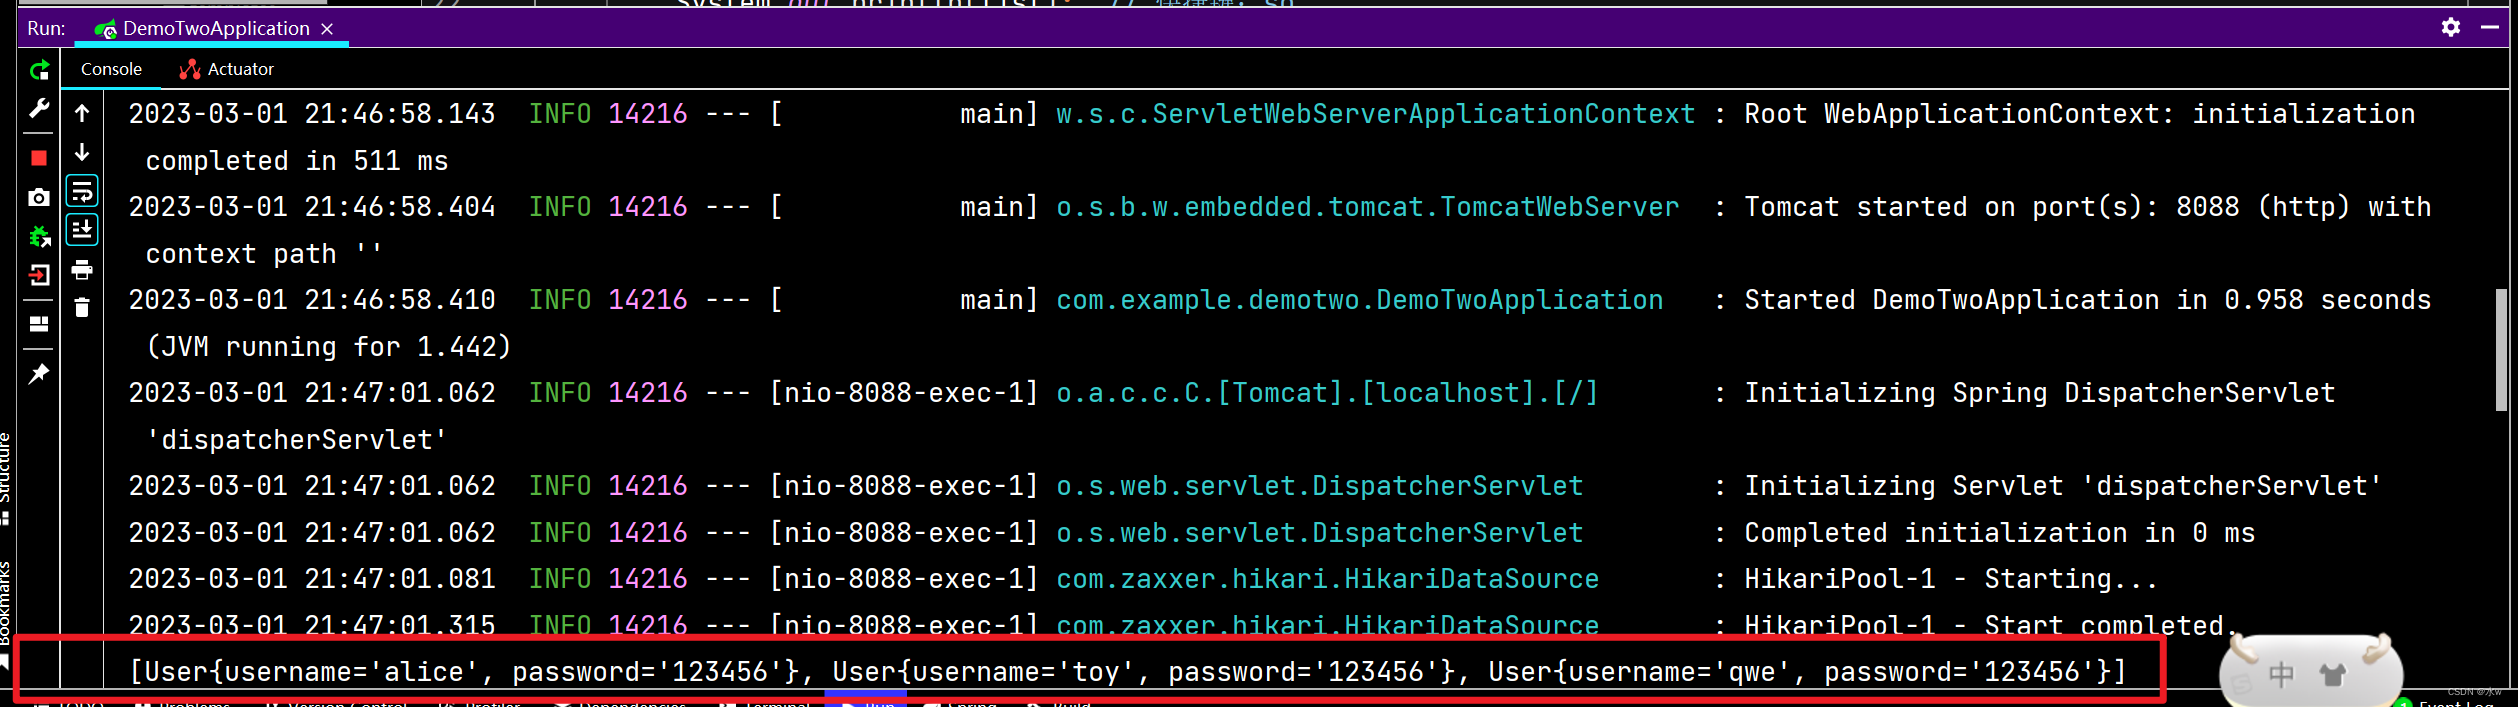
然后,同时,idea的终端也会返回我们从数据库中的【my_user】表中查到的所有数据记录。
ok。