Servlet(Server Applet)是 Java Servlet 的简称,称为小服务程序或服务连接器。狭义的 Servlet是指 Java 语言实现的一个接口,广义的 Servlet 是指任何实现了这个 Servlet 接口的类,一般情况下,人们将 Servlet 理解为后者
从本文开始,笔者会将 servlet 相关的用法做一个汇总,方便工作时查看和使用
环境准备,需要已经安装 Java 和 Tomcat,如果没有安装可以参考
Java 安装:https://blog.csdn.net/wsjzzcbq/article/details/87926635
Tomcat 安装:https://blog.csdn.net/wsjzzcbq/article/details/87953594
Eclipse 或 STS 继承 Tomcat:https://blog.csdn.net/wsjzzcbq/article/details/102687559
开发工具使用 STS
目录
1、新建 servlet 项目
打开 eclipse 或 sts 编辑器
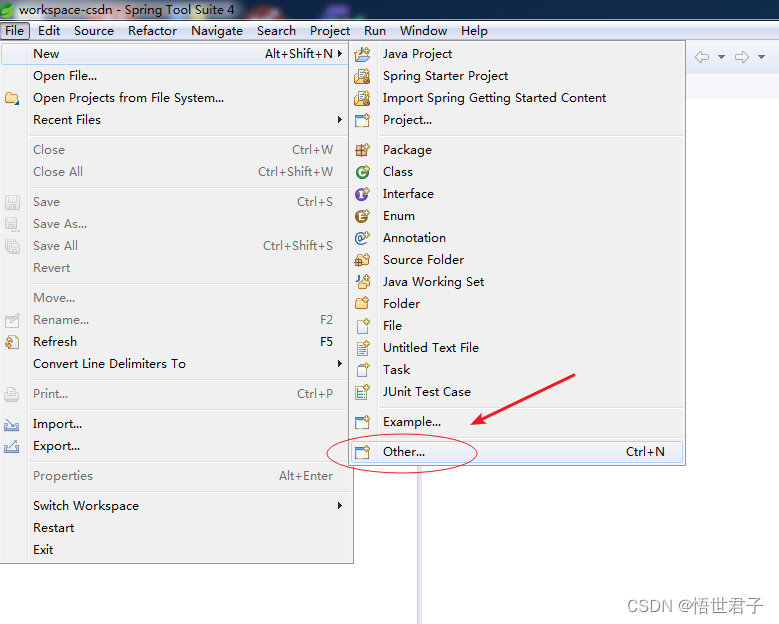
新建 servlet 项目,依次点击 File、New、Other...
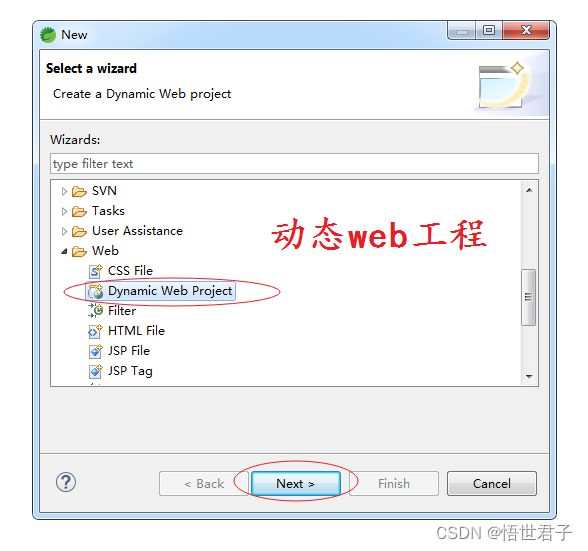
找到 Web、选择 Dynamic Web Project
项目名称
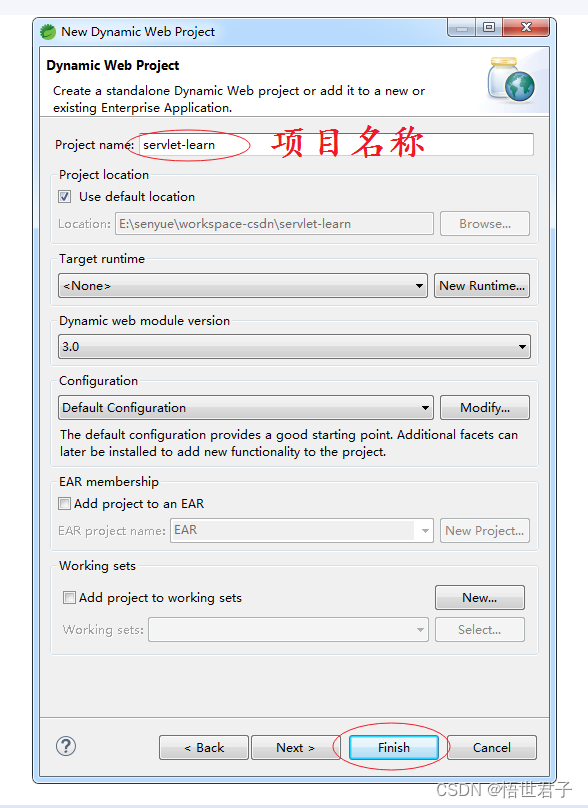
点击 Finish
servlet 项目创建完成
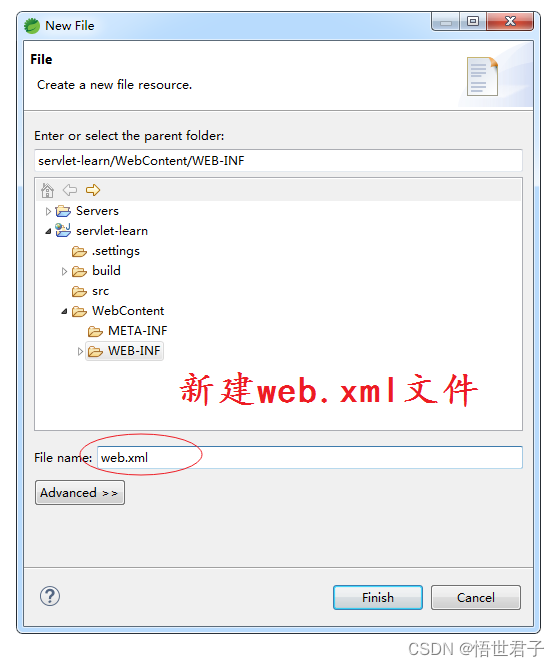
2、新建 web.xml 文件
在 WEB-INF 目录下新建 web.xml 文件(这个文件可以不用建,因为 Servlet 3.0 引入了注解可以替代 web.xml 文件配置,这里为了演示 xml 方式配置 servlet)
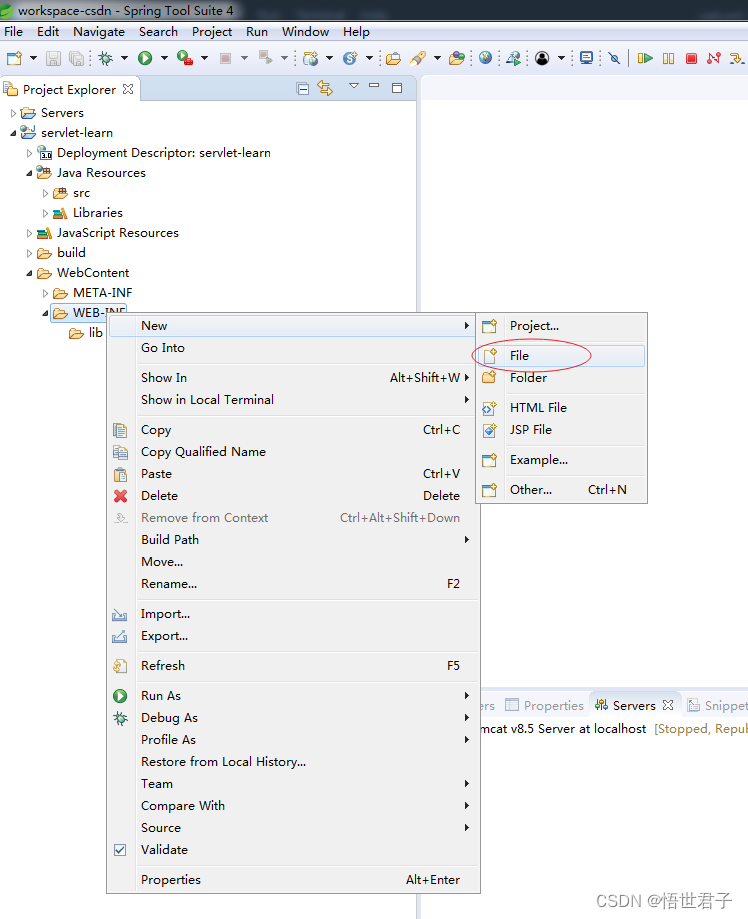
新建 web.xml 文件

点击 Source,将 web.xml 3.0 文件内容复制到 Source 中
web.xml 3.0 文件内容
<?xml version="1.0" encoding="UTF-8"?>
<web-app version="3.0"
         xmlns="http://java.sun.com/xml/ns/javaee"
         xmlns:xsi="http://www.w3.org/2001/XMLSchema-instance
                    http://www.springmodules.org/schema/cache/springmodules-cache.xsd
                    http://www.springmodules.org/schema/cache/springmodules-ehcache.xsd"
         xsi:schemaLocation="http://java.sun.com/xml/ns/javaee
	                         http://java.sun.com/xml/ns/javaee/web-app_3_0.xsd">

</web-app>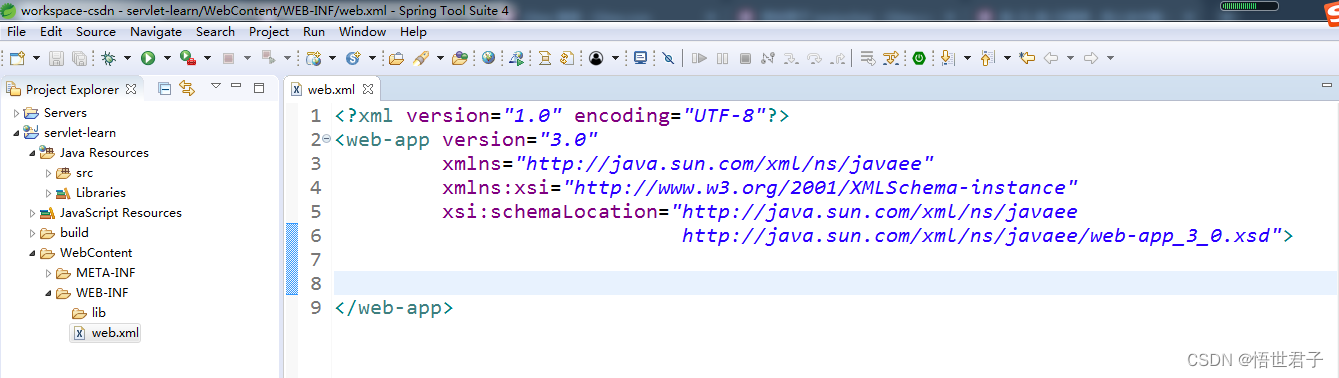
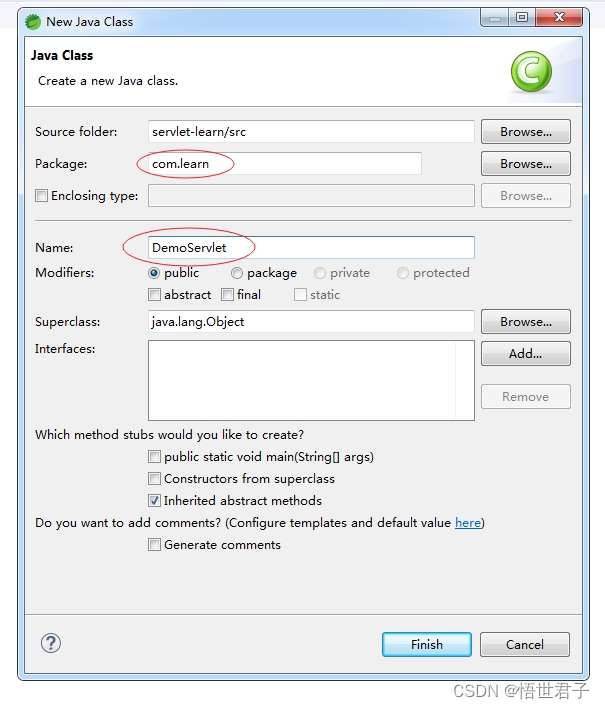
3、新建 DemoServlet
新建 DemoServlet
然后将 DemoServlet 继承 HttpServlet
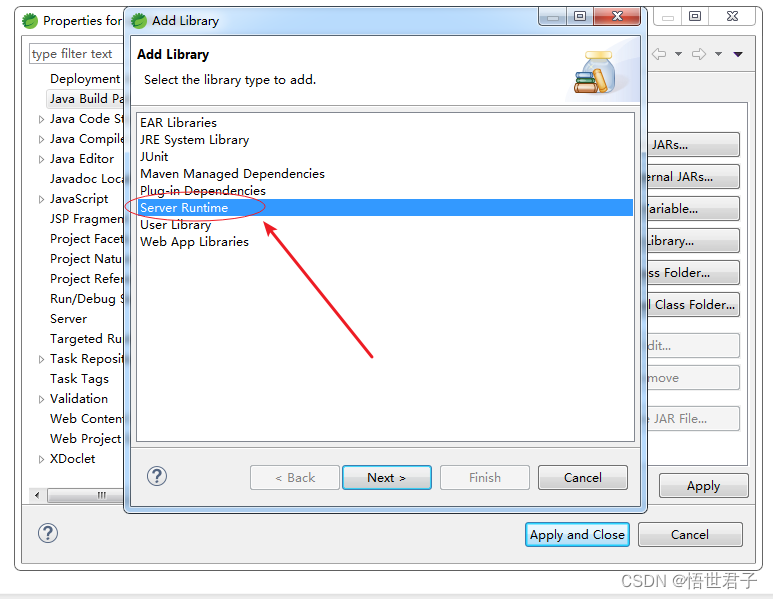
如果项目无法引包 HttpServlet,则需要为项目配置 server 环境,步骤如下
项目右键 Build Path、Configure Build Path...

点击 Add Library...

选择 Server Runtime
选择 Tomcat
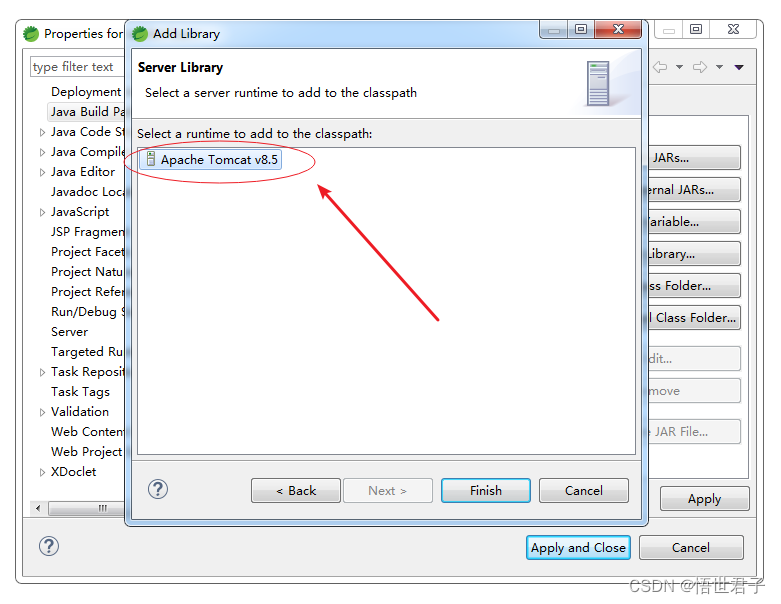
Finish

点击 Apply and Close
配置完成
DemoServlet 继承 javax.servlet.http.HttpServlet,重写 doGet、doPost 方法
DemoServlet 完整代码
package com.learn;

import java.io.IOException;
import javax.servlet.ServletException;
import javax.servlet.http.HttpServlet;
import javax.servlet.http.HttpServletRequest;
import javax.servlet.http.HttpServletResponse;

public class DemoServlet extends HttpServlet{

	@Override
	protected void doGet(HttpServletRequest req, HttpServletResponse resp) throws ServletException, IOException {
		System.out.println("get请求");
	}

	@Override
	protected void doPost(HttpServletRequest req, HttpServletResponse resp) throws ServletException, IOException {
		System.out.println("post请求");
	}


}
在 web.xml 文件中配置 DemoServlet
<?xml version="1.0" encoding="UTF-8"?>
<web-app version="3.0"
         xmlns="http://java.sun.com/xml/ns/javaee"
         xmlns:xsi="http://www.w3.org/2001/XMLSchema-instance
                    http://www.springmodules.org/schema/cache/springmodules-cache.xsd
                    http://www.springmodules.org/schema/cache/springmodules-ehcache.xsd"
         xsi:schemaLocation="http://java.sun.com/xml/ns/javaee
	                         http://java.sun.com/xml/ns/javaee/web-app_3_0.xsd">
  <!-- DemoServlet配置 -->
  <servlet>
  	<servlet-class>com.learn.DemoServlet</servlet-class>
  	<servlet-name>demoServlet</servlet-name>
  </servlet>
  <servlet-mapping>
  	<servlet-name>demoServlet</servlet-name>
  	<url-pattern>/demo</url-pattern>
  </servlet-mapping>
</web-app>
配置说明
servlet-class: 配 servlet 全路径
servlet-name: 自定义,和 servlet-mapping 中 name 保持一致
url-pattern: servlet 对应的请求 url
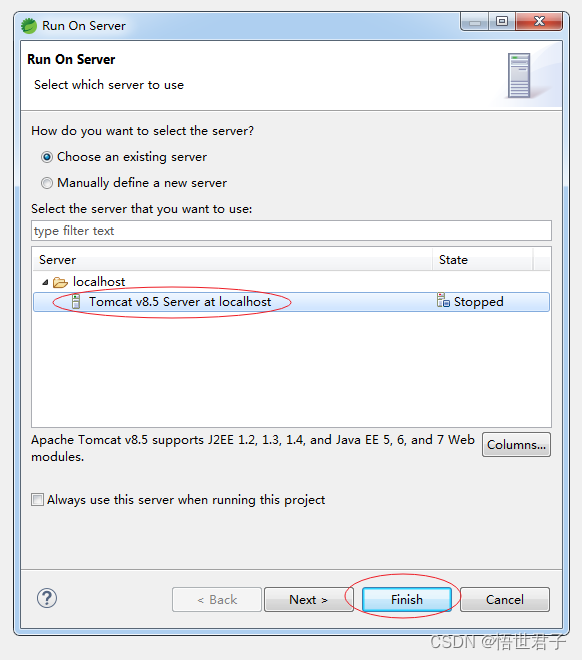
4、运行项目
在项目上右键 Run As、Run on Server
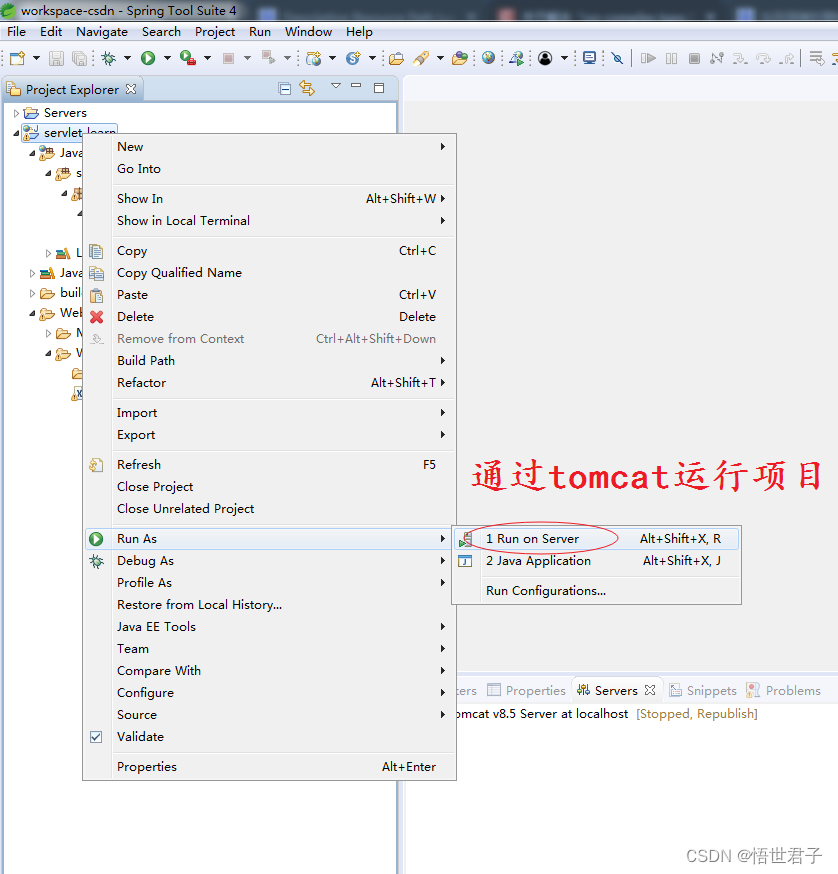
选择 Tomcat ,Finish
浏览器请求:http://localhost:8080/servlet-learn/demo
运行效果

servlet 请求成功
servlet 环境搭建完成
至此完