SVG动画
SVG动画就是可缩放矢量图形,由此知SVG是矢量图。和矢量图相对的是位图Bitmap,位图是一个一个像素点组成,当Bitmap方大时,可能会出现马赛克的状况,但是矢量图是由一个个点组成,经过数学计算利用直线和曲线绘制而成,无论如何放大都不会出现马赛克的现状。
SVG相比Bitmap的好处为:
- SVG使用XML格式定义图形,可被非常多的工具读取和修改。
- SVG由点来储存,由计算机根据点信息绘制而成,不会失真。
- SVG的占用空间比Bitmap小,而且小很多。
- SVG可以转化为Path路径,与Path动画结合可以形成更丰富的动画。
在Android中,SVG矢量图使用标签来定义的,所以它也放在 res/drawable目录下
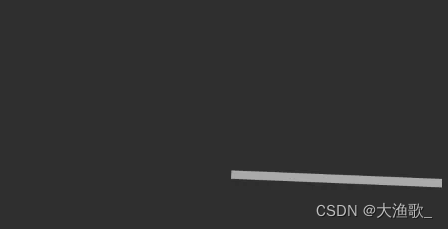
这里举一个简单的SVG图:
<vector android:width="200dp" android:height="100dp" android:viewportHeight="50" android:viewportWidth="100"
    xmlns:android="http://schemas.android.com/apk/res/android">

    <path android:name="bar"
        android:pathData="M50,23 L100,25"
        android:strokeWidth="2"
        android:strokeColor="@android:color/darker_gray"/>
</vector>
可以看出SVG是由vector标签声明,path标签构建路径
呈现的SVG图片如下:
vector中几个属性声明的意思为
- width和height指定了画布的大小
- viewportWidth和viewportHeight表示将width和height切成了多少个点
而path标签中的pathData就和上述的viewportWidth和viewportHeight有联系。
在上述例子中viewportWidth为100,表示把width为200长的画布在宽上面分成了100份,所以一份就占2宽度,高度同样,100分成了50份。
而path中的pathData中的M表示move to,而L表示line to。字母后面接着的就是坐标,也就是说,例子中的"M50,23 L100,25"可以看成:
move to (50,23)
line to(100,25)
而坐标并不是用width和height的坐标,而是viewportWidth和viewportHeight的坐标,(50,23)中50表示宽100份中的第50份,即中点,23为高度50份中的第23份,中点上面一点点。(100,25)也是这么理解,然后一条线划过去,就成为了上述效果图中那样的情况。
下面讲下path的常用属性:
- android:name:ID
- android:pathDate:对SVG矢量图的描述
- android:strokeWidth:画笔宽度
- android:fillColor:填充颜色
- android:fillAlpha:填充颜色的透明度
- android:strokeAlpha:描边的透明度
- android:strokeLineJoin:用于指定折线拐角形状吗,取值有miter(结合处为锐角)、round(结合处为圆弧)、bevel(结合处为直线)
- android:strokeMiterLimit:设置斜角的上限,因为两条线以锐角相交可能会产生很长的斜面。所以这个属性表示斜面长度和线条长度的比值,默认是10,意味着一个斜面的长度不能超过线条长度的10倍,只能和"strokeLineJoin=“miter”"连用。
- android:strokeLineCap:画出线条的终点的形状(线帽),取值有butt(无线帽),round(圆线帽)、square(方形线帽)
- android:trimPathStart:指定路径从哪里开始,表示路径开始的百分比。取值从0-1,当取值为0时,从起点开始取。(可以用该属性做进度)
- android:trimPathEnd:指定路径结束的位置。0-1,当取值为1时,表示Path正常结束,如果取值是0,则一开始就结束了。
- android:trimPathOffset:用于指定结果路径的位移距离,取值0-1,当取值为0时,不进行位置,为1时,位移到路径结束,即最开始的地方。
android:pathData:主要通过改属性来指定SVG的显示内容。而pathData属性除了M,L还有:
- M = move to(MX,Y) 将画笔移动到相应的坐标位置
- L = line to(LX,Y) 绘制直线到指定的位置
- H = horizontal line to(H X):绘制水平线到指定的X坐标位置
- V = vertical line to(V,Y):绘制垂直线到指定的Y坐标位置
- C = curve to(C X1,Y1,X2,Y2,ENDX,ENDY):三阶贝济埃曲线
- S = smooth curve to(S X2,Y2,ENDX,ENDY):三阶贝济埃曲线。很明显,这里的传值相比C指令少了X1、Y1,这是因为S指令会将上一条指令的终点作为这一条指令的起点
- Q = quadratic Belzier curve to(Q X,Y,ENDX,ENDY):二阶贝济埃曲线
- T = smooth quadratic Belzier curve to(T ENDX,ENDY):映射前面路径后的终点
- A = elliptical Arc(A RX,RY,XROTATION,FLAG1,FLAG2,X,Y):弧线
- Z = closepath():关闭路径
其中A的参数意思为:
RX,RY 指所有椭圆的半轴大小
XROTATION :指椭圆的X轴和水平方向顺时针方向的夹角,可以想象成一个水平的椭圆绕中心点顺时针旋转XROTATION角度。
FLAG1 只有两个值,1表示大角度弧度,0表示小角度弧度
FLAG2 只有两个值,1表示顺时针,2表示逆时针。
X、Y 为终点坐标
使用有以下要注意的地方:
- 所有指令大小写均可,大写表示绝对定位,参照全局坐标,小写表示相对定位,参照父容器坐标
- 统一指令出现多次可以只用一个
- 坐标轴以(0,0)为中心,x轴水平向右,y轴垂直向下。
group标签
group标签下可以定义一系列的路径,或者将path标签分组。
在vector标签下可以同时有一个或多个group标签和path标签。
group标签的几个常用属性:
- android:name:组名
- android:rotation:指定该组图像的旋转度数
- android:pivotX:定义缩放和旋转时该组的X参考点。该值是相对于vector的viewport值来指定的
- android:pivotY:定义缩放和旋转该组时的Y参考点。该值是相对于vector的viewport值来指定的
- android:scaleX:x轴缩放大小
- android:scaleY:y轴缩放大小
- android:translateX:指定该组沿X轴平移的距离
- android:translateY:指定该组沿y轴平移的距离
如何制作SVG图像
- 如果有绘图基础就是用Illustrator或在线SVG工具制作SVG图像,或者通过SVG源文件下载网站下载后进行编辑。
- Iconfont
Iconfont是一种比较成熟的SVG解决方案,原理是把想要的矢量图打包成一个.ttf文件,在Android中应用这个ttf文件来加载和指定图标。
Android中引入SVG图像
在Android中是不支持SVG图像解析的,我们必须将SVG图像转化为vector标签描述。
这里有两个方法进行转化:
- 在线转换
拿到SVG图像后,将其拖入在线转换网站 http://inloop.github.io/svg2android/,就可以得到对应的vector标签。 - 通过Android Studio引入
Android Studio2.0以上后就支持创建SVG图像。在 右键单击drawable - Vector Asset 之后,就可以生成Vector图像了。
动态Vector
前面简述了vector的标签的一些应用,而动态Vector实现的SVG效果才是SVG图像在Android应用中的精髓。
要实现Vector动画,首先需要vector图像和它所对应的的动画。
这里用之前做的那个SVG的一条线。
然后定义一个Animator文件:
<?xml version="1.0" encoding="utf-8"?>
<objectAnimator xmlns:android="http://schemas.android.com/apk/res/android"
    android:propertyName="trimPathStart"
    android:valueFrom="0"
    android:valueTo="1"
    android:duration="2000">
</objectAnimator>
这里指定的propertyName为path标签的“trimPathStart”属性,动画效果为从开始到结尾渐渐消失
做好一个vector图像和animator动画后,我们需要将这两个标签关联,Android 提供了关联的标签animated-vector,通过它就能关联动画和SVG了。
<?xml version="1.0" encoding="utf-8"?>
<animated-vector xmlns:android="http://schemas.android.com/apk/res/android"
    android:drawable="@drawable/svg_img1">
    <target
        android:name="bar"
        android:animation="@animator/anim_trim_start"></target>
</animated-vector>
animated-vector中的drawable属性指的是svg文件, target标签有两个属性,name为svg中的某个path的name,是对应的,animation为使用的动画。
其中animated-vector下可以有多个target,因为如果vector标签中有多个path、group,这里就可以使用多个target了。
接下来在代码中声明动画:
AnimatedVectorDrawableCompat.create(MainActivity.this, R.drawable.line_animated_vector);
        iv = findViewById(R.id.iv);
        iv.setImageDrawable(avdCompat);
        ((Animatable) iv.getDrawable()).start();
最后需要在build.gradle脚本中添加对vector兼容性的支持,因为Android APPT是默认是在Lolipop版本以上使用Vector,而在Lolipop版本以前使用Gradle生成相应的PNG图片,所以加了以下属性来关闭这个妥协:
{
        vectorDrawables.useSupportLibrary = true
    }
最后显示的效果如下:

接下来跟着书做一个复杂点的SVG动画。该动画是点击输入框后产生一个搜索的图标
首先准备一个SVG图像:
<?xml version="1.0" encoding="utf-8"?>
<vector xmlns:android="http://schemas.android.com/apk/res/android"
    android:width="150dp"
    android:height="24dp"
    android:viewportWidth="150"
    android:viewportHeight="24">

    <path
        android:name="search"
        android:pathData="M141,17 A9,9 0 1,1 142,16 L149,23"
        android:strokeWidth="2"
        android:strokeColor="@android:color/darker_gray"/>

    <path
        android:name="bar"
        android:trimPathStart="0"
        android:pathData="M0,23 L149,23"
        android:strokeWidth="1"
        android:strokeColor="@android:color/darker_gray"/>
</vector>
得到如下的图片:

动画的效果首先让下面横线渐渐消失,然后放大镜图标同时显现,所以这里使用了两个动画。
//下面横线消失的动画
<?xml version="1.0" encoding="utf-8"?>
<objectAnimator xmlns:android="http://schemas.android.com/apk/res/android"
    android:duration="500"
    android:propertyName="trimPathStart"
    android:valueFrom="0"
    android:valueTo="1"
    android:valueType="floatType">
</objectAnimator>
//这个是让放大镜从无到有的动画
<?xml version="1.0" encoding="utf-8"?>
<objectAnimator xmlns:android="http://schemas.android.com/apk/res/android"
    android:duration="500"
    android:propertyName="trimPathEnd"
    android:valueFrom="0"
    android:valueTo="1"
    android:valueType="floatType">
</objectAnimator>
创建好vector图像和animator后,要做的就是用animated-vector来关联它们,我们这里的animated-vector使用了两个target,分别来对应放大镜和下面的横线:
<?xml version="1.0" encoding="utf-8"?>
<animated-vector android:drawable="@drawable/svg_img2" xmlns:android="http://schemas.android.com/apk/res/android">
    <target
        android:animation="@animator/anim_search_trim_end"
        android:name="search"/>
    <target
        android:animation="@animator/anim_bar_trim_start"
        android:name="bar"/>
</animated-vector>
接下来就是在xml文件中使用这个svg图:
<?xml version="1.0" encoding="utf-8"?>
<FrameLayout xmlns:android="http://schemas.android.com/apk/res/android"
    xmlns:app="http://schemas.android.com/apk/res-auto"
    xmlns:tools="http://schemas.android.com/tools"
    android:layout_width="match_parent"
    android:layout_height="match_parent"
    android:background="#f7f8fa"
    android:orientation="vertical"
    tools:context=".MainActivity">

    <EditText
        android:id="@+id/et"
        android:layout_width="150dp"
        android:layout_height="24dp"
        android:background="@null"
        android:hint="点击输入" />

    <ImageView
        android:id="@+id/iv"
        android:layout_width="150dp"
        android:layout_height="24dp" />
</FrameLayout>
这里用的是FrameLayoout,因为要让EditText和ImageView重合。
那么接下来就是在代码中使用这段动画啦(我们在让EditText取得焦点 即我们点击它的时候 实现这段SVG动画):
//一开始imageview获取焦点
        iv.setFocusable(true);
        iv.setFocusableInTouchMode(true);
        iv.requestFocus();
        iv.requestFocusFromTouch();

        //当EditText获取焦点时开始动画
        et.setOnFocusChangeListener(new View.OnFocusChangeListener() {


            @Override
            public void onFocusChange(View v, boolean hasFocus) {


                if (hasFocus) {


                    AnimatedVectorDrawableCompat animatedVectorDrawableCompat =
                            AnimatedVectorDrawableCompat.create(MainActivity.this, R.drawable.animated_vector_search);
                    iv.setImageDrawable(animatedVectorDrawableCompat);
                    ((Animatable) iv.getDrawable()).start();
                }
            }
        });

到这里,SVG动画就讲完辽。当然这里使用到的是SVG兼容包,相比5.0以上的原生SVG支持,兼容包对以下的内容是不支持的:
- Path Morphing:路径变换动画,在Lolipop版本以前是无法使用的
- Path Interpolation:路径插值器,在Lolipop版本以前只能使用系统的插值器。
转载:https://blog.51cto.com/u_15719342/5475358