1、@Configuration + @Bean
这种方式其实最常用的一种方式,@Configuration用来声明一个配置类,然后使用 @Bean 注解,用于声明一个bean,将其加入到Spring容器中。
@Configuration
public class UserConfig {


    @Bean
    public User user(){


        User user = new User();
        user.setName("张三");
        return user;
    }

}
测试类
@SpringBootApplication
public class PutIntoContainerApplication {


	public static void main(String[] args) {


		AnnotationConfigApplicationContext applicationContext = new AnnotationConfigApplicationContext(PutIntoContainerApplication.class);
		User user = applicationContext.getBean(User.class);
		System.out.println(user);
	}

}

表示成功将User放置在了IOC容器中。
2、@Componet + @ComponentScan
这种方式也是我们用的比较多的方式,@Componet中文译为组件,放在类名上面,然后@ComponentScan放置在我们的配置类上,然后可以指定一个路径,进行扫描带有@Componet注解的bean,然后加至容器中。
@Data
@Component
public class Person {


    private String name;
}
@SpringBootApplication
@ComponentScan(basePackages = {

    "com.zhubayi.putintocontainer.entity"})
public class PutIntoContainerApplication {


	public static void main(String[] args) {


		AnnotationConfigApplicationContext applicationContext = new AnnotationConfigApplicationContext(PutIntoContainerApplication.class);
		Person person = applicationContext.getBean(Person.class);
		System.out.println(person);
	}

}
表示成功将Person放置在了IOC容器中。
3、@Import注解导入
前两种方式,大家用的可能比较多,也是平时开发中必须要知道的,@Import注解用的可能不是特别多了,但是也是非常重要的,在进行Spring扩展时经常会用到,它经常搭配自定义注解进行使用,然后往容器中导入一个配置文件。
关于@Import注解,我会多介绍一点,它有四种使用方式。这是@Import注解的源码,表示只能放置在类上。
/**
* Indicates one or more <em>component classes</em> to import — typically
* {@link Configuration @Configuration} classes.
*
* <p>Provides functionality equivalent to the {@code <import/>} element in Spring XML.
* Allows for importing {@code @Configuration} classes, {@link ImportSelector} and
* {@link ImportBeanDefinitionRegistrar} implementations, as well as regular component
* classes (as of 4.2; analogous to {@link AnnotationConfigApplicationContext#register}).
*
* <p>{@code @Bean} definitions declared in imported {@code @Configuration} classes should be
* accessed by using {@link org.springframework.beans.factory.annotation.Autowired @Autowired}
* injection. Either the bean itself can be autowired, or the configuration class instance
* declaring the bean can be autowired. The latter approach allows for explicit, IDE-friendly
* navigation between {@code @Configuration} class methods.
*
* <p>May be declared at the class level or as a meta-annotation.
*
* <p>If XML or other non-{@code @Configuration} bean definition resources need to be
* imported, use the {@link ImportResource @ImportResource} annotation instead.
*
* @author Chris Beams
* @author Juergen Hoeller
* @since 3.0
* @see Configuration
* @see ImportSelector
* @see ImportBeanDefinitionRegistrar
* @see ImportResource
*/
@Target(ElementType.TYPE)
@Retention(RetentionPolicy.RUNTIME)
@Documented
public @interface Import {
/**
* {@link Configuration @Configuration}, {@link ImportSelector},
* {@link ImportBeanDefinitionRegistrar}, or regular component classes to import.
*/
Class<?>[] value();
}
3.1 @Import直接导入类
代码示例如下:
@Data
public class Person {


    private String name;
}
@SpringBootApplication
@Import(Person.class)
public class PutIntoContainerApplication {


	public static void main(String[] args) {


		AnnotationConfigApplicationContext applicationContext = new AnnotationConfigApplicationContext(PutIntoContainerApplication.class);
		Person person = applicationContext.getBean(Person.class);
		System.out.println(person);
	}

}
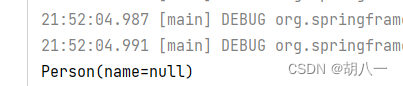
上述代码直接使用@Import导入了一个类,然后自动的就被放置在IOC容器中了。
注意:我们的Person类上 就不需要任何的注解了,直接导入即可。
3.2 @Import + ImportSelector
其实在@Import注解的源码中,说的已经很清楚了,感兴趣的可以看下,我们实现一个ImportSelector的接口,然后实现其中的方法,进行导入。
代码如下:
@SpringBootApplication
@Import(MyImportSelector.class)
public class ImportSelectorDemo{


    public static void main(String[] args) {


        AnnotationConfigApplicationContext applicationContext = new AnnotationConfigApplicationContext(ImportSelectorDemo.class);
        Person bean = applicationContext.getBean(Person.class);
        System.out.println(bean);
    }
}

class MyImportSelector implements ImportSelector {


    @Override
    public String[] selectImports(AnnotationMetadata importingClassMetadata) {


        return new String[]{

    "com.zhubayi.putintocontainer.entity.Person"};
    }
}
我自定义了一个 MyImportSelector 实现了 ImportSelector 接口,重写selectImports 方法,然后将我们要导入的类的全限定名写在里面即可,实现起来也是非常简单。
3.3 @Import + ImportBeanDefinitionRegistrar
这种方式也需要我们实现 ImportBeanDefinitionRegistrar 接口中的方法,具体代码如下:
@SpringBootApplication
@Import(MyImportBeanDefinitionRegistrar.class)
public class ImportBeanDefinitionRegistrarDemo{


    public static void main(String[] args) {


        AnnotationConfigApplicationContext applicationContext = new AnnotationConfigApplicationContext(ImportBeanDefinitionRegistrarDemo.class);
        Person bean = applicationContext.getBean(Person.class);
        System.out.println(bean);
    }
}

class MyImportBeanDefinitionRegistrar implements ImportBeanDefinitionRegistrar {


    @Override
    public void registerBeanDefinitions(AnnotationMetadata importingClassMetadata, BeanDefinitionRegistry registry) {


        // 构建一个beanDefinition, 关于beanDefinition我后续会介绍,可以简单理解为bean的定义.
        AbstractBeanDefinition beanDefinition = BeanDefinitionBuilder.rootBeanDefinition(Person.class).getBeanDefinition();
        // 将beanDefinition注册到Ioc容器中.
        registry.registerBeanDefinition("person", beanDefinition);
    }
}
上述实现其实和Import的第二种方式差不多,都需要去实现接口,然后进行导入。接触到了一个新的概念,BeanDefinition,可以简单理解为bean的定义(bean的元数据),也是需要放在IOC容器中进行管理的,先有bean的元数据,applicationContext再根据bean的元数据去创建Bean。
3.4 @Import + DeferredImportSelector
这种方式也需要我们进行实现接口,其实它和@Import的第二种方式差不多,DeferredImportSelector 它是 ImportSelector 的子接口,所以实现的方法和第二种无异。只是Spring的处理方式不同,它和Spring Boot中的自动导入配置文件 延迟导入有关,非常重要。使用方式如下:
@Import(MyDeferredImportSelector.class)
public class Demo1 {


    public static void main(String[] args) {


        AnnotationConfigApplicationContext applicationContext = new AnnotationConfigApplicationContext(Demo1.class);
        Person bean = applicationContext.getBean(Person.class);
        System.out.println(bean);
    }
}
class MyDeferredImportSelector implements DeferredImportSelector {


    @Override
    public String[] selectImports(AnnotationMetadata importingClassMetadata) {


        // 也是直接将Person的全限定名放进去
        return new String[]{

    Person.class.getName()};
    }
}
关于@Import注解的使用方式,大概就以上三种,当然它还可以搭配@Configuration注解使用,用于导入一个配置类。
4、使用FactoryBean接口
FactoryBean接口和BeanFactory千万不要弄混了,从名字其实可以大概的区分开,FactoryBean, 后缀为bean,那么它其实就是一个bean, BeanFactory,顾名思义 bean工厂,它是IOC容器的顶级接口,这俩接口都很重要。
public class FactoryBeanDemo {


    @Bean
    public PersonFactoryBean personFactoryBean() {


        return new PersonFactoryBean();
    }

    public static void main(String[] args) {


        AnnotationConfigApplicationContext applicationContext = new AnnotationConfigApplicationContext(FactoryBeanDemo.class);
        Person bean = applicationContext.getBean(Person.class);
        System.out.println(bean);
    }
}

class PersonFactoryBean implements FactoryBean<Person> {


    /**
     *  直接new出来Person进行返回.
     */
    @Override
    public Person getObject() throws Exception {


        return new Person();
    }
    /**
     *  指定返回bean的类型.
     */
    @Override
    public Class<?> getObjectType() {


        return Person.class;
    }
}
5、使用 BeanDefinitionRegistryPostProcessor
其实这种方式也是利用到了 BeanDefinitionRegistry,在Spring容器启动的时候会执行 BeanDefinitionRegistryPostProcessor 的 postProcessBeanDefinitionRegistry 方法,大概意思就是等beanDefinition加载完毕之后,对beanDefinition进行后置处理,可以在此进行调整IOC容器中的beanDefinition,从而干扰到后面进行初始化bean。
public class BeanDefinitionRegistryPostProcessorDemo {


    public static void main(String[] args) {


        AnnotationConfigApplicationContext applicationContext = new AnnotationConfigApplicationContext();
        MyBeanDefinitionRegistryPostProcessor beanDefinitionRegistryPostProcessor = new MyBeanDefinitionRegistryPostProcessor();
        applicationContext.addBeanFactoryPostProcessor(beanDefinitionRegistryPostProcessor);
        applicationContext.refresh();
        Person bean = applicationContext.getBean(Person.class);
        System.out.println(bean);
    }
}
class MyBeanDefinitionRegistryPostProcessor implements BeanDefinitionRegistryPostProcessor {


    @Override
    public void postProcessBeanDefinitionRegistry(BeanDefinitionRegistry registry) throws BeansException {


        AbstractBeanDefinition beanDefinition = BeanDefinitionBuilder.rootBeanDefinition(Person.class).getBeanDefinition();
        registry.registerBeanDefinition("person", beanDefinition);
    }

    @Override
    public void postProcessBeanFactory(ConfigurableListableBeanFactory beanFactory) throws BeansException {


    }
}
上述代码中,我们手动向beanDefinitionRegistry中注册了person的BeanDefinition。