小白做毕设---后台管理系统
任务一的链接:基于SpringBoot+MySQL+Vue+ElementUI+Mybatis前后端分离面向小白管理系统搭建(一)—环境搭建
任务二 用户管理页面
前一个任务中,我们完成了项目开发环境和运行环境的搭建。本次任务开始,我们将正式进入后台管理系统搭建。
说明:如果对VUE的基本框架不太熟悉,我们将在任务六-前后端数据跨域连接之一-分页查询中进行介绍。
一般后台管理系统的核心就是用户管理、角色管理(含权限分配)、菜单管理,以及一些业务管理。业务管理通常以及根据不同的角色进行了权限分配。本次任务完成用户管理页面。
文末有完整代码。
为了让大家有一个连续性,我们暂时仍然沿用前面已经运行成功的home组件,后期等前后端跨域链接完成,菜单页面、角色页面完成后进行整个布局与菜单栏的更新。
修改Home.vue
1.引用Element 的Container 布局容器。
Container 布局容器是用于布局的容器组件,方便快速搭建页面的基本结构。
常见布局第4个:

对应的代码为:
<el-container>
  <el-aside width="200px">Aside</el-aside>
  <el-container>
    <el-header>Header</el-header>
    <el-main>Main</el-main>
  </el-container>
</el-container>
2.复制代码并替换原HomeView.vue的 <el-row>。
HomeView.vue完整代码如下:
<template>
  <div class="home">
   <el-container>
	  <el-aside width="200px">Aside</el-aside>
	  <el-container>
	    <el-header>Header</el-header>
	    <el-main>Main</el-main>
	  </el-container>
	</el-container>
  </div>
</template>

<script>
// @ is an alias to /src
import HelloWorld from '@/components/HelloWorld.vue'

export default {
  name: 'HomeView'
}
</script>
3.运行项目
结果如图:

4.修改App.vue
删除App.vue中的如下初始导航,并保存。
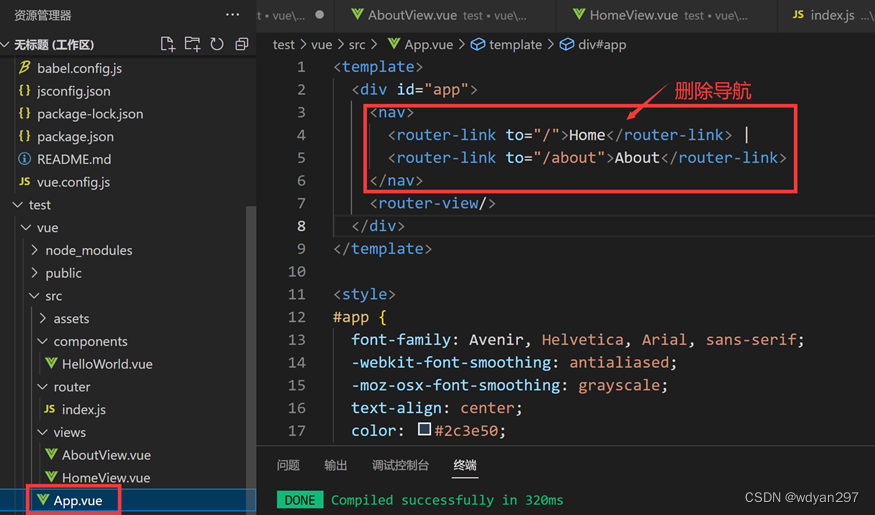
    <nav>
      <router-link to="/">Home</router-link> |
      <router-link to="/about">About</router-link>
    </nav>
运行结果为:

注意:第一次运行成功后,后面只要保存,项目均会自动运行。只需要在浏览器查看效果即可。
5.修改Aside部分
引用Element 的NavMenu导航菜单中的侧栏。根据个人喜好选择默认颜色或者自定义颜色,复制代码,替换原来<el -aside>。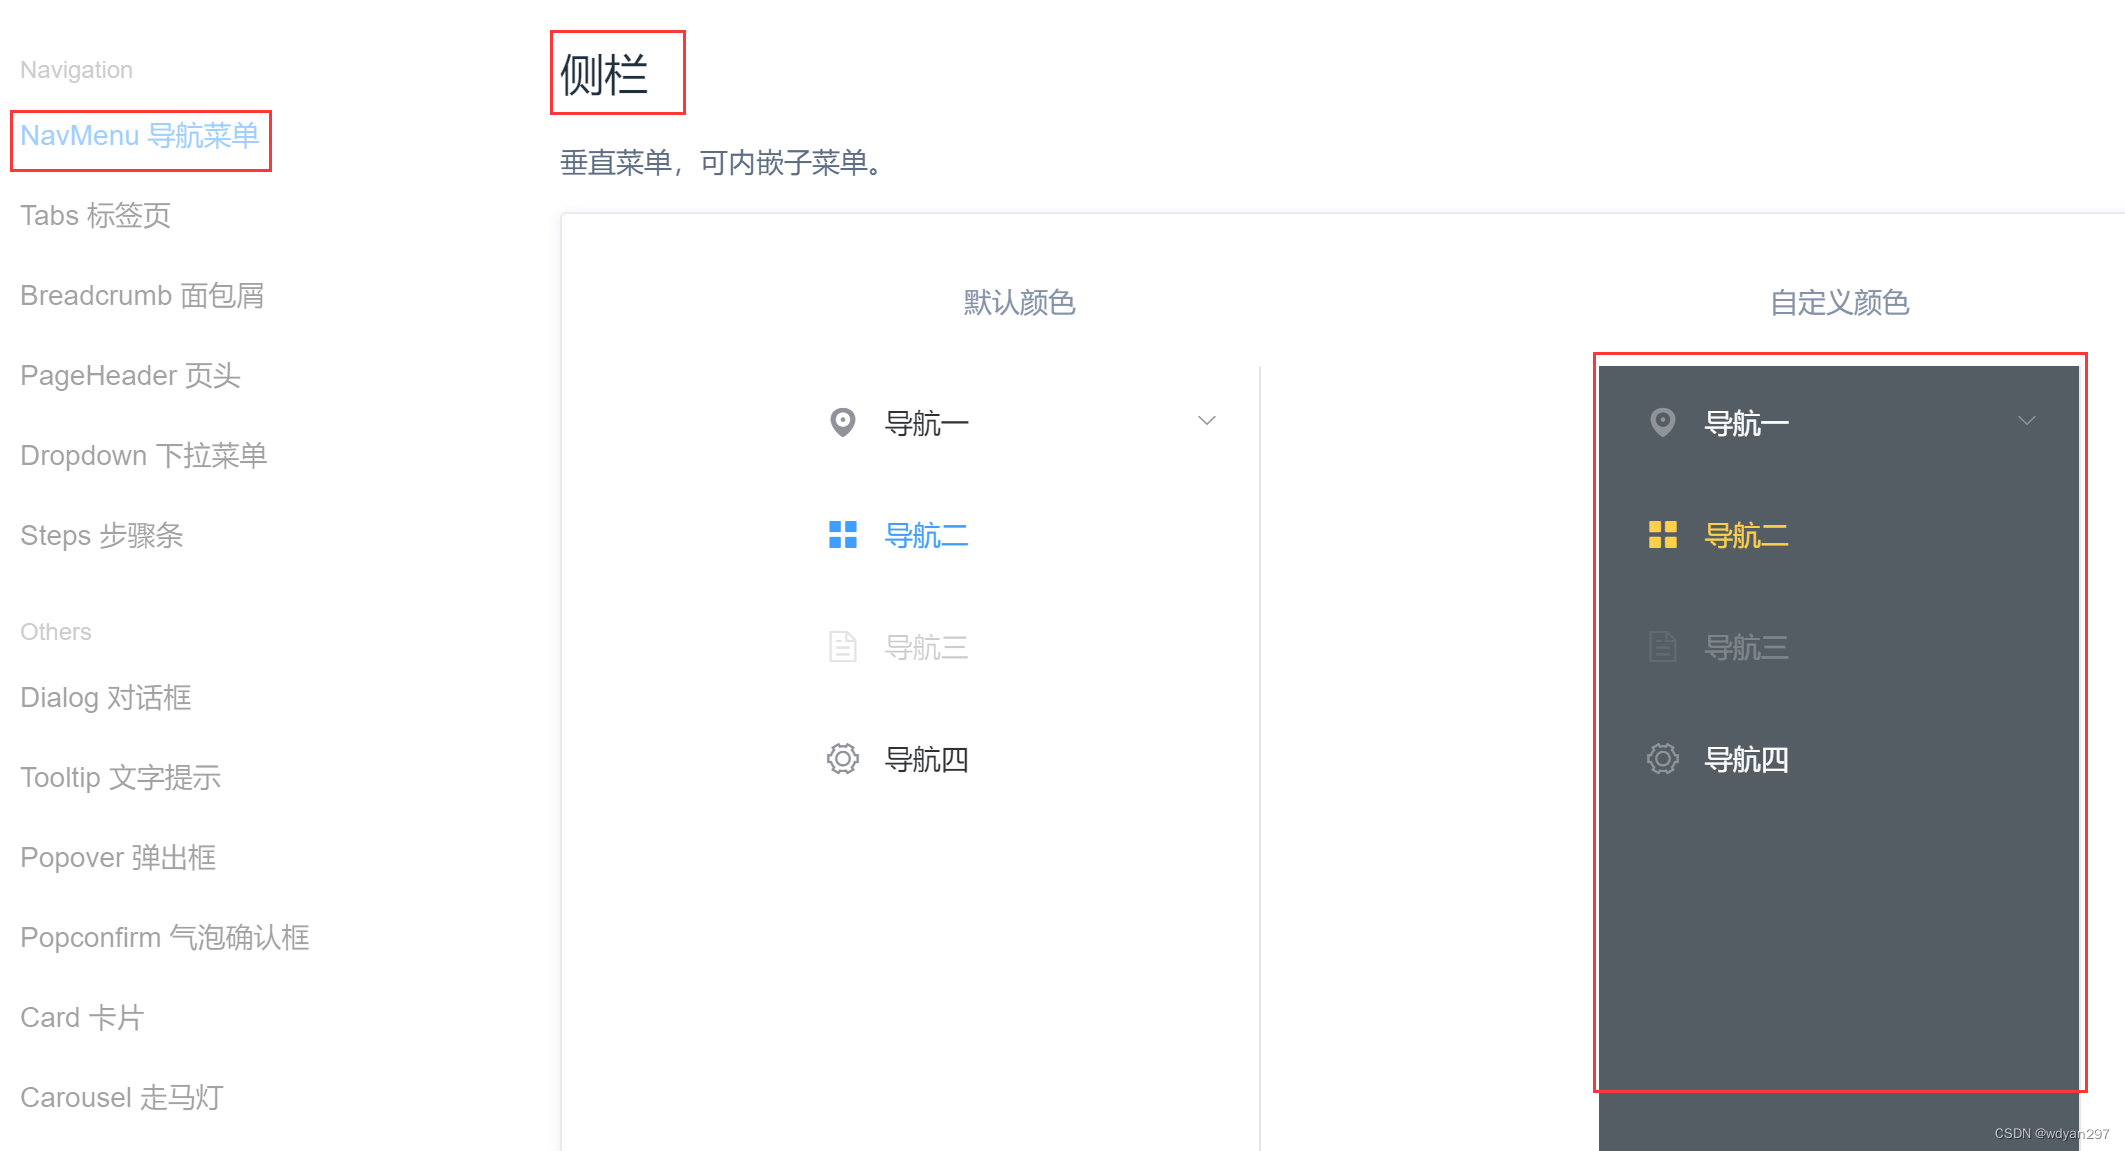
<el-aside width="200px" style="background-color: rgb(238, 241, 246)">
      <el-menu :default-openeds="['1', '3']"
        background-color=rgb(48,65,86)
        text-color=#ccc
        active-text-color=red
        router="">
        <el-submenu index="1">
        <template slot="title"><i class="el-icon-message"></i>导航一</template>
        <el-menu-item-group>
          <template slot="title">分组一</template>
          <el-menu-item index="1-1">选项1</el-menu-item>
          <el-menu-item index="1-2">选项2</el-menu-item>
        </el-menu-item-group>
        <el-menu-item-group title="分组2">
          <el-menu-item index="1-3">选项3</el-menu-item>
        </el-menu-item-group>
        <el-submenu index="1-4">
          <template slot="title">选项4</template>
          <el-menu-item index="1-4-1">选项4-1</el-menu-item>
        </el-submenu>
        </el-submenu>
        <el-submenu index="2">
        <template slot="title"><i class="el-icon-menu"></i>导航二</template>
        <el-menu-item-group>
          <template slot="title">分组一</template>
          <el-menu-item index="2-1">选项1</el-menu-item>
          <el-menu-item index="2-2">选项2</el-menu-item>
        </el-menu-item-group>
        <el-menu-item-group title="分组2">
          <el-menu-item index="2-3">选项3</el-menu-item>
        </el-menu-item-group>
        <el-submenu index="2-4">
          <template slot="title">选项4</template>
          <el-menu-item index="2-4-1">选项4-1</el-menu-item>
        </el-submenu>
        </el-submenu>
        <el-submenu index="3">
        <template slot="title"><i class="el-icon-setting"></i>导航三</template>
        <el-menu-item-group>
          <template slot="title">分组一</template>
          <el-menu-item index="3-1">选项1</el-menu-item>
          <el-menu-item index="3-2">选项2</el-menu-item>
        </el-menu-item-group>
        <el-menu-item-group title="分组2">
          <el-menu-item index="3-3">选项3</el-menu-item>
        </el-menu-item-group>
        <el-submenu index="3-4">
          <template slot="title">选项4</template>
          <el-menu-item index="3-4-1">选项4-1</el-menu-item>
        </el-submenu>
        </el-submenu>
      </el-menu>
    </el-aside>
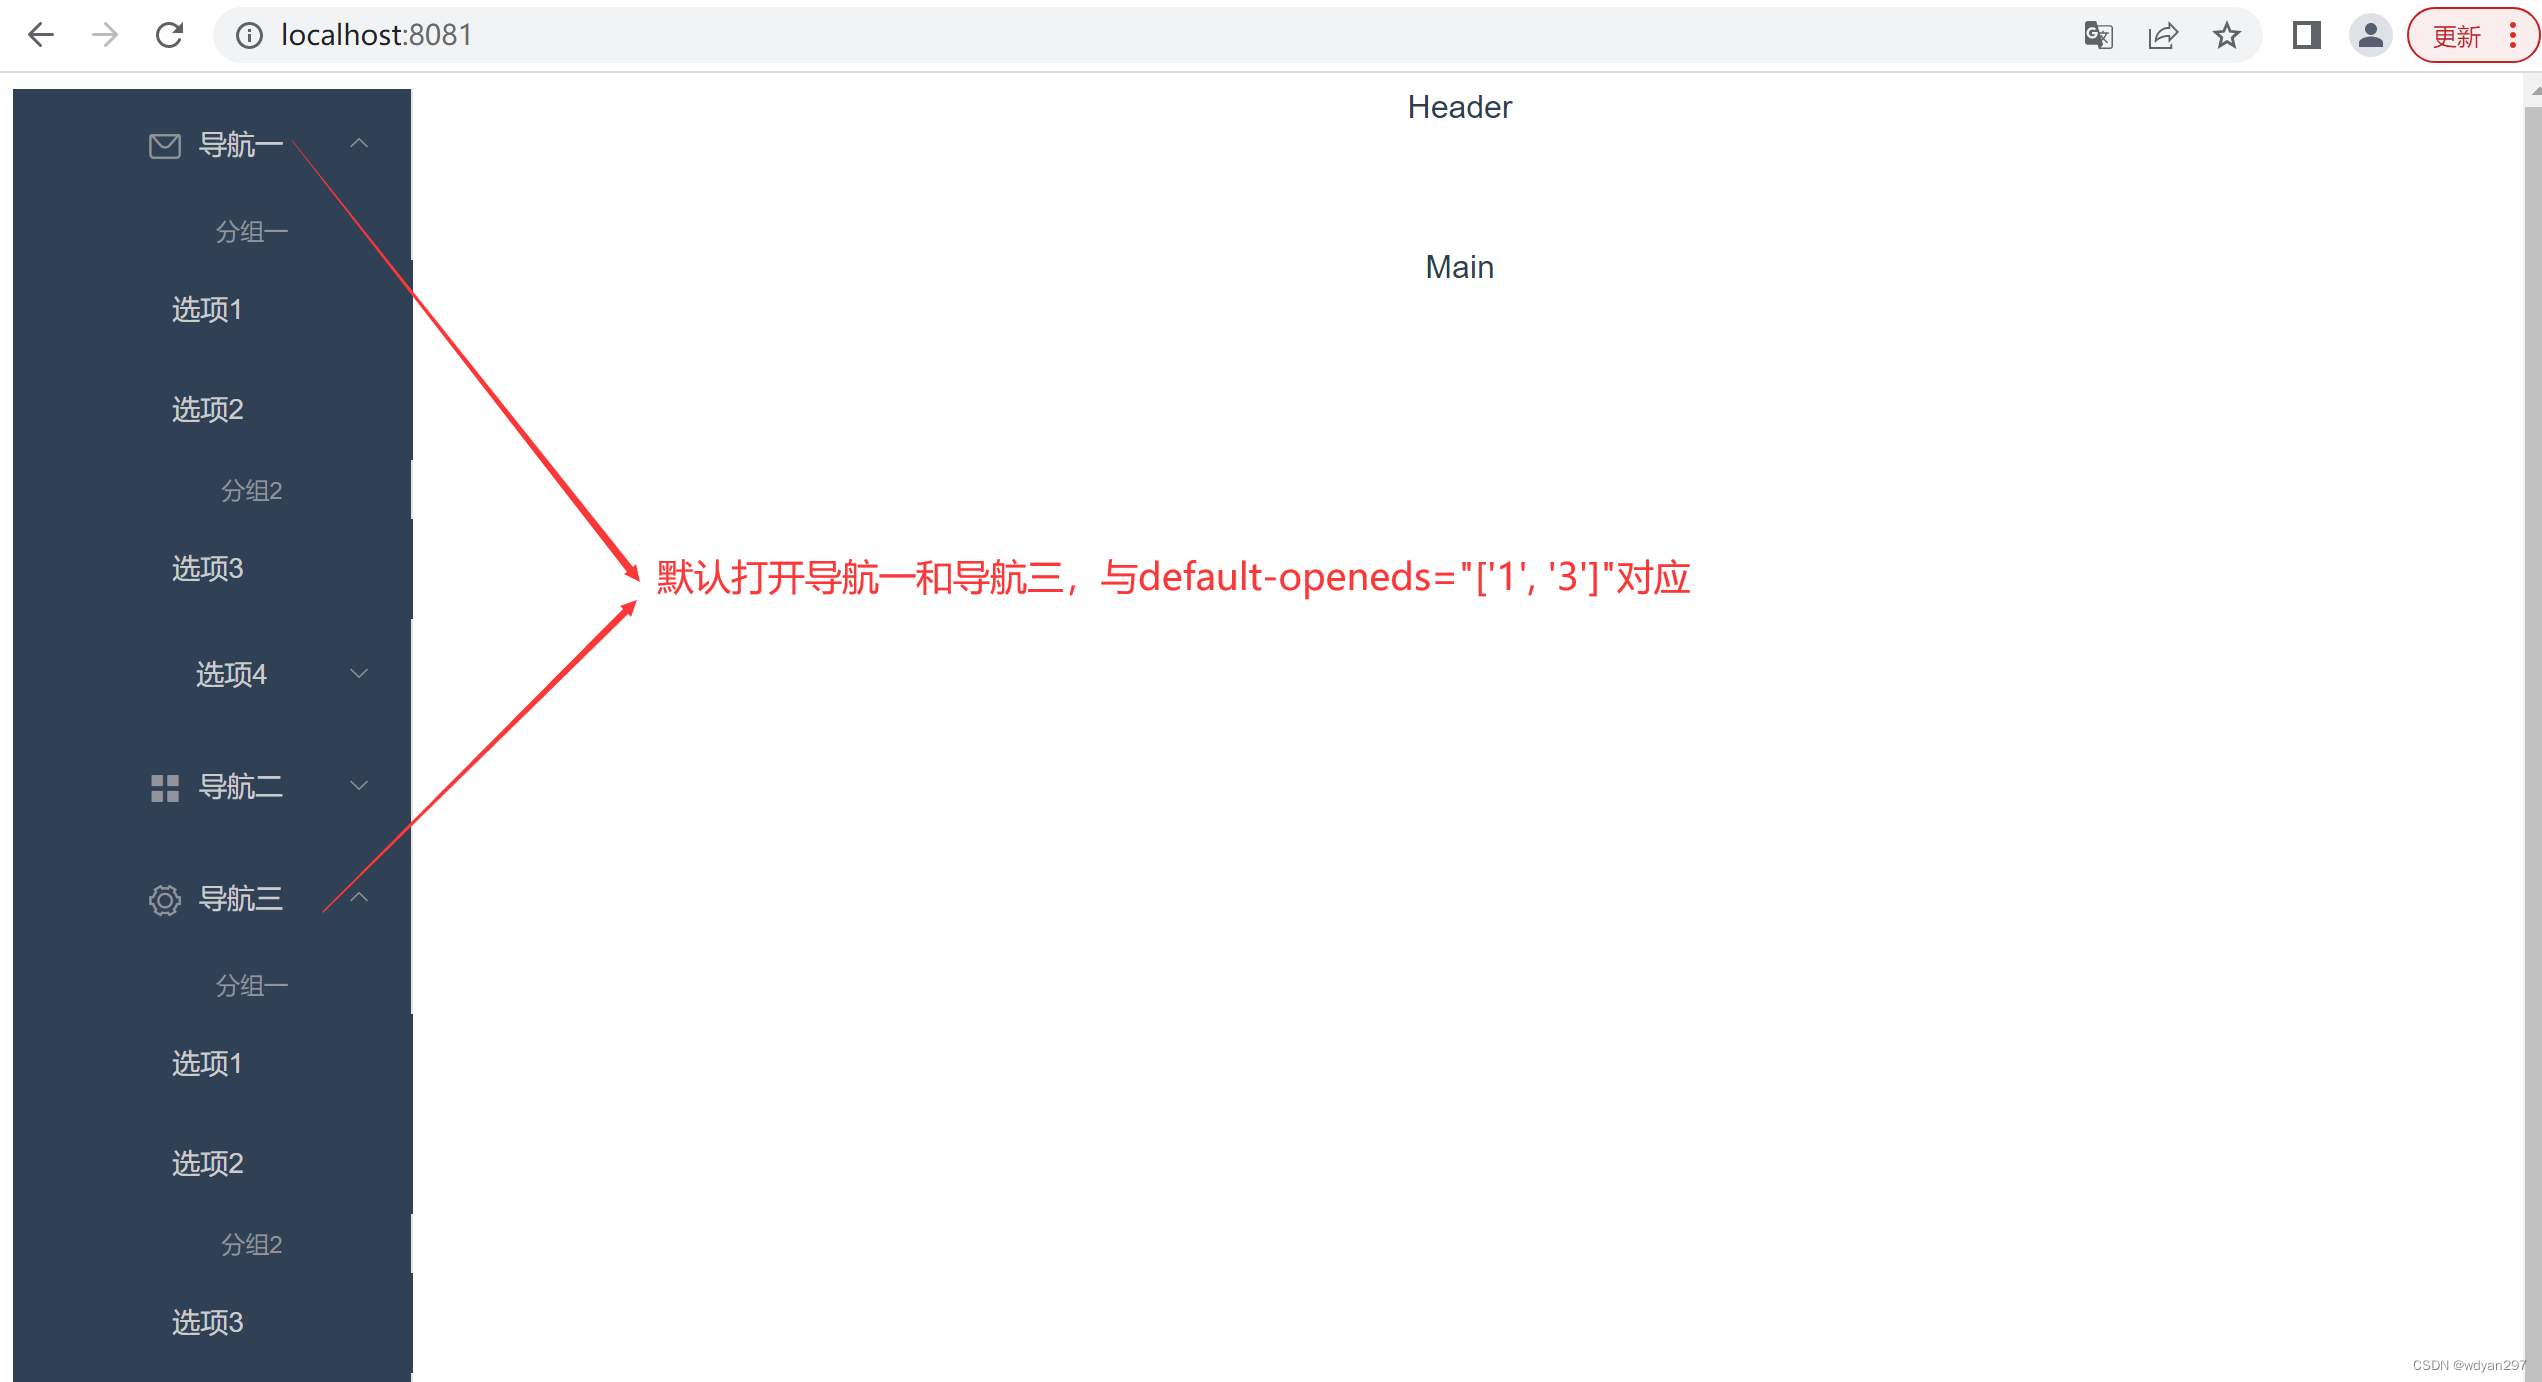
CTRL+S保存,浏览页面如下。
default-openeds="['1', '3']" 可更改默认打开的导航。
6.修改Header部分
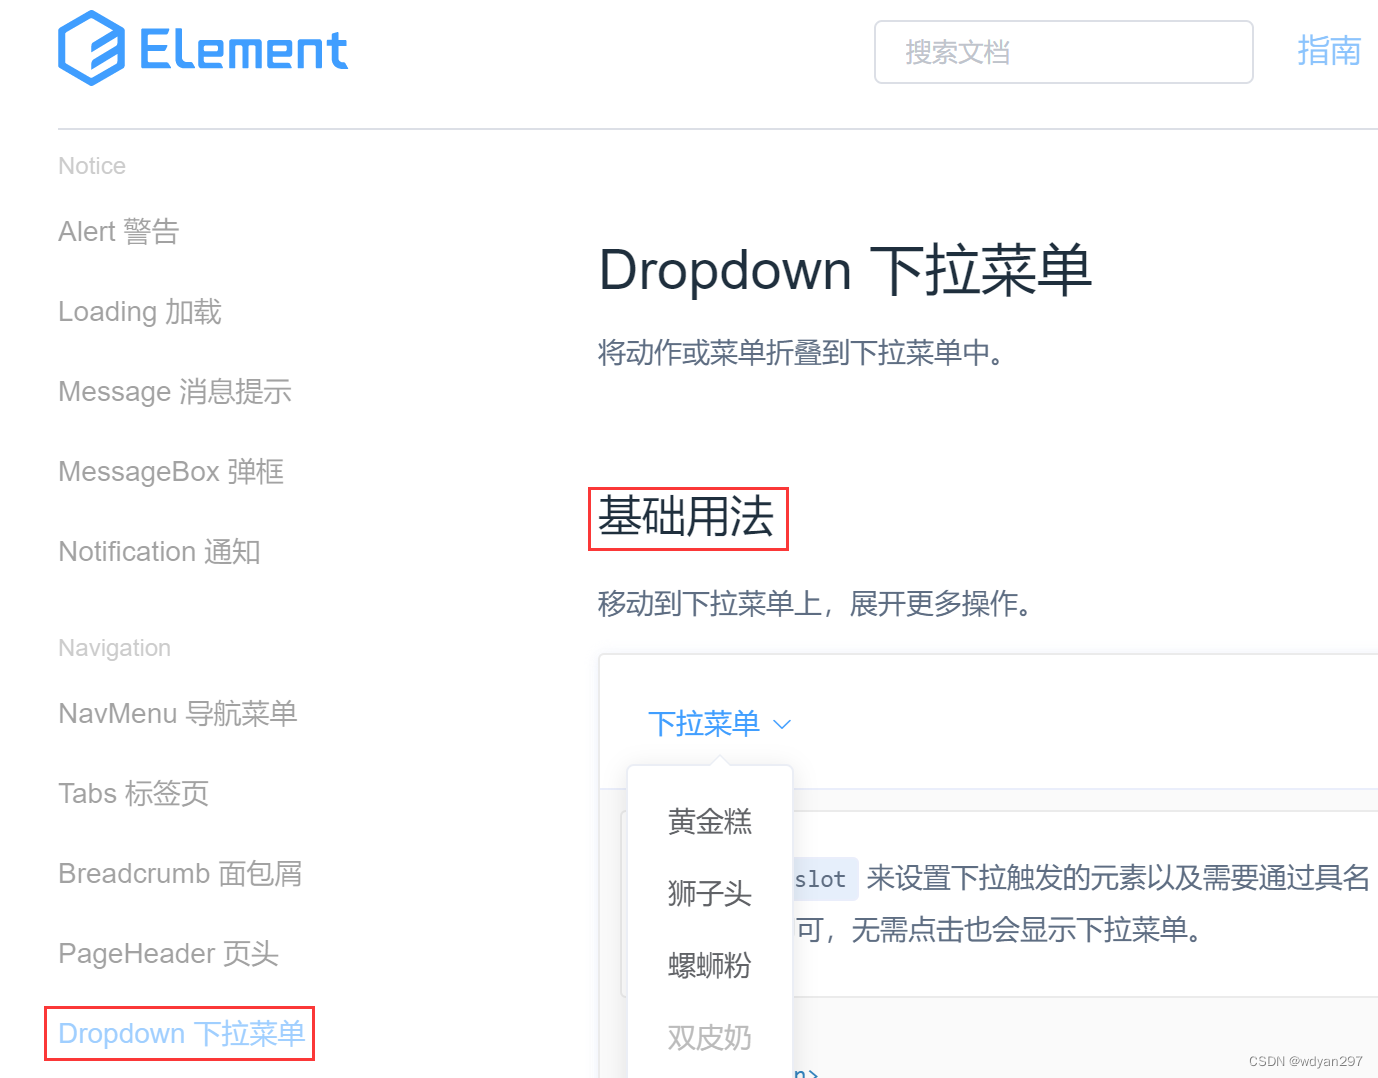
引用Element 的Dropdown下拉菜单中的基础用法。根据个人喜好选择默认颜色或者自定义颜色,复制代码并简单修改,替换原来<el -Header>。
<el-header style="text-align: right; font-size: 12px; border-bottom: 1px solid red; line-height:60px">
        <el-dropdown>
        <i class="el-icon-setting" style="margin-right: 15px"></i>
        <el-dropdown-menu slot="dropdown">
          <el-dropdown-item>查看</el-dropdown-item>
          <el-dropdown-item>新增</el-dropdown-item>
          <el-dropdown-item>删除</el-dropdown-item>
        </el-dropdown-menu>
        </el-dropdown>
        <span>王小虎</span>
      </el-header>
CTRL+S保存,浏览页面如下。
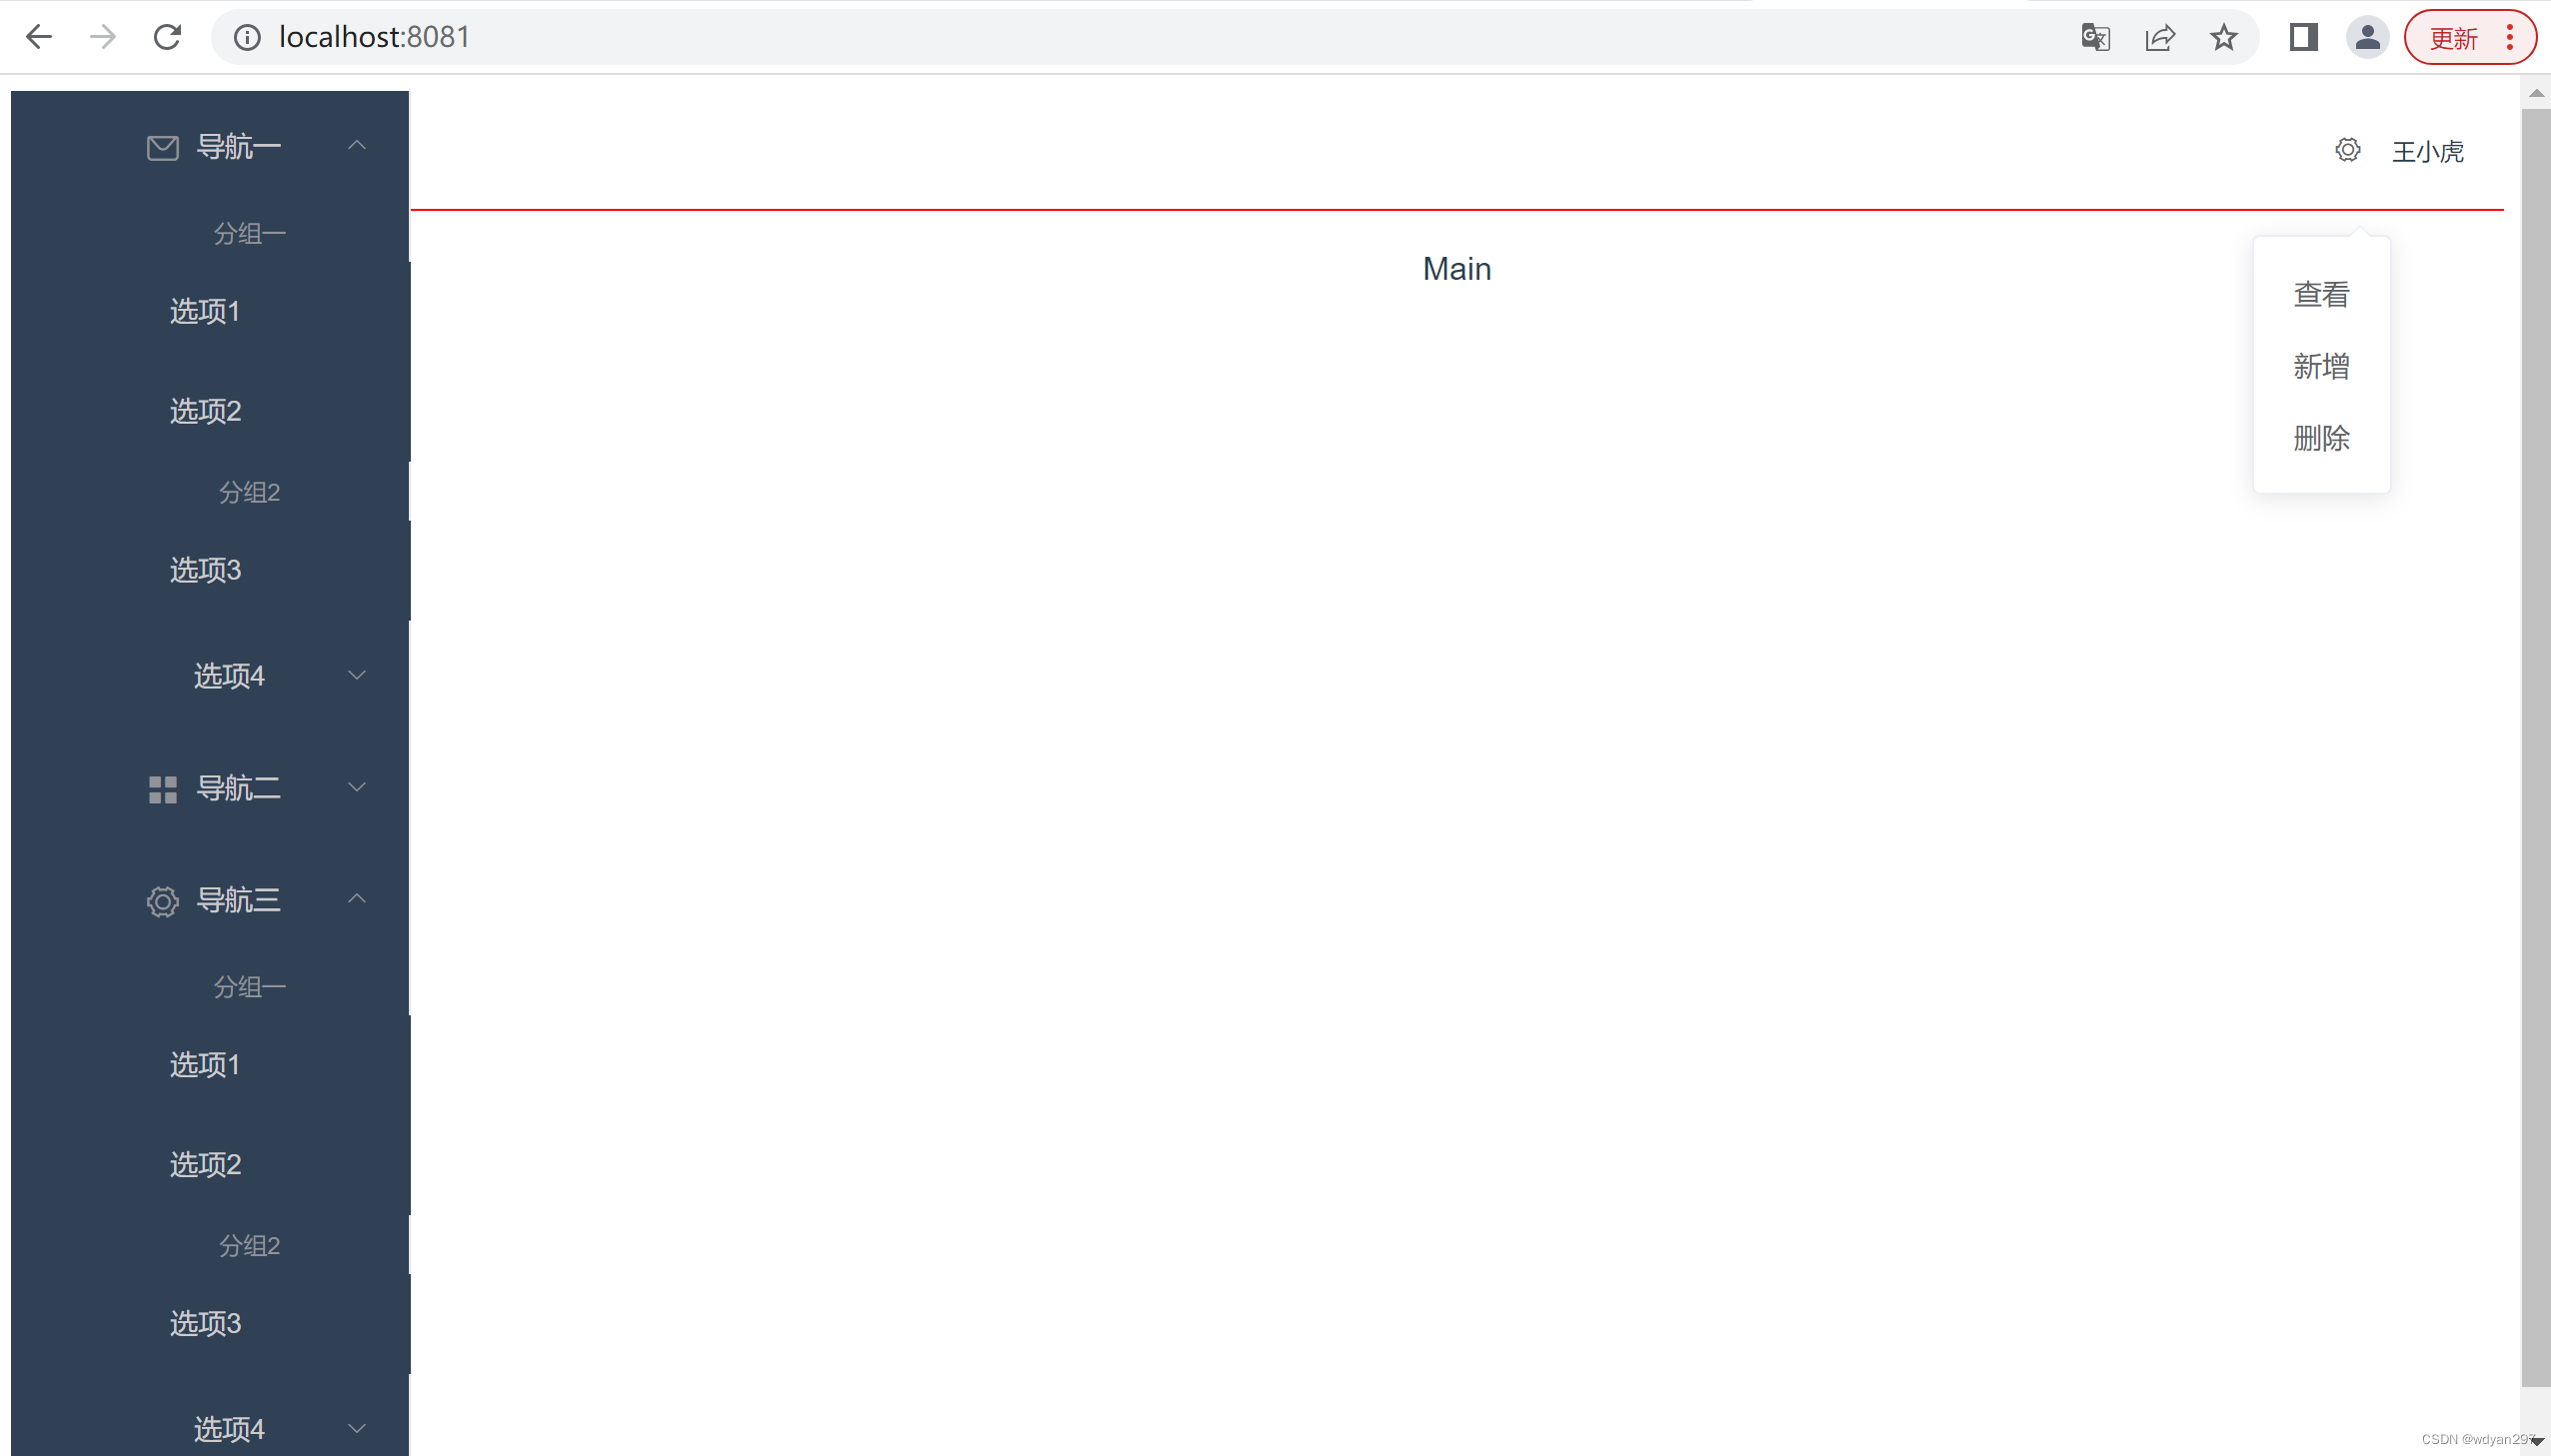
**注意:**现在页面还不美观,不要急哦,我们把框架搭建好了之后,统一美化:-)。
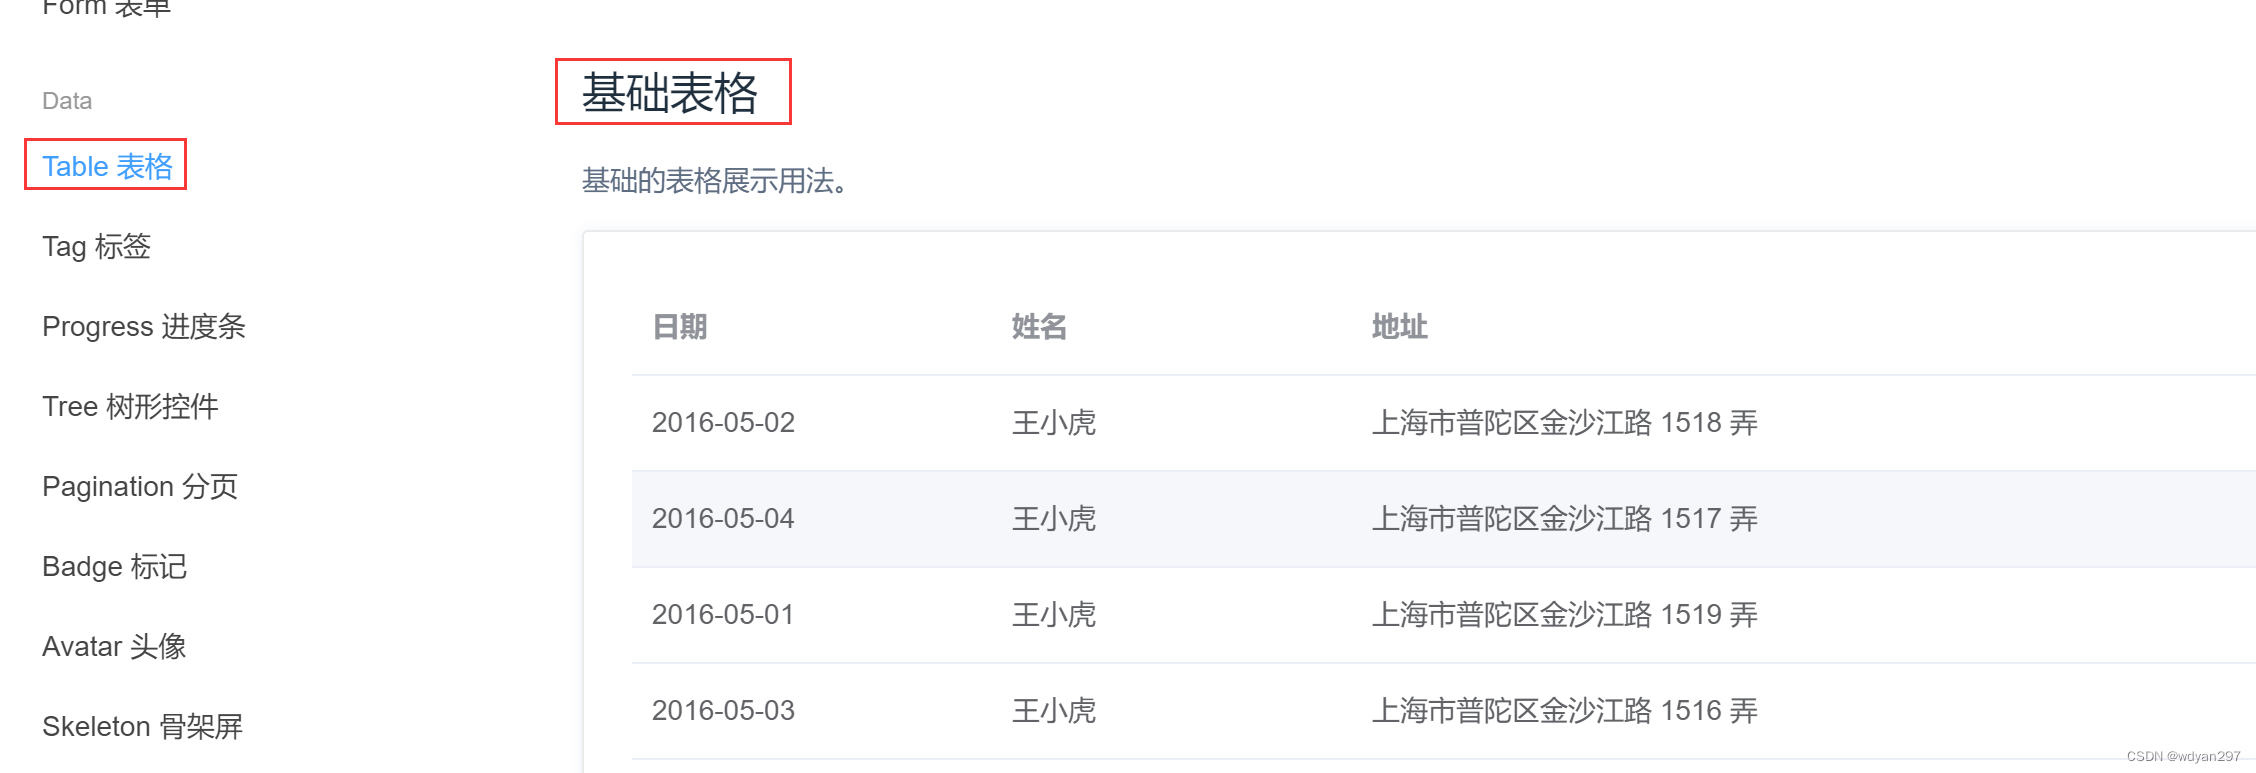
7.修改Main部分
引用Element 的Table表格的基础表格。根据个人喜好选择默认颜色或者自定义颜色,复制代码并简单修改,在原来<el -Main>标签中添加代码。
<el-main>
        <el-table
          :data="tableData"
          style="width: 100%">
          <el-table-column
            prop="date"
            label="日期"
            width="180">
          </el-table-column>
          <el-table-column
            prop="name"
            label="姓名"
            width="180">
          </el-table-column>
          <el-table-column
            prop="address"
            label="地址">
          </el-table-column>
        </el-table>
      </el-main>
**注意:**这时候就需要有数据了,所以要添加data了。在<script>中添加data。
<script>
  export default {
    data() {
      return {
        tableData: [{
          date: '2016-05-02',
          name: '王小虎',
          address: '上海市普陀区金沙江路 1518 弄'
        }, {
          date: '2016-05-04',
          name: '王小虎',
          address: '上海市普陀区金沙江路 1517 弄'
        }, {
          date: '2016-05-01',
          name: '王小虎',
          address: '上海市普陀区金沙江路 1519 弄'
        }, {
          date: '2016-05-03',
          name: '王小虎',
          address: '上海市普陀区金沙江路 1516 弄'
        }]
      }
    }
  }
</script>
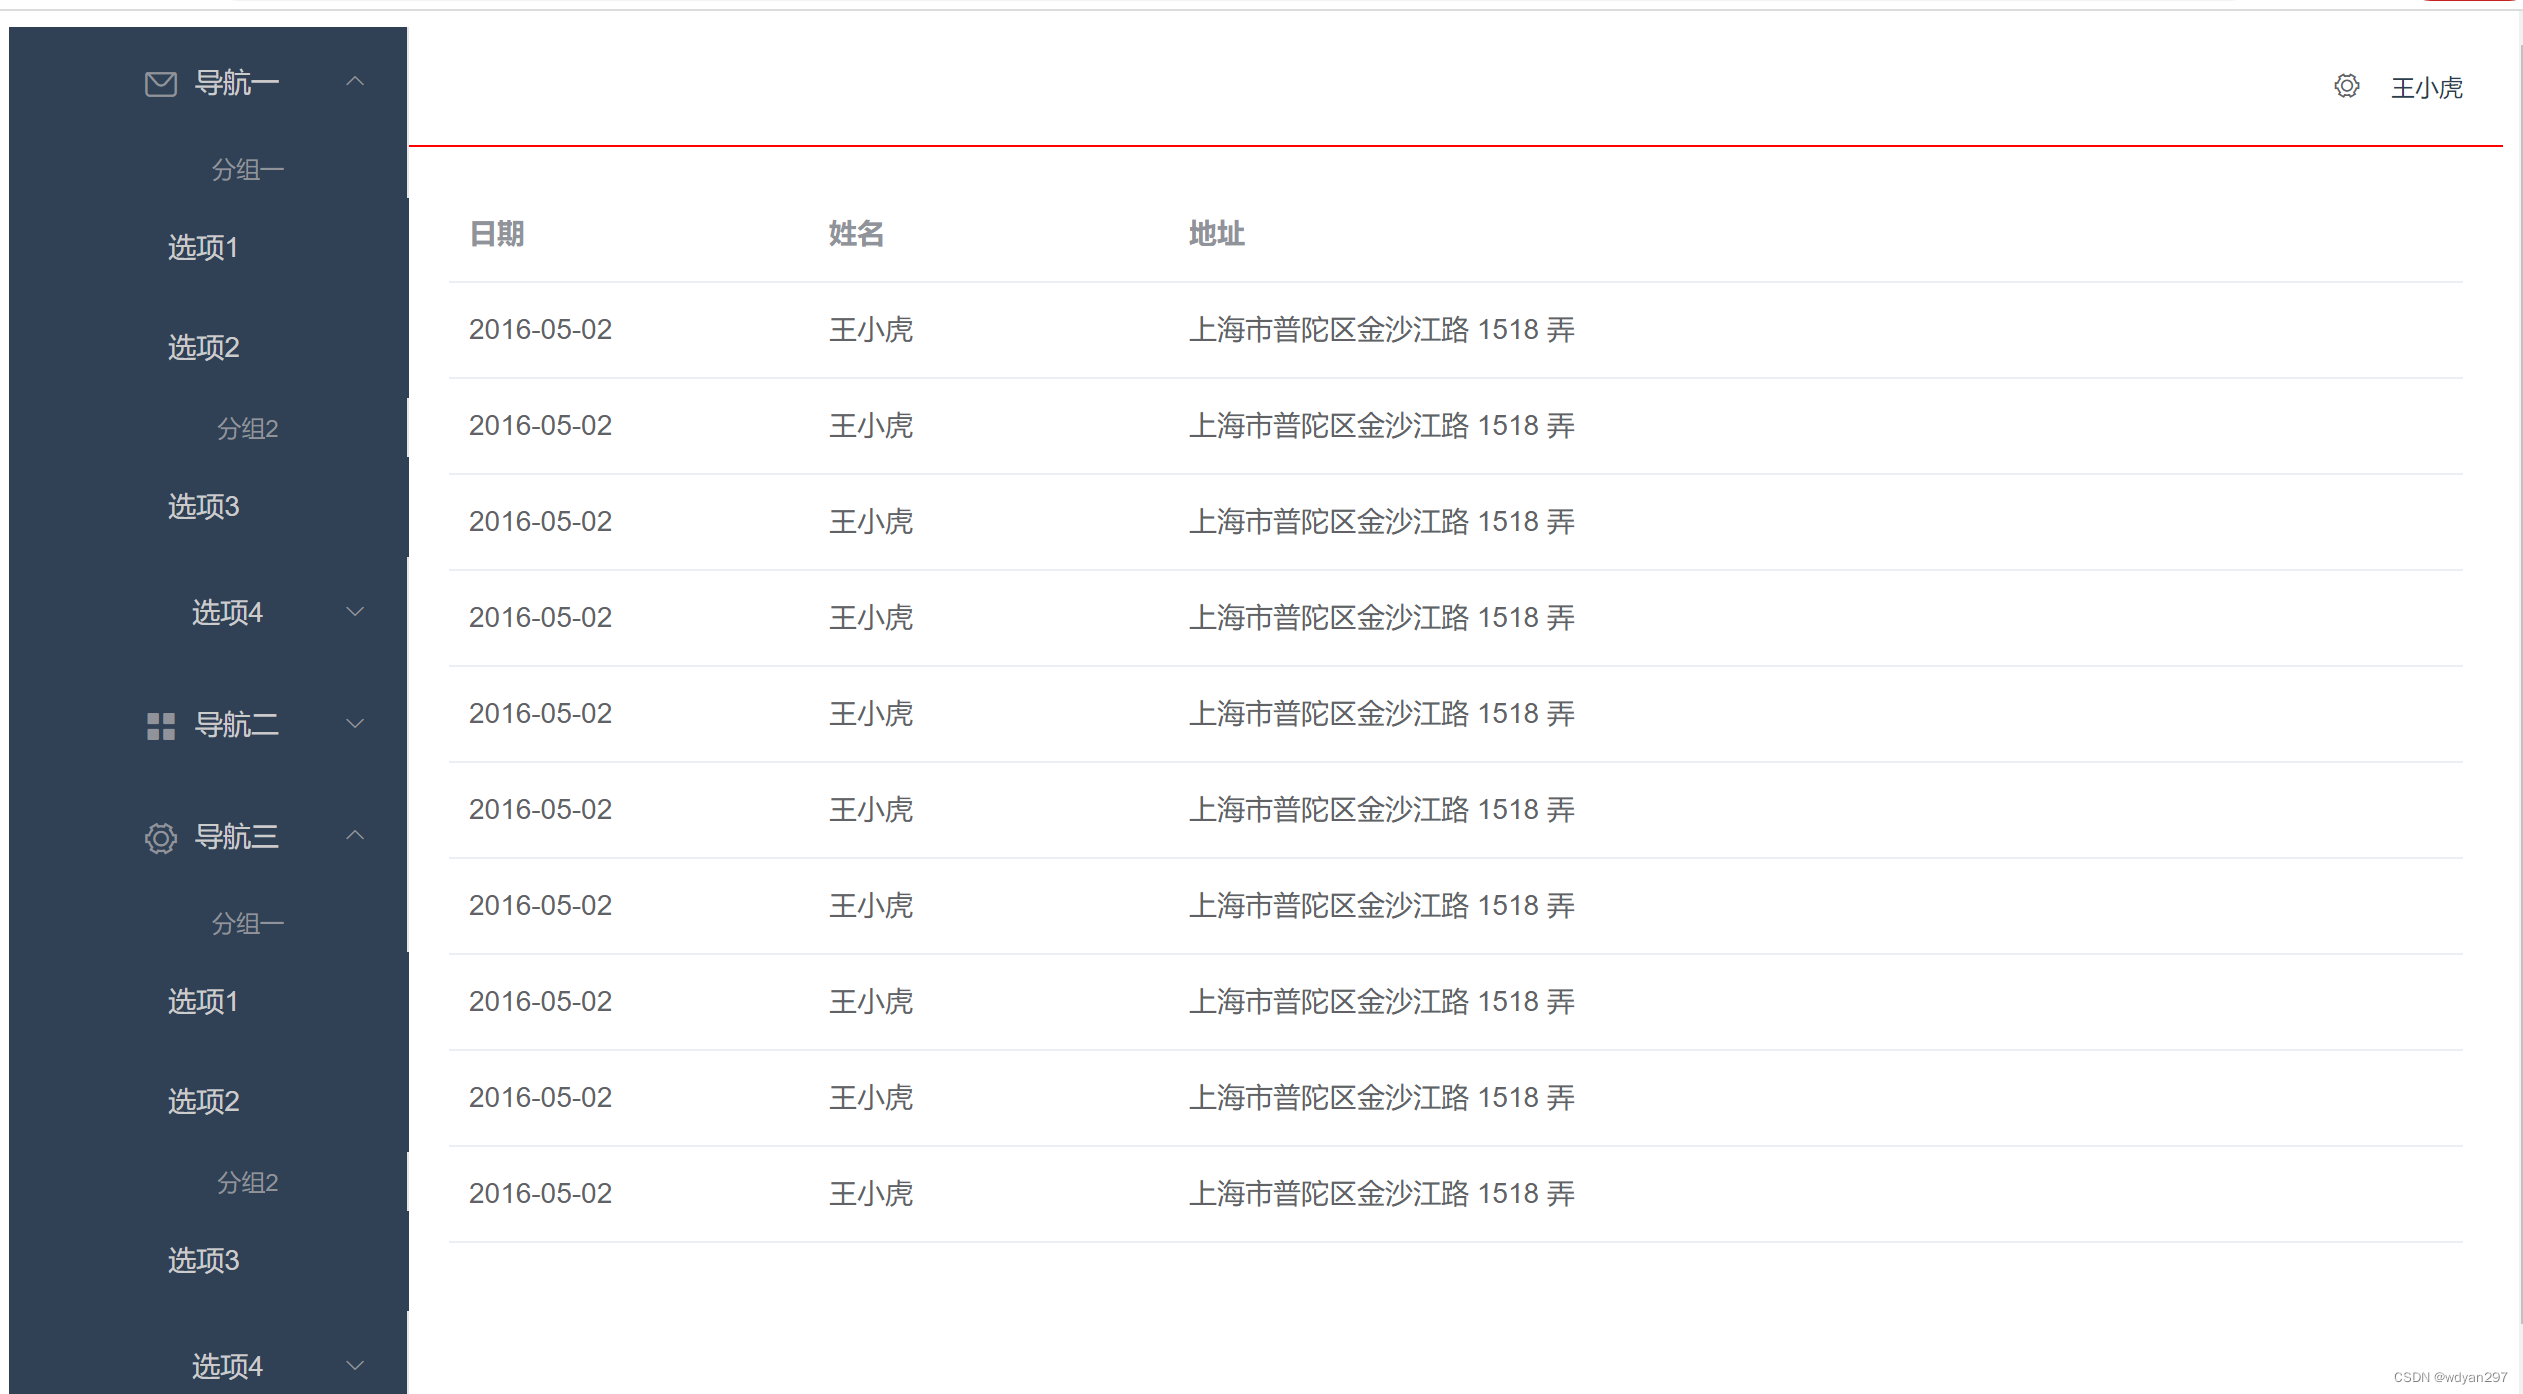
还可以让数据程序生成条数。<script>代码如下:
<script>
// @ is an alias to /src
import HelloWorld from '@/components/HelloWorld.vue'
export default {
 name: 'HomeView',
 data(){
   const item = {
    date: '2016-05-02',
    name: '王小虎',
    address: '上海市普陀区金沙江路 1518 弄'
   };
   return {
    tableData: Array(10).fill(item)
   }
 }
}
</script>
CTRL+S保存,浏览页面如下。
8.问题归纳与解析
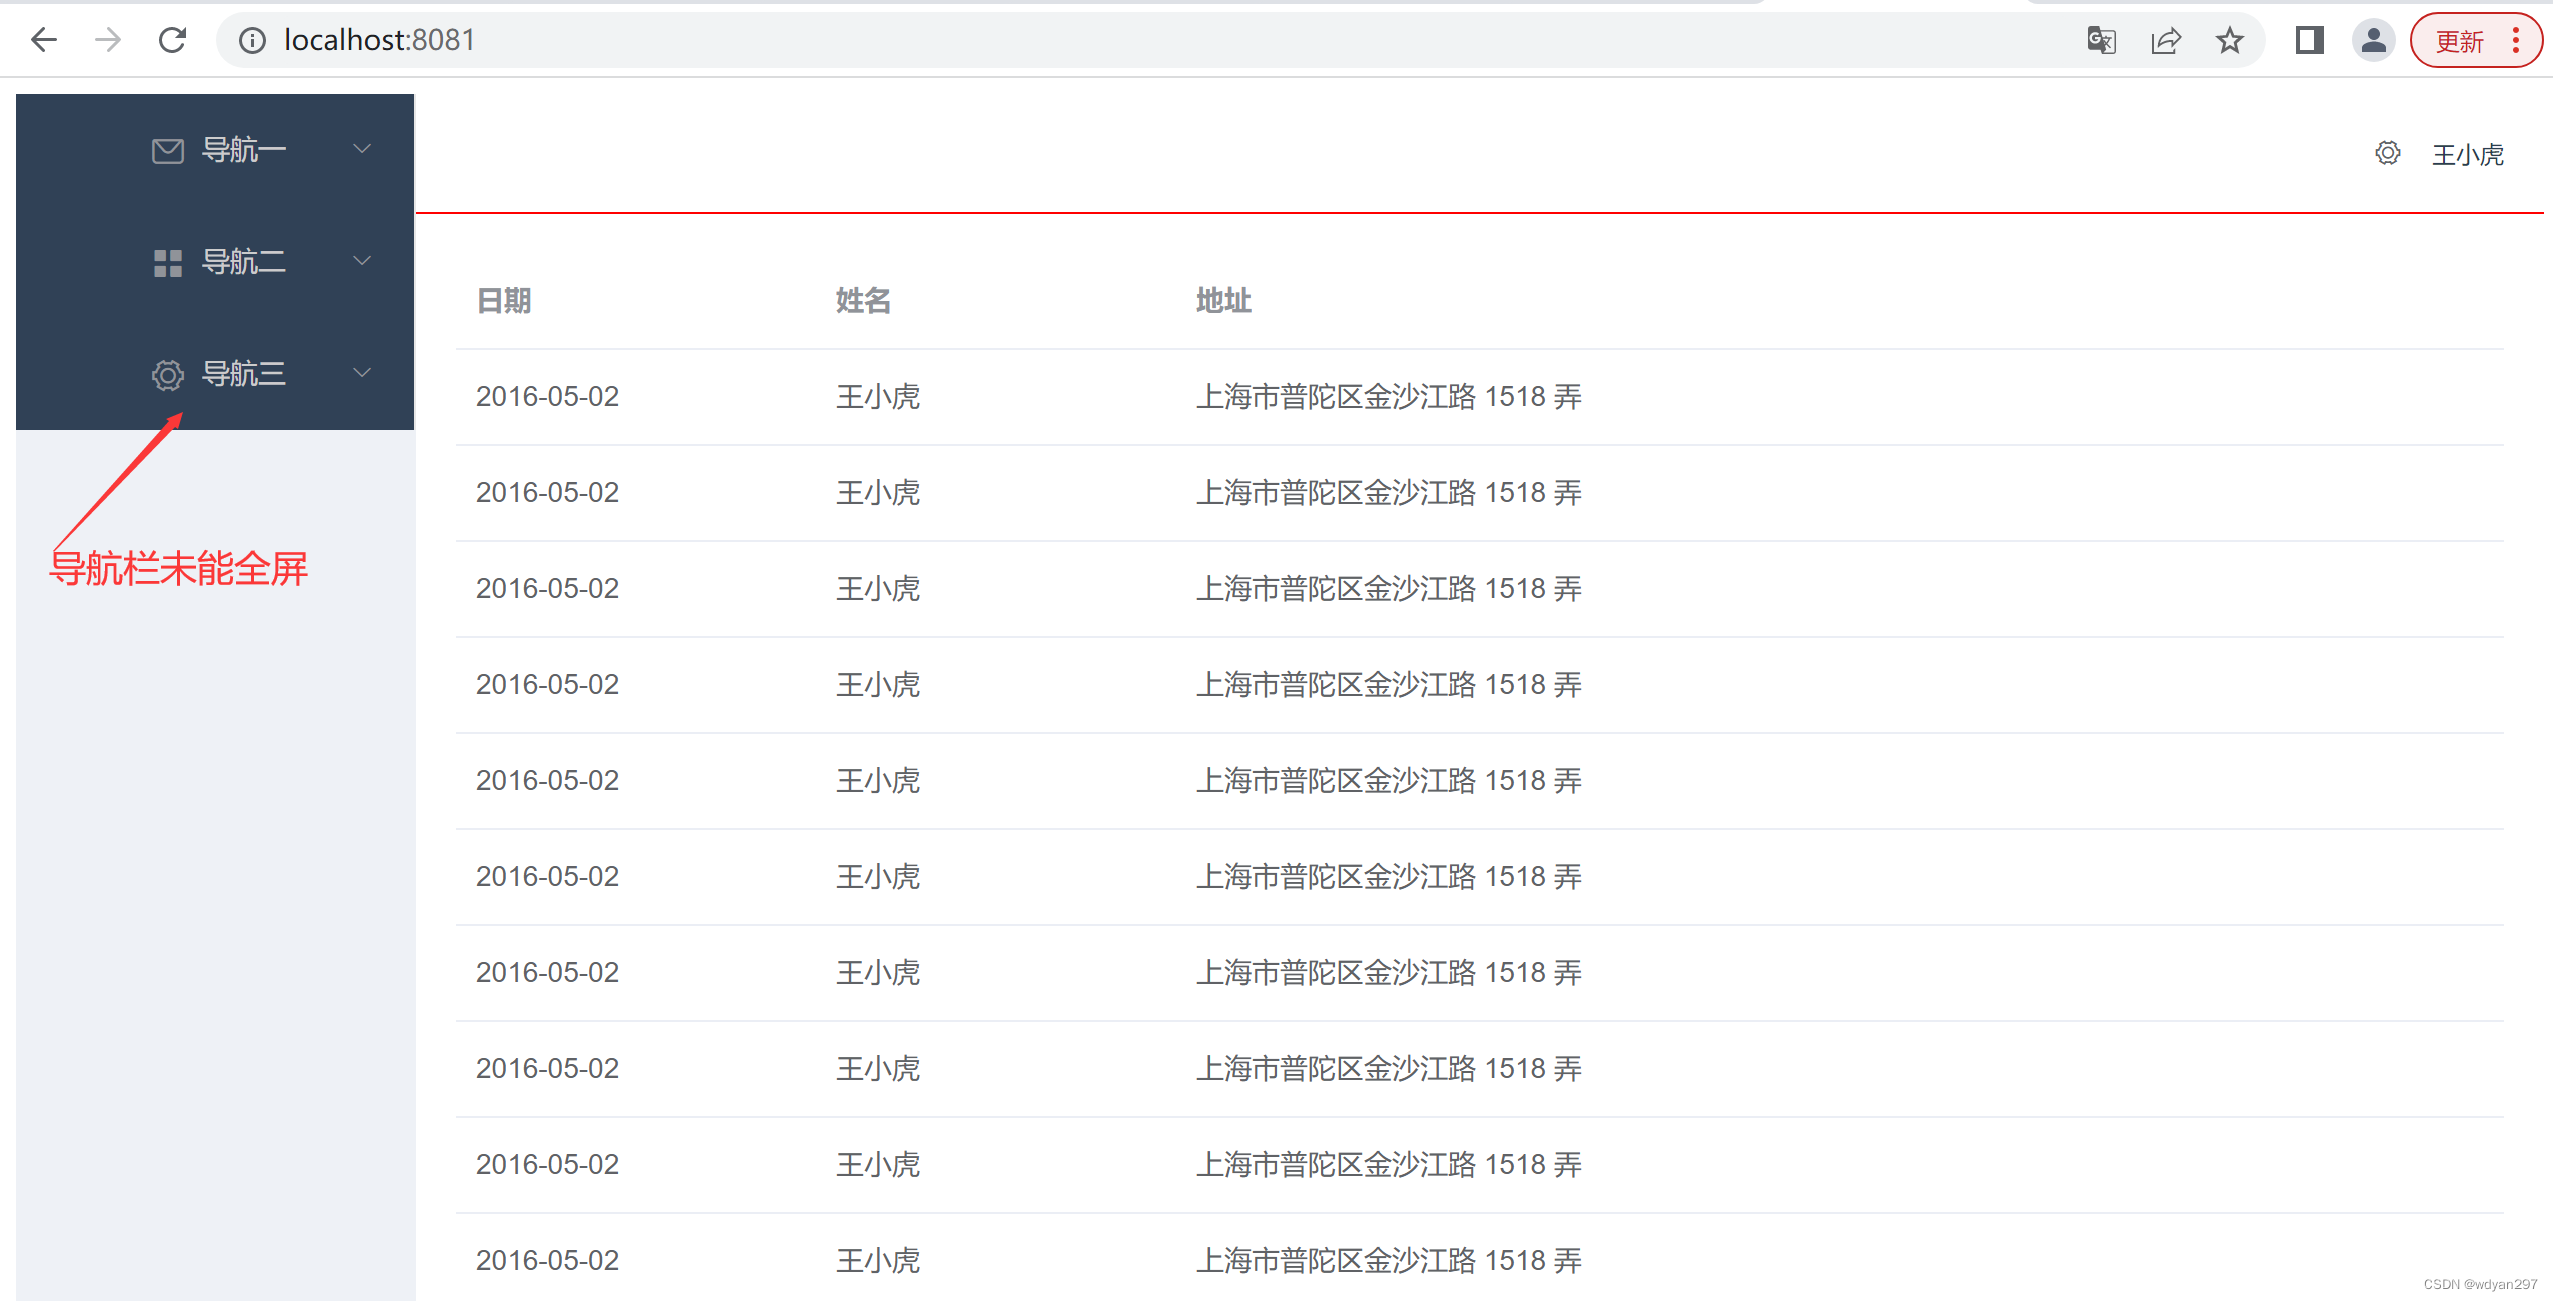
目前可能存在几个问题:
(1)侧边栏如果default-openeds=“[]” 设置不展开,则页面会成为这样的。
(2)全部展开时,边线不好看。
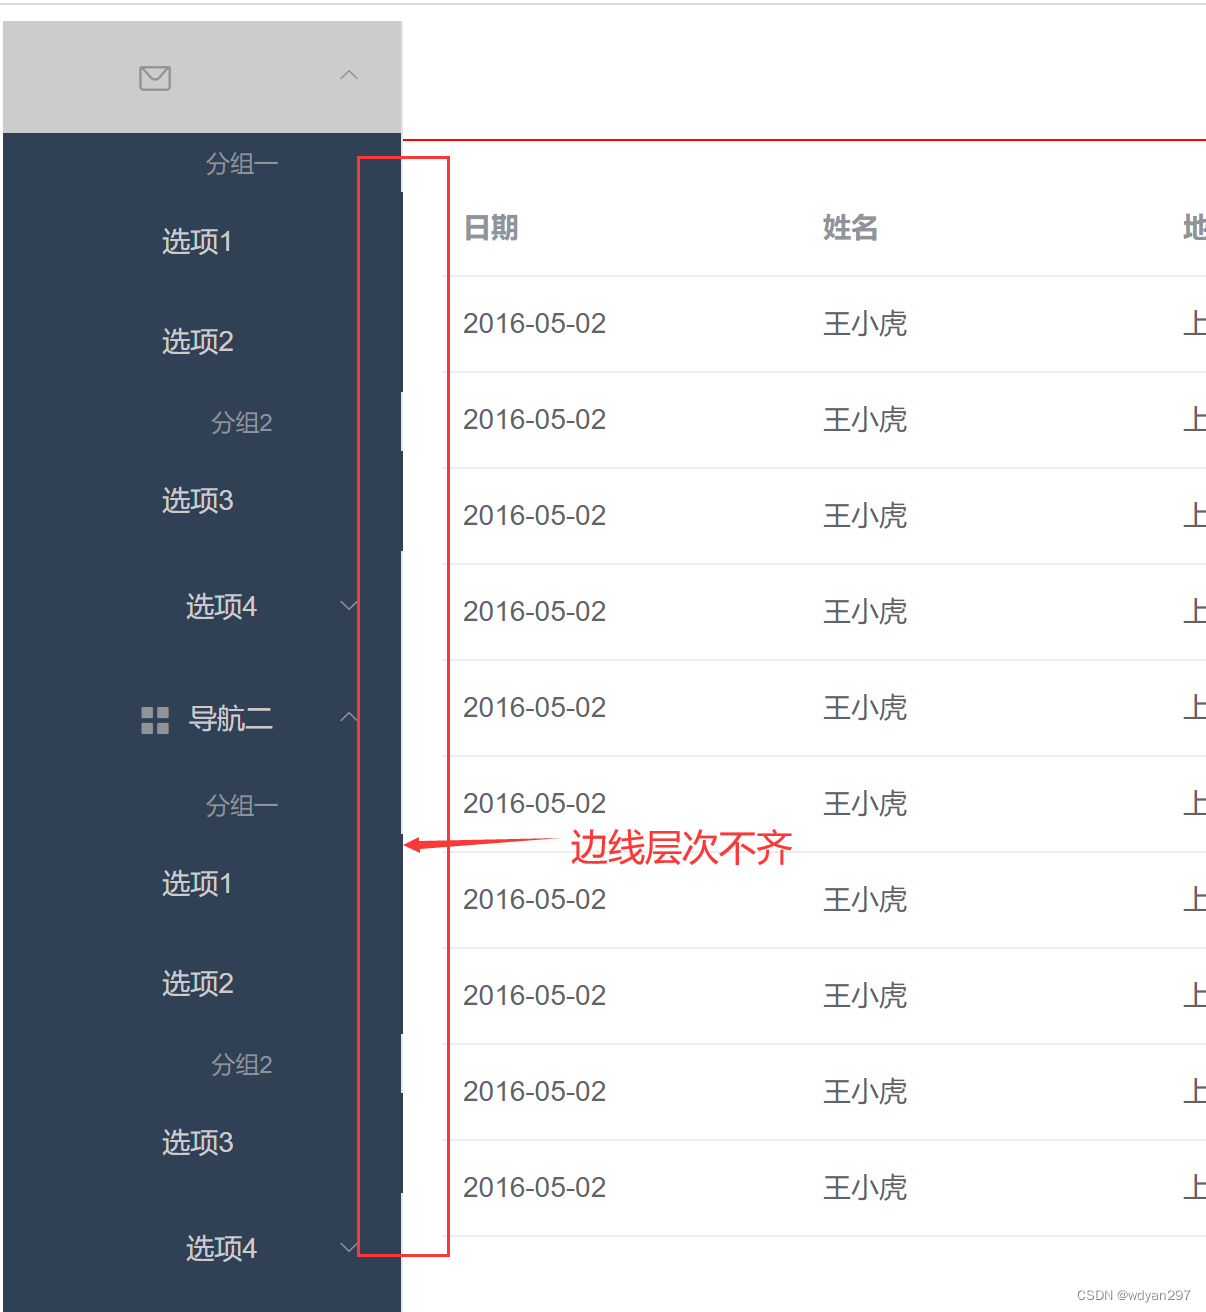
(3)个人中心也不符合实际个人登录后的状态。
(4)表格数据没有分页功能。
9.优化Home页面。
(1)在assets文件中添加一个全局CSS样式gloable.css。
html,body,div{
    margin:0;
    padding:0;
}
html,body{
    height: 100%;
}
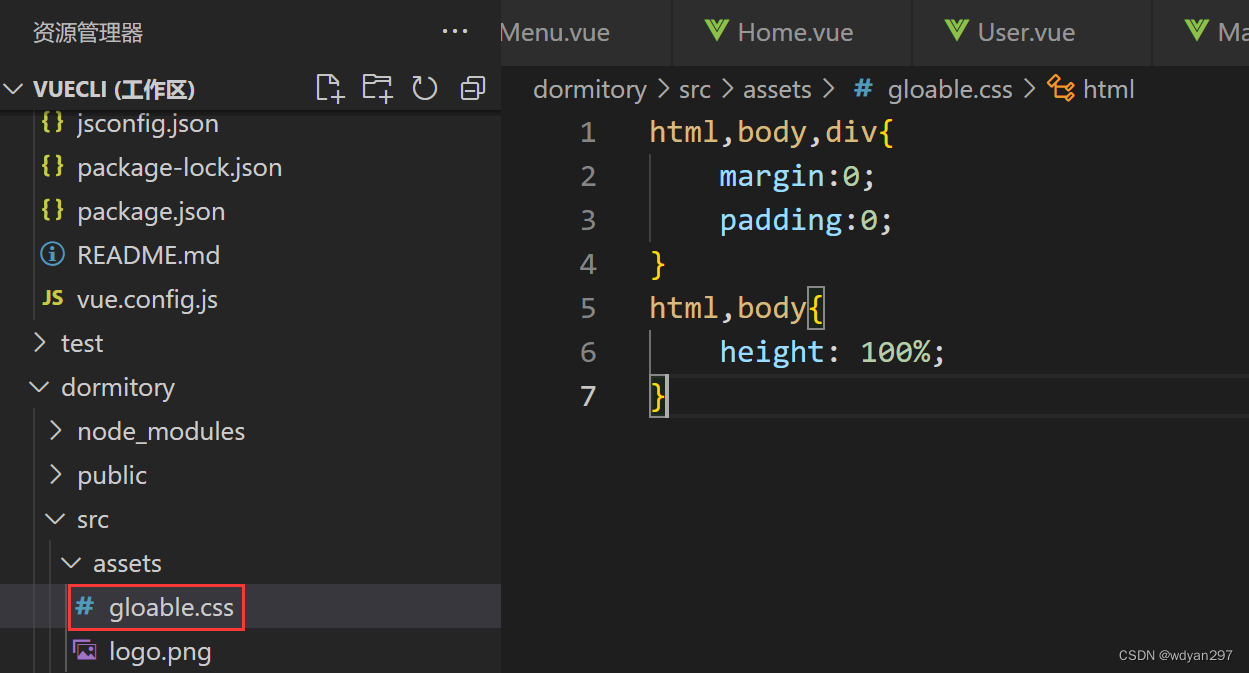
(2)在main.js中引入gloable.css
import Vue from 'vue'
import App from './App.vue'
import router from './router'
import ElementUI from 'element-ui';// 添加
import 'element-ui/lib/theme-chalk/index.css'; // 添加

import './assets/gloable.css' //添加

Vue.config.productionTip = false
Vue.use(ElementUI);// 添加

new Vue({
  router,
  render: h => h(App)
}).$mount('#app')
(3)添加一个溢出样式。为菜单栏加一个超出部分隐藏的样式。
style="min-height:100%; overflow-x:hidden"
(4)菜单栏文字选中加一个高亮样式。
active-text-color=red
(5)菜单栏添加一个div,logo区域的设置。
<div style="height:60px; line-height:60px; text-align:center">
        <img src="../assets/logo.png" style="width:20px;position:relative;top:5px;margin-right:5px"/>
        <b style="color:white">后台管理系统</b>
 </div>
(6)个人中心修改。
<el-header style="text-align: right; font-size: 12px; border-bottom: 1px solid red; line-height:60px">
        <el-dropdown style="width:100px; cursor:pointer">
         <span>王小虎</span><i class="el-icon-arrow-down" style="margin-left:5px"></i>
            <el-dropdown-menu slot="dropdown">
            <el-dropdown-item>个人信息</el-dropdown-item>
            <el-dropdown-item>退出</el-dropdown-item>
          </el-dropdown-menu>
        </el-dropdown>
</el-header>
(7)根容器<el-container>添加样式。
<el-container style="height: 100%; border: 1px solid #eee">
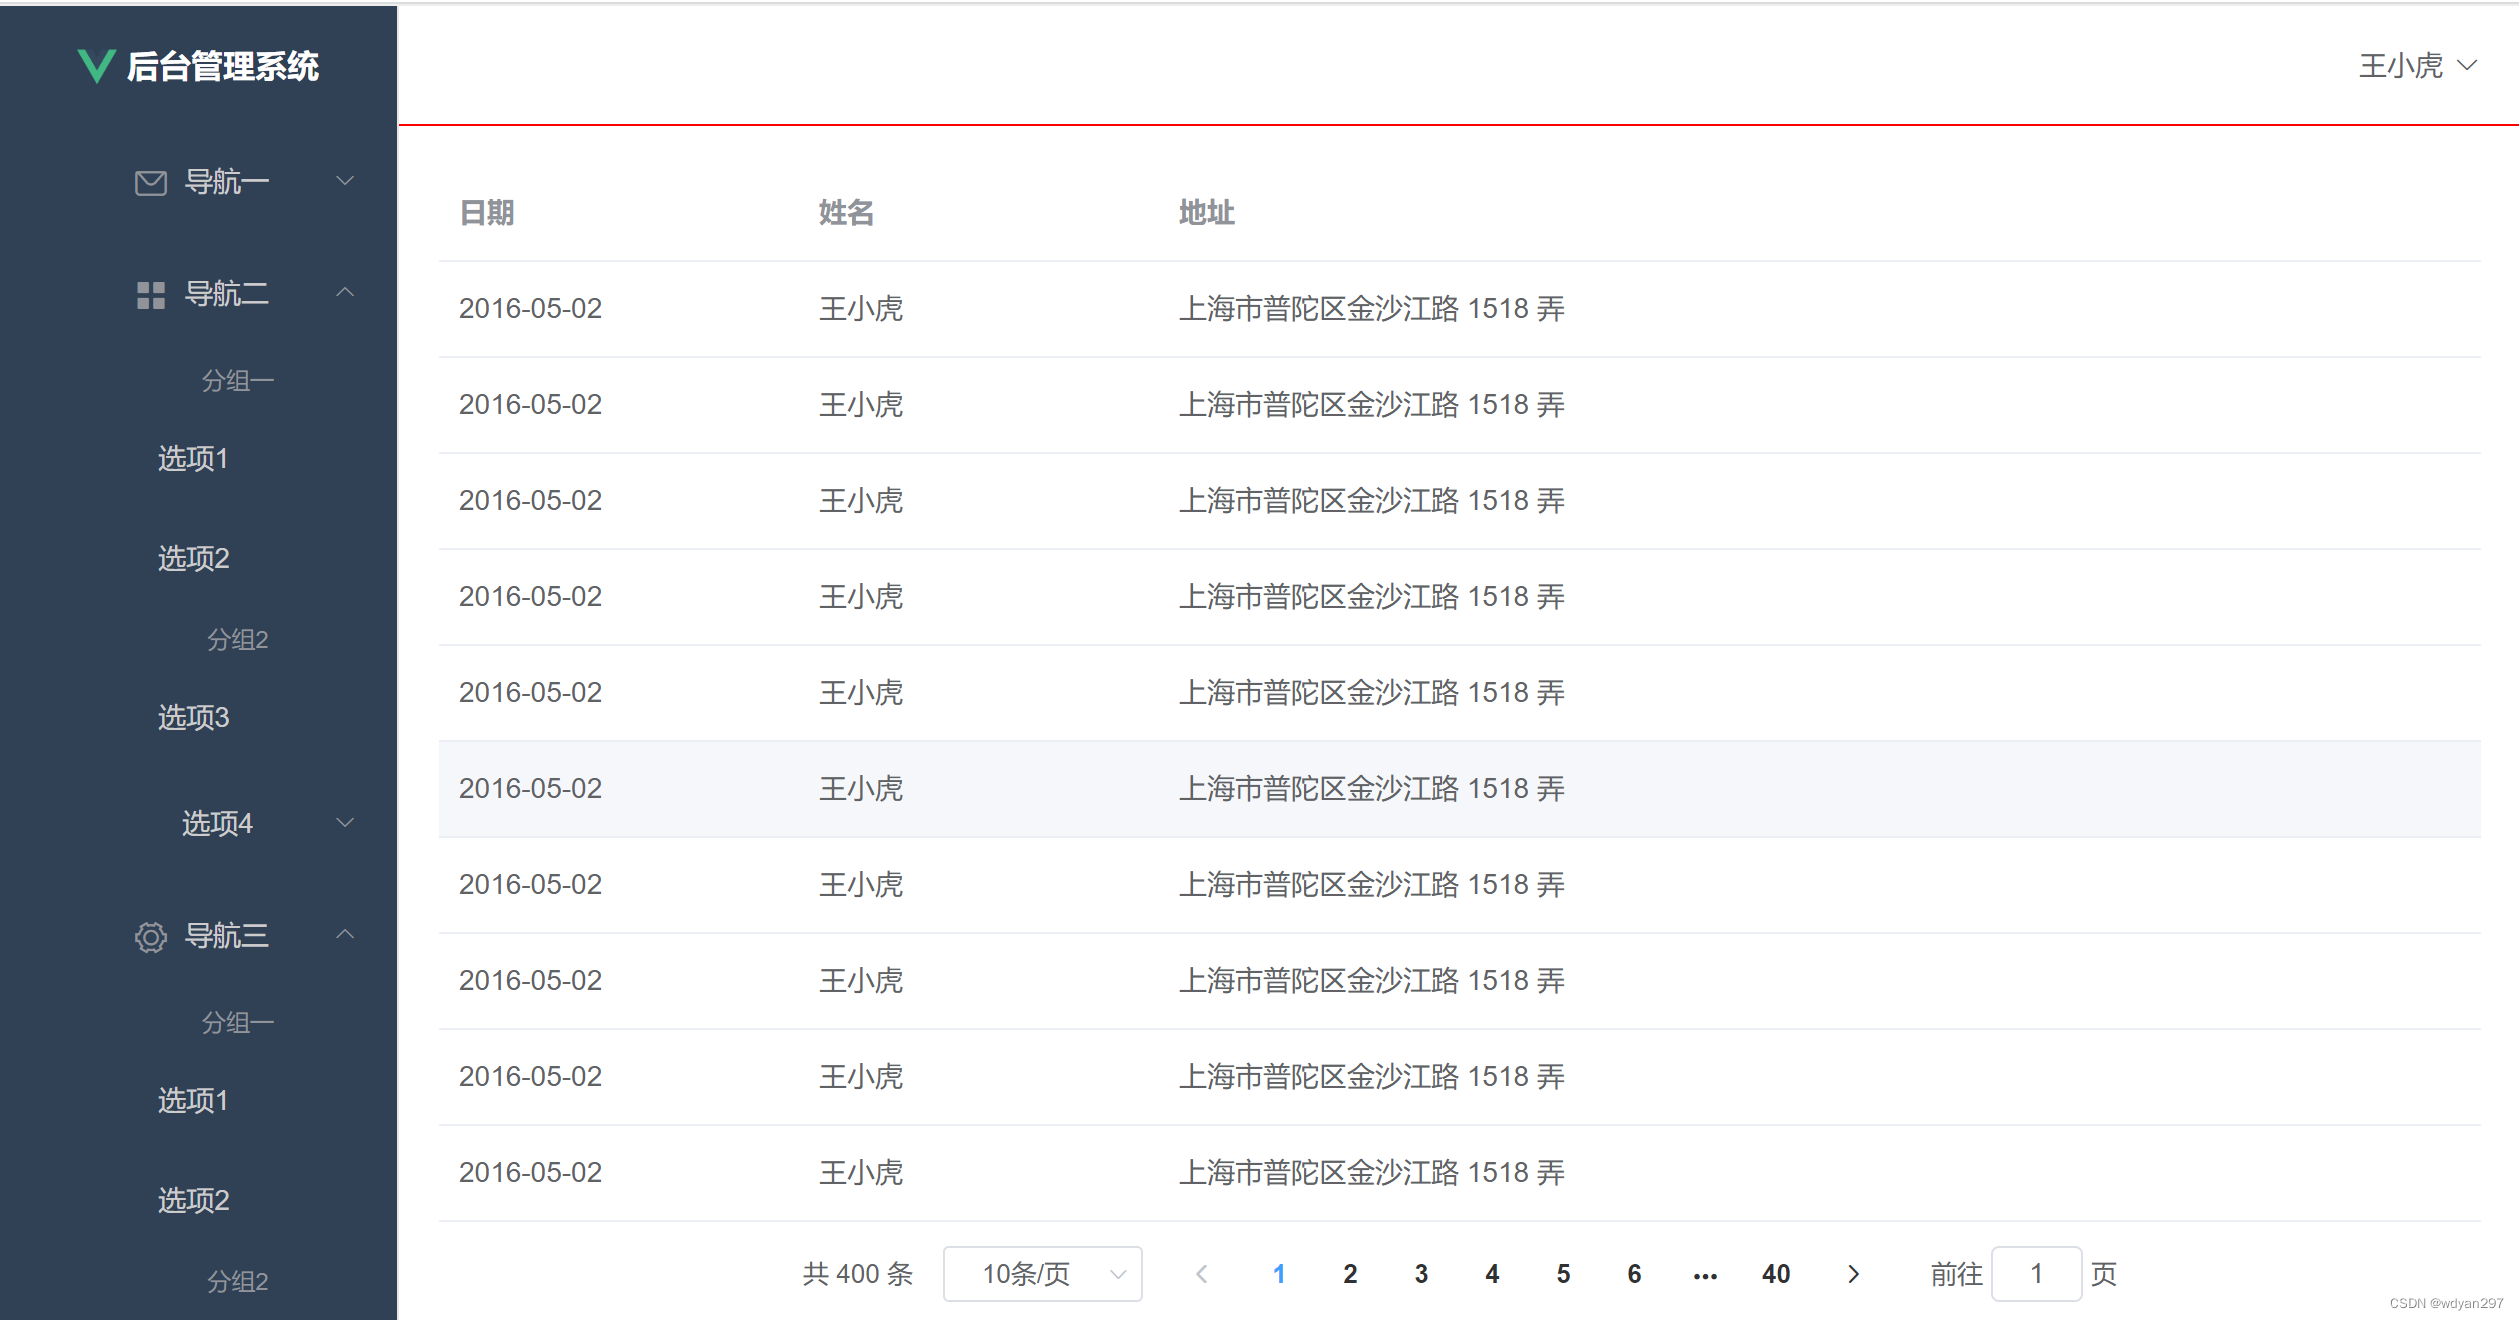
CTRL+S保存,浏览页面如下。
(8)在<el-main>中添加分页功能。
<div style="padding:10px">
    <el-pagination
    @size-change="handleSizeChange"
    @current-change="handleCurrentChange"
    :current-page="currentPage4"
    :page-sizes="[5, 10, 15, 20]"
    :page-size="10"
    layout="total, sizes, prev, pager, next, jumper"
    :total="400">
    </el-pagination>
</div>
**注意:**此时还不能实现分页,真正的分页将在后续实现。
(9)在中添加搜索区域。
**注意:**搜索区域应该在表格前面
<div style="padding:10px">
    <el-input style="width:250px" suffix-icon="el-icon-search" placeholder="请输入名称搜索"></el-input>
    <el-input style="width:250px" suffix-icon="el-icon-email" placeholder="请输入邮箱搜索"></el-input>
    <el-input style="width:250px" suffix-icon="el-icon-position" placeholder="请输入地址搜索"></el-input>
    <el-button style="margin-left:5px" type="primary">搜索</el-button>
</div>
(10)在中添加常用操作按钮。
**注意:**常用操作按钮应该在搜索区域后面
<div style="margin:10px">
    <el-button type="primary">新增<i class="el-icon-circle-plus"></i></el-button>
    <el-button type="danger">批量删除<i class="el-icon-remove"></i></el-button>
    <el-button type="primary">导入<i class="el-icon-bottom"></i></el-button>
    <el-button type="primary">导出<i class="el-icon-top"></i></el-button>
 </div>
(11)如果<el-main>中内容不能左对齐,可以添加一个文本左对齐的样式。
(12)在表格区域添加常用操作按钮。
**注意:**操作按钮应该在所有字段的最后面
<el-table-column fixed="right" label="操作">
    <template slot-scope="scope">
    <el-button type="success" size="small" icon="el-icon-edit">编辑</el-button>
    <el-button type="danger" size="small"  icon="el-icon-delete">删除</el-button>
    </template>
</el-table-column>
10. 运行项目
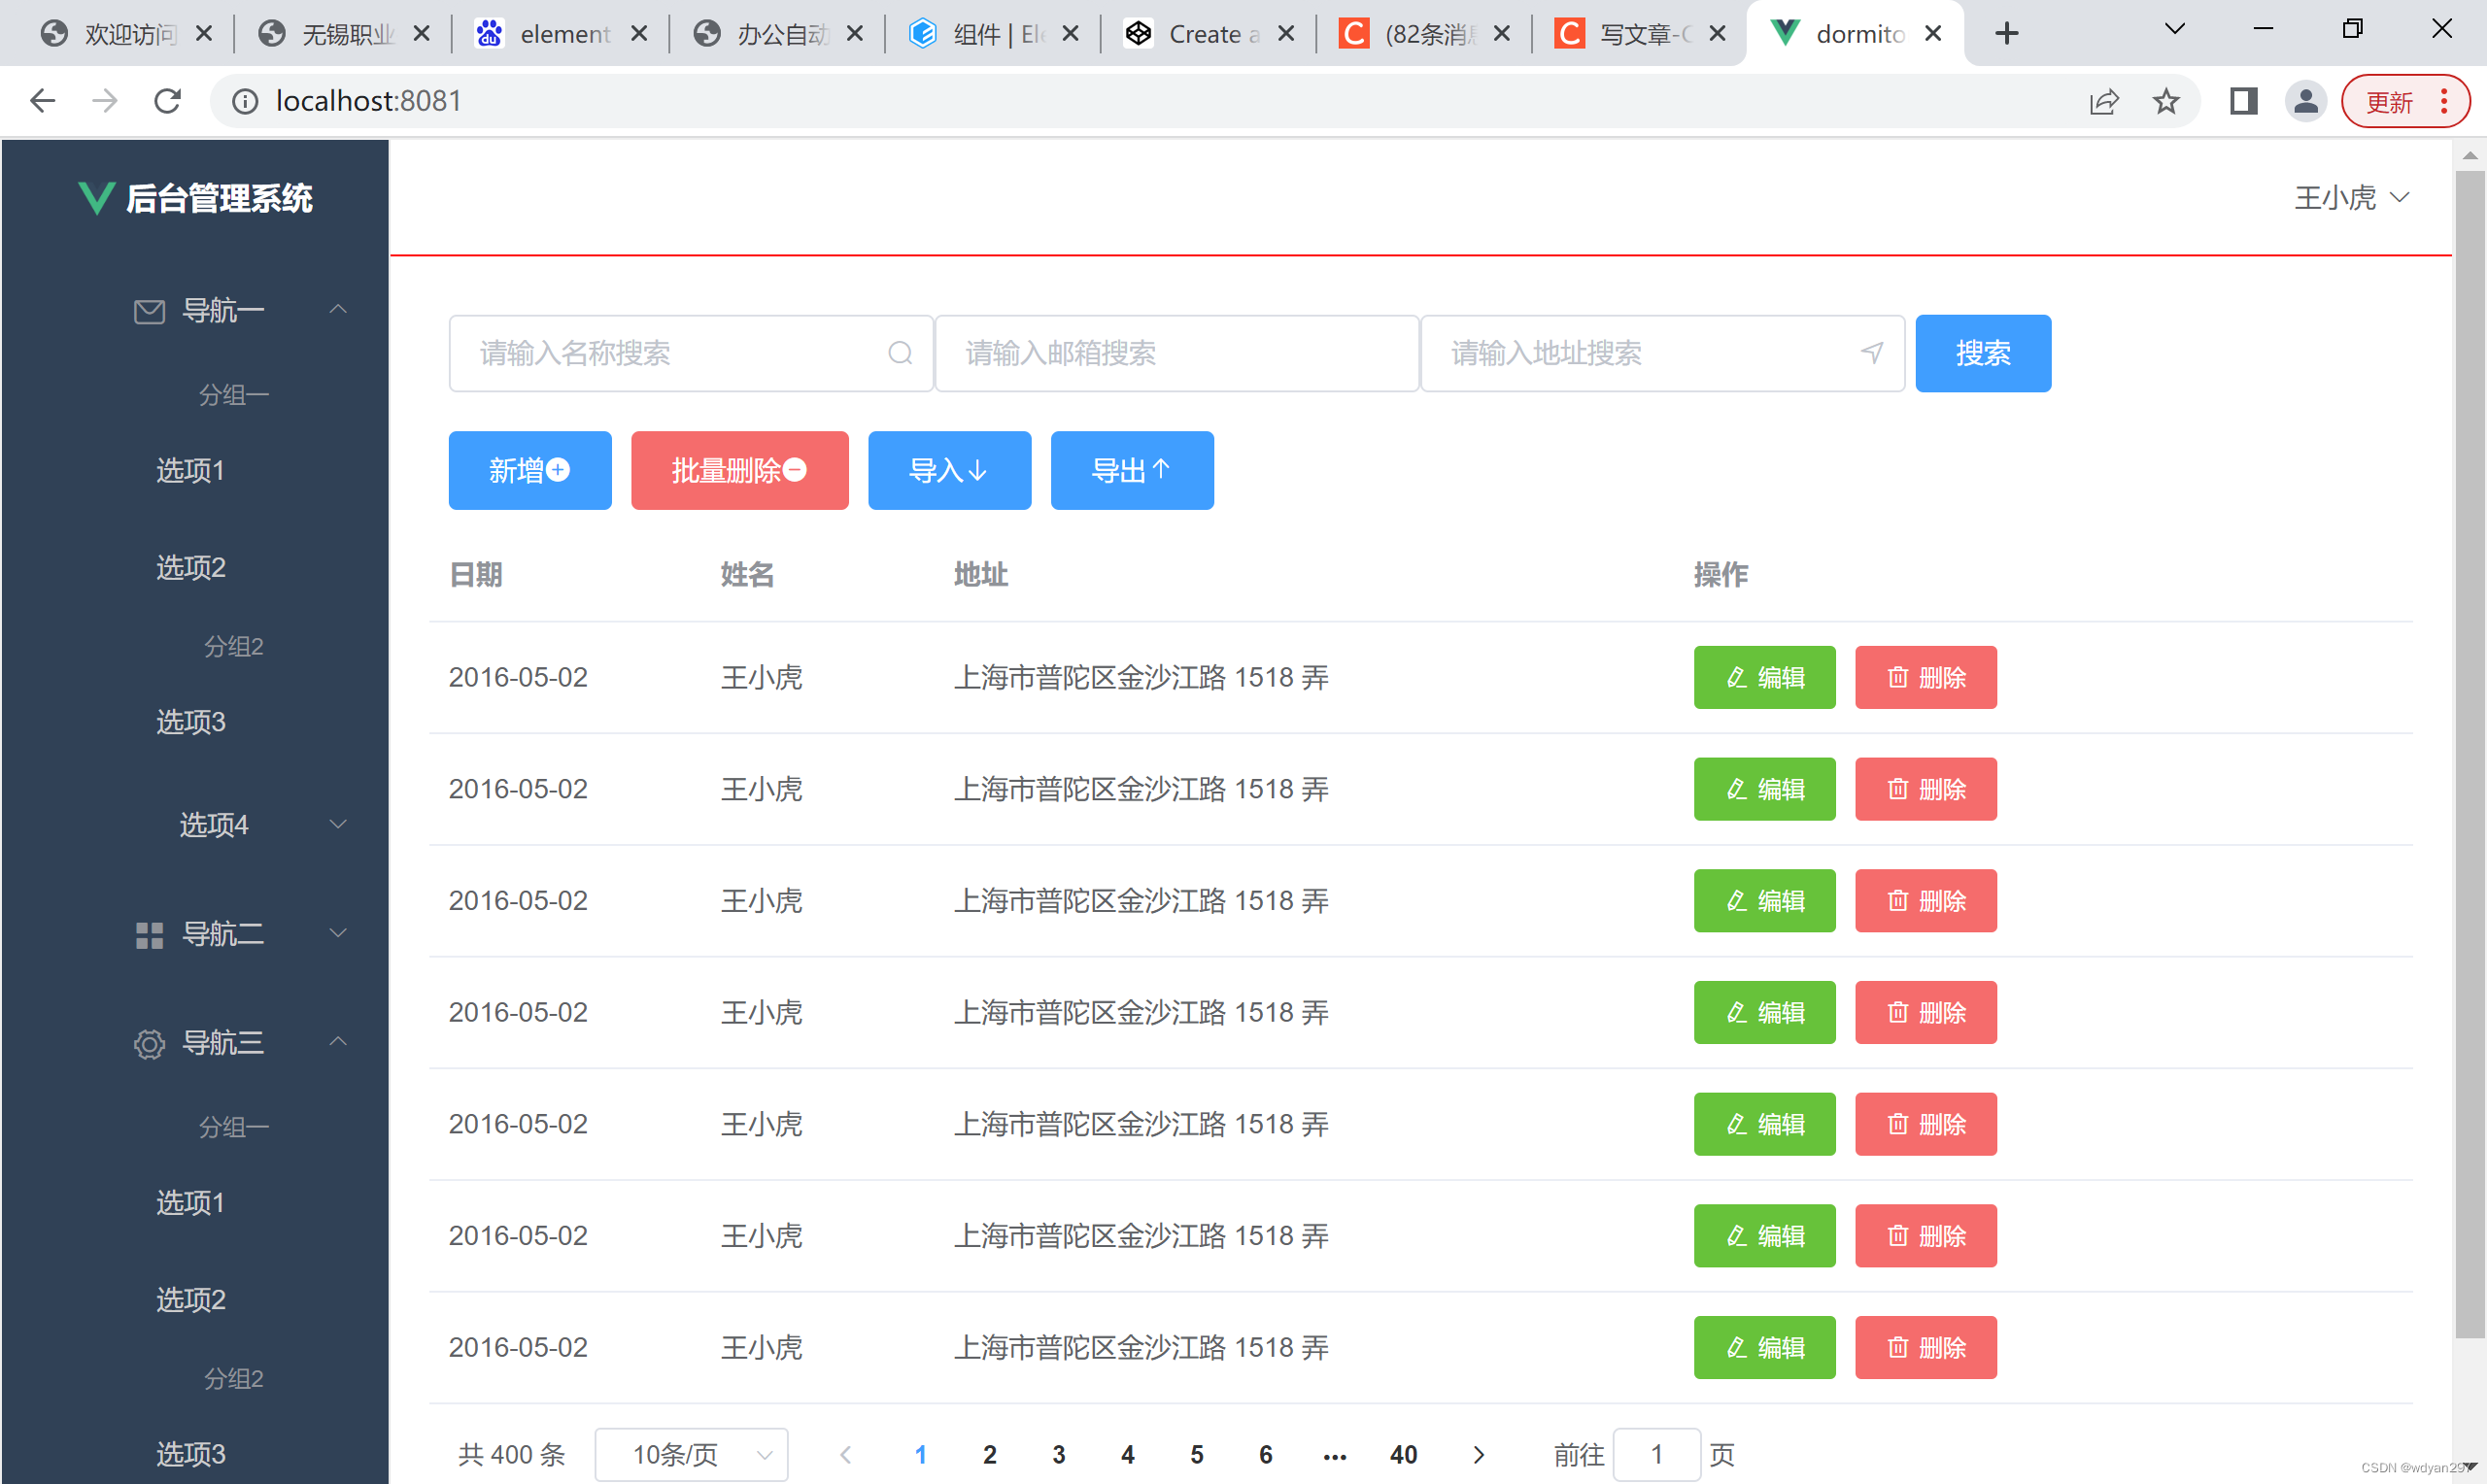
**注意:**可以尝试修改data数据,让自己对前后端数据有一定的熟悉程度。
11.Home.vue的完整代码
如下:
<template>
<div style="height:100%;">
  <el-container style="height: 100%; border: 1px solid #eee">
    <el-aside width="200px" style="background-color: rgb(238, 241, 246)">
      <el-menu :default-openeds="['1', '3']" style="min-height:100%; overflow-x:hidden"
       background-color=rgb(48,65,86)
       text-color=#ccc
       active-text-color=red
      >
      <div style="height:60px; line-height:60px; text-align:center">
        <img src="../assets/logo.png" style="width:20px;position:relative;top:5px;margin-right:5px"/>
        <b style="color:white">后台管理系统</b>
      </div>
        <el-submenu index="1">
          <template slot="title"><i class="el-icon-message"></i>导航一</template>
          <el-menu-item-group>
            <template slot="title">分组一</template>
            <el-menu-item index="1-1">选项1</el-menu-item>
            <el-menu-item index="1-2">选项2</el-menu-item>
          </el-menu-item-group>
          <el-menu-item-group title="分组2">
            <el-menu-item index="1-3">选项3</el-menu-item>
          </el-menu-item-group>
          <el-submenu index="1-4">
            <template slot="title">选项4</template>
            <el-menu-item index="1-4-1">选项4-1</el-menu-item>
          </el-submenu>
        </el-submenu>
        <el-submenu index="2">
          <template slot="title"><i class="el-icon-menu"></i>导航二</template>
          <el-menu-item-group>
            <template slot="title">分组一</template>
            <el-menu-item index="2-1">选项1</el-menu-item>
            <el-menu-item index="2-2">选项2</el-menu-item>
          </el-menu-item-group>
          <el-menu-item-group title="分组2">
            <el-menu-item index="2-3">选项3</el-menu-item>
          </el-menu-item-group>
          <el-submenu index="2-4">
            <template slot="title">选项4</template>
            <el-menu-item index="2-4-1">选项4-1</el-menu-item>
          </el-submenu>
        </el-submenu>
        <el-submenu index="3">
          <template slot="title"><i class="el-icon-setting"></i>导航三</template>
          <el-menu-item-group>
            <template slot="title">分组一</template>
            <el-menu-item index="3-1">选项1</el-menu-item>
            <el-menu-item index="3-2">选项2</el-menu-item>
          </el-menu-item-group>
          <el-menu-item-group title="分组2">
            <el-menu-item index="3-3">选项3</el-menu-item>
          </el-menu-item-group>
          <el-submenu index="3-4">
            <template slot="title">选项4</template>
            <el-menu-item index="3-4-1">选项4-1</el-menu-item>
          </el-submenu>
        </el-submenu>
      </el-menu>
    </el-aside>

    <el-container>
      <el-header style="text-align: right; font-size: 12px; border-bottom: 1px solid red; line-height:60px">
        <el-dropdown style="width:100px; cursor:pointer">
         <span>王小虎</span><i class="el-icon-arrow-down" style="margin-left:5px"></i>
            <el-dropdown-menu slot="dropdown">
            <el-dropdown-item>个人信息</el-dropdown-item>
            <el-dropdown-item>退出</el-dropdown-item>
          </el-dropdown-menu>
        </el-dropdown>
      </el-header>

      <el-main>
       <div style="padding:10px">
        <el-input style="width:250px" suffix-icon="el-icon-search" placeholder="请输入名称搜索"></el-input>
        <el-input style="width:250px" suffix-icon="el-icon-email" placeholder="请输入邮箱搜索"></el-input>
        <el-input style="width:250px" suffix-icon="el-icon-position" placeholder="请输入地址搜索"></el-input>
        <el-button style="margin-left:5px" type="primary">搜索</el-button>
      </div>
      <div style="margin:10px">
         <el-button type="primary">新增<i class="el-icon-circle-plus"></i></el-button>
         <el-button type="danger">批量删除<i class="el-icon-remove"></i></el-button>
         <el-button type="primary">导入<i class="el-icon-bottom"></i></el-button>
         <el-button type="primary">导出<i class="el-icon-top"></i></el-button>
      </div>
        <el-table :data="tableData">
          <el-table-column prop="date" label="日期" width="140">
          </el-table-column>
          <el-table-column prop="name" label="姓名" width="120">
          </el-table-column>
          <el-table-column prop="address" label="地址">
          </el-table-column>
          <el-table-column fixed="right" label="操作">
            <template slot-scope="scope">
              <el-button type="success" size="small" icon="el-icon-edit">编辑</el-button>
              <el-button type="danger" size="small"  icon="el-icon-delete">删除</el-button>
            </template>
          </el-table-column>
        </el-table>
        <div style="padding:10px">
         <el-pagination
          @size-change="handleSizeChange"
          @current-change="handleCurrentChange"
          :current-page="currentPage4"
          :page-sizes="[5, 10, 15, 20]"
          :page-size="10"
          layout="total, sizes, prev, pager, next, jumper"
          :total="400">
         </el-pagination>
       </div>
      </el-main>

    </el-container>
  </el-container>
</div>
</template>

<script>
// @ is an alias to /src
import HelloWorld from '@/components/HelloWorld.vue'

export default {
  name: 'HomeView',
  methods: {
      handleSizeChange(val) {
        console.log(`每页 ${val} 条`);
      },
      handleCurrentChange(val) {
        console.log(`当前页: ${val}`);
      }
    },
  data(){
     const item = {
        date: '2016-05-02',
        name: '王小虎',
        address: '上海市普陀区金沙江路 1518 弄'
      };
      return {
        tableData: Array(7).fill(item)
      }
  }
}
</script>
<style>
  .el-main {
    text-align: left;
  }
</style>
12.多说一句:-)
如果对其中的一些知识点不了解,没有关系,慢慢来,在做的过程中一点点学习,越到后面,越有茅塞顿开的感觉,所以,坚持最重要!!!