前言
近期接到一个关于谷歌EDLA认证的需求,我负责的是谷歌原生桌面布局的修改,通过研究源码,将涉及到了一些修改思路发出来,大家可以参考一下有没有对你有用的信息。主要修改内容有:
1、搜索栏、底部导航栏未居中
2、中部应用未按要求排布,详情请参考摹客
3、在原生Google桌面未添加中性S-write和投屏Kshare、欢迎页应用
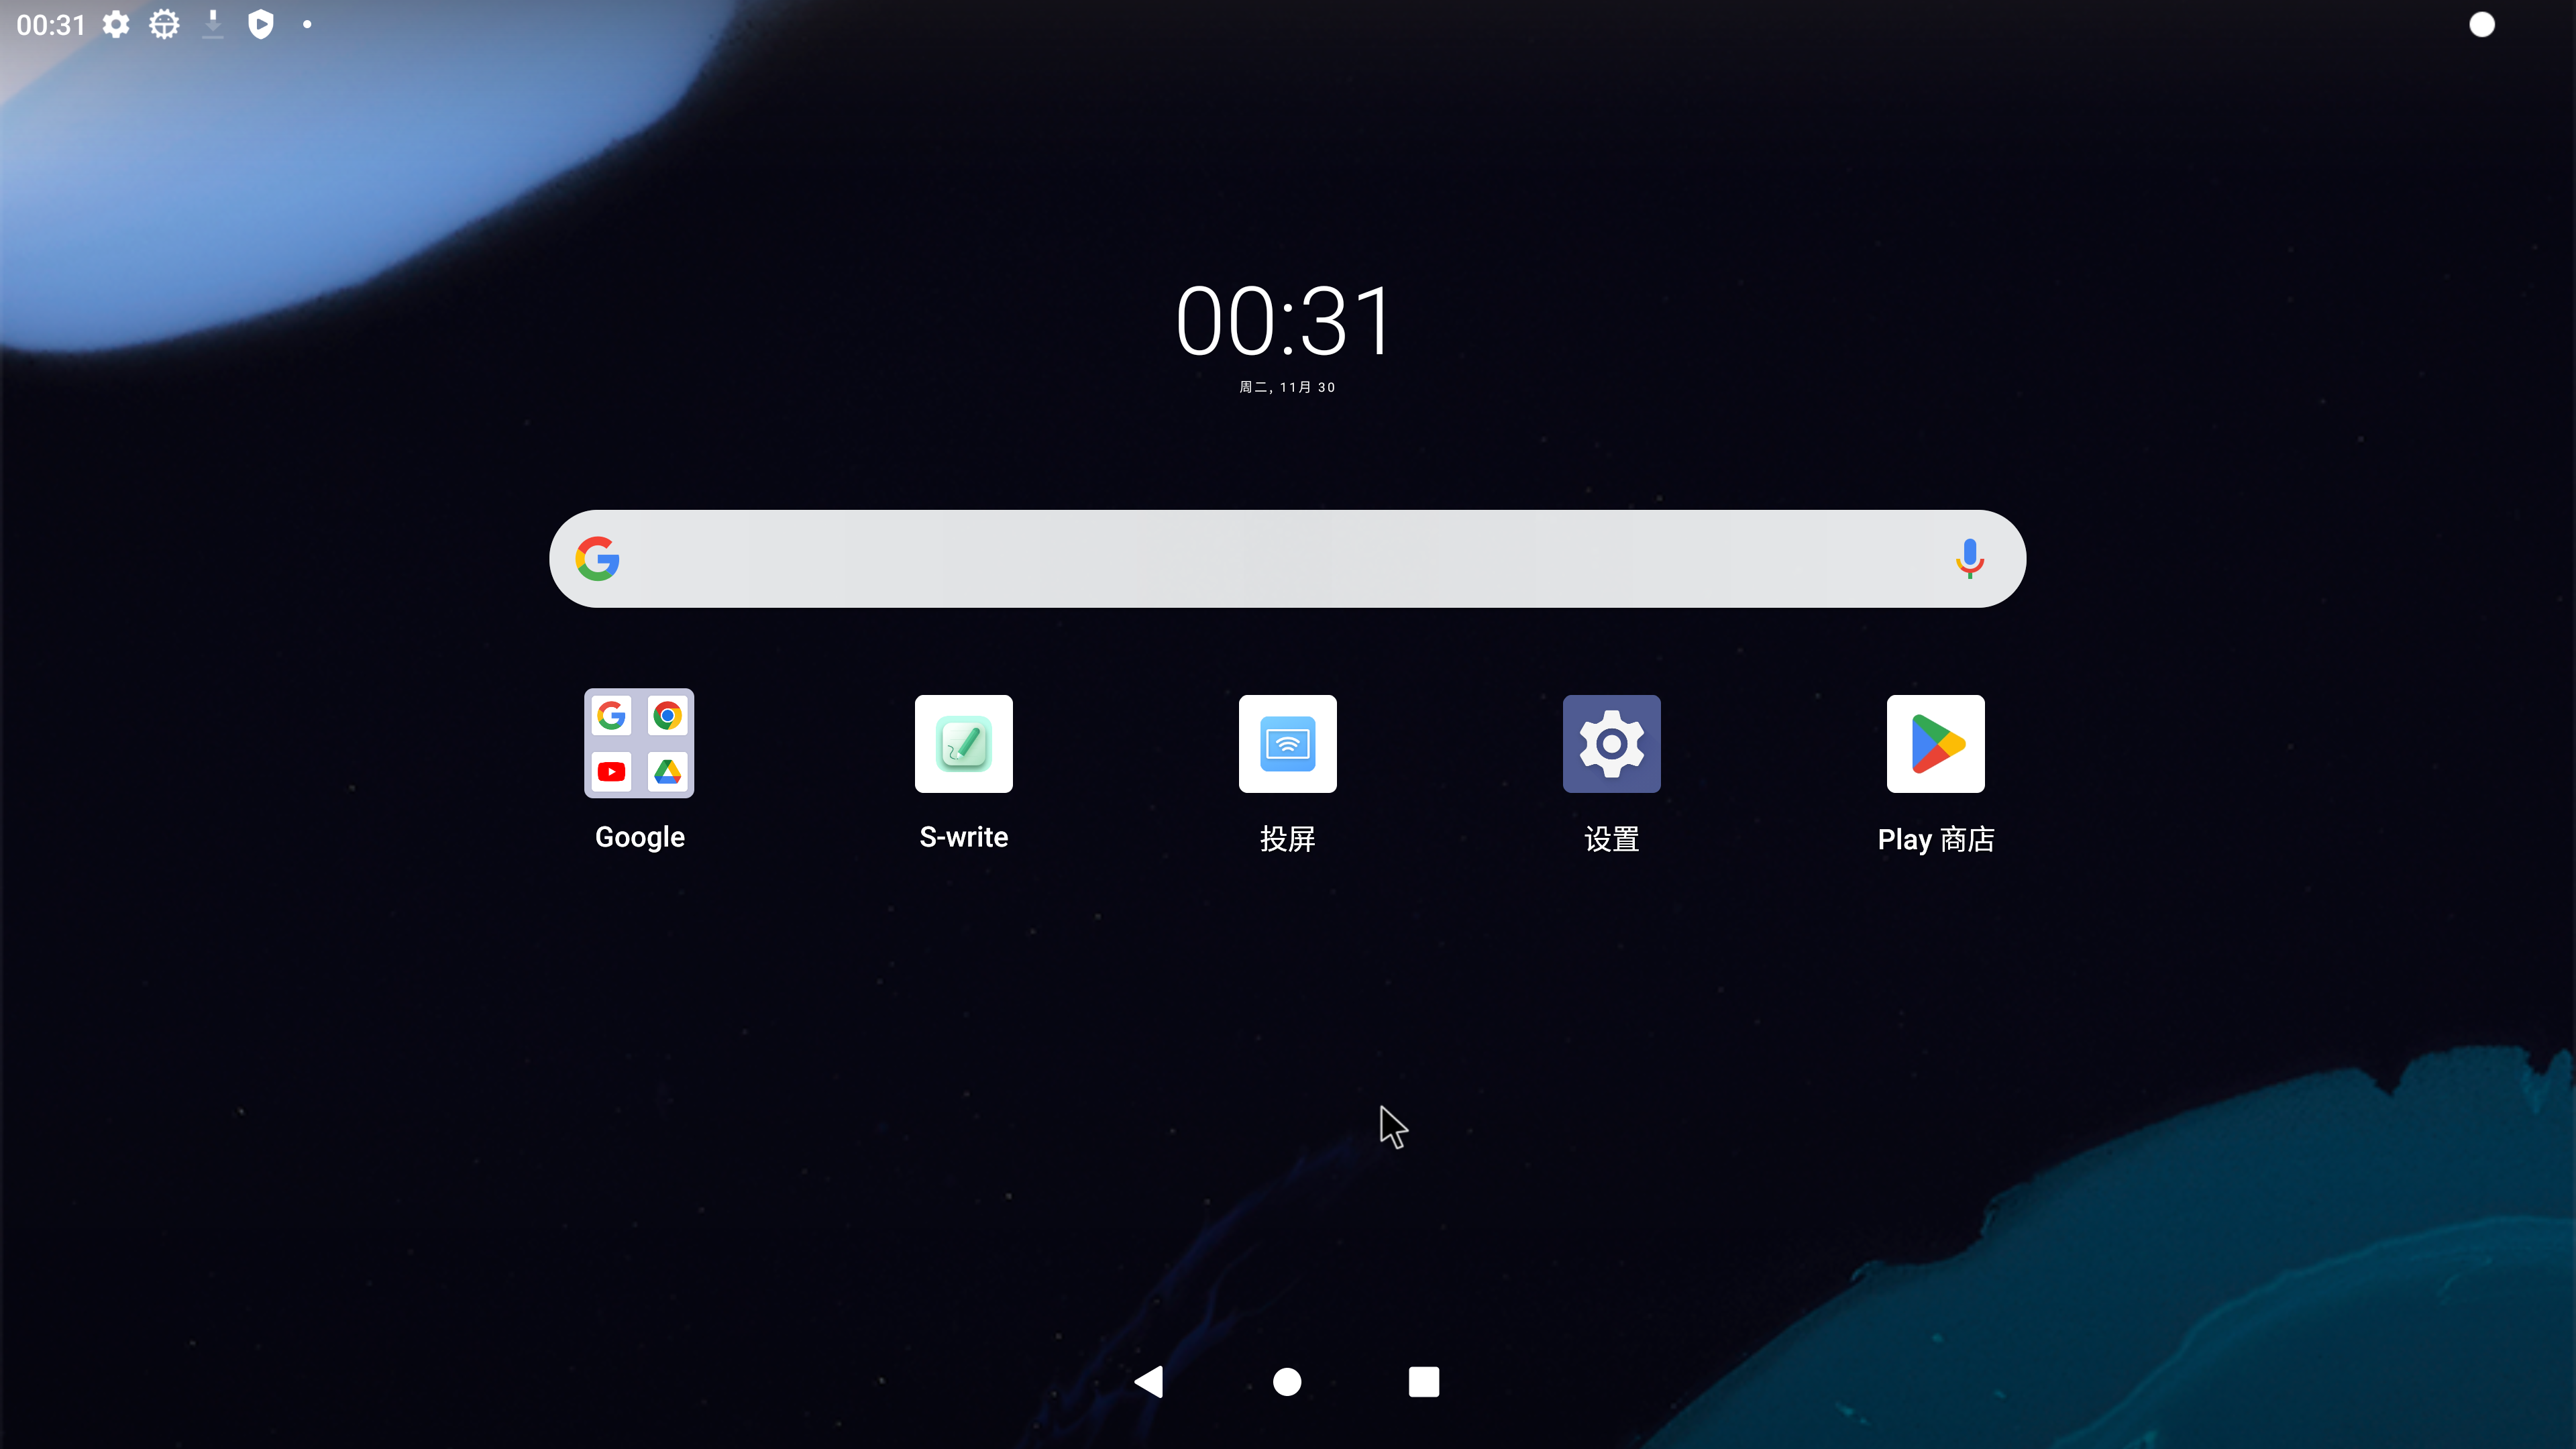
现状图:
参考图: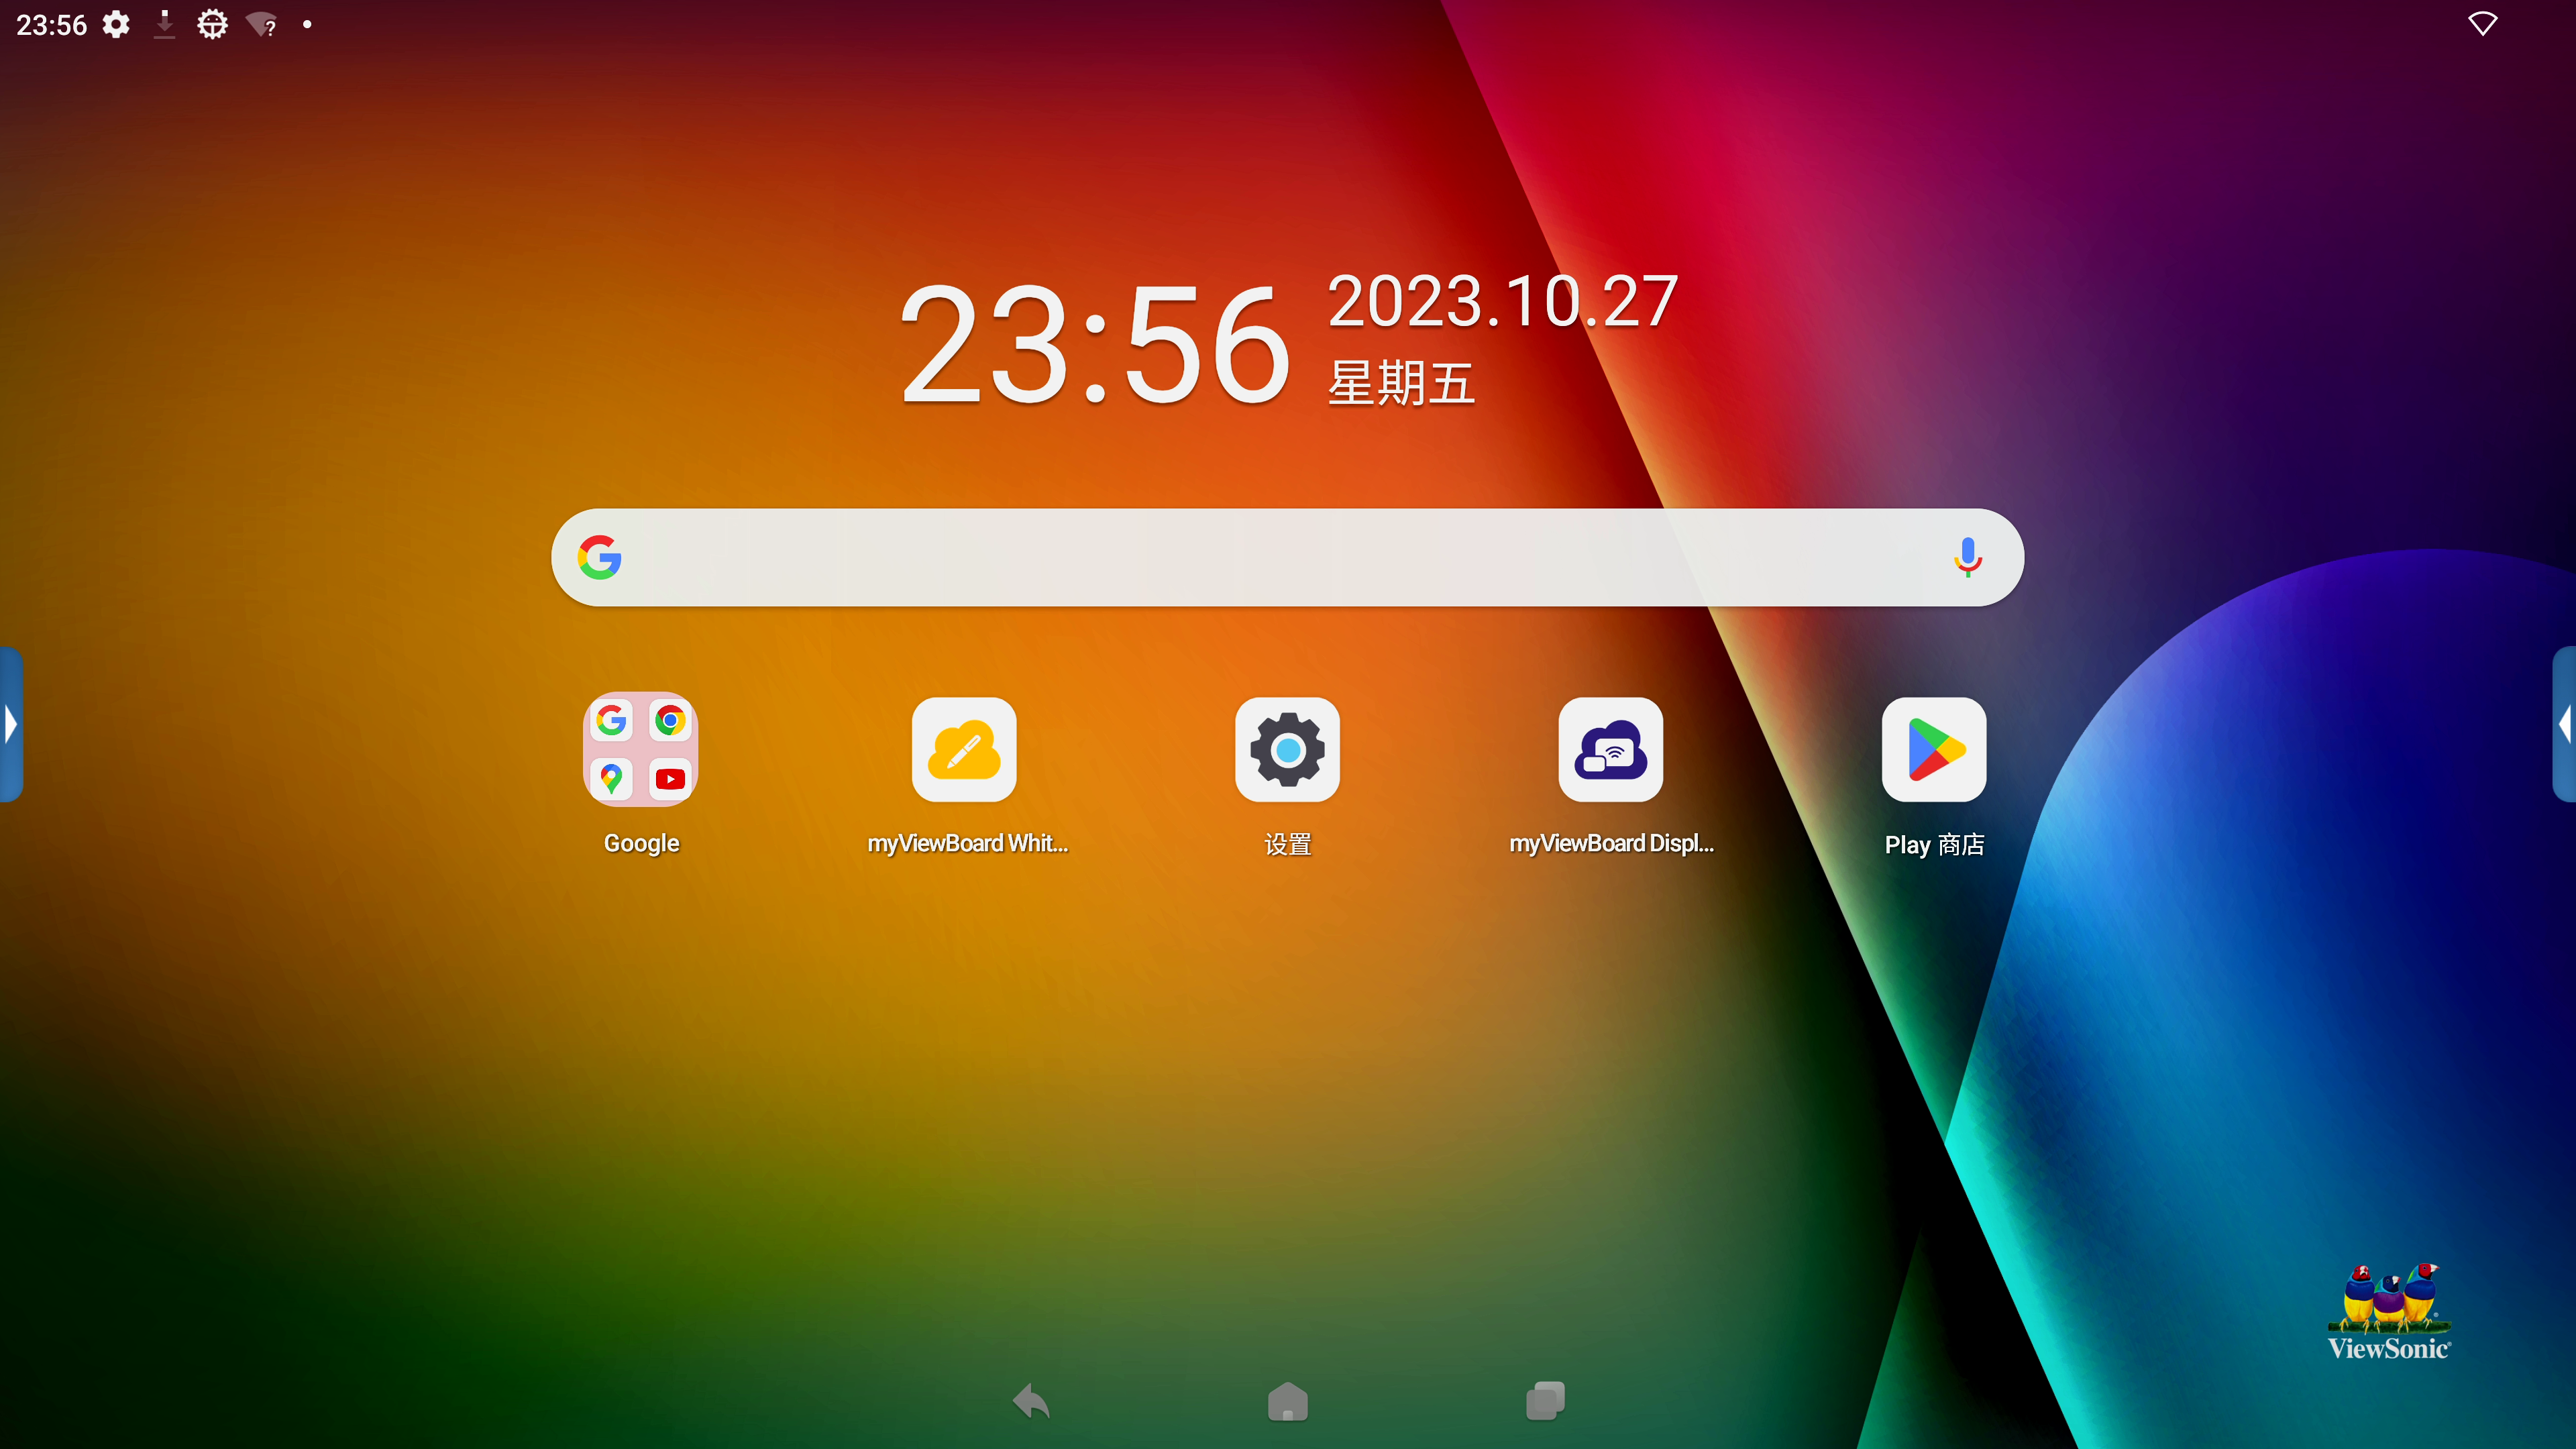
一、谷歌搜索框的修改
涉及修改的地方有:
1、Launcher3\res\xml\device_profiles.xml
2、com/android/launcher3/Workspace.java
1、首先观察device_profiles.xml代码,一般大屏(平板)设备会加载6*5的布局,手机设备会加载手机的布局,该文件里定义了4个不同的布局类型,如何确定设备加载哪个布局呢?你可以在桌面长按应用图标,然后观察可以移动多少个格子,然后根据行列数找到要修改的布局位置。比如我设备是加载6 * 5布局,我修改这里**launcher:numSearchContainerColumns=“5”**修改谷歌搜索框占据5个格子(横屏总共7个格子)
<--这个行数可以根据自己想要的效果修改,比如我就改了7*6布局,6行7列--/>
	<grid-option
        launcher:name="6_by_5"
        launcher:numRows="6"
        launcher:numColumns="7"
        launcher:numSearchContainerColumns="5"
        launcher:numFolderRows="3"
        launcher:numFolderColumns="4"
        launcher:numHotseatIcons="0"
        launcher:hotseatColumnSpanLandscape="2"
        launcher:numAllAppsColumns="6"
        launcher:isScalable="true"
        launcher:inlineNavButtonsEndSpacing="@dimen/taskbar_button_margin_6_5"
        launcher:devicePaddingId="@xml/paddings_6x5"
        launcher:dbFile="launcher_6_by_5.db"
        launcher:defaultLayoutId="@xml/default_workspace_6x5"
        launcher:deviceCategory="tablet" >

        <display-option
            launcher:name="Tablet"
            launcher:minWidthDps="900"
            launcher:minHeightDps="820"
            launcher:minCellHeight="120"
            launcher:minCellWidth="102"
            launcher:minCellHeightLandscape="104"
            launcher:minCellWidthLandscape="120"
            launcher:iconImageSize="60"
            launcher:iconTextSize="14"
            launcher:borderSpaceHorizontal="16"
            launcher:borderSpaceVertical="64"
            launcher:borderSpaceLandscapeHorizontal="64"
            launcher:borderSpaceLandscapeVertical="16"
            launcher:horizontalMargin="54"
            launcher:horizontalMarginLandscape="120"
            launcher:allAppsCellWidth="96"
            launcher:allAppsCellHeight="142"
            launcher:allAppsCellWidthLandscape="126"
            launcher:allAppsCellHeightLandscape="126"
            launcher:allAppsIconSize="60"
            launcher:allAppsIconTextSize="14"
            launcher:allAppsBorderSpaceHorizontal="8"
            launcher:allAppsBorderSpaceVertical="16"
            launcher:allAppsBorderSpaceLandscape="16"
            launcher:hotseatBarBottomSpace="30"
            launcher:hotseatBarBottomSpaceLandscape="40"
            launcher:canBeDefault="true" />

    </grid-option>

</profiles>
2、谷歌搜索框的位置在workspace.java里面修改,在该类里面查找这个方法:bindAndInitFirstWorkspaceScreen,定位到这里
    public void bindAndInitFirstWorkspaceScreen() {


        if (!FeatureFlags.QSB_ON_FIRST_SCREEN) {


            return;
        }

        // Add the first page
        CellLayout firstPage = insertNewWorkspaceScreen(Workspace.FIRST_SCREEN_ID, getChildCount());
        // Always add a first page pinned widget on the first screen.
        if (mFirstPagePinnedItem == null) {


            // In transposed layout, we add the first page pinned widget in the Grid.
            // As workspace does not touch the edges, we do not need a full
            // width first page pinned widget.
            mFirstPagePinnedItem = LayoutInflater.from(getContext())
                    .inflate(R.layout.search_container_workspace, firstPage, false);
        }

        int cellHSpan = mLauncher.getDeviceProfile().inv.numSearchContainerColumns;
        //格子数从0开始算,这里表示搜索框位置从X轴第2格子,y轴第3个格子算起,x轴占据5(cellHSpan)个格子,y轴占据1个格子
        CellLayoutLayoutParams lp = new CellLayoutLayoutParams(1, 2, cellHSpan, 1, FIRST_SCREEN_ID);
        lp.canReorder = false;
        if (!firstPage.addViewToCellLayout(
                mFirstPagePinnedItem, 0, R.id.search_container_workspace, lp, true)) {


            Log.e(TAG, "Failed to add to item at (0, 0) to CellLayout");
            mFirstPagePinnedItem = null;
        }
    }
提示:如果一开始桌面没有谷歌搜索框,可以使用微件的形式添加,添加微件这里又分为两种情况,具体使用哪种方式得看系统有没有去读取配置文件,没有的话就使用第一种,一种是直接在布局文件里面添加,比如res/xml/default_workspace_6x5.xml里面添加:
<appwidget
    container="-100"
    screen="0"
    x="1"
    y="2"
    spanX="5"
    spanY="1"
    packageName="com.google.android.googlequicksearchbox"
    className="com.google.android.googlequicksearchbox.SearchWidgetProvider"/>
另外一种方式是在google_gms包下的配置文件里面添加:release\vendor\partner_gms\apps\GmsSampleIntegration\res_dhs_full\xml\partner_default_layout.xml,例如
<?xml version="1.0" encoding="utf-8"?>
<!-- Copyright (C) 2017 Google Inc. All Rights Reserved. -->
<favorites>
  <!-- Hotseat (We use the screen as the position of the item in the hotseat) -->
  <!-- Dialer Messaging Calendar Contacts Camera -->
  <!--<favorite container="-101" screen="0" x="0" y="0" packageName="com.google.android.dialer" className="com.google.android.dialer.extensions.GoogleDialtactsActivity"/>-->
  <!--<favorite container="-101" screen="1" x="1" y="0" packageName="com.google.android.apps.messaging" className="com.google.android.apps.messaging.ui.ConversationListActivity"/>-->
  <!-- <favorite container="-101" screen="0" x="0" y="0" packageName="com.android.settings" className="com.android.settings.Settings"/> -->
  <!-- <favorite container="-101" screen="1" x="1" y="0" packageName="com.android.deskclock" className="com.android.deskclock.DeskClock"/> -->
  <!-- <favorite container="-101" screen="2" x="2" y="0" packageName="com.google.android.calendar" className="com.android.calendar.event.LaunchInfoActivity"/> -->
  <!-- <favorite container="-101" screen="3" x="3" y="0" packageName="com.google.android.contacts" className="com.android.contacts.activities.PeopleActivity"/> -->
  <!-- <favorite container="-101" screen="4" x="4" y="0" packageName="com.android.camera2" className="com.android.camera.CameraLauncher"/> -->
  <!-- In Launcher3, workspaces extend infinitely to the right, incrementing from zero -->
  <!-- Google folder -->
  <!-- Google, Chrome, Gmail, Maps, YouTube, (Drive), (Music), (Movies), Duo, Photos -->
  <folder title="@string/google_folder_title" screen="0" x="1" y="3">
    <favorite packageName="com.google.android.googlequicksearchbox" className="com.google.android.googlequicksearchbox.SearchActivity"/>
    <favorite packageName="com.android.chrome" className="com.google.android.apps.chrome.Main"/>
    <favorite packageName="com.google.android.gm" className="com.google.android.gm.ConversationListActivityGmail"/>
    <favorite packageName="com.google.android.apps.maps" className="com.google.android.maps.MapsActivity"/>
    <favorite packageName="com.google.android.youtube" className="com.google.android.youtube.app.honeycomb.Shell$HomeActivity"/>
    <favorite packageName="com.google.android.apps.docs" className="com.google.android.apps.docs.app.NewMainProxyActivity"/>
    <favorite packageName="com.google.android.apps.youtube.music" className="com.google.android.apps.youtube.music.activities.MusicActivity"/>
    <favorite packageName="com.google.android.videos" className="com.google.android.videos.GoogleTvEntryPoint"/>
    <favorite packageName="com.google.android.apps.tachyon" className="com.google.android.apps.tachyon.MainActivity"/>
    <favorite packageName="com.google.android.apps.photos" className="com.google.android.apps.photos.home.HomeActivity"/>
  </folder>
  <favorite screen="0" x="5" y="3" packageName="com.android.vending" className="com.android.vending.AssetBrowserActivity"/>

  <appwidget screen="0" x="2" y="0" packageName="com.android.deskclock" className="com.android.alarmclock.DigitalAppWidgetProvider" spanX="3" spanY="2" />
  <appwidget screen="0" x="1" y="2" packageName="com.google.android.googlequicksearchbox" className="com.google.android.googlequicksearchbox.SearchWidgetProvider" spanX="5" spanY="1" />
</favorites>
注释掉的内容是定义桌面的hotSeat显示的应用,其中,添加小部件使用的是appwidget标签,桌面时钟就可以这样添加,folder标签定义的是一个桌面文件夹,里面可以定义文件夹要存放的应用。
二、首屏应用位置修改
和谷歌搜索框一样,也是在device_profiles.xml文件里面定义桌面的行列数,然后根据系统是否会读取partner_default_layout.xml布局文件来决定修改的位置;(1)如果读取,则在partner_default_layout.xml里面定义应用的包名和类型以及位置信息例如<favorite screen="0" x="5" y="3" packageName="com.android.vending" className="com.android.vending.AssetBrowserActivity"/>表示在screen=“0”(第一屏)的第6列格子,第4行格子添加谷歌商店app。(2)如果不读取partner_default_layout.xml布局文件,则在对应的X×X.xml里面修改应用的位置。
三、底部任务栏和导航栏修改
1、如果设置了hotSeat应用在底部,即在partner_default_layout.xml定义的container="-101"的标签(文件里被注释掉的部分代码),那么在桌面是显示的是底部固定的应用,不会展示最近任务栏,如果屏蔽掉了hotSeat固定的应用,则默认显示最近任务栏去替换掉固定的应用,最近任务栏显示图标的数量与device_profiles.xml文件里的launcher:numHotseatIcons="0"属性有关,这里我设置numHotSeatIcon=0表示不显示最近任务栏,如果你想去掉任务栏,可以使用这种方式,有其他博客去掉任务栏的方法是将isTablet的属性设置为false,意思是将设备设置为手机屏幕,手机屏幕不显示最近任务栏,导航栏也会默认居中,我试过该方法在大屏设备上行不通,达不到想要的效果,大家可以去看看他写的:大屏设备导航栏居右
2、如果使用我的方法,即将hotSeat显示的图标数量设置为0:launcher:numHotseatIcons="0"
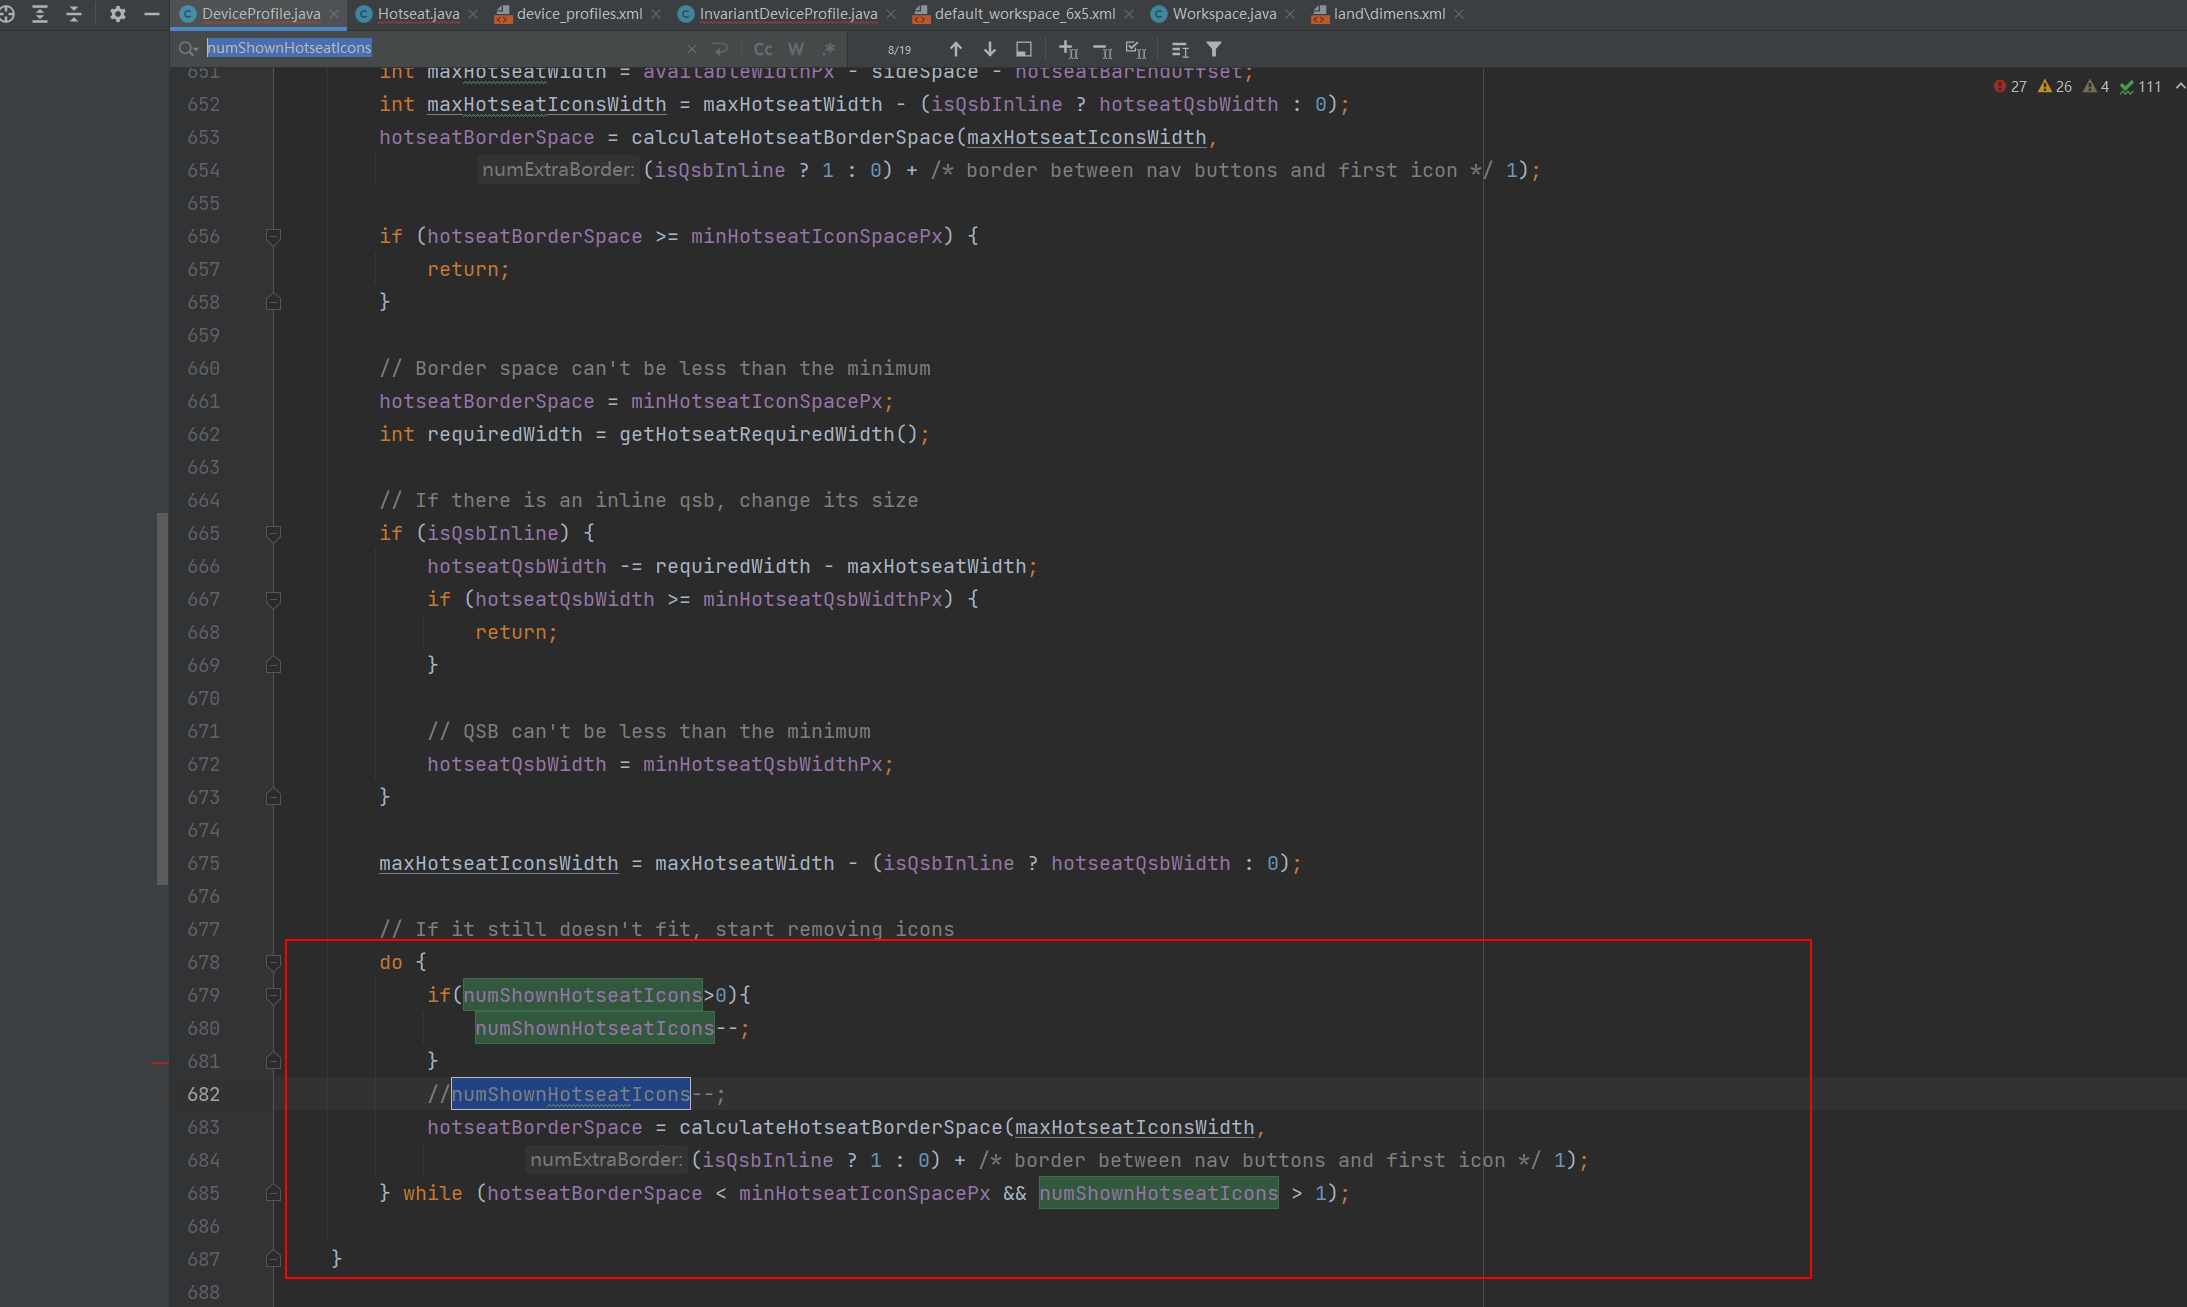
如果直接编译,运行时会发生运行时异常,通过抓log发现,在源码中有多处地方在计算布局的时候,都会去除以numHotseatIcons,而我们知道,除数不能为0,所以报错桌面闪退。这个时候,我们需要将引发异常的地方修改一下(注意numHotseatIcons设置为1和0都会引发异常,因为有个地方对numHotseatIcons做了-1操作),修改位置如下:
com/android/launcher3/DeviceProfile.java
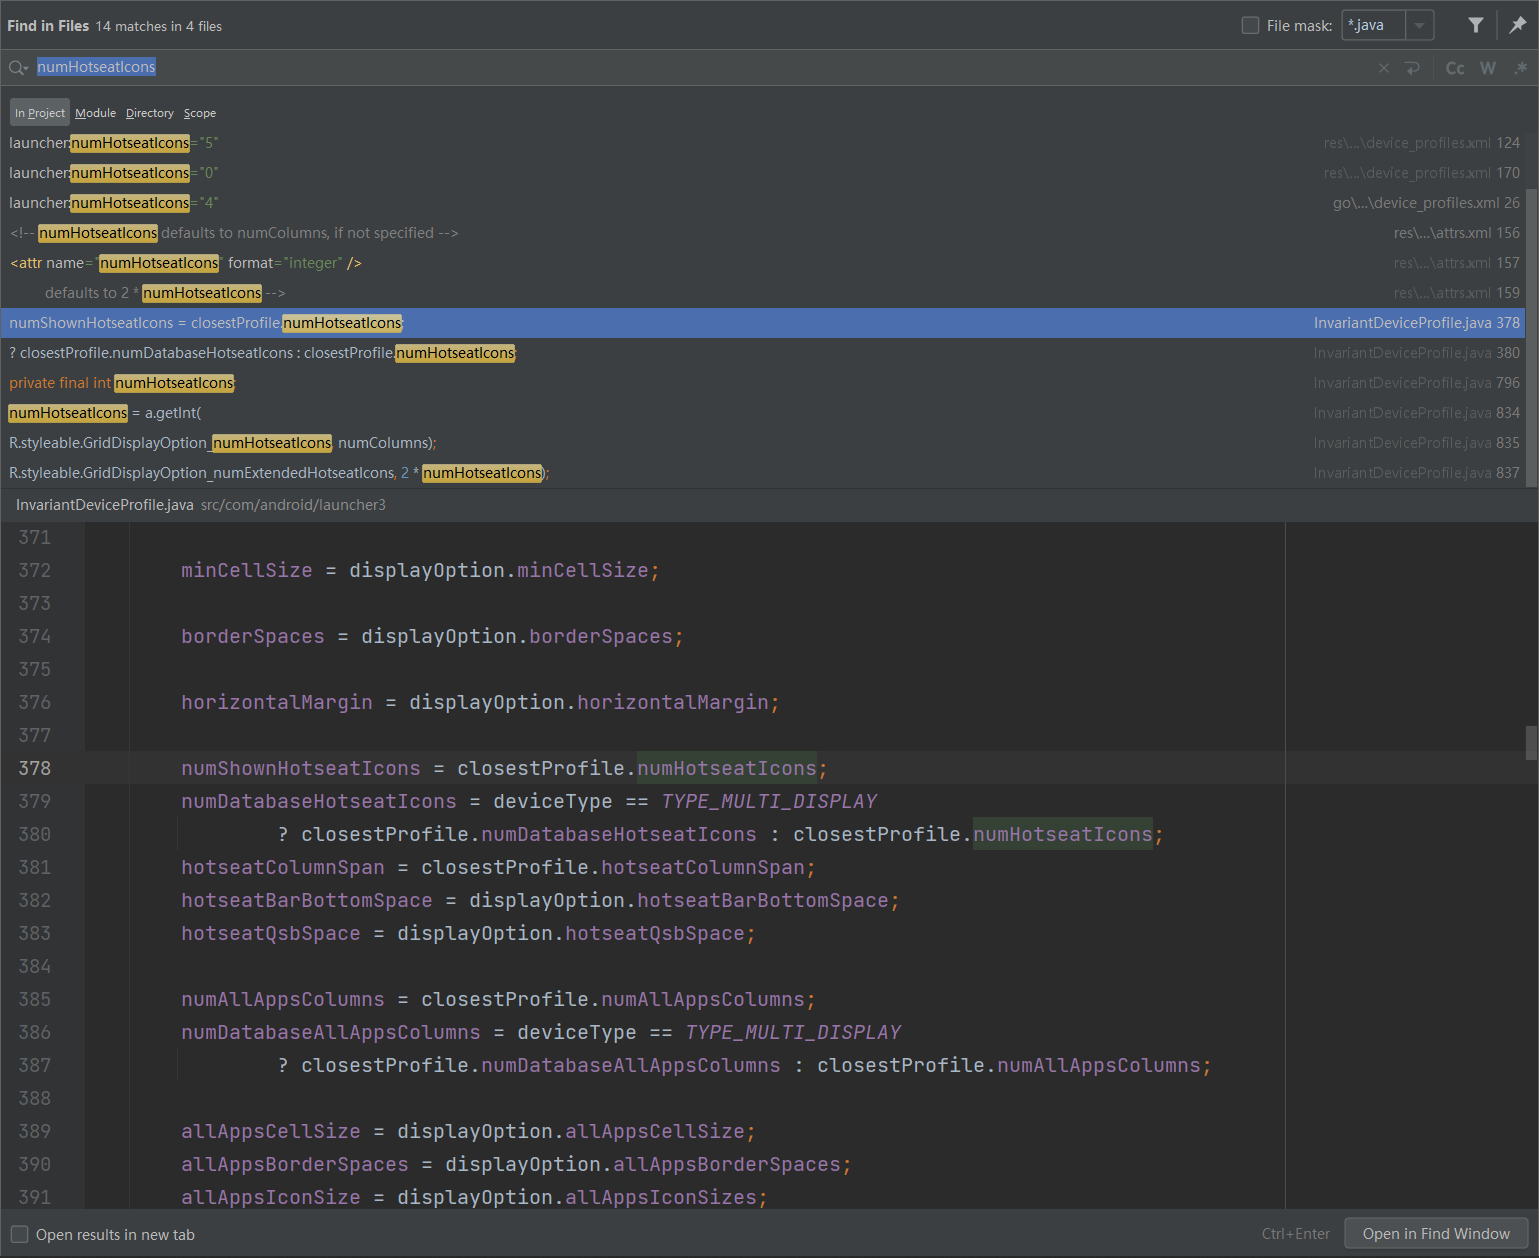
在这类里面按ctrl+F查找numShownHotseatIcons,将涉及到numShownHotseatIcons的计算都做一层判断,如果为0,则换一种算法

也可以先在device_profiles.xml里面全局查找追踪numHotseatIcons这个变量,一步步追踪到DeviceProfile.java这个类,这样会对整个流程更清楚
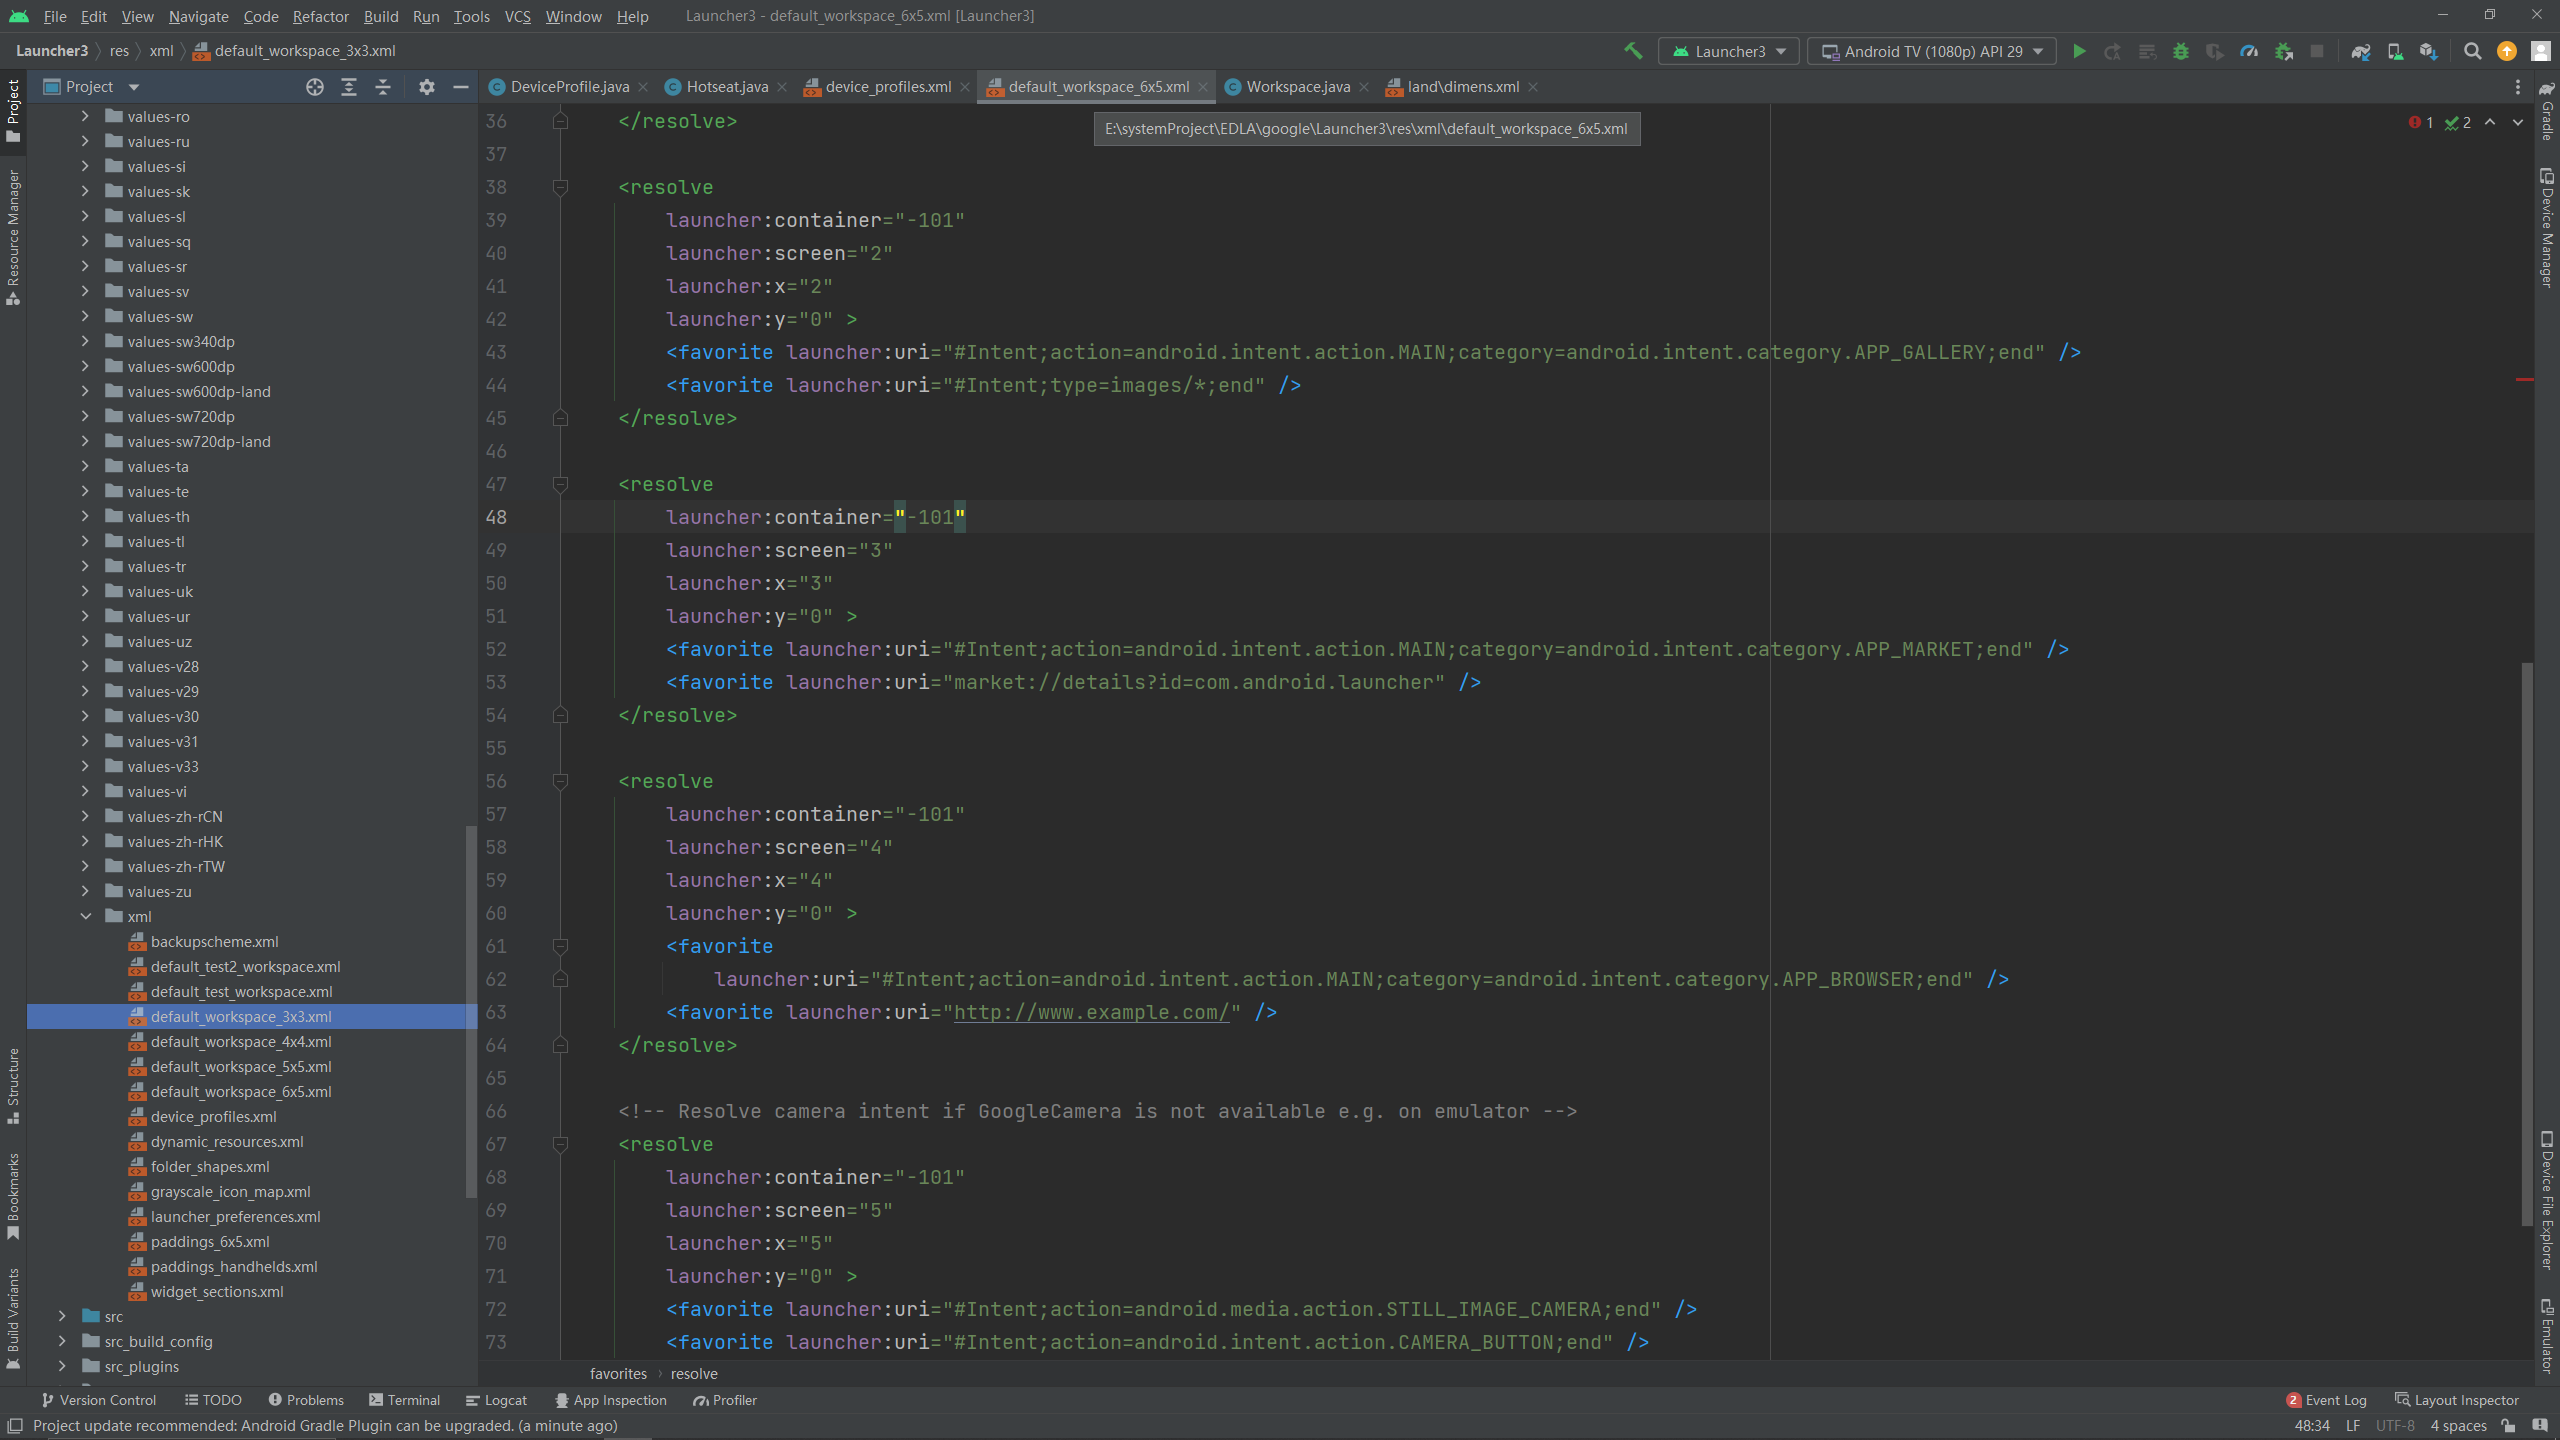
这里是我修改的具体位置,截图有行号,给大家参考:
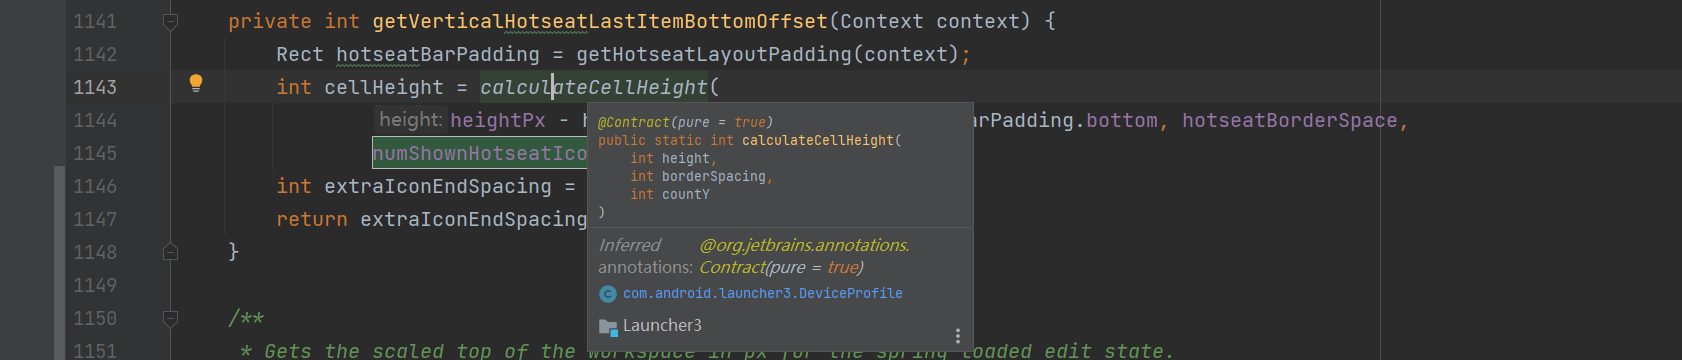
注意到这个方法,里面也用到了
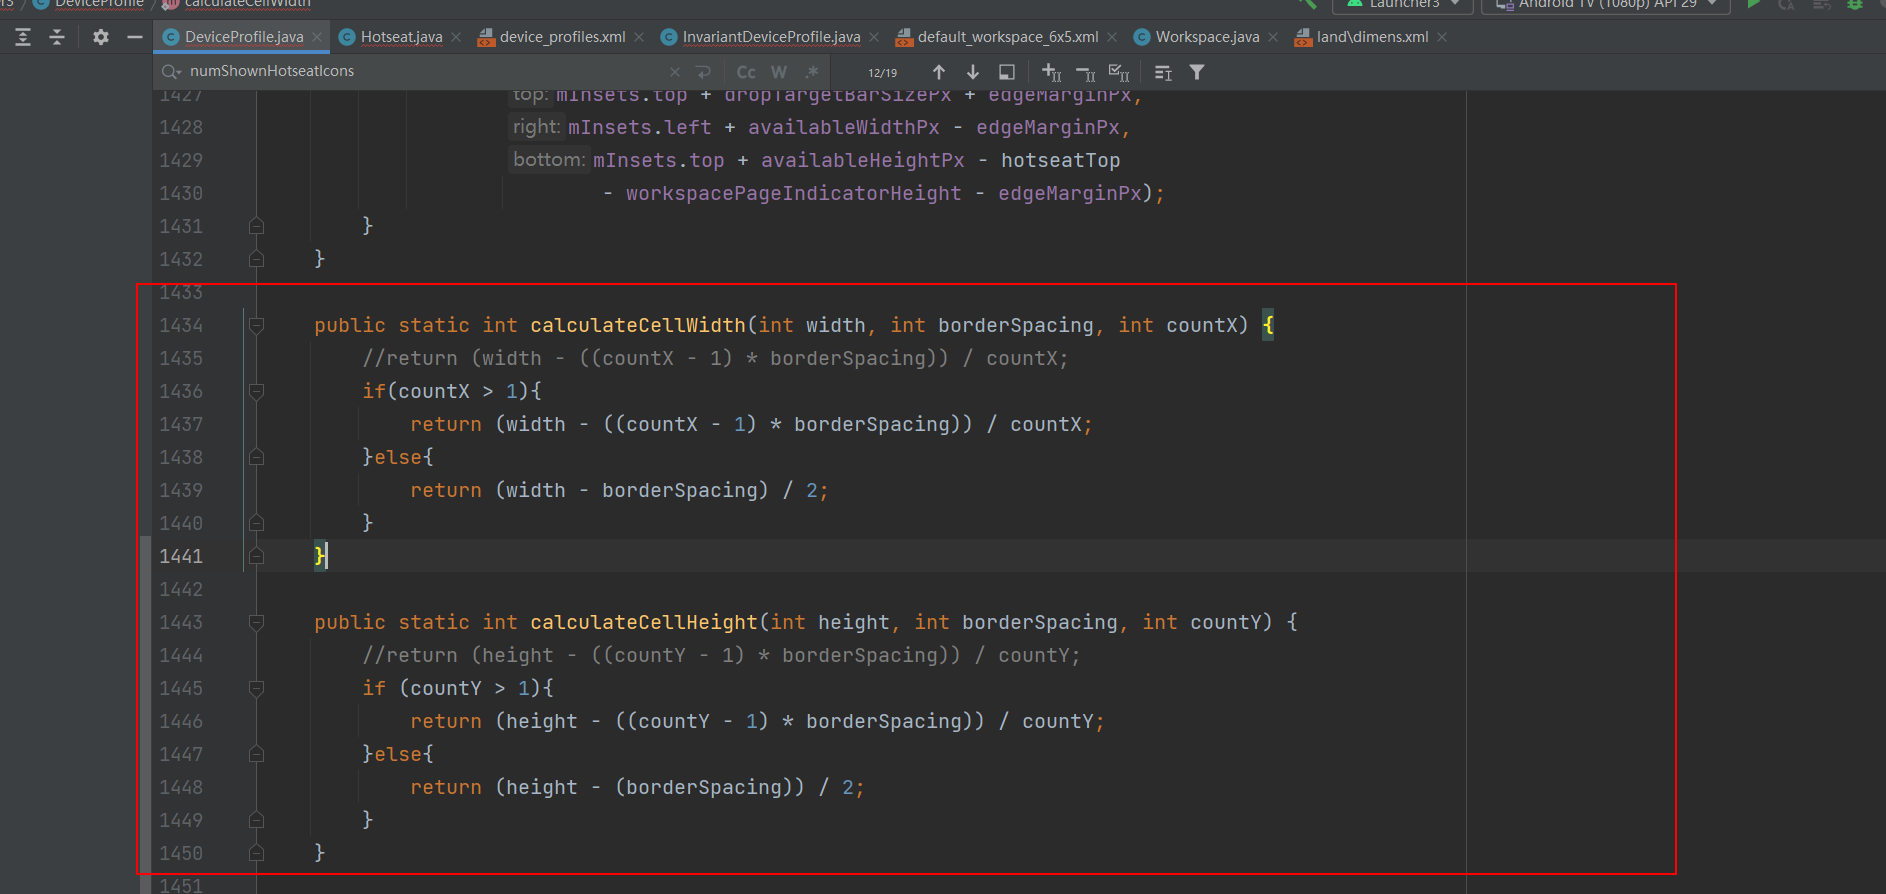
修改这两个计算方法
修改到这里,我们已经把最近任务栏去掉啦!!
四、接下来就是要把导航栏居中
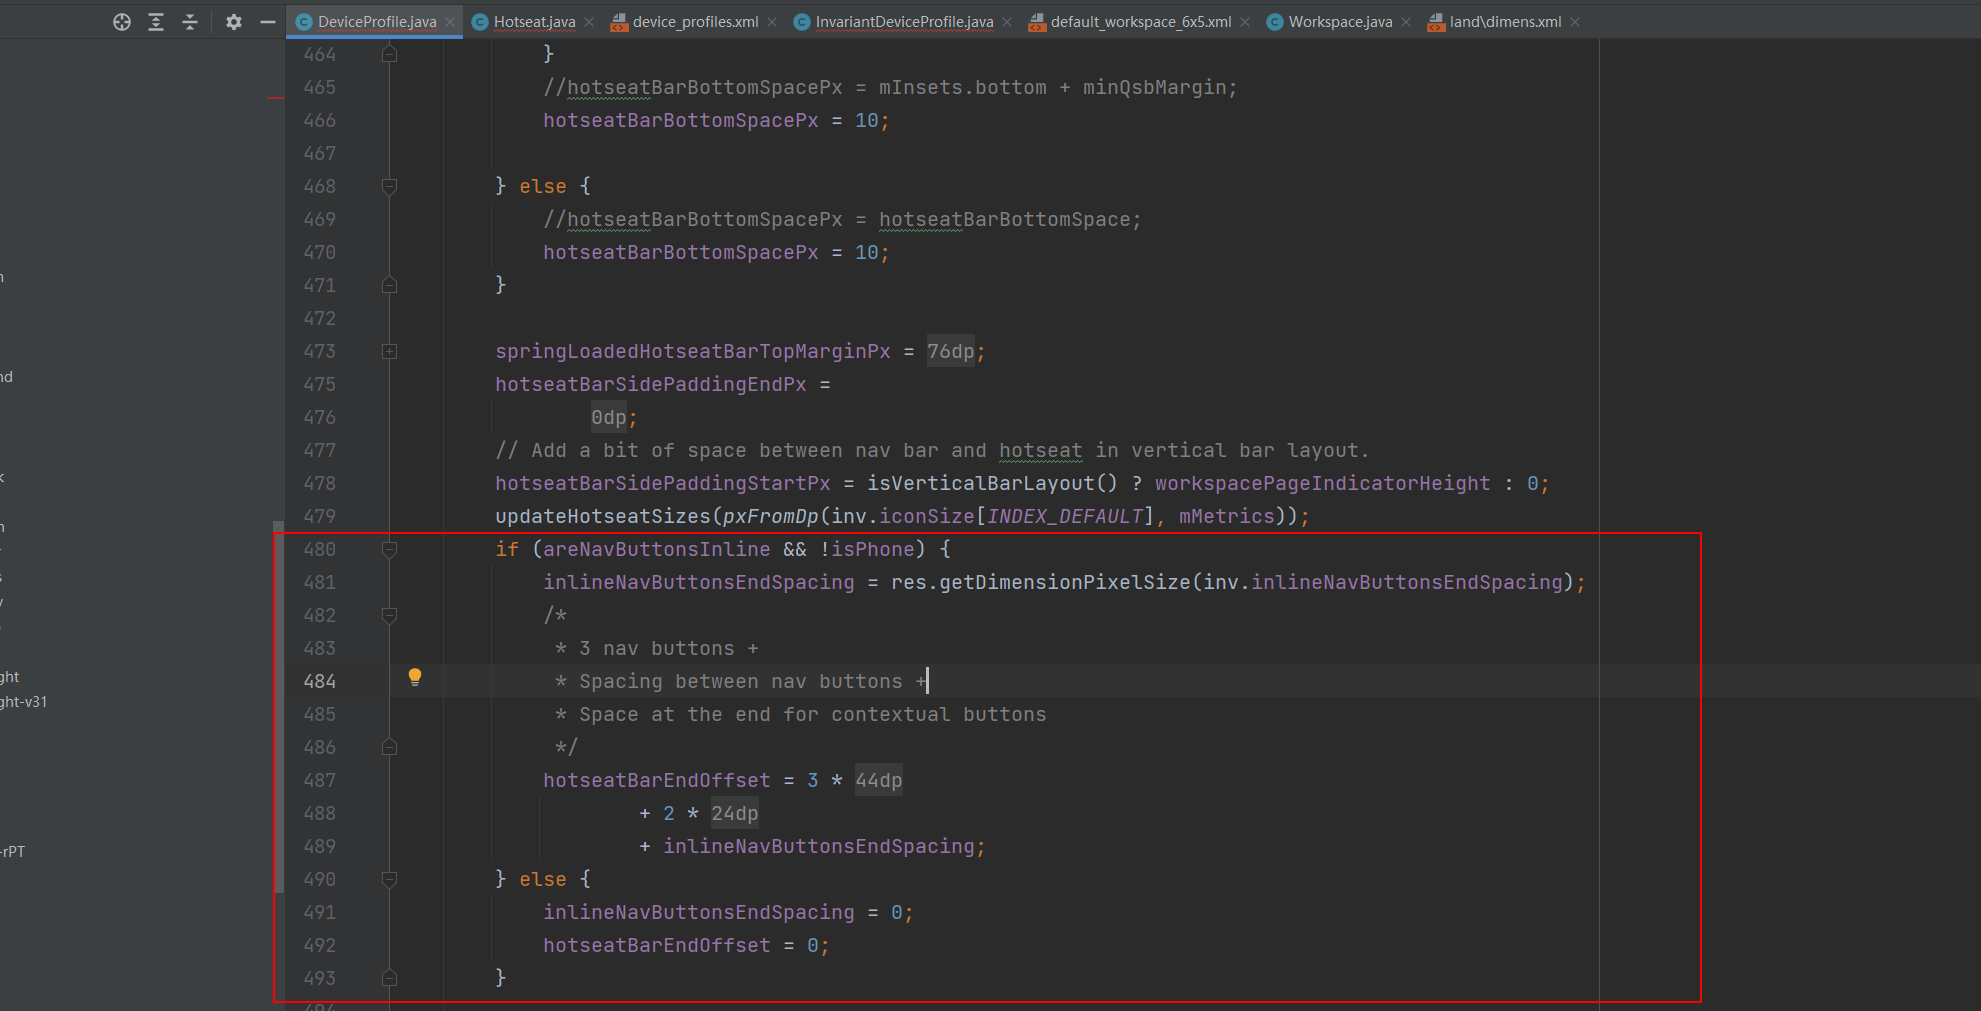
首先我们观察device_profiles.xml文件,注意到有这个变量

查找这个变量,追踪代码发现,这个变量控制着底部导航栏距离右边框的dp值,数值越大,越往中间靠拢,有了这个思路,让导航栏居中也就不难实现了,首先我们知道,导航栏居右是因为系统判断为大屏设备tablet,我们既然要保留tablet这个属性,就不能通过改变设备为手机模式来控制导航栏居中,所以就可以控制右边距啦!
而改变这个值很简单,只需要改变引用的资源值即可

我们进入该文件,改变右边距
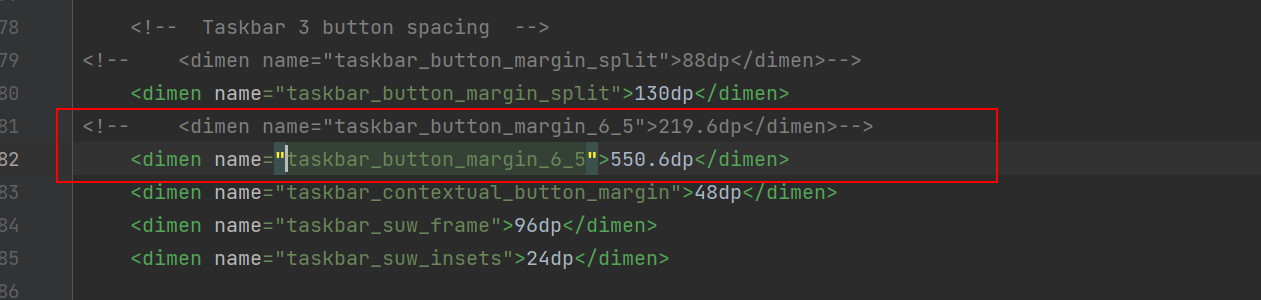
这个值大家可以慢慢调试,我这里是居中了。
五、总结
写个总结:首先判断系统是否加载partner_gms里面的布局文件,再修改布局代码,这个源码我研究了一周多,网上关于安卓13的launcher3资料不全,最终还是得自己研究源码追踪代码,期间编译调试了几十次吧!!
最终效果