1.如何创建一个vbo,并基于vbo进行绘制(写出相应的伪代码过程)
初始化 WebGL 上下文:

首先,需要获取 WebGL 上下文并进行初始化。这可以通过在 HTML 中创建一个 <canvas> 元素,并使用 JavaScript 获取 WebGL 上下文来实现。

const canvas = document.getElementById('myCanvas');

const gl = canvas.getContext('webgl');

创建和绑定 VBO:

使用 WebGL 上下文的相关方法,创建一个缓冲区对象(VBO)并将其绑定到上下文中。


// 创建 VBO

const vbo = gl.createBuffer();


// 绑定 VBO

gl.bindBuffer(gl.ARRAY_BUFFER, vbo);

填充 VBO 数据:

将顶点数据存储到 VBO 中。

// 定义顶点数据

const vertices = [

  // 顶点坐标

  -0.5, 0.5,

  -0.5, -0.5,

  0.5, -0.5,

  // 更多顶点...

];

// 将顶点数据存储到 VBO

gl.bufferData(gl.ARRAY_BUFFER, new Float32Array(vertices), gl.STATIC_DRAW);

设置顶点属性指针:

告诉 WebGL 如何解释和使用 VBO 中的数据。

// 获取顶点位置的 attribute 变量的位置

const positionAttributeLocation = gl.getAttribLocation(shaderProgram, 'a_position');


// 启用顶点属性数组

gl.enableVertexAttribArray(positionAttributeLocation);


// 告诉 WebGL 如何解析 VBO 数据

gl.vertexAttribPointer(

  positionAttributeLocation, // attribute 变量位置

  2, // 每个顶点属性的分量数量(此处为 2D 坐标,所以为 2)

  gl.FLOAT, // 数据类型

  false, // 是否标准化

  0, // 步长

  0 // 偏移量

);

绘制图形:

使用 VBO 进行绘制。

// 清空画布

gl.clearColor(0, 0, 0, 1);

gl.clear(gl.COLOR_BUFFER_BIT);

// 绘制图形

gl.drawArrays(gl.TRIANGLES, 0, 3); // 绘制三角形
2.深度缓存的意义,基于深度检测的方法
意义:绘制图形的顺序没有那么重要,有益于硬件实现
隐藏面消除(或可见面确定)是为了发现绘制片元中的像素是否被遮挡。在绘制前,首先将表面对应像素的深度值与当前深度缓存中的值进行比较,如果大于或等于深度缓存中的值,则深度测试不通过,不能绘制;若小于深度缓存中的值,则更新该像素对应的深度值和颜色值,这一过程称为深度测试。
3, 描述固定管线中的光照模型
在固定管线中,通常使用的光照模型是基于 Phong 光照模型或 Gouraud 光照模型。下面是对这两种光照模型的简要描述:
1.2.Phong 光照模型:
Phong 光照模型是固定管线中最常用的光照模型之一。它考虑了三个主要的光照成分:环境光、漫反射光和镜面光。
环境光(Ambient Light):表示场景中的全局光照,不受物体表面法线和光照方向的影响,使得物体在阴影中仍能有一定的可见度。
漫反射光(Diffuse Light):根据物体表面的法线和光照方向的夹角来计算,越接近光照方向,表面越亮。
镜面光(Specular Light):根据光照反射方向和视角方向的夹角来计算,表现物体表面的高光部分,使物体具有反射光的效果。
Phong 光照模型将这三个光照成分相加得到最终的颜色值。该模型可以通过设置光照的位置、颜色、物体材质的属性(如漫反射系数、镜面反射系数等)来调整光照效果。
Gouraud 光照模型:
Gouraud 光照模型是另一种常用的固定管线光照模型。它与 Phong 光照模型类似,也考虑了环境光、漫反射光和镜面光。但与 Phong 模型不同的是,Gouraud 光照模型在顶点着色阶段计算顶点颜色,然后通过插值技术在片段着色阶段对颜色进行插值得到每个像素的最终颜色。
Gouraud 光照模型的计算过程如下:
计算顶点的漫反射光和镜面光,并将结果存储在顶点属性中。
在片段着色阶段,对每个片段进行插值,计算片段的最终颜色。
Gouraud 光照模型相对于 Phong 光照模型的优点是计算量较小,但其缺点是在高光部分可能出现明显的插值不连续性(颜色平滑度较低)。
需要注意的是,固定管线的光照模型是在基本的渲染阶段中完成的,无法自定义修改光照模型的计算方式。
实验题部分(只有大体框架,要是想跑要自己调试)
4. threejs的程序主框架(初始化和主循环)
// 引入 Three.js 库
import * as THREE from 'three';

// 获取用于渲染的容器元素
const container = document.getElementById('container');

// 创建场景(Scene)
const scene = new THREE.Scene();

// 创建相机(Camera)
const camera = new THREE.PerspectiveCamera(75, container.clientWidth / container.clientHeight, 0.1, 1000);
camera.position.z = 5;

// 创建渲染器(Renderer)
const renderer = new THREE.WebGLRenderer();
renderer.setSize(container.clientWidth, container.clientHeight);
container.appendChild(renderer.domElement);

// 创建物体(Object)
const geometry = new THREE.BoxGeometry();
const material = new THREE.MeshBasicMaterial({ color: 0x00ff00 });
const cube = new THREE.Mesh(geometry, material);
scene.add(cube);

// 主循环函数
function animate() {
  requestAnimationFrame(animate);

  // 在每帧更新物体的状态
  cube.rotation.x += 0.01;
  cube.rotation.y += 0.01;

  // 渲染场景和相机
  renderer.render(scene, camera);
}

// 启动主循环
animate();
5.利用threejs实现某个场景的绘制,写出设计和具体代码
场景:一个太阳系模型,包含太阳、地球和月亮。
import * as THREE from 'three';

// 获取用于渲染的容器元素
const container = document.getElementById('container');
// 创建场景
const scene = new THREE.Scene();

// 创建太阳
const sunGeometry = new THREE.SphereGeometry(1, 32, 32);
const sunMaterial = new THREE.MeshBasicMaterial({ color: 0xffff00 });
const sun = new THREE.Mesh(sunGeometry, sunMaterial);
scene.add(sun);

// 创建地球
const earthGeometry = new THREE.SphereGeometry(0.5, 32, 32);
const earthMaterial = new THREE.MeshBasicMaterial({ color: 0x0000ff });
const earth = new THREE.Mesh(earthGeometry, earthMaterial);
earth.position.x = 3;
scene.add(earth);

// 创建月亮
const moonGeometry = new THREE.SphereGeometry(0.2, 32, 32);
const moonMaterial = new THREE.MeshBasicMaterial({ color: 0x808080 });
const moon = new THREE.Mesh(moonGeometry, moonMaterial);
moon.position.x = 1;
earth.add(moon);

// 创建光照
const ambientLight = new THREE.AmbientLight(0xffffff);
scene.add(ambientLight);

const directionalLight = new THREE.DirectionalLight(0xffffff);
directionalLight.position.set(1, 1, 1);
scene.add(directionalLight);

// 创建相机
const camera = new THREE.PerspectiveCamera(75, container.clientWidth / container.clientHeight, 0.1, 100);
camera.position.z = 6;

// 创建渲染器
const renderer = new THREE.WebGLRenderer();
renderer.setSize(container.clientWidth, container.clientHeight);
container.appendChild(renderer.domElement);

// 主循环函数
function animate() {
  requestAnimationFrame(animate);
  // 地球和月亮自转
  earth.rotation.y += 0.01;
  moon.rotation.y += 0.01;

  // 渲染场景和相机
 renderer.render(scene, camera);
}

// 启动主循环
animate();
6.利用threejs实现对象的运动控制的设计,如太阳系运动,以及汽车与轮子运动等。
公转举例:
import * as THREE from 'three';

// 获取用于渲染的容器元素
const container = document.getElementById('container');

// 创建场景
const scene = new THREE.Scene();

// 创建太阳
const sunGeometry = new THREE.SphereGeometry(1, 32, 32);
const sunMaterial = new THREE.MeshBasicMaterial({ color: 0xffff00 });
const sun = new THREE.Mesh(sunGeometry, sunMaterial);
scene.add(sun);

// 创建地球
const earthGeometry = new THREE.SphereGeometry(0.5, 32, 32);
const earthMaterial = new THREE.MeshBasicMaterial({ color: 0x0000ff });
const earth = new THREE.Mesh(earthGeometry, earthMaterial);
scene.add(earth);

// 创建月亮
const moonGeometry = new THREE.SphereGeometry(0.2, 32, 32);
const moonMaterial = new THREE.MeshBasicMaterial({ color: 0x808080 });
const moon = new THREE.Mesh(moonGeometry, moonMaterial);
earth.add(moon);

// 创建光照
const ambientLight = new THREE.AmbientLight(0xffffff);
scene.add(ambientLight);

const directionalLight = new THREE.DirectionalLight(0xffffff);
directionalLight.position.set(1, 1, 1);
scene.add(directionalLight);

// 创建相机
const camera = new THREE.PerspectiveCamera(75, container.clientWidth / container.clientHeight, 0.1, 100);
camera.position.z = 6;

// 创建渲染器
const renderer = new THREE.WebGLRenderer();
renderer.setSize(container.clientWidth, container.clientHeight);
container.appendChild(renderer.domElement);

// 创建动画循环
function animate() {
  requestAnimationFrame(animate);

  // 地球公转
  earth.rotation.y += 0.01;

  // 月亮公转
  moon.rotation.y += 0.03;

  // 渲染场景和相机
  renderer.render(scene, camera);
}

// 启动动画循环
animate();
7.利用threejs实现天空盒的搭建
import * as THREE from 'three';

// 获取用于渲染的容器元素
const container = document.getElementById('container');

// 创建场景
const scene = new THREE.Scene();

// 创建相机
const camera = new THREE.PerspectiveCamera(75, container.clientWidth / container.clientHeight, 0.1, 100);
camera.position.z = 1;

// 创建渲染器
const renderer = new THREE.WebGLRenderer();
renderer.setSize(container.clientWidth, container.clientHeight);
container.appendChild(renderer.domElement);

// 加载天空盒的纹理图像
const textureLoader = new THREE.CubeTextureLoader();
const texture = textureLoader.load([
  'right.jpg', 'left.jpg',
  'top.jpg', 'bottom.jpg',
  'front.jpg', 'back.jpg'
]);
scene.background = texture;

// 创建天空盒的几何体
const skyboxGeometry = new THREE.BoxGeometry(1, 1, 1);
const skyboxMaterial = new THREE.MeshBasicMaterial({ color: 0xffffff, side: THREE.BackSide });
const skybox = new THREE.Mesh(skyboxGeometry, skyboxMaterial);
scene.add(skybox);

// 创建动画循环
function animate() {
  requestAnimationFrame(animate);

  // 渲染场景和相机
  renderer.render(scene, camera);
}

// 启动动画循环
animate();
8.利用threejs设计实现一个简单游戏:用鼠标控制旋转方向,键盘控制向前向后移动,空格键发射子弹,射线检测碰撞结果
import * as THREE from 'three';

// 获取用于渲染的容器元素
const container = document.getElementById('container');

// 创建场景
const scene = new THREE.Scene();

// 创建相机
const camera = new THREE.PerspectiveCamera(75, container.clientWidth / container.clientHeight, 0.1, 100);
camera.position.z = 5;

// 创建渲染器
const renderer = new THREE.WebGLRenderer();
renderer.setSize(container.clientWidth, container.clientHeight);
container.appendChild(renderer.domElement);

// 创建一个立方体作为玩家角色
const playerGeometry = new THREE.BoxGeometry(1, 1, 1);
const playerMaterial = new THREE.MeshBasicMaterial({ color: 0x00ff00 });
const player = new THREE.Mesh(playerGeometry, playerMaterial);
scene.add(player);

// 创建子弹
const bulletGeometry = new THREE.SphereGeometry(0.1, 16, 16);
const bulletMaterial = new THREE.MeshBasicMaterial({ color: 0xff0000 });
const bullets = [];

// 键盘控制移动
const keyboard = {
  forward: false,
  backward: false
};

document.addEventListener('keydown', (event) => {
  const keyCode = event.code;
  if (keyCode === 'KeyW') {
    keyboard.forward = true;
  } else if (keyCode === 'KeyS') {
    keyboard.backward = true;
  } else if (keyCode === 'Space') {
    // 发射子弹
    const bullet = new THREE.Mesh(bulletGeometry, bulletMaterial);
    bullet.position.copy(player.position);
    bullet.direction = new THREE.Vector3(0, 0, -1);
    bullets.push(bullet);
    scene.add(bullet);
  }
});

document.addEventListener('keyup', (event) => {
  const keyCode = event.code;
  if (keyCode === 'KeyW') {
    keyboard.forward = false;
  } else if (keyCode === 'KeyS') {
    keyboard.backward = false;
  }
});

// 鼠标控制旋转
const mouse = new THREE.Vector2();
const raycaster = new THREE.Raycaster();

document.addEventListener('mousemove', (event) => {
  mouse.x = (event.clientX / container.clientWidth) * 2 - 1;
  mouse.y = -(event.clientY / container.clientHeight) * 2 + 1;
});

// 创建动画循环
function animate() {
  requestAnimationFrame(animate);

  // 更新玩家角色的旋转方向
  raycaster.setFromCamera(mouse, camera);
  const intersects = raycaster.intersectObjects(scene.children, true);
  if (intersects.length > 0) {
    const intersection = intersects[0];
    player.lookAt(intersection.point);
  }

  // 更新玩家角色的移动
  const playerSpeed = 0.1;
  if (keyboard.forward) {
    player.translateZ(-playerSpeed);
  }
  if (keyboard.backward) {
    player.translateZ(playerSpeed);
  }

  // 更新子弹的位置
  const bulletSpeed = 0.3;
  bullets.forEach((bullet) => {
    bullet.translateZ(-bulletSpeed);
  });

  // 射线检测碰撞结果
  bullets.forEach((bullet) => {
    const intersects = raycaster.intersectObject(bullet, true);
    if (intersects.length > 0) {
      console.log('Bullet hit!');
      // 处理碰撞结果
      // ...
      // 从场景中移除子弹
      scene.remove(bullet);
      bullets.splice(bullets.indexOf(bullet), 1);
    }
  });

  // 渲染场景和相机
  renderer.render(scene, camera);
}

// 启动动画循环
animate();
9.利用threejs设计实现一个函数曲线的绘制
import * as THREE from 'three';

// 获取用于渲染的容器元素
const container = document.getElementById('container');

// 创建场景
const scene = new THREE.Scene();

// 创建相机
const camera = new THREE.PerspectiveCamera(75, container.clientWidth / container.clientHeight, 0.1, 100);
camera.position.z = 5;

// 创建渲染器
const renderer = new THREE.WebGLRenderer();
renderer.setSize(container.clientWidth, container.clientHeight);
container.appendChild(renderer.domElement);

// 创建函数曲线的几何体
const curveGeometry = new THREE.Geometry();
const curveMaterial = new THREE.LineBasicMaterial({ color: 0x00ff00 });
const curve = new THREE.Line(curveGeometry, curveMaterial);
scene.add(curve);

// 定义绘制函数曲线的函数
function drawFunctionCurve() {
  const numPoints = 100; // 曲线上的点的数量
  const curveRadius = 2; // 曲线的半径

  for (let i = 0; i < numPoints; i++) {
    const theta = (i / numPoints) * Math.PI * 2; // 在 0 到 2π 之间均匀分布的角度
    const x = Math.cos(theta) * curveRadius;
    const y = Math.sin(theta) * curveRadius;
    const z = Math.sin(theta * 2) * curveRadius; // 示例函数为 z = sin(2θ),可以替换为任何函数

    curveGeometry.vertices.push(new THREE.Vector3(x, y, z));
  }

  curveGeometry.verticesNeedUpdate = true;
}

// 调用绘制函数曲线的函数
drawFunctionCurve();

// 创建动画循环
function animate() {
  requestAnimationFrame(animate);

  // 渲染场景和相机
  renderer.render(scene, camera);
}

// 启动动画循环
animate();
10.利用threejs设计实现一个曲面的绘制
import * as THREE from 'three';

// 获取用于渲染的容器元素
const container = document.getElementById('container');

// 创建场景
const scene = new THREE.Scene();

// 创建相机
const camera = new THREE.PerspectiveCamera(75, container.clientWidth / container.clientHeight, 0.1, 100);
camera.position.z = 5;

// 创建渲染器
const renderer = new THREE.WebGLRenderer();
renderer.setSize(container.clientWidth, container.clientHeight);
container.appendChild(renderer.domElement);

// 创建曲面的几何体
const surfaceGeometry = new THREE.ParametricGeometry(createSurface, 20, 20);
const surfaceMaterial = new THREE.MeshBasicMaterial({ color: 0x00ff00, wireframe: true });
const surface = new THREE.Mesh(surfaceGeometry, surfaceMaterial);
scene.add(surface);

// 定义创建曲面的函数
function createSurface(u, v, target) {
  const x = u - 0.5; // 曲面的 x 坐标
  const y = v - 0.5; // 曲面的 y 坐标
  const z = Math.sin(x * Math.PI * 2) * Math.cos(y * Math.PI * 2); // 曲面的 z 坐标,示例为 sin(2πx)cos(2πy),可以替换为任何函数

  target.set(x, y, z);
}

// 创建动画循环
function animate() {
  requestAnimationFrame(animate);

  // 渲染场景和相机
  renderer.render(scene, camera);
}

// 启动动画循环
animate();
11.利用threejs设计实现一个模型文件的加载和场景绘制
import * as THREE from 'three';
import { GLTFLoader } from 'three/examples/jsm/loaders/GLTFLoader';

// 获取用于渲染的容器元素
const container = document.getElementById('container');

// 创建场景
const scene = new THREE.Scene();

// 创建相机
const camera = new THREE.PerspectiveCamera(75, container.clientWidth / container.clientHeight, 0.1, 100);
camera.position.z = 5;

// 创建渲染器
const renderer = new THREE.WebGLRenderer();
renderer.setSize(container.clientWidth, container.clientHeight);
container.appendChild(renderer.domElement);

// 创建光源
const ambientLight = new THREE.AmbientLight(0xffffff, 0.5);
scene.add(ambientLight);
const directionalLight = new THREE.DirectionalLight(0xffffff, 0.5);
directionalLight.position.set(5, 5, 5);
scene.add(directionalLight);

// 创建加载器
const loader = new GLTFLoader();

// 加载模型文件
loader.load(
  'path/to/your/model.glb',
  function (gltf) {
    const model = gltf.scene;
    scene.add(model);

    // 调整模型的位置、旋转或缩放
    model.position.set(0, 0, 0);
    model.rotation.set(0, Math.PI / 2, 0);
    model.scale.set(0.1, 0.1, 0.1);

    // 执行渲染
    animate();
  },
  undefined,
  function (error) {
    console.error(error);
  }
);

// 创建动画循环
function animate() {
  requestAnimationFrame(animate);

  // 渲染场景和相机
  renderer.render(scene, camera);
}

// 启动动画循环
animate();
12.利用threejs实现三维文字信息tip注释的功能。
import * as THREE from 'three';

// 获取用于渲染的容器元素
const container = document.getElementById('container');

// 创建场景
const scene = new THREE.Scene();

// 创建相机
const camera = new THREE.PerspectiveCamera(75, container.clientWidth / container.clientHeight, 0.1, 100);
camera.position.z = 5;

// 创建渲染器
const renderer = new THREE.WebGLRenderer();
renderer.setSize(container.clientWidth, container.clientHeight);
container.appendChild(renderer.domElement);

// 创建光源
const ambientLight = new THREE.AmbientLight(0xffffff, 0.5);
scene.add(ambientLight);
const directionalLight = new THREE.DirectionalLight(0xffffff, 0.5);
directionalLight.position.set(5, 5, 5);
scene.add(directionalLight);

// 创建一个立方体作为示例对象
const geometry = new THREE.BoxGeometry(1, 1, 1);
const material = new THREE.MeshPhongMaterial({ color: 0x00ff00 });
const cube = new THREE.Mesh(geometry, material);
scene.add(cube);

// 创建文字标签
const textLabel = createTextLabel('Hello, World!');
textLabel.position.set(0, 1.5, 0); // 设置文字标签的位置
scene.add(textLabel);

// 创建文字标签的函数
function createTextLabel(text) {
  const canvas = document.createElement('canvas');
  const context = canvas.getContext('2d');
  context.font = 'Bold 30px Arial';
  context.fillStyle = 'rgba(255, 255, 255, 0.95)';
  context.fillText(text, 0, 30);

  const texture = new THREE.Texture(canvas);
  texture.needsUpdate = true;

  const spriteMaterial = new THREE.SpriteMaterial({ map: texture });
  const sprite = new THREE.Sprite(spriteMaterial);
  sprite.scale.set(2, 1, 1); // 设置文字标签的缩放

  return sprite;
}

// 创建动画循环
function animate() {
  requestAnimationFrame(animate);

  // 渲染场景和相机
  renderer.render(scene, camera);
}

// 启动动画循环
animate();
13.利用threejs的raycaster.setFromCamera( pointer, camera )实现鼠标选中三维物体进行交互
import * as THREE from 'three';

// 获取用于渲染的容器元素
const container = document.getElementById('container');

// 创建场景
const scene = new THREE.Scene();

// 创建相机
const camera = new THREE.PerspectiveCamera(75, container.clientWidth / container.clientHeight, 0.1, 100);
camera.position.z = 5;

// 创建渲染器
const renderer = new THREE.WebGLRenderer();
renderer.setSize(container.clientWidth, container.clientHeight);
container.appendChild(renderer.domElement);

// 创建光源
const ambientLight = new THREE.AmbientLight(0xffffff, 0.5);
scene.add(ambientLight);
const directionalLight = new THREE.DirectionalLight(0xffffff, 0.5);
directionalLight.position.set(5, 5, 5);
scene.add(directionalLight);

// 创建一个立方体作为示例对象
const geometry = new THREE.BoxGeometry(1, 1, 1);
const material = new THREE.MeshPhongMaterial({ color: 0x00ff00 });
const cube = new THREE.Mesh(geometry, material);
scene.add(cube);

// 创建射线拾取器
const raycaster = new THREE.Raycaster();
const mouse = new THREE.Vector2();

// 监听鼠标移动事件
container.addEventListener('mousemove', onMouseMove, false);

// 监听鼠标点击事件
container.addEventListener('mousedown', onMouseDown, false);

// 鼠标移动事件处理程序
function onMouseMove(event) {
  // 根据鼠标位置计算归一化设备坐标
  mouse.x = (event.clientX / container.clientWidth) * 2 - 1;
  mouse.y = -(event.clientY / container.clientHeight) * 2 + 1;
}

// 鼠标点击事件处理程序
function onMouseDown(event) {
  // 更新射线的起点和方向
  raycaster.setFromCamera(mouse, camera);

  // 计算射线和物体的交叉点
  const intersects = raycaster.intersectObjects(scene.children, true);

  if (intersects.length > 0) {
    // 选中了物体
    const selectedObject = intersects[0].object;
    console.log('Selected object:', selectedObject);
  }
}

// 创建动画循环
function animate() {
  requestAnimationFrame(animate);

  // 渲染场景和相机
  renderer.render(scene, camera);
}

// 启动动画循环
animate();
14.利用threejs 的PCDloader实现点云的加载,与现实,并交互展示
  import * as THREE from 'three';
     import { OrbitControls } from './js/OrbitControls.js';
     import { PCDLoader } from './js/PCDLoader.js';

                const scene = new THREE.Scene();
		const camera = new THREE.PerspectiveCamera(75, window.innerWidth / window.innerHeight, 0.1, 5000);
		const renderer = new THREE.WebGLRenderer();
		renderer.setSize(window.innerWidth, window.innerHeight);
		document.body.appendChild(renderer.domElement);


                camera.position.set(0, -500, -100);
		const helper = new THREE.CameraHelper(camera);
		scene.add(helper);
		const controls = new OrbitControls(camera, renderer.domElement);
		controls.enableDamping = true;
		controls.dampingFactor = 0.25;
		controls.enableZoom = true;

		const loader = new PCDLoader();
		loader.load('./images/ism_train_cat.pcd',function (points) {
				points.material.size=0.01;
				points.material.color= new THREE.Color(0xff0000);
				scene.add(points);

                function animate() {
			requestAnimationFrame(animate);
			renderer.render(scene, camera);
			controls.update();

		}

		animate();
			},
			function (xhr) {
				console.log((xhr.loaded / xhr.total * 100) + '% 加载数');
			},
			function (error) {
				console.log('发生错误', error);
			}
		);
15.利用pcljs实现点云数据的处理,比如过滤,语义分割等。
切割举例:
import * as PCL from "https://cdn.jsdelivr.net/npm/[email protected]/dist/pcl.esm.js";
import * as THREE from 'three';
import { OrbitControls } from 'three/addons/controls/OrbitControls.js';
import { PCDLoader } from 'three/addons/loaders/PCDLoader.js';

const scene = new THREE.Scene();
const camera = new THREE.PerspectiveCamera(80, container.offsetWidth / container.offsetHeight, 0.01, 10000000);
camera.position.set(0, 0, 1.5);
const renderer = new THREE.WebGLRenderer();
renderer.setSize(container.offsetWidth, container.offsetHeight);
container.appendChild(renderer.domElement);
const controls = new OrbitControls(camera, renderer.domElement);

let cloudOriginalData;
let cloudFilteredData;
let cloud;

async function main() {
    const cloudBuffer = await fetch("./images/point_cloud.pcd").then((res) =>
        res.arrayBuffer()
    );

    await PCL.init({
        url: `https://cdn.jsdelivr.net/npm/pcl.js/dist/pcl-core.wasm`
    });

    cloud = PCL.loadPCDData(cloudBuffer, PCL.PointXYZ);

    const objectCenter = new PCL.PointXYZ(2, 0, 0);
    const foregroundPoints = new PCL.PointCloud();
    foregroundPoints.addPoint(objectCenter);

    const seg = new PCL.MinCutSegmentation();
    seg.setForegroundPoints(foregroundPoints);
    seg.setInputCloud(cloud);
    seg.setRadius(3.0433856);
    seg.setSigma(0.1);
    seg.setSourceWeight(0.8);
    seg.setNumberOfNeighbours(14);
    seg.extract();
    const coloredCloud = seg.getColoredCloud();

    cloudFilteredData = PCL.savePCDDataASCII(coloredCloud);
showPointCloud(coloredCloud) ;

}


function showPointCloud(currentPointCloud) {
    const decoder = new TextDecoder('utf-8');
    const pcdString = decoder.decode(new Uint8Array(cloudFilteredData));
    const blob = new Blob([pcdString], { type: 'text/plain' });
    const url = URL.createObjectURL(blob);
    const loader = new PCDLoader();
    loader.load(url, function (points) {
        points.geometry.center();
        points.geometry.rotateX(Math.PI);
        const material = new THREE.PointsMaterial({ color: 0xffffff, size: 0.02, vertexColors: showVertColor });
        const pointCloud = new THREE.Points(points.geometry, material);
        scene.add(pointCloud);
    });
}

function animate() {
    requestAnimationFrame(animate);
    renderer.render(scene, camera);
}

main();
animate();
过滤举例:
import * as PCL from "https://cdn.jsdelivr.net/npm/[email protected]/dist/pcl.esm.js";
import * as THREE from 'three';
import { OrbitControls } from 'three/addons/controls/OrbitControls.js';
import { PCDLoader } from 'three/addons/loaders/PCDLoader.js';
const container = document.getElementById('Panel1');
const scene = new THREE.Scene();
const camera = new THREE.PerspectiveCamera(80, container.offsetWidth / container.offsetHeight, 0.01, 10000000);
camera.position.set(0, 0, 1.5);
const renderer = new THREE.WebGLRenderer();
renderer.setSize(container.offsetWidth, container.offsetHeight);
container.appendChild(renderer.domElement);
const controls = new OrbitControls(camera, renderer.domElement);
let cloudOriginalData;
let cloudFilteredData;
let cloud;
async function main() {
const cloudBuffer = await fetch("./images/point_cloud.pcd").then((res) =>
res.arrayBuffer()
);
await PCL.init({
url: `https://cdn.jsdelivr.net/npm/pcl.js/dist/pcl-core.wasm`
});
cloud = PCL.loadPCDData(cloudBuffer, PCL.PointXYZ);
const sor = new PCL.StatisticalOutlierRemoval();
sor.setInputCloud(cloud);
sor.setMeanK(40);
sor.setStddevMulThresh(3.0);
const cloudFiltered = sor.filter();
cloudFilteredData = PCL.savePCDDataASCII(cloudFiltered);
cloudOriginalData = PCL.savePCDDataASCII(cloud);
showPointCloud(cloudOriginalData);
}
function showPointCloud(currentPointCloud) {
const decoder = new TextDecoder('utf-8');
const pcdString = decoder.decode(new Uint8Array(currentPointCloud));
const blob = new Blob([pcdString], { type: 'text/plain' });
const url = URL.createObjectURL(blob);
const loader = new PCDLoader();
loader.load(url, function (points) {
points.geometry.center();
points.geometry.rotateX(Math.PI);
const material = new THREE.PointsMaterial({ color: 0xffffff, size: 0.02, vertexColors: false });
if (currentPointCloud == cloudOriginalData) {
material.color.setHex(0xad1010);
} else {
material.color.setHex(0x1ea10c);
}
const pointCloud = new THREE.Points(points.geometry, material);
scene.add(pointCloud);
});
}
function animate() {
requestAnimationFrame(animate);
renderer.render(scene, camera);
}
main();
animate();
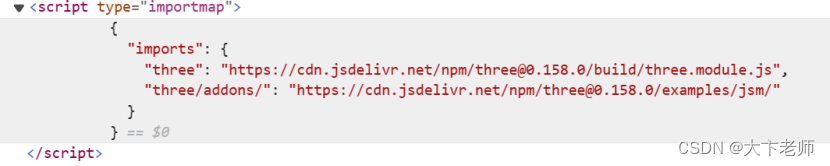
免责声明:大部分就是主要的框架里面如果自己跑需要配置好环境和相应的库的调取,比如最后一个题需要: