目录
一、 容器命令
如何创建容器?
使用docker run命令创建容器语法格式:
docker run -参数 镜像名称:镜像标签 [手工指定启动命令]
- 查看run的参数
docker help run
man docker rundocker run 常用参数
- 参数 -i 交互式
- 参数 -t 分配终端
- 参数 -d 后台运行
- 参数 --name 容器名称- 参数 -rm 容器结束后自动删除
- 转入后台快捷键 (ctrl -p + ctrl -q)
1. 镜像管理命令
| 镜像管理命令 | 说明 |
| docker images | 查看本机镜像 |
| docker pull 镜像名称:标签 | 下载镜像 |
| docker save 镜像名称:标签 -o 文件名 | 备份镜像为tar包 |
| docker load -i 备份文件名称 | 导入备份的镜像文件 |
| docker history 镜像名称:标签 | 查看镜像的制作历史 |
例一:pull、images、history
# 下载 busybox:latest 镜像
[root@docker-0001 ~]# docker pull busybox:latest
latest: Pulling from library/busybox
8b3d7e226fab: Pull complete
Digest: sha256:410a07f17151ffffb513f942a01748dfdb921de915ea6427d61d60b0357c1dcd
Status: Downloaded newer image for busybox:latest
docker.io/library/busybox:latest

# 查看本机镜像
[root@docker-0001 ~]# docker images
REPOSITORY TAG    IMAGE        ID CREATED   SIZE
busybox    latest a9d583973f65 2  years ago 1.23MB

# 查看镜像的制作历史
[root@docker-0001 ~]# docker history busybox:latest
IMAGE        CREATED     CREATED BY                                      SIZE   COMMENT
a9d583973f65 2 years ago /bin/sh -c #(nop) CMD ["sh"]                    0B
<missing>    2 years ago /bin/sh -c #(nop) ADD file:b49bf6359240618f2... 1.23MB
例二:save、load
# 备份 rockylinux:8.5 镜像为 tar 包
[root@docker-0001 ~]# docker save busybox:latest -o busybox.tar

# 使用备份文件恢复镜像
[root@docker-0001 ~]# docker load -i myos.tar.xz
3d0a99d5e068: Loading layer 49.9MB/49.9MB
Loaded image: myos:httpd
bbd48077e0f3: Loading layer 24.91MB/24.91MB
Loaded image: myos:nginx
3ae63ef871b0: Loading layer 25.72MB/25.72MB
Loaded image: myos:php-fpm

# 查看本机镜像
[root@docker-0001 ~]# docker images
REPOSITORY TAG     IMAGE        ID CREATED    SIZE
myos       php-fpm f70bdfd2042c 6  months ago 275MB
myos       nginx   10dc658da2fe 6  months ago 274MB
myos       httpd   9245e660f88f 7  months ago 299MB

[root@docker-0001 ~]# docker load -i myos.tar.xz
Loaded image: myos:httpd
Loaded image: myos:nginx
Loaded image: myos:php-fpm
[root@docker-0001 ~]# docker save myos:php-fpm -o php-fpm.tar
[root@docker-0001 ~]# scp php-fpm.tar 192.168.1.32:/root
#--------------------------------------------------------------------------------
-----------------------#
[root@docker-0002 ~]# docker load -i php-fpm.tar
[root@docker-0002 ~]# docker history myos:php-fpm
IMAGE        CREATED       CREATED BY                                       SIZE COMMENT
210996f98b85 21 months ago /bin/sh -c #(nop) CMD ["/bin/bash"]              0B
<missing>    21 months ago /bin/sh -c #(nop) ADD file:790b4c6a174560d47...  205MB
2. 容器管理命令
| 容器管理命令 | 说明 |
| docker run -it(d) 镜像名称:标签 | 创建容器(d在后台运行) |
| docker ps | 查看容器的信息 |
| docker inspect 镜像名称 | 容器名称 | 查询(容器/镜像)的详细信息 |
| docker [start | stop | restart] 容器id | 启动、停止、重启容器 |
| docker exec -it 容器ID | 启动命令 在容器内执行命令 |
| docker cp 路径1 路径2 | 拷贝文件:路径格式(本机路径、容器ID/路径) |
| docker rm 容器ID | 删除容器 |
| docker logs 容器ID | 查看容器日志 |
| docker tag 镜像ID:标签 镜像名称:新的标签 | 创建新的镜像名称和标签 |
| docker rmi 镜像名称:标签 | 删除镜像(必须先删除该镜像启动的所有容器) |
例一:run
# 创建一个容器
[root@docker-0001 ~]# docker run -it myos:8.5
[root@29c75fc3f7d9 /]# hostname
29c75fc3f7d9
[root@29c75fc3f7d9 /]# ps -ef
UID  PID PPID  C STIME TTY   TIME     CMD
root   1    0  0 09:45 pts/0 00:00:00 /bin/bash
root  19    1  0 09:46 pts/0 00:00:00 ps -ef
[root@29c75fc3f7d9 /]# ifconfig eth0
eth0: flags=4163<UP,BROADCAST,RUNNING,MULTICAST> mtu 1500
    inet 172.17.0.2 netmask 255.255.0.0 broadcast 172.17.255.255
    ether 02:42:ac:11:00:02 txqueuelen 0 (Ethernet)
    RX packets 14 bytes 1252 (1.2 KiB)
    RX errors 0 dropped 0 overruns 0 frame 0
    TX packets 0 bytes 0 (0.0 B)
    TX errors 0 dropped 0 overruns 0 carrier 0 collisions 0
[root@29c75fc3f7d9 /]# exit
exit

# 创建后台容器
[root@docker-0001 ~]# docker run -itd myos:httpd
0039f9743702a5a3e468d778597efabb7b9a04fd0cba1de4a941d91990c38212

# 创建名为web1的后台容器
[root@docker-0001 ~]# docker run -itd --name web1 myos:httpd
c9b8579842c4f615582e96ac87ce9053513b91c5ebdae31183f242d95e3ba3e7
例二:ps
[root@docker-0001 ~]# docker ps
CONTAINER ID IMAGE      COMMAND             CREATED             STATUS            PORTS NAMES
c9b8579842c4 myos:httpd "httpd -DFOREGROUND" 40 seconds ago     Up  40seconds     80/tcp web1
0039f9743702 myos:httpd "httpd -DFOREGROUND" About a minute ago Up About a minute 80/tcp peaceful_khorana
[root@docker-0001 ~]# docker ps -a
CONTAINER ID IMAGE      COMMAND              CREATED            STATUS            PORTS NAMES
c9b8579842c4 myos:httpd "httpd -DFOREGROUND" About a minute ago Up About a minute 80/tcp web1
0039f9743702 myos:httpd "httpd -DFOREGROUND" 2 minutes ago      Up 2 minutes      80/tcp peaceful_khorana
29c75fc3f7d9 myos:8.5   "/bin/bash"          3 minutes ago      Exited(0) 3 minutes ago infallible_swartz
[root@docker-0001 ~]# docker ps -aq
c9b8579842c4
0039f9743702
29c75fc3f7d9
例三:start | stop | restart
# 停止容器
[root@docker-0001 ~]# docker stop web1 0039f9743702
web1
0039f9743702

# 启动容器
[root@docker-0001 ~]# docker start web1
web1

# 重启容器
[root@docker-0001 ~]# docker restart 0039f9743702
0039f9743702
例四:inspect
# 查询镜像的详细信息
[root@docker-0001 ~]# docker inspect myos:httpd
{ ......
       "Cmd": [
           "httpd",
           "-DFOREGROUND"
       ],
......
}
# 查询容器的详细信息
[root@docker-0001 ~]# docker inspect 0039f9743702 web1
[
{ ... ...
        "Gateway": "172.17.0.1",
        "GlobalIPv6Address": "",
        "GlobalIPv6PrefixLen": 0,
        "IPAddress": "172.17.0.3",
        "IPPrefixLen": 16,
  ... ...
例五:exec、cp
# 在容器内执行非交互命令
[root@docker-0001 ~]# docker exec -t web1 /bin/ls
index.html info.php

# 在容器内执行交互命令
[root@docker-0001 ~]# docker exec -it web1 /bin/bash
[root@c9b8579842c4 html]# exit
exit

# 从容器内拷贝文件出来
[root@docker-0001 ~]# docker cp web1:/etc/httpd/conf/httpd.conf ./
[root@docker-0001 ~]# sed -ri "s,(Listen )80,\18080," httpd.conf

# 把文件拷贝到容器内
[root@docker-0001 ~]# docker cp httpd.conf web1:/etc/httpd/conf/

# 重启容器
[root@docker-0001 ~]# docker restart web1
web1

[root@docker-0001 ~]# curl http://172.17.0.2:8080
Welcome to The Apache.
例五:rm、logs
# 删除容器
[root@docker-0001 ~]# docker rm 29c75fc3f7d9
29c75fc3f7d9
# 强制删除容器
[root@docker-0001 ~]# docker rm -f web1
web1
# 删除所有容器
[root@docker-0001 ~]# docker rm -f $(docker ps -aq)
0039f9743702

# 创建容器
[root@docker-0001 ~]# docker run -itd --name web myos:nginx
a76a68ddd2c5703305f7965aeadb5cbbdeac6809ae6dfa9b956d77a8a4ccb49e
# 访问容器
[root@docker-0001 ~]# docker inspect web | grep IPAddress
            "SecondaryIPAddresses": null,
            "IPAddress": "172.17.0.2",
                    "IPAddress": "172.17.0.2",
[root@docker-0001 ~]# curl http://172.17.0.2/info.php
<html>
<head><title>404 Not Found</title></head>
<body>
<center><h1>404 Not Found</h1></center>
<hr><center>nginx/1.22.1</center>
</body>
</html>
# 查看容器日志
[root@docker-0001 ~]# docker logs web
2023/09/07 11:29:17 [error] 7#0: *1 open() "/usr/local/nginx/html/info.php"
failed (2: No such file or directory), client: 172.17.0.1, server: localhost,
request: "GET /info.php HTTP/1.1", host: "172.17.0.2"
例六:rmi、tag
# 删除一个镜像
[root@docker-0001 ~]# docker rmi busybox:latest
Untagged: busybox:latest
Untagged:
busybox@sha256:410a07f17151ffffb513f942a01748dfdb921de915ea6427d61d60b0357c1dcd
Deleted: sha256:a9d583973f65a19b3bbd7a4312b4e2c27712c44c0ed8b94e9a38cc73e7565b75
Deleted: sha256:2983725f2649f8847244cbb73ff9cb0b041bd319144816dfdee904adfd18bd1f

# 已经创建容器的镜像无法删除
[root@docker-0001 ~]# docker rmi -f myos:nginx
Untagged: myos:nginx
[root@docker-0001 ~]# docker images
REPOSITORY TAG     IMAGE     ID CREATED       SIZE
myos       php-fpm f70bdfd2042c 6 months ago  275MB
<none>     <none>  10dc658da2fe 6 months ago  274MB
myos       latest  1de38c85c2d1 7 months ago  4.67MB
myos       httpd   9245e660f88f 7 months ago  299MB
myos       8.5     621bfd7f9b46 7 months ago  249MB
rockylinux 8.5     210996f98b85 21 months ago 205MB

# 给镜像设置一个新的名称标签
[root@docker-0001 ~]# docker tag 10dc658da2fe myos:nginx
[root@docker-0001 ~]# docker images
REPOSITORY TAG     IMAGE     ID CREATED       SIZE
myos       php-fpm f70bdfd2042c 6 months ago  275MB
myos       nginx   10dc658da2fe 6 months ago  274MB
myos       latest  1de38c85c2d1 7 months ago  4.67MB
myos       httpd   9245e660f88f 7 months ago  299MB
myos       8.5     621bfd7f9b46 7 months ago  249MB
rockylinux 8.5     210996f98b85 21 months ago 205MB
二、 简易镜像制作
准备
# 使用基础镜像创建一个容器
[root@docker-0001 ~]# docker run -itd --name linux rockylinux:8.5
25385893c89533058331a127fe18e56a9b82056d5f6e24ac297c99a68efc6292

# 删除容器内的Yum配置文件
[root@docker-0001 ~]# docker exec -it linux rm -rf /etc/yum.repos.d

# 拷贝宿主机的Yum配置文件到容器内
[root@docker-0001 ~]# docker cp /etc/yum.repos.d linux:/etc/

# 在容器内安装工具软件包
[root@docker-0001 ~]# docker exec -it linux dnf install -y net-tools vim-enhanced
tree bash-completion iproute procps-ng psmisc

# 清理缓存文件
[root@docker-0001 ~]# docker exec -it linux dnf clean all
27 files removed

# 停止容器
[root@docker-0001 ~]# docker stop linux
linux
制作
# 把容器制作成镜像
[root@docker-0001 ~]# docker commit linux mylinux:latest
sha256:e67f7ad19649fc3a9086a8cceb2bb05b2732d8d9b97f5ceb4f973571221848cd

# 查看新制作的镜像
[root@docker-0001 ~]# docker images
REPOSITORY TAG      IMAGE     ID CREATED        SIZE
mylinux    latest   e67f7ad19649 48 seconds ago 249MB
myos       php-fpm  f70bdfd2042c 6 months ago   275MB
myos       nginx    10dc658da2fe 6 months ago   274MB
myos       latest   1de38c85c2d1 7 months ago   4.67MB
myos       httpd    9245e660f88f 7 months ago   299MB
myos       8.5      621bfd7f9b46 7 months ago   249MB
rockylinux 8.5      210996f98b85 21 months ago  205MB

# 删除制作镜像的容器
[root@docker-0001 ~]# docker rm -f linux
linux
三、 镜像编排Dockerfile
Dockerfile优势
需要设置默认的启动命令
需要设置环境环境
需要指定镜像开放某些特定的端口
Dockerfile 是什么?
Dockerfile 是一种更强大的镜像制作方式
编写类似脚本的 Dockerfile 文件,通过该文件制作镜像
如何使用 Dockerfile 制作镜像?
创建编写 Dockerfile
制作镜像:docker build -t 镜像名称:标签 Dockerfile所在目录
| 指令 | 说明 |
| FROM | 指定基础镜像(唯一) |
| RUN | 在容器内执行命令,可以写多条 |
| ADD | 把文件拷贝的容器内,如果文件是 tar.xx 格式,会自动解压 |
| COPY | 把文件拷贝的容器内,不会自动解压 |
| ENV | 设置启动容器的环境变量 |
| WORKDIR | 设置启动容器的默认工作目录(唯一) |
| CMD | 容器默认的启动参数(唯一) |
| ENTRYPOINT | 容器默认的启动命令(唯一) |
| USER | 启动容器使用的用户(唯一) |
| EXPOSE | 使用镜像创建的容器默认监听使用的端口号/协议 |
例一:
编写 Dockerfile
# 编写 Dockerfile
[root@docker-0001 ~]# mkdir myimg
[root@docker-0001 ~]# vim myimg/Dockerfile
FROM mylinux:latest # 基础镜像
CMD ["/bin/ls","-l"] # 默认启动命令
创建镜像
# 创建镜像
[root@docker-0001 ~]# docker build -t img1:latest myimg
Sending build context to Docker daemon 2.048kB
Step 1/2 : FROM mylinux:latest
---> e67f7ad19649
Step 2/2 : CMD ["/bin/ls","-l"]
---> Running in 1cce9689b1a0
Removing intermediate container 1cce9689b1a0
---> e67f106522c3
Successfully built e67f106522c3
Successfully tagged img1:latest
[root@docker-0001 ~]# docker images
REPOSITORY  TAG     IMAGE     ID CREATED        SIZE
img1        latest  e67f106522c3 56 seconds ago 249MB
mylinux     latest  e67f7ad19649 18 hours ago   249MB
myos        php-fpm f70bdfd2042c 6 months ago   275MB
myos        nginx   10dc658da2fe 6 months ago   274MB
myos        latest  1de38c85c2d1 7 months ago   4.67MB
myos        httpd   9245e660f88f 7 months ago   299MB
myos        8.5     621bfd7f9b46 7 months ago   249MB
rockylinux  8.5     210996f98b85 21 months ago  205MB
创建容器
# 创建容器
[root@docker-0001 ~]# docker run -it --rm img1:latest
total 48
lrwxrwxrwx 1 root root 7 Oct 11 2021 bin -> usr/bin
drwxr-xr-x 5 root root 360 Sep 8 06:55 dev
drwxr-xr-x 1 root root 4096 Sep 8 06:55 etc
drwxr-xr-x 2 root root 4096 Oct 11 2021 home
lrwxrwxrwx 1 root root 7 Oct 11 2021 lib -> usr/lib
lrwxrwxrwx 1 root root 9 Oct 11 2021 lib64 -> usr/lib64
drwx------ 2 root root 4096 Nov 14 2021 lost+found
drwxr-xr-x 2 root root 4096 Oct 11 2021 media
drwxr-xr-x 2 root root 4096 Oct 11 2021 mnt
drwxr-xr-x 2 root root 4096 Oct 11 2021 opt
dr-xr-xr-x 116 root root 0 Sep 8 06:55 proc
dr-xr-x--- 1 root root 4096 Sep 7 11:39 root
drwxr-xr-x 11 root root 4096 Nov 14 2021 run
lrwxrwxrwx 1 root root 8 Oct 11 2021 sbin -> usr/sbin
drwxr-xr-x 2 root root 4096 Oct 11 2021 srv
dr-xr-xr-x 13 root root 0 Sep 8 06:55 sys
drwxrwxrwt 1 root root 4096 Sep 7 11:39 tmp
drwxr-xr-x 1 root root 4096 Nov 14 2021 usr
drwxr-xr-x 1 root root 4096 Nov 14 2021 var
# 传递参数命令,覆盖 CMD 执行
[root@docker-0001 ~]# docker run -it --rm img1:latest id
uid=0(root) gid=0(root) groups=0(root)
例二:
编写 Dockerfile
# ENTRYPOINT 与 CMD 执行方式为 ${ENTRYPOINT} ${CMD}
[root@docker-0001 ~]# vim myimg/Dockerfile
FROM mylinux:latest
ENTRYPOINT ["echo"] # 默认启动命令
CMD ["/bin/ls","-l"] # 默认参数
创建镜像
# 创建镜像
[root@docker-0001 ~]# docker build -t img2:latest myimg
Sending build context to Docker daemon 2.048kB
Step 1/3 : FROM mylinux:latest
---> e67f7ad19649
Step 2/3 : ENTRYPOINT ["echo"]
---> Running in 2e3233b51a5b
Removing intermediate container 2e3233b51a5b
---> dd0ceae1c17d
Step 3/3 : CMD ["/bin/ls","-l"]
---> Running in 2b423723884a
Removing intermediate container 2b423723884a
---> d1b16ade27fe
Successfully built d1b16ade27fe
Successfully tagged img2:latest
创建容器
# CMD 做为参数传递,在容器内执行了 echo '/bin/ls -l'
[root@docker-0001 ~]# docker run -it --rm img2:latest
/bin/ls -l

# CMD 被替换,在容器内执行了 echo id
[root@docker-0001 ~]# docker run -it --rm img2:latest id
id
例三:
编写 Dockerfile
# 制作测试文件
[root@docker-0001 ~]# tar -cf myimg/myfile.tar -C /etc hosts issue
# 编辑Dockerfile
[root@docker-0001 ~]# vim myimg/Dockerfile
FROM mylinux:latest
COPY myfile.tar /var/tmp    # 拷贝文件到容器内
ADD myfile.tar /tmp         # 添加文件到容器内,会自动解压 tar 包
RUN id && touch /tmp/file1  # 在容器内执行命令
USER nobody                 # 设置使用 nobody 用户
RUN id && touch /tmp/file2  # file2的所有者和所属组都是nobody
ENV mymsg="Hello World"     # 设置一个环境变量,容器内程序可以引用
WORKDIR /tmp                # 设置容器工作目录,相当于 cd /tmp
CMD ["/bin/bash"]
创建镜像
# 创建镜像
[root@docker-0001 ~]# docker build -t img3:latest myimg
Sending build context to Docker daemon 12.8kB
Step 1/9 : FROM mylinux:latest
---> e67f7ad19649
Step 2/9 : COPY myfile.tar /var/tmp
---> aca75b8caff1
Step 3/9 : ADD myfile.tar /tmp
---> 6c347e5bcb50
Step 4/9 : RUN id && touch /tmp/file1
---> Running in 60894ecafc96
uid=0(root) gid=0(root) groups=0(root)
Removing intermediate container 60894ecafc96
---> 3d46613f6e66
Step 5/9 : USER nobody
---> Running in 97b6d1d2c41d
Removing intermediate container 97b6d1d2c41d
---> e2b0e7c75ad0
Step 6/9 : RUN id && touch /tmp/file2
---> Running in dc4cb00c0ef3
uid=65534(nobody) gid=65534(nobody) groups=65534(nobody)
Removing intermediate container dc4cb00c0ef3
---> 14fb8d7956a9
Step 7/9 : ENV mymsg="Hello World"
---> Running in 729a1b991c08
Removing intermediate container 729a1b991c08
---> 9fcff8b0e43a
Step 8/9 : WORKDIR /tmp
---> Running in a70b9a6459e2
Removing intermediate container a70b9a6459e2
---> 3b102513b640
Step 9/9 : CMD ["/bin/bash"]
---> Running in 65718f0a658b
Removing intermediate container 65718f0a658b
---> ffdfb3342545
Successfully built ffdfb3342545
Successfully tagged img3:latest
创建容器
# 运行测试
[root@docker-0001 ~]# docker run -it --rm img3:latest

# 使用 COPY 进来的文件还是 tar 包
bash-4.4$ tree /var/tmp
/var/tmp
`-- myfile.tar

# 使用 ADD 添加的文件已经被解压了
bash-4.4$ tree /tmp
/tmp
|-- file1
|-- file2
|-- hosts
|-- issue
|-- ks-script-jr03uzns
`-- ks-script-pu9ezlau

# USER 指令设置使用 nobody 用户运行容器
bash-4.4$ id
uid=65534(nobody) gid=65534(nobody) groups=65534(nobody)

# USER 指令前创建的文件是 root 权限,之后是 USER 用户权限
bash-4.4$ ls -l /tmp/file?
-rw-r--r-- 1 root root 0 Sep 8 07:11 /tmp/file1
-rw-r--r-- 1 nobody nobody 0 Sep 8 07:11 /tmp/file2

# 环境变量可以直接调用
bash-4.4$ echo ${mymsg}
Hello World

# WORKDIR 把工作目录设置到 /tmp
bash-4.4$ pwd
/tmp
制作nginx镜像
编译软件包
# 安装编译工具和依赖软件包
[root@docker-0001 ~]# dnf install -y openssl-devel pcre-devel gcc make

# 编译安装
[root@docker-0001 ~]# tar zxf nginx-1.22.1.tar.gz
[root@docker-0001 ~]# cd nginx-1.22.1/
[root@docker-0001 nginx-1.22.1]# ./configure --prefix=/usr/local/nginx --with-
pcre --with-http_ssl_module
[root@docker-0001 nginx-1.22.1]# make && make install

# 设置默认首页
[root@docker-0001 nginx-1.22.1]# echo 'Nginx is running !' >
/usr/local/nginx/html/index.html
制作镜像
[root@docker-0001 nginx-1.22.1]# cd
[root@docker-0001 ~]# mkdir nginx

# 将编译好的 nginx 打包,这里必须使用相对路径
[root@docker-0001 ~]# tar czf nginx/nginx.tar.gz -C /usr/local nginx
[root@docker-0001 ~]# vim nginx/Dockerfile
FROM mylinux:latest
RUN dnf install -y pcre openssl && dnf clean all
ADD nginx.tar.gz /usr/local/
ENV PATH=${PATH}:/usr/local/nginx/sbin
WORKDIR /usr/local/nginx/html
EXPOSE 80/tcp
CMD ["nginx","-g","daemon off;"]

[root@docker-0001 ~]# docker build -t nginx:latest nginx
Successfully tagged nginx:latest
验证镜像
# 查看镜像并创建容器
[root@docker-0001 ~]# docker images nginx:latest
REPOSITORY TAG IMAGE ID CREATED SIZE
nginx latest db8ce949d82b 2 minutes ago 274MB
[root@docker-0001 ~]# docker run -itd --name myweb nginx:latest
585409ef2def06a4dc0ebacd853dfcf3d5434c9dbb86148038e70d69e56bb947

# 查看容器地址并访问验证
[root@docker-0001 ~]# docker inspect myweb | grep -i IPAddress
"SecondaryIPAddresses": null,
"IPAddress": "172.17.0.2",
"IPAddress": "172.17.0.2",
[root@docker-0001 ~]# curl http://172.17.0.2
Nginx is running !

# 查看 nginx 服务的用户
[root@docker-0001 ~]# docker exec -it myweb ps -ef
UID PID PPID C STIME TTY TIME CMD
root 1 0 0 03:22 pts/0 00:00:00 nginx: master process nginx
nobody 7 1 0 03:22 pts/0 00:00:00 nginx: worker process
root 8 0 0 03:24 pts/1 00:00:00 ps -ef
[root@docker-0001 ~]# docker rm -f myweb
myweb
四、 对外发布端口
容器化带来的问题之一
需要设置默认的启动命令
需要设置环境环境
需要指定镜像开放某些特定的端口
如何才能使用容器对外提供稳定的服务
容器端口可以与宿主机的端口进行映射绑定
从而把宿主机变成对应的服务,不用关心容器的IP地址
每个端口都只能和一个容器绑定
端口映射语法格式:
docker run -itd -p 宿主机端口:容器端口 镜像名称:标签
端口绑定
[root@docker-0001 ~]# docker rm -f $(docker ps -aq)
e662f2b7bab5
7cd6117c6e48
[root@docker-0001 ~]# docker ps -a
CONTAINER ID IMAGE COMMAND CREATED STATUS PORTS NAMES

# 宿主机绑定 apache
[root@docker-0001 ~]# docker run -itd --name web -p 80:80 myos:httpd
f4c570525b9ec0daa80609d0616641917738d2209d13e4baa0869737bb4be4fc

# 绑定后,直接访问宿主机的 IP 地址即可
[root@docker-0001 ~]# curl 192.168.1.31
Welcome to The Apache.

# 同一个端口不能同时绑定给多个容器
# 如果想把 80 端口绑定给 nginx 容器需要把之前的 apache 容器关停
[root@docker-0001 ~]# docker rm -f web
web
[root@docker-0001 ~]# docker run -itd --name web -p 80:80 myos:nginx
8a25b582fbcc92b1d7b5e441d417afe1c719e22400796a6c7e836ac479b9641a

# 重新绑定后,访问验证
[root@docker-0001 ~]# curl 192.168.1.31
Nginx is running !

# 完成实验,删除容器
[root@docker-0001 ~]# docker rm -f web
web
五、 存储卷
容器化带来的问题之二
Docker容器不适合保存任何数据
重要数据在容器内不方便管理易丢失
修改多个容器中的数据非常困难
多容器之间有数据共享、同步需求
数据文件与配置文件频繁更改
以上问题都可以使用容器卷来解决
Docker可以映射宿主机文件或目录到容器中
目标对象不存在就自动创建
目标对象存在就直接覆盖掉
多个容器可以映射同一个目标对象来达到数据共享的目的
存储文件映射语法格式:
docker run -itd -v 宿主机对象:容器内对象 镜像名称:标签
# 创建共享卷目录
[root@docker-0001 ~]# mkdir /var/webroot
# 添加测试页面
[root@docker-0001 ~]# echo "hello world" > /var/webroot/index.html
[root@docker-0001 ~]# cp info.php /var/webroot

# 创建 nginx 容器,并映射数据卷
[root@docker-0001 ~]# docker run -itd --rm --name mynginx -v /var/webroot:/usr/local/nginx/html myos:nginx
3e04030c6ceded5d89589af1b6540a962bf9e1ccc520f87b417cb8b279eb8322

# 创建 apache 容器,与 mynginx 映射同样的卷
[root@docker-0001 ~]# docker run -itd --rm --name myhttpd -v
/var/webroot:/var/www/html myos:httpd
f2386e132f7b93457492c659ae72cf9dfefce660992a520d236345b7c4732998

# 查看容器 IP 地址,并访问验证
[root@docker-0001 ~]# docker inspect mynginx | grep -i IPAddress
"SecondaryIPAddresses": null,
"IPAddress": "172.17.0.2",
"IPAddress": "172.17.0.2",
[root@docker-0001 ~]# curl 172.17.0.2
hello world
[root@docker-0001 ~]# docker inspect myhttpd | grep -i IPAddress
"SecondaryIPAddresses": null,
"IPAddress": "172.17.0.3",
"IPAddress": "172.17.0.3",
[root@docker-0001 ~]# curl 172.17.0.3
hello world
六、 微服务
# 安装 compose 组件
[root@docker-0001 ~]# dnf install -y docker-compose-plugin
# 创建项目
[root@docker-0001 ~]# vim docker-compose.yaml
name: websvc # 项目名称
version: "3" # 语法格式版本
services: # 关键字,定义服务
websvc: # 服务名称
container_name: nginx # 容器名称
image: myos:nginx # 创建容器使用的镜像
容器服务编排
在微服务架构中每个微服务一般都会包含多个容器实例。
如果每个微服务都要手动管理,那么效率之低、维护量之大可想而知。为了解决编排部署的问题,docker 公司推出了docker Compose工具
Compose 是一个用于定义和运行多容器的应用的工具。
使用 Compose,可以在一个文件中配置多个容器服务,然后使用一个简单的命令就可以轻松、高效地管理配置中引用的所有容器服务
安装 compose 组件
# 安装 compose 组件
[root@docker-0001 ~]# dnf install -y docker-compose-plugin
# 创建项目
[root@docker-0001 ~]# vim docker-compose.yaml
name: websvc          # 项目名称
version: "3"          # 语法格式版本
services:             # 关键字,定义服务
websvc:               # 服务名称
container_name: nginx # 容器名称
image: myos:nginx     # 创建容器使用的镜像
容器项目管理
# 创建项目,并启动
[root@docker-0001 ~]# docker compose -f docker-compose.yaml up -d
[+] Running 2/2
⠿ Network websvc_default  Created 0.1s
⠿ Container nginx         Started 0.3s

# 查看项目
[root@docker-0001 ~]# docker compose ls
NAME   STATUS      CONFIG FILES
websvc running(1)  /root/docker-compose.yaml

# 查看项目中的容器状态
[root@docker-0001 ~]# docker compose -p websvc ps
NAME   COMMAND                 SERVICE STATUS  PORTS
nginx "nginx -g 'daemon of..." websvc  running 80/tcp

# 启动、停止、重启项目
[root@docker-0001 ~]# docker compose -p websvc stop
[+] Running 1/0
⠿ Container nginx Stopped 0.1s
[root@docker-0001 ~]# docker compose -p websvc start
[+] Running 1/1
⠿ Container nginx Started 0.2s
[root@docker-0001 ~]# docker compose -p websvc restart
[+] Running 1/1
⠿ Container nginx Started 0.3s

# 查看项目中容器的日志
[root@docker-0001 ~]# docker inspect nginx | grep IPAddress
"SecondaryIPAddresses": null,
"IPAddress": "",
"IPAddress": "172.18.0.2",
[root@docker-0001 ~]# curl http://127.18.0.2/info.php
<html>
<head><title>404 Not Found</title></head>
<body>
<center><h1>404 Not Found</h1></center>
<hr><center>nginx/1.22.1</center>
</body>
</html>
[root@docker-0001 ~]# docker compose -p websvc logs
nginx | 2023/02/13 13:55:39 [error] 7#0: *1 open()
"/usr/local/nginx/html/info.php" failed (2: No such file or directory), client:
172.17.0.1, server: localhost, request: "GET /info.php HTTP/1.1", host:
"172.17.0.2"

# 删除项目
[root@docker-0001 ~]# docker compose -p websvc down
[+] Running 2/2
⠿ Container nginx        Removed 0.1s
⠿ Network websvc_default Removed 0.1s
6.1 微服务编排
Compose概述
Compose 项目是Docker 官方的开源项目,负责实现容器集群的快速编排,在 Compose 中有两个核心概念,分别是服务和项目
服务(service):一个应用的容器,实际上可以包括若干运行相同镜像的容器实例。
项目(project):由一组关联的应用容器组成的一个完整业务单元,在 docker-compose.yaml 文件中定义
compose 语法
| 指令 | 说明 |
| networks | 配置容器连接的网络 |
| container_name | 指定容器名称 |
| depends_on | 解决容器的依赖、启动先后的问题 |
| command | 覆盖容器启动后默认执行的命令 |
| environment | 设置环境变量 |
| image | 指定为镜像名称或镜像 ID |
| network_mode | 设置网络模式 |
| restart | 容器保护策略[always、no、on-failure] |
| ports | 暴露端口信息 |
| volumes | 数据卷,支持 [volume、bind、tmpfs、npipe] |
容器服务编排
[root@docker-0001 ~]# vim docker-compose.yaml
name: websvc
version: "3"
services:
  nginxsvc:
    container_name: nginx
    image: myos:nginx
    restart: always
    volumes:
    - type: bind
      source: /var/webconf/nginx.conf
      target: /usr/local/nginx/conf/nginx.conf
    - type: bind
      source: /var/webroot
      target: /usr/local/nginx/html
    network_mode: bridge
    ports:
      - 80:80
    environment:
      - "TZ=Asia/Shanghai"
  php-fpm:
    container_name: php-fpm
    image: myos:php-fpm
    restart: always
    volumes:
      - type: bind
        source: /var/webroot
        target: /usr/local/nginx/html
    depends_on:
      - nginxsvc
    network_mode: "container:nginx"
验证项目
# 创建,并启动项目
[root@docker-0001 ~]# docker compose -f docker-compose.yaml up -d
[+] Running 2/2
⠿ Container nginx   Started
                     0.3s
⠿ Container php-fpm Started
                     0.3s

# 查看项目
[root@docker-0001 ~]# docker compose ls
NAME     STATUS        CONFIG FILES
websvc   running(2)    /root/docker-compose.yaml

# 查看容器状态,验证服务
[root@docker-0001 ~]# docker compose -p websvc ps
NAME  COMMAND                  SERVICE STATUS   PORTS
nginx "nginx -g 'daemon of..." nginxsvc running 0.0.0.0:80->80/tcp, :::80->80/tcp
php-fpm "php-fpm --nodaemoni..." php-fpm running

# 访问 php 页面验证
[root@docker-0001 ~]# curl http://127.0.0.1/info.php
<pre>
Array
(
    [REMOTE_ADDR] => 172.17.0.1
    [REQUEST_METHOD] => GET
    [HTTP_USER_AGENT] => curl/7.61.1
    [REQUEST_URI] => /info.php
)
php_host: 8d49ac2b28ae
1229
七、 harbor仓库
Harbor概述
Harbor 是在 Registry上进行了相应的企业级扩展,从而获得了更加广泛的应用,这些新的企业级特性包括:提供WEB界面,优化用户体验,支持登陆、搜索功能,区分公有、私有镜像,以及基于角色的访问控制,集成日志审计、支持水平扩展等功能
部署 harbor 环境非常繁琐,涉及到 web服务器、数据库服务器、程序代码、docker 私有镜像仓库等 9 个应用
harbor安装部署概述
官方为了简化安装部署的步骤和流程,采用了微服务方式对项目进行了管理,所有应用官方都以 docker 镜像的方式发布,项目采用 compose 方式管理
使用微服务项目方式部署 harbor 仓库
创建 https 证书
# 导入 harbor 项目镜像
[root@harbor ~]# tar -zxf harbor-v2.7.0.tgz -C /usr/local
[root@harbor ~]# cd /usr/local/harbor
[root@harbor harbor]# docker load -i harbor.v2.7.0.tar.gz

# 创建 https 证书
[root@harbor harbor]# mkdir tls
[root@harbor harbor]# openssl genrsa -out tls/cert.key 2048
Generating RSA private key, 2048 bit long modulus (2 primes)
.............................+++++
...........................................................................+++++
e is 65537 (0x010001)
[root@harbor harbor]# openssl req -new -x509 -days 3650 \
> -key tls/cert.key -out tls/cert.crt \
> -subj "/C=CN/ST=BJ/O=Tedu/OU=NSD/CN=harbor"
创建并启动项目
# 修改配置文件
[root@harbor harbor]# cp harbor.yml.tmpl harbor.yml
[root@harbor harbor]# vim harbor.yml
05: hostname: harbor
08: # http:
10: # port: 80
17: certificate: /usr/local/harbor/tls/cert.crt
18: private_key: /usr/local/harbor/tls/cert.key
34: harbor_admin_password: admin123

# 预安装环境检查,生成项目文件
[root@harbor harbor]# /usr/local/harbor/prepare
# 创建并启动项目
[root@harbor harbor]# docker compose -f docker-compose.yml up -d
# 添加开机自启动
[root@harbor harbor]# chmod 0755 /etc/rc.d/rc.local
[root@harbor harbor]# echo "/usr/bin/docker compose -p harbor start" >>
/etc/rc.d/rc.local
查看验证项目
# 查看项目
[root@harbor harbor]# docker compose ls
NAME   STATUS      CONFIG FILES
harbor running(9) /usr/local/harbor/docker-compose.yml

# 查看容器状态
[root@harbor harbor]# docker compose -p harbor ps
NAME              COMMAND                  SERVICE     STATUS            PORTS
harbor-core       "/harbor/entrypoint...." core        running(healthy)
harbor-db         "/docker-entrypoint...." postgresql  running(healthy)
harbor-jobservice "/harbor/entrypoint...." jobservice  running(healthy)
harbor-log        "/bin/sh -c /usr/loc..." log         running (healthy) 127.0.0.1:1514->10514/tcp
harbor-portal     "nginx -g 'daemon of..." portal      running(healthy)
nginx             "nginx -g 'daemon of..." proxy       running(healthy)  0.0.0.0:80->8080/tcp, :::80->8080/tcp, 0.0.0.0:443->8443/tcp, :::443->8443/tcp
redis             "redis-server /etc/r..." redis       running(healthy)
registry          "/home/harbor/entryp..." registry    running(healthy)
registryctl       "/home/harbor/start...." registryctl running(healthy)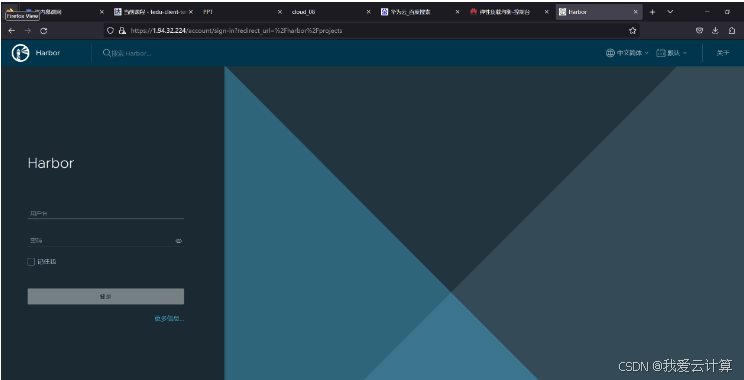
用户名:admin 密码:admin123
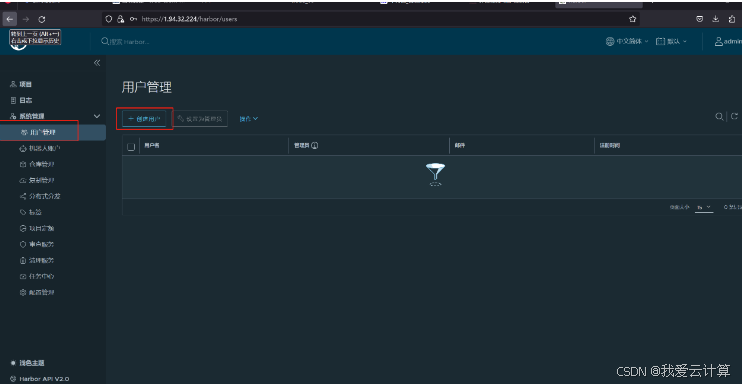
7.1 harbor管理
用户:用来登录 harbor,以及认证权限
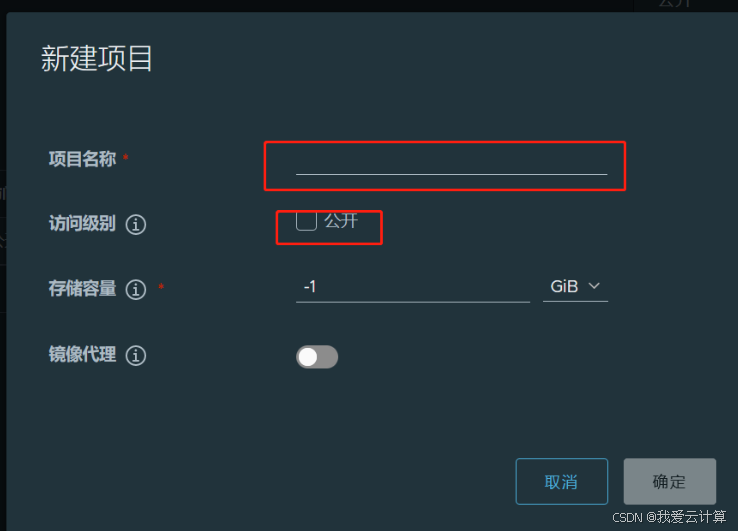
项目: 用来存储镜像的地址路径
管理员可以分配项目权限给用户
用户也可以自己创建项目
公共仓库:
任何人都可以访问或下载镜像,上传镜像需要用户认证
私有仓库:
不管是上传还是下载只有认证用户才可以访问
系统管理------->用户管理(创建用户)
新建项目
| 容器管理命令 | 说明 |
| docker login | 登录私有镜像仓库 |
| docker logout | 退出登录 |
登录私有仓库
# 添加主机配置
[root@docker-0001 ~]# vim /etc/hosts
192.168.1.30 harbor
192.168.1.35 registry

# 添加私有仓库配置
[root@docker-0001 ~]# vim /etc/docker/daemon.json
{
    "registry-mirrors": ["https://harbor:443","http://registry:5000"],
    "insecure-registries": ["harbor:443","registry:5000"]
}
[root@docker-0001 ~]# systemctl restart docker

# 登录 harbor 仓库
[root@docker-0001 ~]# docker login harbor:443
Username: luck
Password:
WARNING! Your password will be stored unencrypted in /root/.docker/config.json.
Configure a credential helper to remove this warning. See
https://docs.docker.com/engine/reference/commandline/login/#credentials-store
Login Succeeded

# 认证信息记录文件
[root@docker-0001 ~]# cat /root/.docker/config.json
{
    "auths": {
        "harbor:443": {
        "auth": "bHVjazpMdWNreTEyMw=="
        }
    }
}

# 退出登录
[root@docker-0001 ~]# docker logout harbor:443
Removing login credentials for harbor:443
上传镜像
# 设置标签
[root@docker-0001 ~]# docker tag rockylinux:8.5 harbor:443/myimg/rockylinux:8.5

# 没有登录上传失败
[root@docker-0001 ~]# docker push harbor:443/myimg/rockylinux:8.5
The push refers to repository [harbor:443/myimg/rockylinux]
65dbea0a4b39: Preparing
unauthorized: unauthorized to access repository: myimg/rockylinux, action: push:
unauthorized to access repository: myimg/rockylinux, action: push

# 登录成功后才可以上传
[root@docker-0001 ~]# docker login harbor:443
Username: luck
Password:
WARNING! Your password will be stored unencrypted in /root/.docker/config.json.
Configure a credential helper to remove this warning. See
https://docs.docker.com/engine/reference/commandline/login/#credentials-store

Login Succeeded

# 上传成功
[root@docker-0001 ~]# docker push harbor:443/myimg/rockylinux:8.5
The push refers to repository [harbor:443/myimg/rockylinux]
65dbea0a4b39: Pushed
8.5: digest:
sha256:8a94380717b7e6b21c56f8333e0e8242e89a020c0c861d6346f59f179f096240 size: 529
# 设置标签
[root@docker-0001 ~]# docker tag myos:latest harbor:443/library/myos:latest
# 上传镜像到 library 项目,没有权限上传失败
[root@docker-0001 ~]# docker push harbor:443/library/myos:latest
The push refers to repository [harbor:443/library/myos]
1e3ea69e39a7: Preparing
unauthorized: unauthorized to access repository: library/myos, action: push:
unauthorized to access repository: library/myos, action: push