【1】引言
前序学习进程中,已经对人脸和猫脸检测进行了探索,相关文章链接为:
python学opencv|读取图像(七十一)使用cv2.CascadeClassifier()函数+detectMultiScale()函数实现图像中的人脸检测-CSDN博客
python学opencv|读取图像(七十二)猫脸检测:使用cv2.CascadeClassifier()函数+detectMultiScale()函数实现图像中的猫脸检测-CSDN博客
这两种检测实际上都是对脸部进行识别,在此基础上,会自然想到对全身进行检测。本次的学习目标就是,对人的全身进行检测,一般的说法是:行人检测。
【2】级联分类器说明
行人检测需要用到的级联分类器为:
haarcascade_fullbody.xml
【3】代码检测
经过前序学习,已经知晓进行检测的基本流程:引入模块和图像,加载级联分类器,应用级联分类器进行检测,对检测出来的特征加框显示,保存图像。
首先引入必要的模块和初始图像:
import cv2 as cv  # 引入cv2模块
import numpy as np  # 引入numpy模块
import os  # 引入os模块

# 读取原始图像
src = cv.imread('srcxr3.png')  # 请替换为你的实际图像文件名
然后进行检测工作:
# 加载级联分类器
facecascade = cv.CascadeClassifier(
    r"D:\python\pythonworkspace\pythonProject2\cascades\haarcascade_fullbody.xml"
    )
faces = facecascade.detectMultiScale(src, 1.1) #检测
print(f"检测到的目标数量: {len(faces)}")
# 复制原始图像,避免修改原始图像
result = src.copy()
# 在检测到的目标周围绘制矩形框
for (x, y, w, h) in faces:
    cv.rectangle(result, (x, y), (x + w, y + h), (200, 200, 55), 2)
然后显示和保存图像:
# 显示拼接后的大图
cv.imshow('Combined Results', result)
cv.imwrite('Combined Results-fullbody.png', result)
# 等待按键事件
cv.waitKey(0)
# 关闭所有窗口
cv.destroyAllWindows()
由于本次只用了一个级联分类器,所以代码非常简单。
代码运行相关的图像有:
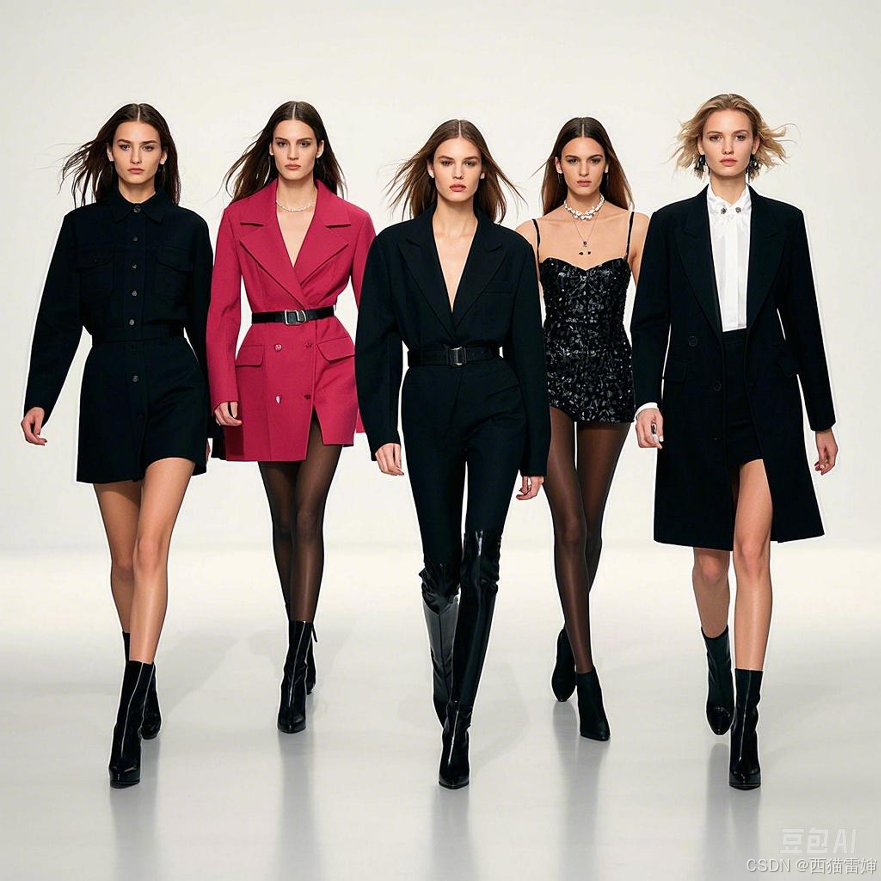
图1 初始图像
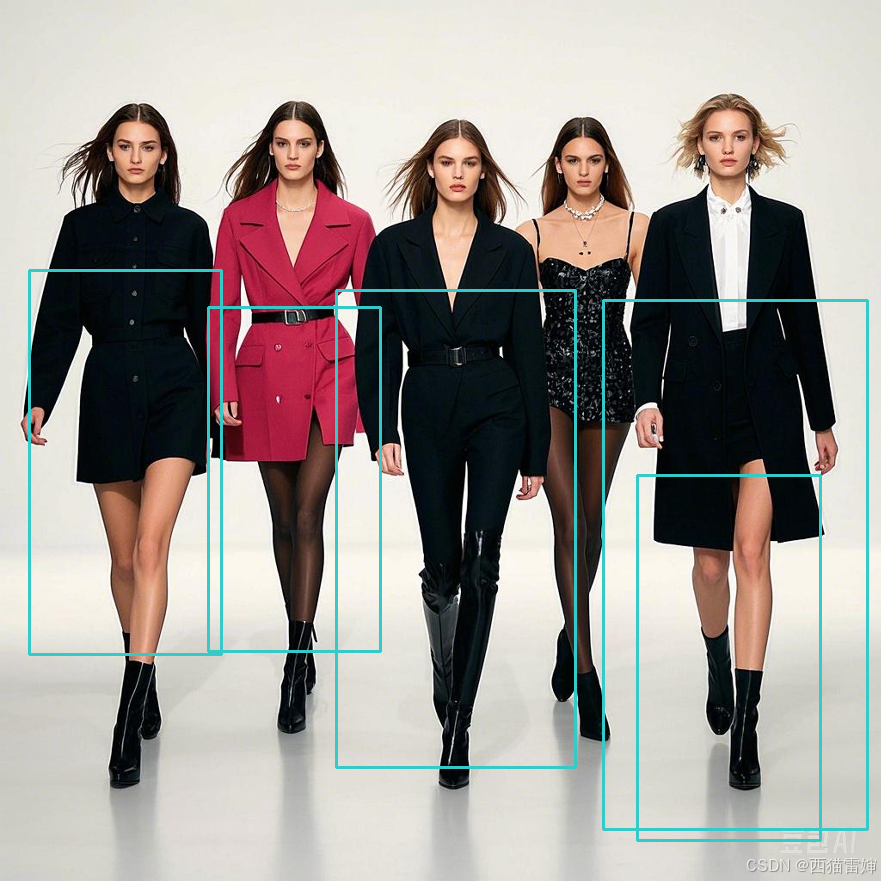
图2 行人检测效果
由图2现实的行人检测效果,表明图像上识别出了5个行人,单最右侧的识别效果重合在一起,所以本质上没有实现精准是被。
考虑到此次识别使用的scaleFactor=1.1,为此,想单独改变该值,优化代码。
此时的完整代码为:
import cv2 as cv  # 引入cv2模块
import numpy as np  # 引入numpy模块
import os  # 引入os模块

# 读取原始图像
src = cv.imread('srcxr3.png')  # 请替换为你的实际图像文件名

# 加载级联分类器
facecascade = cv.CascadeClassifier(
    r"D:\python\pythonworkspace\pythonProject2\cascades\haarcascade_fullbody.xml"
    )
faces = facecascade.detectMultiScale(src, 1.1) #检测
print(f"检测到的目标数量: {len(faces)}")
# 复制原始图像,避免修改原始图像
result = src.copy()
# 在检测到的目标周围绘制矩形框
for (x, y, w, h) in faces:
    cv.rectangle(result, (x, y), (x + w, y + h), (200, 200, 55), 2)

# 显示拼接后的大图
cv.imshow('Combined Results', result)
cv.imwrite('Combined Results-fullbody.png', result)
# 等待按键事件
cv.waitKey(0)
# 关闭所有窗口
cv.destroyAllWindows()
【4】代码优化
为测试多个缩放因子,需要设置一个缩放因子矩阵,然后使用循环按顺序调用缩放因子,最后统一输出图像。
核心代码段为:
#定义不同的缩放因子
scaleFactors=[1.1,1.15,1.5,1.8,1.6]
#定义图像存储矩阵
result_images = []

# 遍历每个级联分类器文件
for scaleFactor in scaleFactors:
    # 加载级联分类器
    facecascade = cv.CascadeClassifier(
        r"D:\python\pythonworkspace\pythonProject2\cascades\haarcascade_fullbody.xml"
    )
    faces = facecascade.detectMultiScale(src, scaleFactor=scaleFactor)  # 检测
    print(f"检测到的目标数量: {len(faces)}")
    # 复制原始图像,避免修改原始图像
    result = src.copy()
    # 在检测到的目标周围绘制矩形框
    for (x, y, w, h) in faces:
        cv.rectangle(result, (x, y), (x + w, y + h), (200, 200, 55), 2)
这里按照顺序调用了图像缩放因子。
之后为了对不同的图像进行命名,需要在此读取图像缩放因子:
    # 拼接文件名和 scaleFactor 信息
    info_text = f"(sF={scaleFactor})"
    # 在图像上方添加文件名
    text_height = int(0.1 * result.shape[0])  # 文本高度
    text_width = result.shape[1]  # 文本宽度
    #text_image = np.zeros((text_height, text_width, 3), dtype=np.uint8)
    cv.putText(result, info_text, (int(0.05 * text_width), int(0.6 * text_height)), cv.FONT_HERSHEY_SIMPLEX, 0.8,
               (155, 100, 155), 2)
    #result_with_text = cv.vconcat([text_image, result])
    result_images.append(result)
有时候给的缩放因子数量为奇数,为了把图像输出为两行的子图组合成的大图,需要补充一个图像来占位置。所以需要先来判断一下已经完成行人检测的数量,如果是奇数,就要新增一个空图:
# 拼接所有检测结果图像
if result_images:
    num_images = len(result_images)
    if num_images % 2 != 0:
        num_images += 1
        print('num_images=', num_images)
        # 在空白图像上方添加 "none" 文字
        blank_image = np.zeros_like(src)
        text_height = int(blank_image.shape[0])
        text_width = blank_image.shape[1]
        text_image = np.zeros((text_height, text_width, 3), dtype=np.uint8)
        cv.putText(text_image, "none", (int(0.2 * text_width), int(0.6 * text_height)), cv.FONT_HERSHEY_SIMPLEX,
                   0.8,
                   (155, 100, 155), 2)
        #blank_image_with_text = cv.vconcat([text_image, blank_image])
        result_images.append(text_image)
        print('num_images=', num_images)
然后就是拼接和展示图像:
    # 图像拼接
    first_row = result_images[:int(0.5 * num_images)]
    second_row = result_images[int(0.5 * num_images):num_images]

    # 水平拼接每行的图像
    h_concat_first_row = cv.hconcat(first_row)
    h_concat_second_row = cv.hconcat(second_row)

    # 垂直拼接两行的图像
    final_image = cv.vconcat([h_concat_first_row, h_concat_second_row])

    # 显示拼接后的大图
    cv.imshow('Combined Results', final_image)
    cv.imwrite('Combined Results-named.png', final_image)
    # 等待按键事件
    cv.waitKey(0)
    # 关闭所有窗口
    cv.destroyAllWindows()
else:
    print("没有有效的检测结果。")
代码运行后,获得的图像为:

图3 行人检测效果-多个图像缩放因子
由图3可见,不痛的图像缩放因子会影响图像的人形检测效果,实际效果很难做到百分百检测。
此时的完整代码为:
import cv2 as cv  # 引入cv2模块
import numpy as np  # 引入numpy模块
import os  # 引入os模块

# 读取原始图像
src = cv.imread('srcxr3.png')  # 请替换为你的实际图像文件名

#定义不同的缩放因子
scaleFactors=[1.1,1.15,1.5,1.8,1.6]
#定义图像存储矩阵
result_images = []

# 遍历每个级联分类器文件
for scaleFactor in scaleFactors:
    # 加载级联分类器
    facecascade = cv.CascadeClassifier(
        r"D:\python\pythonworkspace\pythonProject2\cascades\haarcascade_fullbody.xml"
    )
    faces = facecascade.detectMultiScale(src, scaleFactor=scaleFactor)  # 检测
    print(f"检测到的目标数量: {len(faces)}")
    # 复制原始图像,避免修改原始图像
    result = src.copy()
    # 在检测到的目标周围绘制矩形框
    for (x, y, w, h) in faces:
        cv.rectangle(result, (x, y), (x + w, y + h), (200, 200, 55), 2)

    # 拼接文件名和 scaleFactor 信息
    info_text = f"(sF={scaleFactor})"
    # 在图像上方添加文件名
    text_height = int(0.1 * result.shape[0])  # 文本高度
    text_width = result.shape[1]  # 文本宽度
    #text_image = np.zeros((text_height, text_width, 3), dtype=np.uint8)
    cv.putText(result, info_text, (int(0.05 * text_width), int(0.6 * text_height)), cv.FONT_HERSHEY_SIMPLEX, 0.8,
               (155, 100, 155), 2)
    #result_with_text = cv.vconcat([text_image, result])
    result_images.append(result)

# 拼接所有检测结果图像
if result_images:
    num_images = len(result_images)
    if num_images % 2 != 0:
        num_images += 1
        print('num_images=', num_images)
        # 在空白图像上方添加 "none" 文字
        blank_image = np.zeros_like(src)
        text_height = int(blank_image.shape[0])
        text_width = blank_image.shape[1]
        text_image = np.zeros((text_height, text_width, 3), dtype=np.uint8)
        cv.putText(text_image, "none", (int(0.2 * text_width), int(0.6 * text_height)), cv.FONT_HERSHEY_SIMPLEX,
                   0.8,
                   (155, 100, 155), 2)
        #blank_image_with_text = cv.vconcat([text_image, blank_image])
        result_images.append(text_image)
        print('num_images=', num_images)

    # 图像拼接
    first_row = result_images[:int(0.5 * num_images)]
    second_row = result_images[int(0.5 * num_images):num_images]

    # 水平拼接每行的图像
    h_concat_first_row = cv.hconcat(first_row)
    h_concat_second_row = cv.hconcat(second_row)

    # 垂直拼接两行的图像
    final_image = cv.vconcat([h_concat_first_row, h_concat_second_row])

    # 显示拼接后的大图
    cv.imshow('Combined Results', final_image)
    cv.imwrite('Combined Results-named.png', final_image)
    # 等待按键事件
    cv.waitKey(0)
    # 关闭所有窗口
    cv.destroyAllWindows()
else:
    print("没有有效的检测结果。")
【5】总结
掌握了python+opencv通过使用cv2.CascadeClassifier()函数+detectMultiScale()函数实现图像中的行人检测的技巧。