一、基础配置与文档生成
Swagger(现称 OpenAPI)是用于生成、描述和测试 RESTful API 的标准工具。NestJS 通过 @nestjs/swagger 模块深度集成 Swagger,支持自动生成接口文档。
1. 安装依赖
npm install @nestjs/swagger swagger-ui-express
2. 初始化 Swagger
在 main.ts 中配置:
import {

     NestFactory } from '@nestjs/core';
import {

     SwaggerModule, DocumentBuilder } from '@nestjs/swagger';
import {

     AppModule } from './app.module';

async function bootstrap() {


  const app = await NestFactory.create(AppModule);

  // Swagger 配置
  const config = new DocumentBuilder()
    .setTitle('API 文档')
    .setDescription('系统接口文档')
    .setVersion('1.0')
    .addBearerAuth(
      {


        type: 'http',
        scheme: 'bearer',
        bearerFormat: 'JWT',
        in: 'header',
        name: 'Authorization',
      } // 支持 Bearer Token 认证
     )  // 这里的配置项可以为空
    .build();

  const document = SwaggerModule.createDocument(app, config);
  SwaggerModule.setup('/api-docs', app, document);

  await app.listen(3000);
}
bootstrap();
参数说明:
type: ‘http’:指定认证类型为 HTTP。
scheme: ‘bearer’:指定认证方案为 Bearer Token。
bearerFormat: ‘JWT’:指定 Token 格式为 JWT。
in: ‘header’:指定 Token 位于 HTTP 请求头中。
name: ‘Authorization’:指定请求头的字段名为 Authorization。
通过这些配置,Swagger UI 会自动在每个请求中添加 Authorization 头,并允许用户输入 JWT Token。

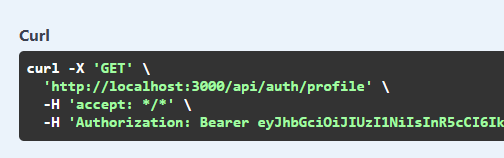
swagger 会自动携带上 Bearer 前缀。
手动配置原始 swagger json 可以:
  const document = SwaggerModule.createDocument(app, config);
  SwaggerModule.setup('api', app, document);

    // 添加路由来提供 Swagger JSON 文档
    app.get('/api-json', (req, res) => {


        res.json(document);
    });
二、核心装饰器与用法
1. 接口分组 (@ApiTags)
场景:将用户管理相关的接口归类到 用户管理 分组。
import {

     ApiTags } from '@nestjs/swagger';

@ApiTags('用户管理')
@Controller('users')
export class UsersController {


  // ...
}
2. 接口描述 (@ApiOperation)
场景:为创建用户的接口添加描述。
import {

     ApiOperation } from '@nestjs/swagger';

@Post()
@ApiOperation({

     summary: '创建用户', description: '需提供用户名和密码' })
createUser(@Body() dto: CreateUserDto) {


  // ...
}
3. 响应模型 (@ApiResponse)
场景:明确接口的响应状态码和数据结构。
import {

     ApiCreatedResponse, ApiBadRequestResponse } from '@nestjs/swagger';

@Post()
@ApiCreatedResponse({


  description: '用户创建成功',
  type: UserEntity, // 关联实体类
})
@ApiBadRequestResponse({


  description: '参数格式错误',
  schema: {

     example: {

     message: '用户名不能为空' } }
})
createUser(@Body() dto: CreateUserDto) {


  // ...
}
4. DTO 字段说明 (@ApiProperty)
场景:定义创建用户接口的请求体字段。
import {

     ApiProperty } from '@nestjs/swagger';

export class CreateUserDto {


  @ApiProperty({


    description: '用户名',
    example: 'john_doe',
    required: true
  })
  username: string;

  @ApiProperty({


    description: '密码(6-20位)',
    example: '123456',
    minLength: 6,
    maxLength: 20
  })
  password: string;
}
三、实际应用场景示例
场景 1:带分页的列表接口
目标:生成清晰的查询参数和响应模型文档。
控制器代码
@ApiTags('文章管理')
@Controller('articles')
export class ArticlesController {


  @Get()
  @ApiOperation({

     summary: '获取文章列表(分页)' })
  @ApiQuery({

     name: 'page', type: Number, example: 1, required: false })
  @ApiQuery({

     name: 'limit', type: Number, example: 10, required: false })
  @ApiOkResponse({


    type: PaginatedArticleDto, // 自定义分页响应 DTO
    description: '分页数据'
  })
  getArticles(
    @Query('page') page = 1,
    @Query('limit') limit = 10
  ) {


    // 查询逻辑...
  }
}
分页响应 DTO
export class PaginatedArticleDto {


  @ApiProperty({

     description: '总记录数', example: 100 })
  total: number;

  @ApiProperty({


    type: [ArticleEntity], // 嵌套数组类型
    description: '当前页数据'
  })
  items: ArticleEntity[];
}
场景 2:文件上传接口
目标:描述文件上传格式并支持 Swagger UI 测试。
控制器代码
@Post('upload')
@ApiConsumes('multipart/form-data') // 指定请求类型
@ApiBody({


  schema: {


    type: 'object',
    properties: {


      file: {


        type: 'string',
        format: 'binary', // 表示文件字段
        description: '上传的图片文件'
      },
      title: {


        type: 'string',
        example: '示例标题',
        description: '图片标题'
      }
    }
  }
})
@ApiOperation({

     summary: '上传图片' })
uploadFile(@UploadedFile() file: Express.Multer.File, @Body('title') title: string) {


  // 处理上传逻辑...
}
四、高级用法
1. 认证集成
场景:在 Swagger UI 中直接测试需要 Token 的接口。
// main.ts 中已配置 addBearerAuth()

// 在需要认证的接口上添加装饰器
@ApiBearerAuth()
@UseGuards(JwtAuthGuard)
@Get('profile')
getProfile() {

     ... }
2. 使用插件自动推断 DTO 类型
配置:在 main.ts 中启用插件,自动生成复杂类型的文档。
const config = new DocumentBuilder()
  .addServer('https://api.example.com')
  .build();

const document = SwaggerModule.createDocument(app, config, {


  extraModels: [/* 手动注册额外模型 */],
  deepScanRoutes: true, // 深度扫描路由
});
3. 排除接口
场景:隐藏某些接口(如内部调试接口)。
@ApiExcludeEndpoint() // 隐藏此接口
@Get('debug')
debug() {

     ... }