原生 GLTFUtility插件不支持HDRP渲染管线,导入的GLB模型改为使用HDRP/Lit Shader时,原本的法线贴图不再显示凹凸感。通过修改插件代码解决此问题。
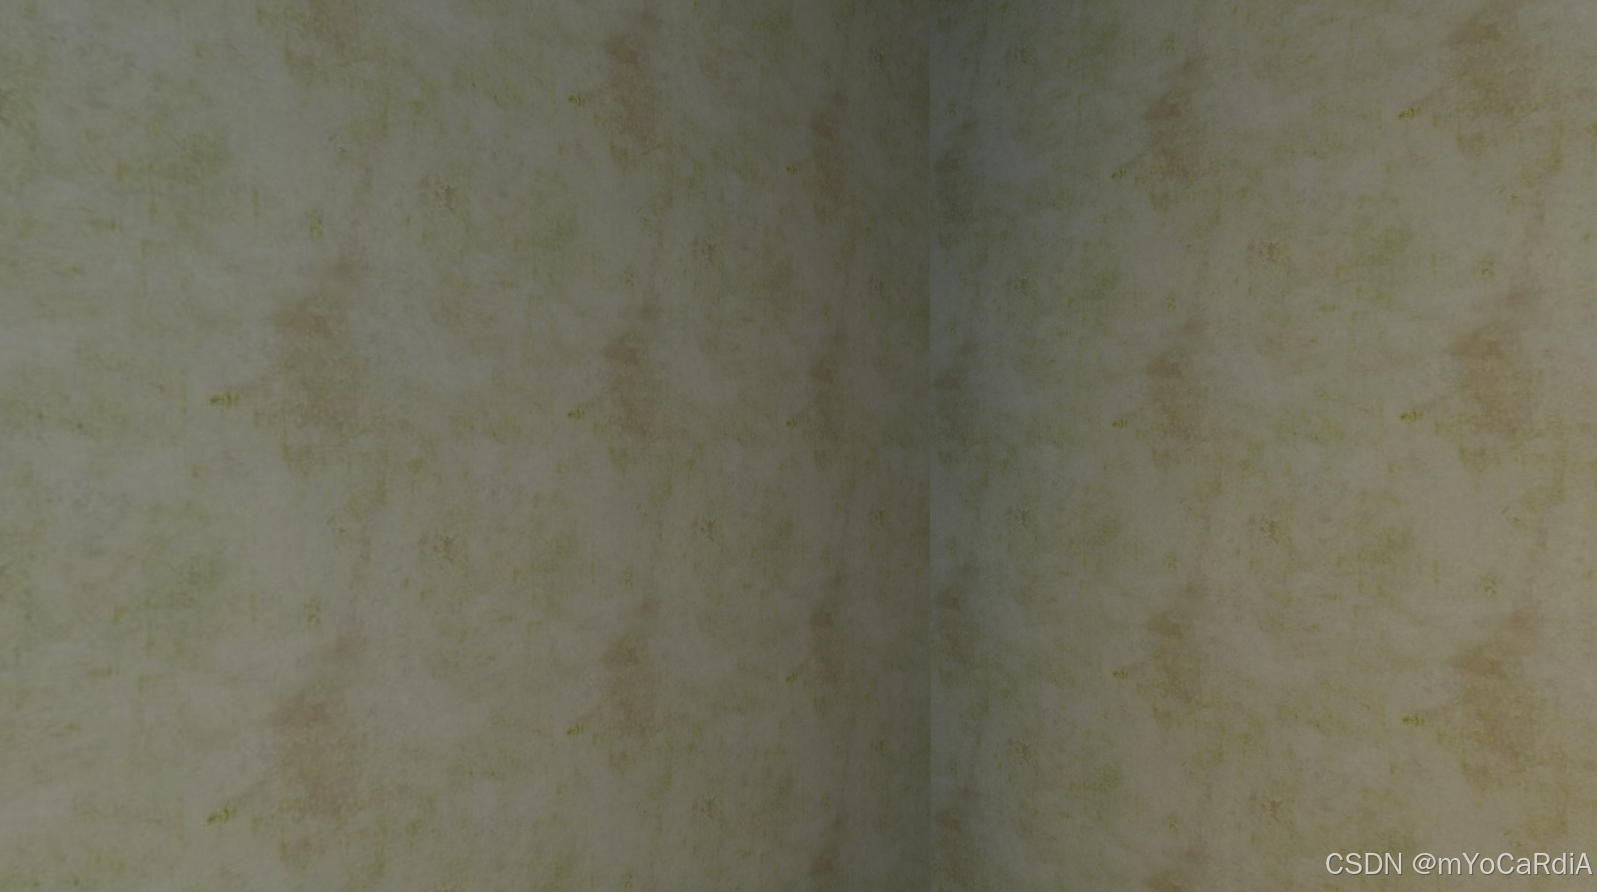
解决前墙壁模型:
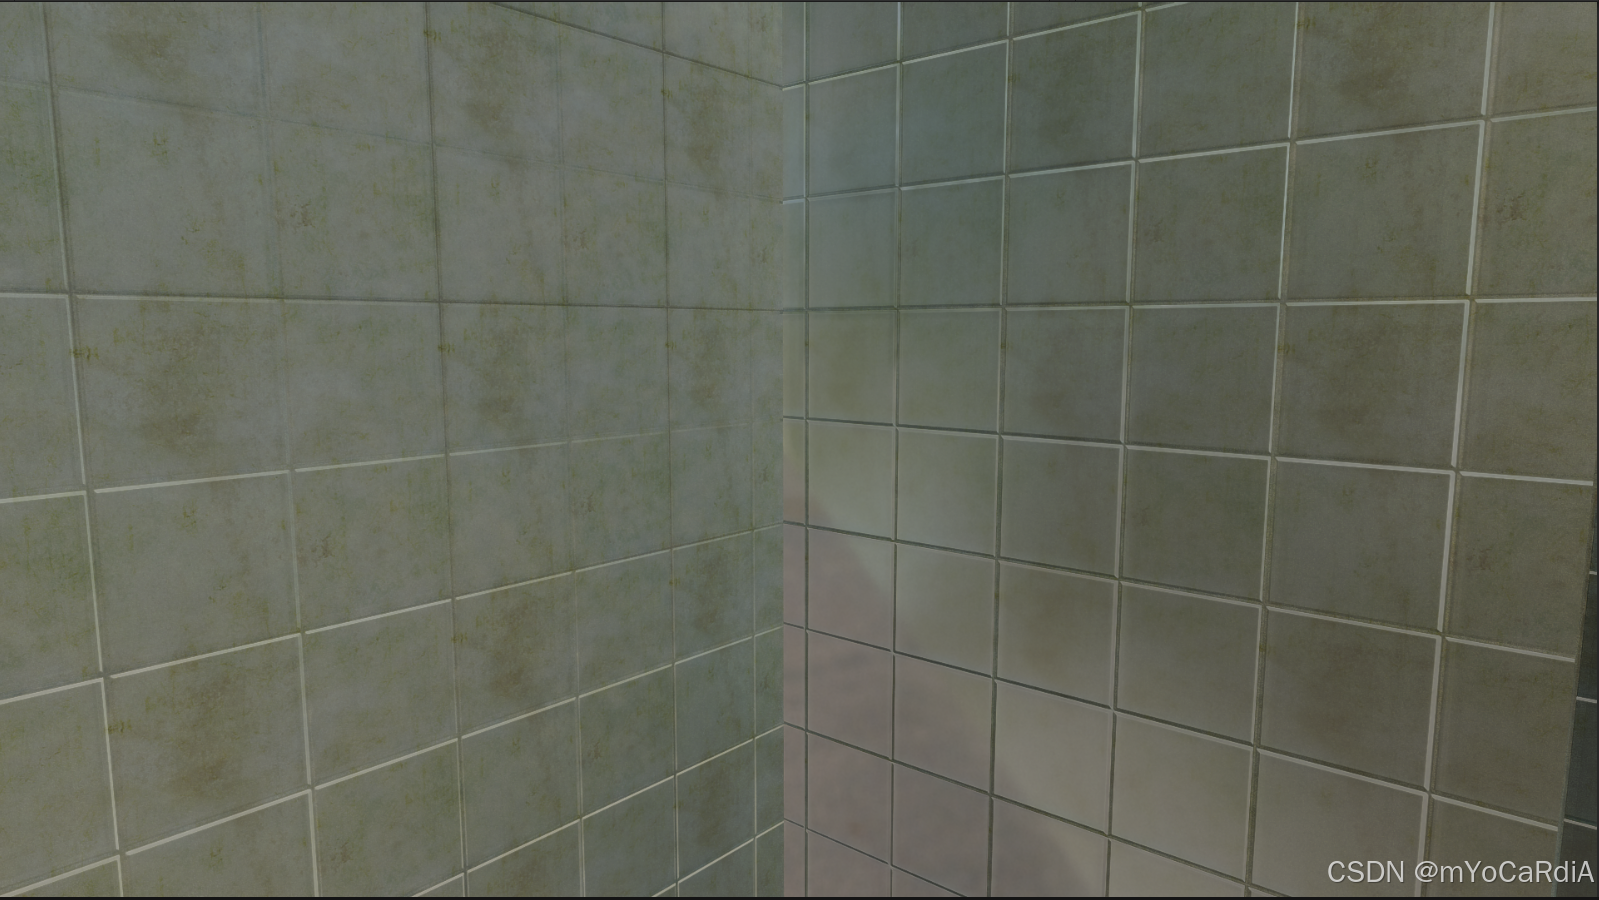
解决后:
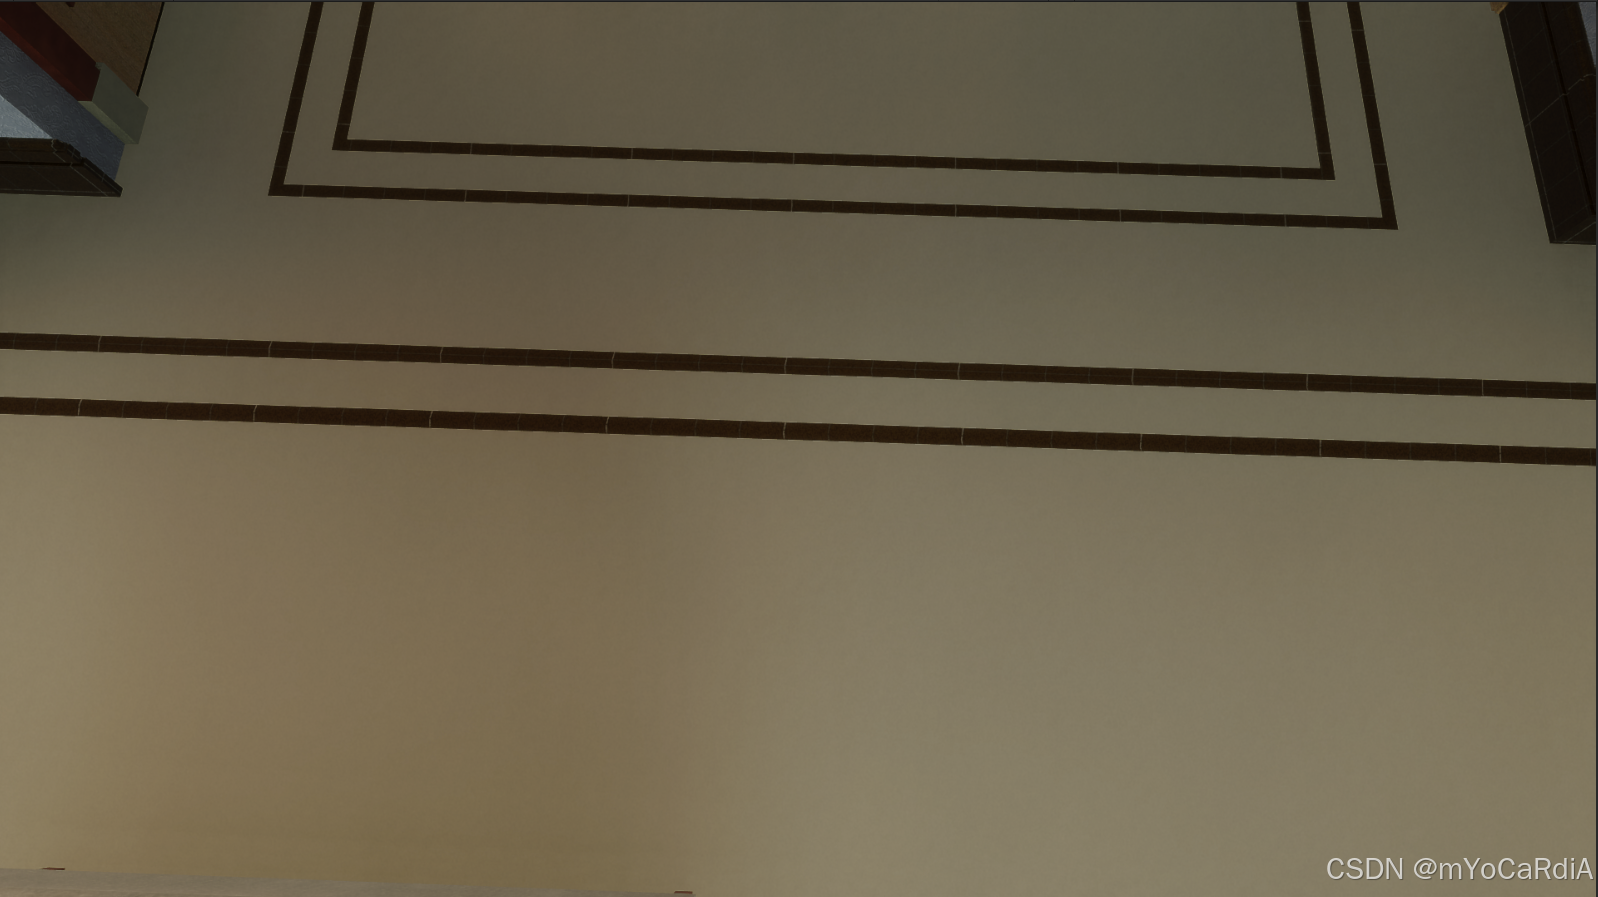
解决前地砖模型:
解决后:

解决方案如下
在插件包文件中找到GLTFMaterial脚本(此脚本控制导入的模型最终的材质),找到CreateMaterial方法,复制以下代码并粘贴
public static IEnumerator TryGetNormalTexture(GLTFTexture.ImportResult[] textures, TextureInfo texture, bool linear, Action<Texture2D> onFinish, Action<float> onProgress = null)
{
	if (texture == null || texture.index < 0)
	{
		if (onProgress != null) onProgress(1f);
		onFinish(null);
	}
	if (textures == null)
	{
		if (onProgress != null) onProgress(1f);
		onFinish(null);
	}
	if (textures.Length <= texture.index)
	{
		Debug.LogWarning("Attempted to get texture index " + texture.index + " when only " + textures.Length + " exist");
		if (onProgress != null) onProgress(1f);
		onFinish(null);
	}
	IEnumerator en = textures[texture.index].GetNormalTextureCached(linear, onFinish, onProgress);
	while (en.MoveNext()) { yield return null; };
}
找到GLTFTexture脚本(此脚本和GLTFImage脚本控制从GLB的Json中读取贴图位置并从二进制流中读取这些贴图),在ImportResult类中添加如下代码
public IEnumerator GetNormalTextureCached(bool linear, Action<Texture2D> onFinish, Action<float> onProgress = null)
{
	if (cache == null && image != null)
	{
		IEnumerator en = image.CreateNormalTextureAsync(linear, x => cache = x, onProgress);

		while (en.MoveNext()) { yield return null; };
	}
	onFinish(cache);
}
找到GLTFImage脚本,在ImportResult类中添加如下代码
			public IEnumerator CreateNormalTextureAsync(bool linear, Action<Texture2D> onFinish, Action<float> onProgress = null)
			{
				if (!string.IsNullOrEmpty(path))
				{
#if UNITY_EDITOR
					// Load textures from asset database if we can
					Texture2D assetTexture = UnityEditor.AssetDatabase.LoadAssetAtPath(path, typeof(Texture2D)) as Texture2D;
					if (assetTexture != null)
					{
						onFinish(assetTexture);
						if (onProgress != null) onProgress(1f);
						yield break;
					}
#endif

#if !UNITY_EDITOR && (UNITY_ANDROID || UNITY_IOS)
					path = "File://" + path;
#endif
					// TODO: Support linear/sRGB textures
					using (UnityWebRequest uwr = UnityWebRequestTexture.GetTexture(path, true))
					{
						UnityWebRequestAsyncOperation operation = uwr.SendWebRequest();
						float progress = 0;
						while (!operation.isDone)
						{
							if (progress != uwr.downloadProgress)
							{
								if (onProgress != null) onProgress(uwr.downloadProgress);
							}
							yield return null;
						}
						if (onProgress != null) onProgress(1f);

#if UNITY_2020_2_OR_NEWER
						if (uwr.result == UnityWebRequest.Result.ConnectionError ||
							uwr.result == UnityWebRequest.Result.ProtocolError)
#else
						if(uwr.isNetworkError || uwr.isHttpError)
#endif
						{
							Debug.LogError("GLTFImage.cs ToTexture2D() ERROR: " + uwr.error);
						}
						else
						{
							Texture2D tex = DownloadHandlerTexture.GetContent(uwr);
							if (tex != null)
							{
								tex.name = Path.GetFileNameWithoutExtension(path);
								onFinish(tex);
							}
						}
						uwr.Dispose();
					}
				}
				else
				{

					Texture2D tex = new Texture2D(2, 2, TextureFormat.ARGB32, true, linear);
					if (!tex.LoadImage(bytes))
					{
						Debug.Log("mimeType not supported");
						yield break;
					}
					else
					{
						onFinish(GenerateNormalMap(tex));
					}
				}
			}
GenerateNormalMap方法如下
Texture2D GenerateNormalMap(Texture2D heightMap)
{
	int width = heightMap.width;
	int height = heightMap.height;

	Texture2D normalMap = new Texture2D(width, height, TextureFormat.RGB24, false);

	// 创建一个新的高度图进行平滑处理(比如高斯模糊)
	Texture2D smoothedHeightMap = new Texture2D(width, height);
	smoothedHeightMap.SetPixels(heightMap.GetPixels());
	smoothedHeightMap.Apply();  // 应用平滑处理

	for (int x = 1; x < width - 1; x++)
	{
		for (int y = 1; y < height - 1; y++)
		{
			// 获取周围的像素并计算法线
			float heightL = smoothedHeightMap.GetPixel(x - 1, y).grayscale;
			float heightR = smoothedHeightMap.GetPixel(x + 1, y).grayscale;
			float heightD = smoothedHeightMap.GetPixel(x, y - 1).grayscale;
			float heightU = smoothedHeightMap.GetPixel(x, y + 1).grayscale;

			float dx = heightR - heightL;
			float dy = heightU - heightD;

			Vector3 normal = new Vector3(dx, dy, 1.0f).normalized;
			Color normalColor = new Color(normal.x * 0.5f + 0.5f, normal.y * 0.5f + 0.5f, normal.z * 0.5f + 0.5f);
			normalMap.SetPixel(x, y, normalColor);
		}
	}

	normalMap.Apply();
	//byte[] normalMapData = normalMap.EncodeToPNG();
	//System.IO.File.WriteAllBytes("C:\\Users\\Administrator\\Desktop\\" + UnityEngine.Random.Range(0,1000)+ "NormalMap.png", normalMapData);
	return normalMap;
}
此方法是本次修改的核心算法,从原本Task提取出的NormalMap做完灰度图像提取灰度信息并重新转换为法线贴图。
方法详细分析:
-
参数:
-
heightMap:一个灰度图像,表示物体表面的高度信息。每个像素的亮度值对应表面上的高度。值越大表示表面越高,值越小则表示表面越低。
-
-
返回值:
-
normalMap:生成的法线图,包含了表面每个像素的法线信息(即表面各点的法向量),这些信息用于计算光照。
-
过程解析:
-
初始化:
int width = heightMap.width; int height = heightMap.height; Texture2D normalMap = new Texture2D(width, height, TextureFormat.RGB24, false);-
获取
heightMap的宽度和高度。 -
创建一个新的
Texture2D对象normalMap,这是最终要生成的法线图。
-
-
平滑处理:
Texture2D smoothedHeightMap = new Texture2D(width, height); smoothedHeightMap.SetPixels(heightMap.GetPixels()); smoothedHeightMap.Apply(); // 应用平滑处理-
将原始高度图的像素数据拷贝到新的纹理
smoothedHeightMap中。 -
Apply()方法确保像素数据应用到纹理上。在实际应用中,你可以对高度图进行平滑处理(例如使用高斯模糊)来减少噪声并改善法线图的效果,但是这个代码段中没有实际执行平滑操作,只是简单地拷贝数据。
-
-
计算法线:
for (int x = 1; x < width - 1; x++) { for (int y = 1; y < height - 1; y++) { // 获取周围的像素并计算法线 float heightL = smoothedHeightMap.GetPixel(x - 1, y).grayscale; float heightR = smoothedHeightMap.GetPixel(x + 1, y).grayscale; float heightD = smoothedHeightMap.GetPixel(x, y - 1).grayscale; float heightU = smoothedHeightMap.GetPixel(x, y + 1).grayscale; float dx = heightR - heightL; float dy = heightU - heightD; Vector3 normal = new Vector3(dx, dy, 1.0f).normalized; Color normalColor = new Color(normal.x * 0.5f + 0.5f, normal.y * 0.5f + 0.5f, normal.z * 0.5f + 0.5f); normalMap.SetPixel(x, y, normalColor); } }-
这个嵌套的
for循环遍历heightMap中的每个像素(除了边缘像素),并通过计算相邻像素之间的高度差来估算表面法线。 -
heightL和heightR分别是当前位置左边和右边像素的高度,heightD和heightU分别是下边和上边像素的高度。 -
dx是水平方向上的高度差,dy是垂直方向上的高度差。 -
然后使用这两个差值计算法线方向,
Vector3 normal = new Vector3(dx, dy, 1.0f).normalized。 -
法线被规范化并转化为一个颜色值(将法线的三个分量分别映射到 [0, 1] 的范围),并应用到法线图的对应像素上。
-
注意:
-
在计算法线之前可以进行平滑处理(如高斯模糊)来减少噪声,提高法线图的质量。但网上找到的处理算法代码尝试了一下效果都一般般,所以笔者这里没有使用平滑算法。
-