前置条件:
服务器驱动安装:
显卡:NVIDIA GeForce RTX 4090
1.下载安装依赖
切换镜像源:
   cp /etc/yum.repos.d/CentOS-Base.repo /etc/yum.repos.d/CentOS-Base.repo.backup
    curl -o /etc/yum.repos.d/CentOS-Base.repo http://mirrors.aliyun.com/repo/Centos-7.repo
安装gcc
yum -y install gcc
安装这个需要金额系统的内核版本一致,需要特别注意,在线下载的版本不一定对。或许要离线安装。
查看系统内核 。查看系统内核如下,所以kernet也需要安装对应的版本。我的为3.10-957.el7离线下载。
下载地址为:https://www.alipan.com/s/wzWUhTSQUED

上传至指定文件夹进行安装:
sudo yum localinstall kernel-devel-3.10.0-957.el7.x86_64.rpm
sudo yum localinstall kernel-tools-3.10.0-957.el7.x86_64.rpm
2.屏蔽系统自带的nouveau如图所示:文件路径/lib/modprobe.d/dist-blacklist.conf
将nvidiafb注释掉:
#blacklist nvidiafb
添加以下两句在blacklist.conf 文件中。
blacklist nouveau
options nouveau modeset=0
#
# Listing a module here prevents the hotplug scripts from loading it.
# Usually that'd be so that some other driver will bind it instead,
# no matter which driver happens to get probed first.  Sometimes user
# mode tools can also control driver binding.
#
# Syntax: see modprobe.conf(5).
#

# watchdog drivers
blacklist i8xx_tco

# framebuffer drivers
blacklist aty128fb
blacklist atyfb
blacklist radeonfb
blacklist i810fb
blacklist cirrusfb
blacklist intelfb
blacklist kyrofb
blacklist i2c-matroxfb
blacklist hgafb
#blacklist nvidiafb
blacklist rivafb
blacklist savagefb
blacklist sstfb
blacklist neofb
blacklist tridentfb
blacklist tdfxfb
blacklist virgefb
blacklist vga16fb
blacklist viafb

# ISDN - see bugs 154799, 159068
blacklist hisax
blacklist hisax_fcpcipnp

# sound drivers
blacklist snd-pcsp

# I/O dynamic configuration support for s390x (bz #563228)
blacklist chsc_sch

# crypto algorithms
blacklist sha1-mb

# see bz #1562114
blacklist sha256-mb
blacklist sha512-mb
blacklist nouveau
options nouveau modeset=0
3. 重建initramfs image步骤
#(1)删除
mv /boot/initramfs-$(uname -r).img /boot/initramfs-$(uname -r).img.bak
#(2)重建
dracut /boot/initramfs-$(uname -r).img $(uname -r)
4.下载指定驱动文件NVIDIA-Linux-x86_64-550.144.03.run,离线地址:https://www.alipan.com/s/b27tPh54HAb
上传至指定文件夹并设置可执行权限:
5.重启服务器:
reboot
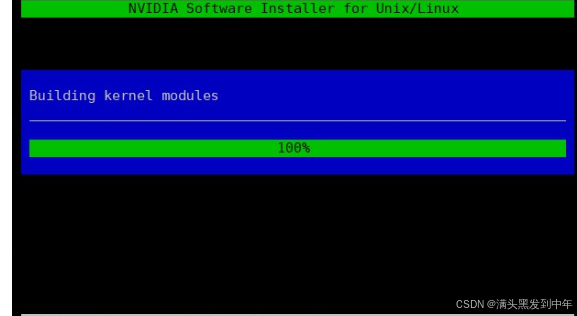
6.重新登陆,执行驱动文件进行安装。安装会有界面进行选择,一般直接点继续,或直接到下一步,即可安装成功。
./NVIDIA-Linux-x86_64-550.144.03.run
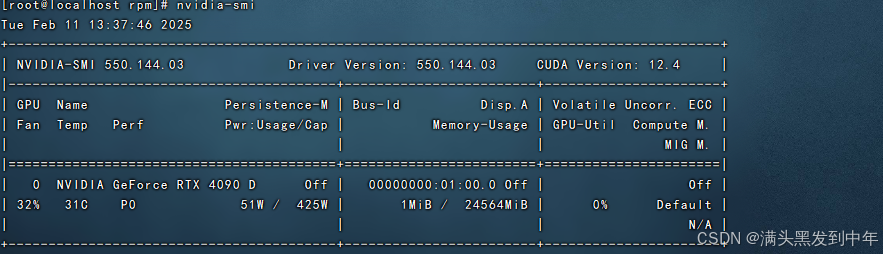
7.安装完成测试命令,如图所示
nvidia-smi
安装模型
1.下载ollama离线安装包
地址:https://ollama.com/download/ollama-linux-amd64.tgz
2.上传至服务器/home/ollama文件夹下。
3.解压
tar -xzf ollama-linux-amd64.tgz
4.在/etc/systemd/system创建ollama.service文件,进行环境配置。文件内容如下:
[Unit]
Description=Ollama Service
After=network-online.target

[Service]
ExecStart=/home/ollama/bin/ollama serve
User=root
Group=root
Restart=always
RestartSec=3
Environment="PATH=$PATH"
#指定模型存储位置,可以直接在外网下载好模型,打包解压到内网的ollama的模型目录下,就能实现离线安装了
Environment="OLLAMA_MODELS=/home/ollama/models"
#解决ollama无法访问的问题
Environment="OLLAMA_HOST=0.0.0.0:11434"

[Install]
WantedBy=default.target
刷新配置
systemctl daemon-reload
5. 配置全局环境
在 /etc/profile.d/下新疆 ollama.sh文件
#ollama.sh内容如下
PATH=$PATH:/home/ollama/bin
export PATH
刷新配置
source /etc/profile
6.ollama启动/关闭相关命令
systemctl enable ollama

systemctl start ollama

systemctl status ollama

systemctl stop ollama

systemctl restart ollama
7.查看是否安装成功
ollama ls
8.安装deepseek模型
模型大小根据自己电脑配置有1.5b,7b等,可查看官网。
ollama run deepseek-r1:32b