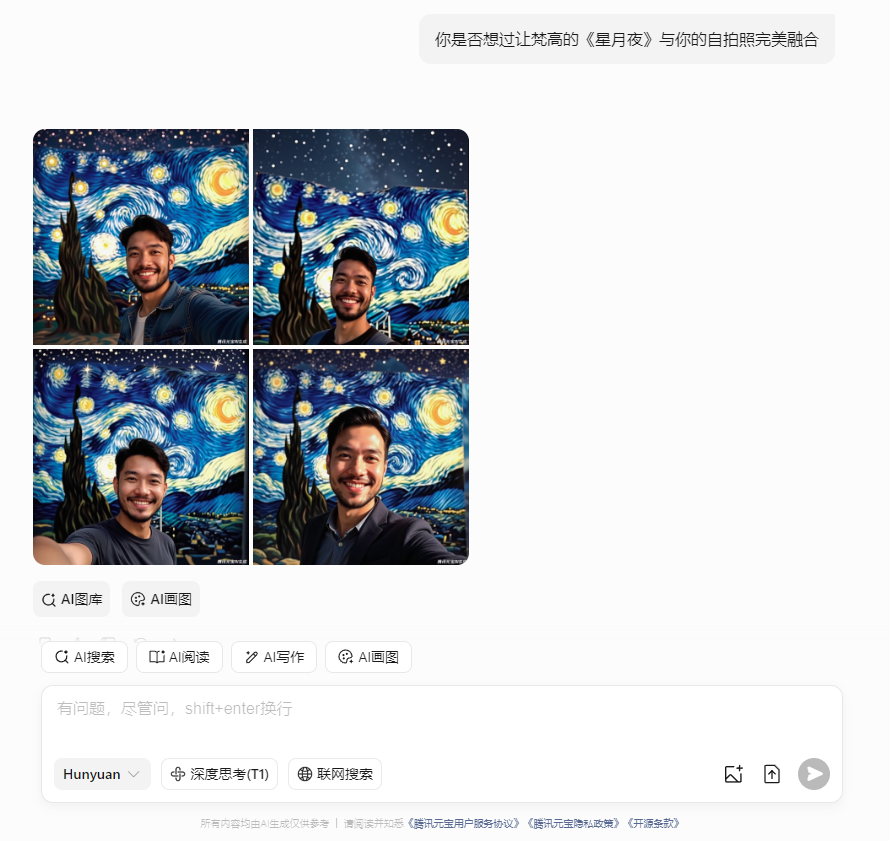
在这个数字技术蓬勃发展的时代,人工智能正在重塑艺术创作的边界。你是否想过让梵高的《星月夜》与你的自拍照完美融合?或是将水墨画的飘逸笔触赋予现代建筑摄影?这一切并非天方夜谭,借助深度学习技术,我们可以在JupyterLab中轻松实现图像的风格迁移。这项技术不仅被广泛应用于手机滤镜开发,更在数字艺术创作、影视特效制作等领域大放异彩。本文将带您深入浅出地探索这项神奇技术的实现奥秘。
一、技术原理
1.1 卷积神经网络的视觉理解
想象一位经验丰富的艺术评论家,能瞬间捕捉画作的笔触特点和色彩运用。VGG19网络就如同这样一位"数字评论家",这个包含19层结构的深度卷积网络,在数百万张图片的训练下,形成了对视觉特征的深刻理解。其前几层识别基础元素(如边缘、纹理),深层则理解复杂特征(如物体部件),这种分层认知正是风格迁移的关键。
1.2 内容与风格的数学表达
-
内容特征提取:在网络的深层(如block5_conv2层),模型捕捉到的是图像的核心内容特征。就像我们可以用寥寥数笔勾勒人物轮廓,这些高层特征保留了物体的空间结构。
-
风格特征解析:通过Gram矩阵计算各层特征的统计分布,这相当于将画家的调色板进行数字化建模。Gram矩阵中的每个元素反映了不同特征通道之间的相关性,这正是笔触风格、色彩搭配的数学表达。
1.3 三重奏的损失函数
-
内容损失:保持生成图与内容图在高层特征上的相似度(公式:L_content = Σ(生成特征 - 内容特征)²)
-
风格损失:计算各风格层Gram矩阵的差异(公式:L_style = Σ(风格Gram - 生成Gram)² / (4N²M²))
-
总变差损失:如同画布上的防抖滤镜,平滑相邻像素的突变(公式:L_tv = Σ相邻像素差²)
这三者的加权组合(L_total = αL_content + βL_style + γL_tv)构成了优化目标,如同指挥家协调乐队各声部,最终奏响视觉的交响乐章。
二、实战指南
2.1 环境搭建
在HAI中使用JupyterLab新建Notebook,执行以下魔法咒语:
!pip install tensorflow matplotlib pillow这三个法宝分别是:TensorFlow(深度学习框架)、Matplotlib(可视化工具)、PIL(图像处理库)。
2.2 图像预处理的艺术
def preprocess_image(path):
    img = load_img(path, target_size=(512,512))  # 统一画布尺寸
    img = img_to_array(img)  # 转化为数字颜料
    img = np.expand_dims(img, axis=0)  # 添加批次维度
    return vgg19.preprocess_input(img)  # 标准化处理
这个预处理过程就像画家准备画布:拉伸画布到统一尺寸(512x512)、将颜料按特定配方调配(减去ImageNet均值)、整理绘画工具(转换为张量格式)。
2.3 构建特征提取器
model = vgg19.VGG19(weights='imagenet', include_top=False)
feature_extractor = Model(inputs=model.input, outputs=[layer.output for layer in model.layers])
这里我们截取了VGG19的特征提取部分,就像拆解显微镜的目镜组,每个目镜(网络层)都能观察到不同放大倍率的特征。
三、参数调优:寻找美学平衡点
3.1 权重参数的舞蹈
-
内容权重(1e3):如同素描本上的铅笔痕迹,值越大越忠实于原图轮廓
-
风格权重(1e-2):相当于画家的风格浓度,值越高风格特征越强烈
-
平滑权重(30):控制画面噪点,防止出现马赛克式突变
3.2 学习率的节奏把控
Adam优化器的学习率通常设置在0.02左右,这就像画家运笔的力度:过大容易"画糊",过小则进展缓慢。实践中可采用退火策略,后期逐步降低学习率。
3.3 迭代次数的黄金分割
建议采用5-10个epoch,每个epoch包含100次迭代。这个过程如同油画创作:第一遍打底稿(快速捕捉大体风格),后续逐步细化细节。
人人都是数字艺术家
通过本文的探索,我们看到深度学习不仅改变了图像处理的技术范式,更降低了艺术创作的门槛。在JupyterLab这个数字画室中,每个代码单元都如同画家的调色板,参数调整好比运笔的轻重缓急。当我们将内容图的tf.Variable()声明改为可训练参数,就开启了艺术创造的无限可能。
这种技术演进带给我们的不仅是炫酷的滤镜效果,更是对艺术本质的重新思考——在算法与美学的碰撞中,我们正在见证艺术民主化进程的新篇章。正如印象派打破学院派的桎梏,风格迁移技术也正在创造属于这个时代的数字艺术语言。
(完整代码如下):
import numpy as np
import matplotlib.pyplot as plt
import tensorflow as tf
from tensorflow.keras.applications import vgg19
from tensorflow.keras.preprocessing.image import load_img, img_to_array
from tensorflow.keras import backend as K
def preprocess_image(image_path, target_size=None):
"""加载并预处理图像"""
if target_size is None:
target_size = (512, 512)
img = load_img(image_path, target_size=target_size)
img = img_to_array(img)
img = np.expand_dims(img, axis=0)
img = vgg19.preprocess_input(img)
return img
def deprocess_image(x, target_size=None):
"""将处理后的图像转换回可显示格式"""
if target_size is None:
target_size = (512, 512)
x = x.reshape((target_size[0], target_size[1], 3))
# 去除VGG19的预处理
x[:, :, 0] += 103.939
x[:, :, 1] += 116.779
x[:, :, 2] += 123.68
x = x[:, :, ::-1] # BGR -> RGB
x = np.clip(x, 0, 255).astype('uint8')
return x
def get_model():
"""构建只包含特征提取层的VGG19模型"""
model = vgg19.VGG19(weights="imagenet", include_top=False)
outputs_dict = dict([(layer.name, layer.output) for layer in model.layers])
return tf.keras.Model(inputs=model.inputs, outputs=outputs_dict)
def content_loss(base, combination):
"""内容损失函数"""
return K.sum(K.square(combination - base))
def gram_matrix(x):
"""计算Gram矩阵"""
features = K.batch_flatten(K.permute_dimensions(x, (2, 0, 1)))
gram = K.dot(features, K.transpose(features))
return gram
def style_loss(style, combination, img_size):
"""风格损失函数"""
S = gram_matrix(style)
C = gram_matrix(combination)
channels = 3
size = img_size[0] * img_size[1]
return K.sum(K.square(S - C)) / (4.0 * (channels ** 2) * (size ** 2))
def total_variation_loss(x, img_size):
"""总变差损失,用于平滑图像"""
a = K.square(
x[:, : img_size[0] - 1, : img_size[1] - 1, :] - x[:, 1:, : img_size[1] - 1, :]
)
b = K.square(
x[:, : img_size[0] - 1, : img_size[1] - 1, :] - x[:, : img_size[0] - 1, 1:, :]
)
return K.sum(K.pow(a + b, 1.25))
class StyleTransfer:
def __init__(self, content_path, style_path, content_weight=1e3, style_weight=1e-2,
total_variation_weight=30, img_size=(512, 512)):
self.content_weight = content_weight
self.style_weight = style_weight
self.total_variation_weight = total_variation_weight
self.img_size = img_size
# 加载内容图像和风格图像
self.content_image = preprocess_image(content_path, img_size)
self.style_image = preprocess_image(style_path, img_size)
self.combination_image = tf.Variable(self.content_image, dtype=tf.float32)
# 获取模型
self.model = get_model()
# 定义要使用的层
self.content_layer = 'block5_conv2'
self.style_layers = [
'block1_conv1',
'block2_conv1',
'block3_conv1',
'block4_conv1',
'block5_conv1',
]
def compute_loss(self):
"""计算总损失"""
# 组合三张图像输入模型
input_tensor = tf.concat(
[self.content_image, self.style_image, self.combination_image], axis=0
)
features = self.model(input_tensor)
# 初始化损失
loss = tf.zeros(())
# 添加内容损失
layer_features = features[self.content_layer]
content_features = layer_features[0, :, :, :]
combination_features = layer_features[2, :, :, :]
loss = loss + self.content_weight * content_loss(
content_features, combination_features
)
# 添加风格损失
for layer_name in self.style_layers:
layer_features = features[layer_name]
style_features = layer_features[1, :, :, :]
combination_features = layer_features[2, :, :, :]
sl = style_loss(style_features, combination_features, self.img_size)
loss += (self.style_weight / len(self.style_layers)) * sl
# 添加总变差损失
loss += self.total_variation_weight * total_variation_loss(
self.combination_image, self.img_size
)
return loss
@tf.function
def train_step(self, optimizer):
"""单次训练步骤"""
with tf.GradientTape() as tape:
loss = self.compute_loss()
grads = tape.gradient(loss, [self.combination_image])
optimizer.apply_gradients(zip(grads, [self.combination_image]))
return loss
def transfer_style(self, epochs=10, steps_per_epoch=100, lr=0.02):
"""执行风格迁移"""
optimizer = tf.optimizers.Adam(learning_rate=lr)
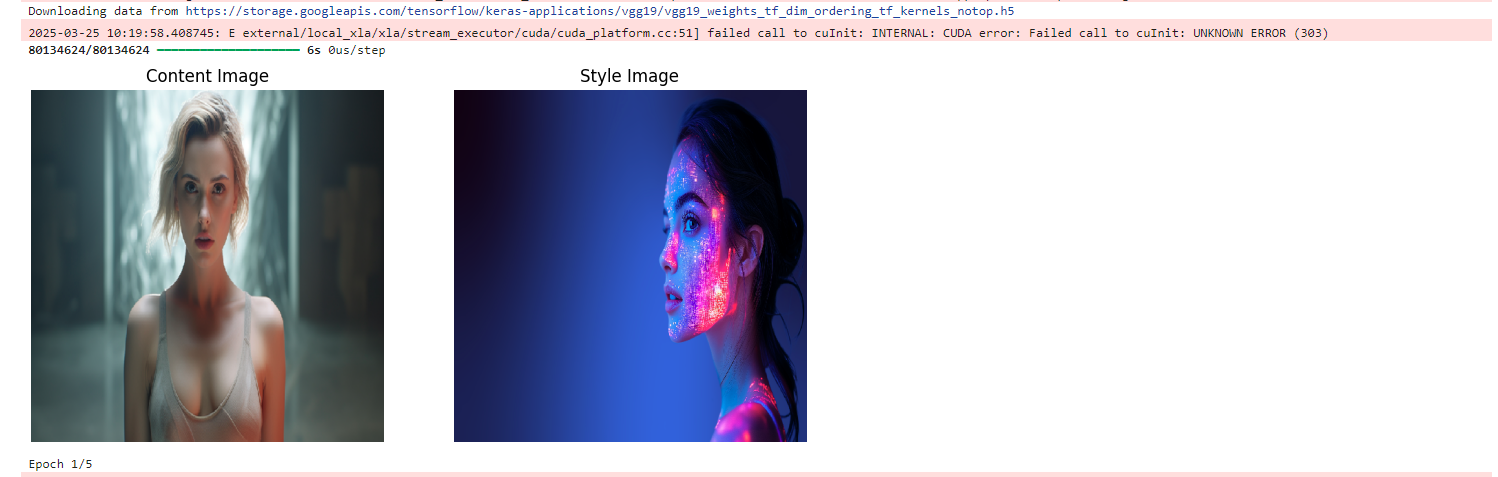
# 显示原始图像
plt.figure(figsize=(10, 5))
plt.subplot(1, 2, 1)
plt.imshow(deprocess_image(self.content_image[0], self.img_size))
plt.title("Content Image")
plt.axis('off')
plt.subplot(1, 2, 2)
plt.imshow(deprocess_image(self.style_image[0], self.img_size))
plt.title("Style Image")
plt.axis('off')
plt.show()
# 训练循环
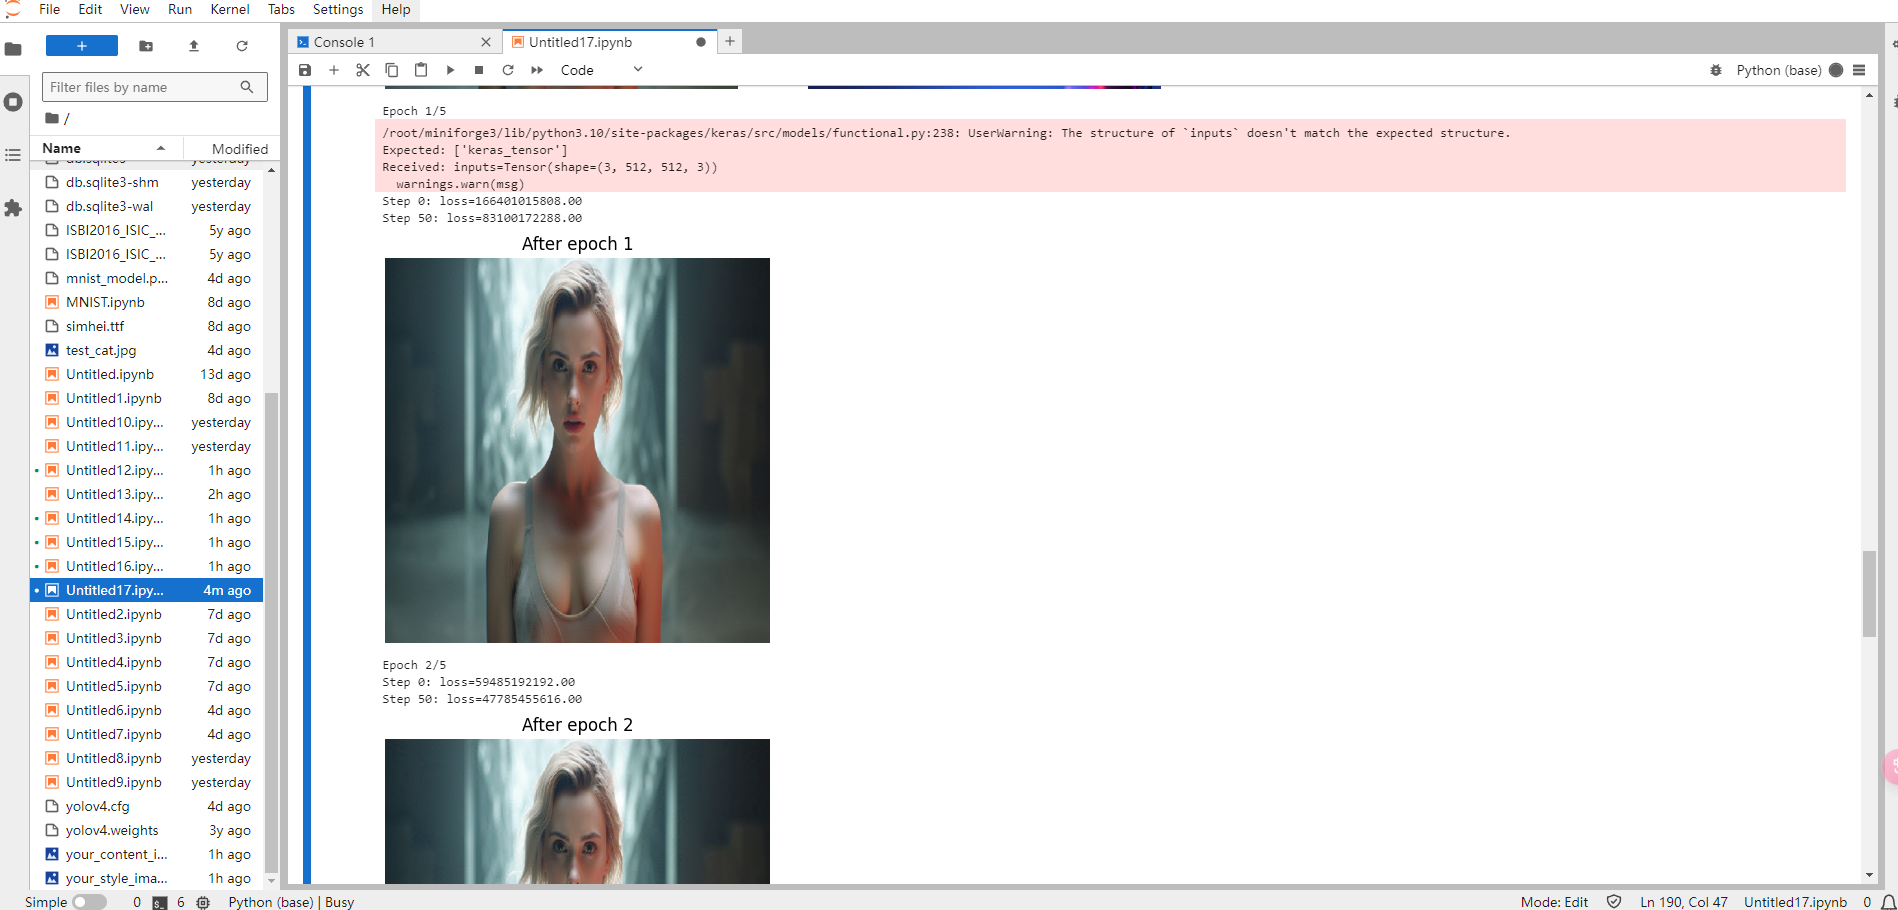
for epoch in range(epochs):
print(f"Epoch {epoch+1}/{epochs}")
for step in range(steps_per_epoch):
loss = self.train_step(optimizer)
if step % 50 == 0:
print(f"Step {step}: loss={loss.numpy():.2f}")
# 显示中间结果
img = deprocess_image(self.combination_image.numpy()[0], self.img_size)
plt.figure(figsize=(5, 5))
plt.imshow(img)
plt.title(f"After epoch {epoch+1}")
plt.axis('off')
plt.show()
# 返回最终结果
return deprocess_image(self.combination_image.numpy()[0], self.img_size)
# 设置图像路径
content_path = "your_content_image.jpg" # 替换为你的内容图像路径
style_path = "your_style_image.jpg" # 替换为你的风格图像路径
# 创建并运行风格迁移
st = StyleTransfer(content_path, style_path)
result = st.transfer_style(epochs=5, steps_per_epoch=100)
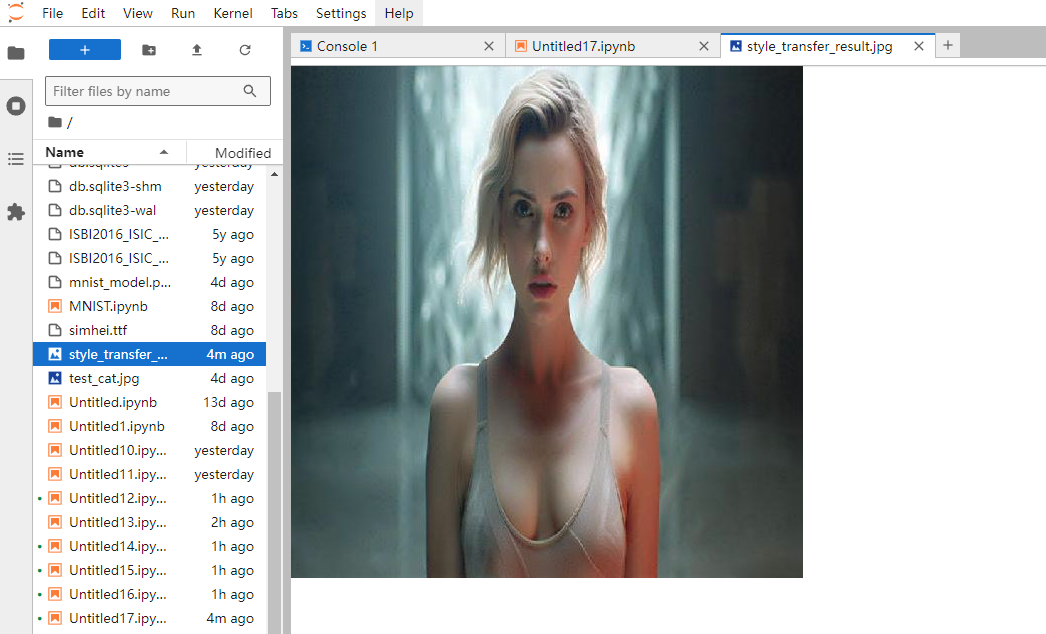
# 显示最终结果
plt.figure(figsize=(10, 10))
plt.imshow(result)
plt.title("Final Result")
plt.axis('off')
plt.show()
from PIL import Image
result_image = Image.fromarray(result)
result_image.save("style_transfer_result.jpg")