内容将会持续更新,有错误的地方欢迎指正,谢谢!
|
拥有更好的学习体验 —— 不断努力,不断进步,不断探索 |
|
助力快速掌握 Window服务 学习 为初学者节省宝贵的学习时间,避免困惑! |
前言:
在Windows操作系统中,服务是一种特殊的程序类型,它能够在系统后台持续运行而无需用户交互。这种特性使得服务非常适合用于执行定时任务、监控资源使用情况或提供网络服务等场景。本文将详细介绍如何通过C#语言来创建一个Windows服务,并讲解如何进行该服务的安装、启动、停止及卸载操作。
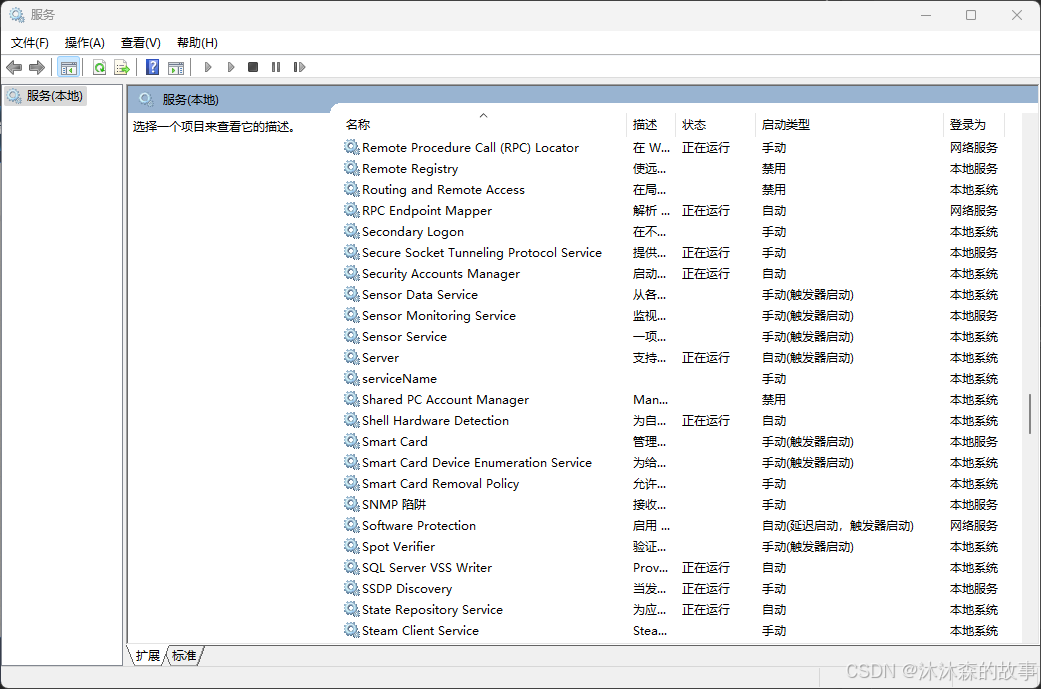
TechX 教程效果:
一、Window 服务创建
首先,我们定义了一个名为Service1的服务类,继承自ServiceBase。在这个类中,我们实现了几个关键的方法:OnStart、OnStop以及OnTimerElapsed。这些方法分别对应于服务启动时、停止时的行为,以及基于计时器触发的操作。此外,我们还配置了NLog日志记录库,以便更好地跟踪服务运行状态。
using NLog;
using NLog.Config;
using NLog.Targets;
using System;
using System.ServiceProcess;
using System.Timers;

namespace WindowsService1
{


    public partial class Service1 : ServiceBase
    {


        private static readonly Logger Logger = LogManager.GetCurrentClassLogger();
        private Timer _timer;

        public Service1()
        {


            InitializeComponent();
            // 配置 NLog 日志(代码配置)
            ConfigureLogging();
        }

        protected override void OnStart(string[] args)
        {


            // 日志:服务启动
            Logger.Info("WindowsService1服务已启动");

            // 初始化定时器,每隔 1 分钟触发一次
            _timer = new Timer();
            _timer.Interval = 60000; // 60,000 毫秒 = 1 分钟
            _timer.Elapsed += OnTimerElapsed;
            _timer.Start();
        }

        private void OnTimerElapsed(object sender, ElapsedEventArgs e)
        {


            // 每分钟写一次日志
            Logger.Info($"WindowsService1服务正在运行: {

      DateTime.Now}");
        }

        protected override void OnStop()
        {


            // 日志:服务停止
            Logger.Info("WindowsService1服务已停止");
            // 停止定时器
            if (_timer != null)
            {


                _timer.Stop();
                _timer.Dispose();
            }
        }

        /// <summary>
        /// 配置 NLog 日志输出(代码方式)
        /// </summary>
        private void ConfigureLogging()
        {


            // 创建 NLog 配置对象
            var config = new LoggingConfiguration();

            // 创建一个文件日志目标
            var fileTarget = new FileTarget("logfile")
            {


                FileName = "${basedir}/WindowsService1.log", // 日志文件路径,${basedir} 是 exe 所在目录
                Layout = "${longdate} ${uppercase:${level}} ${message}", // 日志格式
                ArchiveFileName = "${basedir}/logs/archive/WindowsService1.{#}.log", // 归档文件路径
                ArchiveEvery = FileArchivePeriod.Day, // 每天归档一次
                ArchiveNumbering = ArchiveNumberingMode.Rolling, // 滚动归档
                MaxArchiveFiles = 7 // 最大保留 7 个归档文件
            };

            // 将目标添加到配置中
            config.AddTarget(fileTarget);

            // 创建一个规则,将所有级别的日志都写入文件
            config.AddRule(LogLevel.Info, LogLevel.Fatal, fileTarget);

            // 应用配置
            LogManager.Configuration = config;
        }
    }
}
using System.ComponentModel;
using System.ServiceProcess;

namespace WindowsService1
{


    [RunInstaller(true)]
    public partial class Installer1 : System.Configuration.Install.Installer
    {


        public Installer1()
        {


            InitializeComponent();

            // 创建服务安装器
            ServiceInstaller serviceInstaller = new ServiceInstaller
            {


                ServiceName = "WindowsService1", // 服务名称
                DisplayName = "Windows Service1", // 服务显示名称
                StartType = ServiceStartMode.Automatic // 服务启动类型:自动
            };

            // 创建服务进程安装器
            ServiceProcessInstaller processInstaller = new ServiceProcessInstaller
            {


                Account = ServiceAccount.LocalSystem // 服务运行账户
            };

            // 将安装器添加到安装程序集合
            Installers.Add(processInstaller);
            Installers.Add(serviceInstaller);
        }
    }
}
二、Window 服务安装
为了使我们的服务能够被操作系统识别并管理,我们需要将其安装到系统的服务列表中。这可以通过编写一个简单的批处理脚本来实现。此脚本会检查当前是否以管理员权限运行,并自动请求提升权限(如果需要)。然后,脚本会尝试删除任何已存在的同名服务实例,接着安装新的服务实例。这样做可以确保每次安装都是从干净的状态开始,避免旧版本可能带来的冲突或问题。
@echo off
setlocal enabledelayedexpansion

:: Check if it is running as an administrator
echo Checking administrator permissions...
net session >nul 2>&1
if %errorLevel% neq 0 (
    echo Requesting administrator privileges...
    PowerShell Start-Process '%~fnx0' -Verb runAs
    exit /b
)

:: Set the absolute path of the service executable file (please replace with the actual path)
set SERVICE_PATH="G:\CSharp\Server\WindowsService1\bin\Debug\WindowsService1.exe"

:: Output the currently set service path
echo The service path used: %SERVICE_PATH%

:: Check if the service already exists
echo Checking if the service exists...
sc query "WindowsService1" >nul 2>&1
if %errorlevel% equ 0 (
    echo Service "WindowsService1" already exists, deleting old service...
    sc delete "WindowsService1"
    if %errorlevel% neq 0 (
        echo Failed to delete service: error code %errorlevel%
        goto :end
    )
) else (
    echo Service "WindowsService1" does not exist
)

:: Installation service
echo Installing service...
sc create "WindowsService1" binPath= "%SERVICE_PATH%" >nul
if %errorlevel% neq 0 (
    echo Installation service failed: error code %errorlevel%
    goto :end
) else (
    echo The service has been successfully installed
)

:end
:: Ensure that the command prompt window remains open
pause
三、Window 服务运行
一旦服务被成功安装,下一步就是启动它。同样地,我们也提供了一个批处理脚本来简化这个过程。该脚本首先确认是否拥有足够的权限来启动服务,随后尝试启动指定的服务,并验证其是否正确进入运行状态。这样的步骤有助于快速诊断启动过程中可能出现的问题。
@echo off
setlocal enabledelayedexpansion

:: Check if it is running as an administrator
echo Checking administrator permissions...
net session >nul 2>&1
if %errorLevel% neq 0 (
    echo Requesting administrator privileges...
    PowerShell Start-Process '%~fnx0' -Verb runAs
    exit /b
)

:: Set service name
set serviceName=WindowsService1

:: Attempt to stop the service and record the results
echo Attempting to start the service [%serviceName%]...
sc start %serviceName%
if !errorlevel! neq 0 (
    echo Failed to start service [%serviceName%]. Error code:!errorlevel!
    exit /b !errorlevel!
) else (
    echo The service [%serviceName%] has been successfully started.
)

:: Verify service status
timeout /t 5 /nobreak >nul
echo Verify the status of service [%serviceName%]...
sc query %serviceName% | findstr /C:"RUNNING" >nul
if !errorlevel! neq 0 (
    echo Service [%serviceName%] has not entered the running state.
) else (
    echo Service [%serviceName%] is running.
)

echo All operations have been completed.
pause
四、Window 服务停止
当不再需要某个服务时,我们可以使用另一个批处理脚本来安全地停止它。这个脚本的工作流程与启动服务的脚本类似,但它专注于发送停止命令给服务,并确认服务已经完全停止。这对于维护系统的稳定性和释放资源非常重要。
@echo off
setlocal enabledelayedexpansion

:: Check if it is running as an administrator
echo Checking administrator permissions...
net session >nul 2>&1
if %errorLevel% neq 0 (
    echo Requesting administrator privileges...
    PowerShell Start-Process '%~fnx0' -Verb runAs
    exit /b
)

:: Set service name
set serviceName=WindowsService1

:: Attempt to stop the service and record the results
echo Attempting to stop service [%serviceName%]...
sc stop %serviceName%
if !errorlevel! neq 0 (
    echo Failed to stop service [%serviceName%]. Error code:!errorlevel!
    exit /b !errorlevel!
) else (
    echo Service [%serviceName%] has been successfully stopped.
)

:: Verify service status
timeout /t 5 /nobreak >nul
echo Verify the status of service [%serviceName%]...
sc query %serviceName% | findstr /C:"STOPPED" >nul
if !errorlevel! neq 0 (
    echo Service [%serviceName%] did not stop correctly.
) else (
    echo Service [%serviceName%] has stopped.
)

echo All operations have been completed.
pause
五、Window 服务卸载
最后,当我们希望彻底移除一个服务时,可以利用最后一个批处理脚本来完成这项任务。该脚本不仅负责停止正在运行的服务(如果有的话),还会将其从系统的服务列表中删除,从而完全卸载该服务。
@echo off
setlocal enabledelayedexpansion

:: Check if it is running as an administrator
echo Checking administrator permissions......
net session >nul 2>&1
if %errorLevel% neq 0 (
    echo Requesting administrator privileges...
    PowerShell Start-Process '%~fnx0' -Verb runAs
    exit /b
)

:: Set service name
set serviceName=WindowsService1

:: Attempt to stop the service and record the results
echo Attempting to stop service [%serviceName%]...
sc query %serviceName% | findstr /C:"RUNNING" >nul
if !errorlevel! equ 0 (
    sc stop %serviceName%
    if !errorlevel! neq 0 (
        echo Failed to stop service [%serviceName%].
        exit /b !errorlevel!
    ) else (
        echo Service [%serviceName%] has been successfully stopped.
    )
) else (
    echo Service [%serviceName%] is currently not running.
)

:: Uninstall the service and record the results
echo Attempting to uninstall the service [%serviceName%]...
sc delete %serviceName%
if !errorlevel! neq 0 (
    echo Uninstalling service [%serviceName%] failed. Error code:!errorlevel!
    exit /b !errorlevel!
) else (
    echo Service [%serviceName%] has been successfully uninstalled.
)

echo All operations have been completed.
pause
通过以上步骤,我们就可以全面掌握Windows服务的生命周期管理,从创建到最终卸载的每一个环节都得到了详细的介绍。无论是开发人员还是系统管理员,都可以从中获得宝贵的知识和实用的工具,以便更高效地工作。
|
每一次跌倒都是一次成长 每一次努力都是一次进步 |
如果您喜欢本博客,请点赞和分享给更多的朋友,让更多人受益。同时,您也可以关注我的博客,以便及时获取最新的更新和文章。
在未来的写作中,我将继续努力,分享更多有趣、实用的内容。再次感谢大家的支持和鼓励,期待与您在下一篇博客再见!