开发一个记事本App的主要功能点包括以下几点:
创建笔记:用户可以在应用中创建新的笔记,包括输入笔记标题、内容,以及记录创建时间和更新时间等。
编辑笔记:用户可以对已创建的笔记进行修改。
删除笔记:用户可以删除不需要的笔记。
分类管理:笔记可以按照类别管理,自定义类别等。
查询功能:支持按标题或内容进行查询。
选择数据库:
这里使用关系型数据库(Relational Database,RDB),它是一种基于关系模型来管理数据的数据库。关系型数据库基于SQLite组件提供了一套完整的对本地数据库进行管理的机制,对外提供了一系列的增、删、改、查等接口,也可以直接运行用户输入的SQL语句来满足复杂的场景需要。支持通过ResultSet.getSendableRow方法获取Sendable数据,进行跨线程传递。
为保证插入并读取数据成功,建议一条数据不要超过2M。超出该大小,插入成功,读取失败。
注意:大数据量场景下查询数据可能会导致耗时长甚至应用卡死,建议如下:
- 单次查询数据量不超过5000条。
- 在TaskPool中查询。
- 拼接SQL语句尽量简洁。
- 合理地分批次查询。
关于@ohos.data.relationalStore (关系型数据库)的官方文档地址:文档中心。
此篇接着上一篇内容继续讲,完成数据的存储、读取等操作,上一篇地址:HarmonyOS开发 - 记事本实例一(界面搭建)-CSDN博客
一、初始化数据库
在HarmonyOS中,RdbStore是关系型数据库(Relational Database Store)的核心接口,用于管理和操作本地关系型数据库。
1.1 主要功能:
1、创建或打开数据库:
- RdbStore 可以用来创建一个新的数据库,或者打开一个已经存在的数据库文件。
- 通过 getRdbStore 接口获取 RdbStore 实例时,可以指定数据库的路径、版本号等参数。
2、执行数据库操作:
- RdbStore 提供了增删改查(CRUD)操作的接口,支持执行 SQL 查询和事务处理。
- 例如,可以使用 insert、delete、update 和 query 等方法来操作数据库。
3、数据库版本管理:
- 在获取 RdbStore 实例时,可以通过配置参数来控制数据库的行为,例如设置数据库版本号和升级策略。
- 如果数据库版本发生变化,可以实现相应的升级逻辑。
4、跨线程数据传递:
- 支持通过 ResultSet.getSendableRow 方法获取可跨线程传递的数据
1.2 创建数据库
在目录src/main/ets/db下,创建文件index.ets,用于创建和数据库配置。代码如下:
import relationalStore from '@ohos.data.relationalStore';
import common from '@ohos.app.ability.common';
// 配置数据类型接口
interface configTypes {
  name: string;
  securityLevel: number;
}
// RDB配置
const storeConfig: configTypes = {
  name: 'myNotes.db',     // 数据库文件名
  securityLevel: relationalStore.SecurityLevel.S1 // 数据库安全级别
}

// 本地存储实例
export let store: relationalStore.RdbStore;

// 分类信息建表SQL
const ClassifySql = `CREATE TABLE IF NOT EXISTS Classify (
                  ID INTEGER PRIMARY KEY,
                  NAME TEXT NOT NULL,
                  CREATE_TIME DATE NOT NULL,
                  UPDATE_TIME DATE NOT NULL,
                  IS_VIEW INTEGER NOT NULL
                )`

// 记事本建表SQL
const notesSql = `CREATE TABLE IF NOT EXISTS Notes (
                  ID INTEGER PRIMARY KEY,
                  NAME TEXT NOT NULL,
                  CONTENT TEXT NOT NULL,
                  CLASSIFY_ID INTEGER NOT NULL,
                  CREATE_TIME DATE NOT NULL,
                  UPDATE_TIME DATE NOT NULL,
                  IS_VIEW INTEGER NOT NULL
                )`

/**
 * 初始化数据库
 * @param context
 */
export const initialDB = async (context: common.UIAbilityContext) => {
  const rdbStore = await relationalStore.getRdbStore(context, storeConfig)
  if(!rdbStore) {
    console.error(`Get RdbStore failed`);
    return;
  }
  store = rdbStore
  rdbStore.executeSql(ClassifySql) // 创建分类表
  rdbStore.executeSql(notesSql)    // 创建记事本表
  console.info(`Get RdbStore successfully.`);
}
注意的是,初始化数据库函数initialDB()函数,使用的是 async 和 await 异步操作,async 关键字用于声明一个函数是异步的,wait 关键字用于暂停 async 函数的执行,直到某个异步操作完成。
1.3 初始化数据库
打开src/main/ets/entryability/EntryAbility.ets文件,找到onWindowStageCreate函数,在此处初始化数据库,以及获取RdbStore实例。
onWindowStageCreate(windowStage: window.WindowStage) : void {
  // Main window is created, set main page for this ability
  hilog.info(0x0000, 'testTag', '%{public}s', 'Ability onWindowStageCreate');

  windowStage.loadContent('pages/Index', (err) => {
    if (err.code) {
      hilog.error(0x0000, 'testTag',
            'Failed to load the content. Cause: %{public}s', JSON.stringify(err) ?? '');
      return;
    }
    hilog.info(0x0000, 'testTag', 'Succeeded in loading the content.');
  });
}
如果想在onWindowStageCreate函数中使用await关键字,其自身必须使用async声明为异步函数,同时将 : void返回类型去除,否则会报错。
当onWindowStageCreate声明为异步函数后,在initialDb()函数前加上await关键词,待数据库初始化完毕后,再执行windowStage.loadContent函数加载主界面,以确保页面加载时,获取的RdbStore实例对象不为空。
import { AbilityConstant, ConfigurationConstant, UIAbility, Want } from '@kit.AbilityKit';
import { hilog } from '@kit.PerformanceAnalysisKit';
import { window } from '@kit.ArkUI';
import { initialDB } from '../db/index'

export default class EntryAbility extends UIAbility {
  // 略...

  async onWindowStageCreate(windowStage: window.WindowStage) {
    // Main window is created, set main page for this ability
    hilog.info(0x0000, 'testTag', '%{public}s', 'Ability onWindowStageCreate');
    // 初始化数据库,并获取RdbStore实例对象
    await initialDB(this.context)
    //
    windowStage.loadContent('pages/Index', (err) => {
      if (err.code) {
        hilog.error(0x0000, 'testTag',
            'Failed to load the content. Cause: %{public}s', JSON.stringify(err) ?? '');
        return;
      }
      hilog.info(0x0000, 'testTag', 'Succeeded in loading the content.');
    });
  }

  // 略...
}
此时,在”设备管理器“中打开虚拟机,运行后查看控制台,会输出”Get RdbStore successfully."日志,表示数据库初始化完成,并成功获取RdbStore实例对象。

二、类型定义
在HarmonyOS的ArkUI开发框架中,使用TypeScript语言进地开发。在TypeScript中,给变量指定类型是一个常见的做法,这有助于在编译时捕获潜在的错误,并提供了更好的代码提示和自动补全功能。
在ArkUI中给变量指定类型的基本语法 与TypeScript中是类似的,我们先在项目中创建types目录,用于存储相关类型定义,路径:src/main/ets/types/types.ets,打开文件并定义Classify和Notes的数据结构类型。代码如下:
// 定义:分类信息的类型
export interface  ClassifyInfo {
  id: number
  name: string
  updateTime?: number
}

// 定义笔记的类型
export interface NotesInfo {
  id?: number
  title: string    // 笔记名称
  content: string  // 笔记内容
  classify_id: number //对应分类ID
  create_time?: number  // 创建笔记时间
  update_time?: number  // 修改笔记时间
}
三、创建模型
使用Model(模型)来表示数据结构和业务逻辑是常见的设计模式。Model 在数据的增、删、改、查(CRUD)操作起到了核心的作用。
在项目中创建model目录,用于创建和定义分类信息Classify和记事本Notes的Model,路径:src/main/ets/model。
3.1 Model的作用
- 封装数据:Model通常是一个类,用于封装数据与数据相关的业务逻辑。它定义了数据和结构(属性)和操作数据的方法。
- 与数据库交互:Model通常与数据库表对应,负责将数据持久化到数据库中,或者从数据库中读取数据。
通过这种方式,Model在数据的增、删、改、查操作起到了桥梁的作用,将业务逻辑与数据库操作紧密结合起来,使得代码更加清晰和易于维护。
3.2 RdbPredicates
RdbPredicates表示关系型数据库的谓词,用于确定RDB中条件表达式值是true还是false。它支持多语句拼接,默认使用and()连接。
作用:
- 构建查询条件:通过 RdbPredicates,可以指定查询条件,例如等于(equalTo)、以某个值开头(beginsWith)等。
- 支持多种条件组合:可以将多个条件组合在一起,形成复杂的查询条件。
- 简化数据库操作:通过 RdbPredicates,可以更方便地构建和执行数据库查询操作
3.3 分类信息
创建分类信息的model文件,路径:src/main/ets/model/Classify.ets,创建类Classify并定义其对应的相关属性。代码如下:
import { store } from '../db/index'
import relationalStore from '@ohos.data.relationalStore'
import { ClassifyInfo } from '../types/types'

/**
 * 分类 - 模型
 */
export class Classify {
  private tableName: string = 'Classify'
  private _ID: string = 'ID'
  private _NAME: string = 'NAME'
  private _UPDATE_TIME: string = 'UPDATE_TIME'

}

export const ClassifyModal = new Classify()
3.3.1 获取分类信息
通过实例relationalStore获取RdbPredicates,调用orderByDesc()函数来构建查询条件,查询Classify表中的所有行数据,并以更新日期进行倒序显示。
当查询到数据库,通过while循环提取出每行数据,并且使用getColumnIndex()函数获取对应字段的索引,再使用索引取出对应字段的值。
代码如下:
/**
 * 获取行数据
 */
async getAllRows(){
  const predicates = new relationalStore.RdbPredicates(this.tableName)
  predicates.orderByDesc(this._UPDATE_TIME)
  const result = await store.query(predicates, [this._ID, this._NAME, this._UPDATE_TIME])
  const list: ClassifyInfo[] = []
  while (!result.isAtLastRow) {
    // 指针移动到下一行数据
    result.goToNextRow()
    // 根据字段读取index,从而获取对应字段的值
    let id = result.getLong(result.getColumnIndex(this._ID))
    let name = result.getString(result.getColumnIndex(this._NAME))
    let updateTime = result.getLong(result.getColumnIndex(this._UPDATE_TIME))
    list.push({ id, name, updateTime })
  }
  return list
}
3.3.2 判断分类名称
这里定义isContainName()函数,用于判断分类名称是否已存在;如果已存在则返回true,否则为false。代码如下:
/**
 * 判断 名称是否存在
 * @param name
 */
async isContainName(name: string) {
  const predicates = new relationalStore.RdbPredicates(this.tableName)
  predicates.equalTo(this._NAME, name)
  const result = await store.query(predicates, [this._ID, this._NAME])
  // 大于0表示已存在
  return result.rowCount > 0
}
3.3.3 添加分类信息
通过RdbStore提供的insert方法,插入一条新数据。代码如下:
/**
 * 添加行数据
 * @param name
 */
async addRowData(name: string){
  await store.insert(this.tableName, {
    NAME: name,
    CREATE_TIME: new Date().getTime(),
    UPDATE_TIME: new Date().getTime(),
    IS_VIEW: 1
  })
}
3.3.4 修改分类名称
通过RdbPredicate谓词构建查询条件,找到指定id行数据,再使用RdbStore的update方法完成分类名称的修改。代码如下:
/**
 * 修改行数据
 * @param id
 * @param name
 */
async editRowData(id: number, name: string) {
  const predicates = new relationalStore.RdbPredicates(this.tableName)
  predicates.equalTo(this._ID, id)
  await store.update({
    NAME: name,
    UPDATE_TIME: new Date().getTime()
  }, predicates)
}
3.3.5 删除分类信息
通过RdbPredicate谓词构建查询条件,找到指定id行数据,再使用RdbStore的delete方法完成数据的删除操作。代码如下:
/**
 * 删除行数据
 * @param id
 */
async deleteRowData(id: number) {
  const predicates = new relationalStore.RdbPredicates(this.tableName)
  predicates.equalTo(this._ID, id)
  await store.delete(predicates)
}
3.4 记事本信息
创建记事本信息的model文件,路径:src/main/ets/model/Notes.ets,创建类Notes并定义其对应的相关属性。代码如下:
import { store } from '../db/index'
import relationalStore from '@ohos.data.relationalStore'
import { NotesInfo } from '../types/types'

/**
 * 记事本 - 模型
 */
class Notes {
  private tableName: string = 'Notes'
  private _ID: string = 'ID'
  private _NAME: string = 'NAME'
  private _CONTENT: string = 'CONTENT'
  private _CLASSIFY_ID: string = 'CLASSIFY_ID'
  private _CREATE_TIME: string = 'CREATE_TIME'
  private _UPDATE_TIME: string = 'UPDATE_TIME'

}

export const NotesModal = new Notes()
3.4.1 获取记事本信息
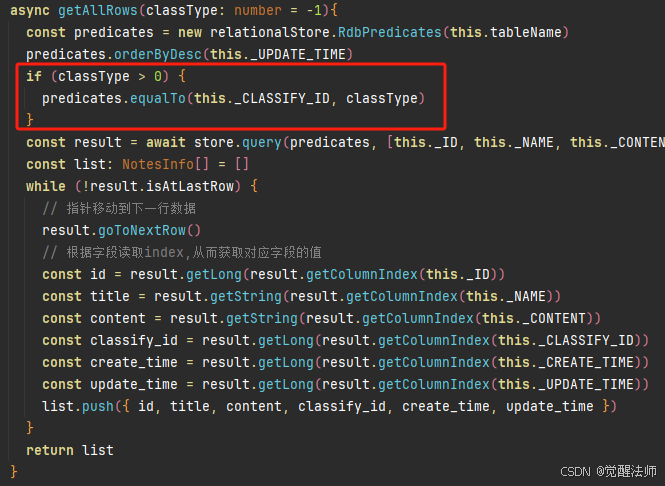
通过RdbPredicates谓词构建查询条件,以倒序查询出所有记事本的行数据;当分类信息ID存在时,追加关联分类的ID查询条件。代码如下:
/**
 * 获取行数据
 * @param classType -1 默认
 * @returns
 */
async getAllRows(classType: number = -1){
  const predicates = new relationalStore.RdbPredicates(this.tableName)
  predicates.orderByDesc(this._UPDATE_TIME)
  if (classType > 0) {
    predicates.equalTo(this._CLASSIFY_ID, classType)
  }
  const result = await store.query(predicates,
    [this._ID, this._NAME, this._CONTENT, this._CLASSIFY_ID, this._CREATE_TIME, this._UPDATE_TIME]
  )
  const list: NotesInfo[] = []
  while (!result.isAtLastRow) {
    // 指针移动到下一行数据
    result.goToNextRow()
    // 根据字段读取index,从而获取对应字段的值
    const id = result.getLong(result.getColumnIndex(this._ID))
    const title = result.getString(result.getColumnIndex(this._NAME))
    const content = result.getString(result.getColumnIndex(this._CONTENT))
    const classify_id = result.getLong(result.getColumnIndex(this._CLASSIFY_ID))
    const create_time = result.getLong(result.getColumnIndex(this._CREATE_TIME))
    const update_time = result.getLong(result.getColumnIndex(this._UPDATE_TIME))
    list.push({ id, title, content, classify_id, create_time, update_time })
  }
  return list
}
3.4.2 添加记事本信息
通过RdbStore提供的insert方法,插入一条新数据。代码如下:
/**
 * 添加行数据
 * @param data
 */
async addRowData(data: NotesInfo){
  await store.insert(this.tableName, {
    NAME: data.title,
    CONTENT: data.content,
    CLASSIFY_ID: data.classify_id,
    CREATE_TIME: new Date().getTime(),
    UPDATE_TIME: new Date().getTime(),
    IS_VIEW: 1
  })
}
3.4.3 修改记事本信息
通过RdbPredicate谓词构建查询条件,找到指定id行数据,再使用RdbStore的update方法完成记事本信息的修改。代码如下:
/**
 * 修改行数据
 * @param id
 * @param data
 */
async editRowData(id: number, data: NotesInfo) {
  const predicates = new relationalStore.RdbPredicates(this.tableName)
  predicates.equalTo(this._ID, id)
  await store.update({
    NAME: data.title,
    CONTENT: data.content,
    CLASSIFY_ID: data.classify_id,
    UPDATE_TIME: new Date().getTime()
  }, predicates)
}
3.4.4 删除记事本信息
通过RdbPredicate谓词构建查询条件,找到指定id行数据,再使用RdbStore的delete方法完成数据的删除操作。代码如下:
/**
 * 删除行数据
 * @param id
 */
async deleteRowData(id: number) {
  const predicates = new relationalStore.RdbPredicates(this.tableName)
  predicates.equalTo(this._ID, id)
  await store.delete(predicates)
}
四、分类信息
记事本App作用日常生活的工具类应用,主要功能是帮助用户记录、管理各类信息。所以,分类不宜过多,且应保持简洁明了。
为了满足不同需求,并方便用户操作,这里将分类操作分为两部分:
- 主界面中的分类信息查询和新增分类功能;
- 用户管理界面实现对分类的增、删、改、查等功能。
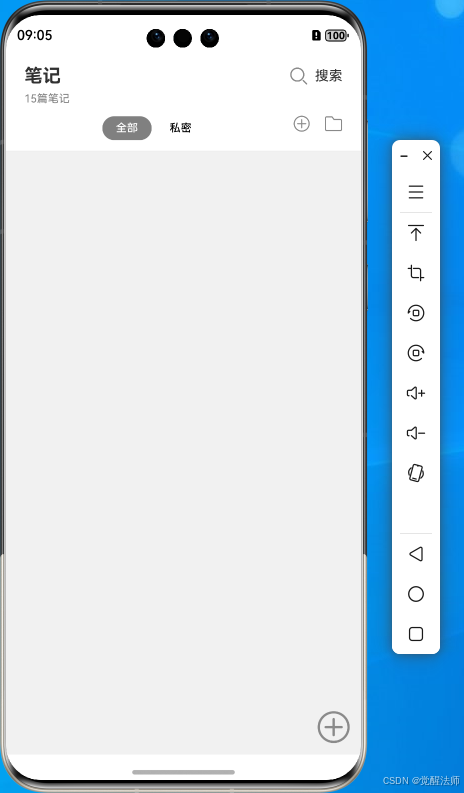
4.1 主界面
主界面顶部展示的分类信息,可以通过切换选择不同的分类,以达到查询其关联的记事本信息。另外,可以通过右侧新增分类按钮,快速创建分类名称。
4.1.1 查询分类信息
打开src/main/ets/components/Header.ets文件,在头部文件定义updateClassifyList()函数用于获取分类信息,在周期函数aboutToAppear()执行时调用。
import { ClassifyAddDialog } from './classifyAddDialog'
import { ClassifyInfo } from '../types/types'
import { ClassifyModal } from '../model/Classify'
import router from '@ohos.router'

// 略...

@Component
export default struct Header {
  @State isSearch: boolean = false  // 是否为搜索状态
  // 分类信息
  @State classifyList: Array<ClassifyInfo> = []
  @State classifyActive: number = 0 // 分类选中项索引,默认为0

  @State textValue: string = ''   // 文本信息
  @State inputValue: string = ''  // 输入信息
  dialogController: CustomDialogController = new CustomDialogController({
    builder: ClassifyAddDialog({
      cancel: this.onCancel.bind(this),
      confirm: this.onAccept.bind(this),
      textValue: $textValue,
      inputValue: $inputValue
    }),
    cancel: this.existApp,
    autoCancel: true,
    alignment: DialogAlignment.Default,
    gridCount: 4,
    customStyle: false
  })
  // 取消事件回调函数
  onCancel() {
    this.textValue = ''
    console.info('Callback when the cancel button is clicked', this.inputValue)
  }
  // 确认完成回调函数,追加分类信息到classifyList容器中
  async onAccept() {
    this.textValue = ''
    console.info('Callback when the accept button is clicked', this.inputValue)
  }

  existApp() {
    console.info('Click the callback in the blank area')
  }
  /**
   * 更新 分类列表数据
   */
  async updateClassifyList(){
    const result = await ClassifyModal.getAllRows() // 获取分类信息
    const defaultData: Array<ClassifyInfo> = [{id: -1, name: '全部'}]
    if (Array.isArray(result) && result.length > 0) {
      this.classifyList = [...defaultData, ...result]
    } else {
      this.classifyList = [...defaultData]
    }
    console.log('testTag classify result', JSON.stringify(result))
  }

  /**
   * 更新分类选中索引
   * @param index
   */
  updateClassifyActive(index: number){
    this.classifyActive = index
  }

  aboutToAppear(): void {
    this.updateClassifyList() // 获取分类数据
  }

  build() {
    // 略...
  }
}
此时表中还没有分类信息数据,当新增分类功能完成后,再来查看updateClassifyList()函数执行效果。
4.1.2 新增分类信息
当用户点击弹框中保存按钮时,在onAccept()函数执行中,先判断数据库中是否存在该新增分类名称,如果不存在,则调用addRowData()函数新增一条数据。代码如下:
  // 确认完成回调函数,追加分类信息到classifyList容器中
  async onAccept() {
    this.textValue = ''
    const flag = await ClassifyModal.isContainName(this.inputValue)
    if (flag) {
      AlertDialog.show({
        title: '提示',
        message: `当前分类名称[${this.inputValue}]已存在,请重新输入~`
      })
      return;
    }
	// 添加分类信息
    await ClassifyModal.addRowData(this.inputValue)
    this.updateClassifyList()
    console.info('Callback when the accept button is clicked', this.inputValue)
  }
当新增分类信息后,顶部重新获取则获取到刚新增的分类数据。如下图:

4.1.3 完整代码
Header.ets文件完成代码如下:
import { ClassifyAddDialog } from './classifyAddDialog'
import { ClassifyInfo } from '../types/types'
import { ClassifyModal } from '../model/Classify'
import router from '@ohos.router'
// 定义分类默认样式
@Extend(Button) function classifyNormalStyle(){
.fontSize(12)
.fontColor(Color.Black)
.padding({left: 15, right: 15})
.height(26).backgroundColor(Color.White)
}
// 定义分类项选中后的样式
@Extend(Button) function classifyActiveStyle(){
.fontColor(Color.White).backgroundColor(Color.Grey)
}
@Component
export default struct Header {
@State isSearch: boolean = false // 是否为搜索状态
// 分类信息
@State classifyList: Array<ClassifyInfo> = [ ]
@State classifyActive: number = 0 // 分类选中项索引,默认为0
@State textValue: string = '' // 文本信息
@State inputValue: string = '' // 输入信息
dialogController: CustomDialogController = new CustomDialogController({
builder: ClassifyAddDialog({
cancel: this.onCancel.bind(this),
confirm: this.onAccept.bind(this),
textValue: $textValue,
inputValue: $inputValue
}),
cancel: this.existApp,
autoCancel: true,
alignment: DialogAlignment.Default,
gridCount: 4,
customStyle: false
})
// 取消事件回调函数
onCancel() {
this.textValue = ''
console.info('Callback when the cancel button is clicked', this.inputValue)
}
// 确认完成回调函数,追加分类信息到classifyList容器中
async onAccept() {
this.textValue = ''
// this.classifyList.push({
// id: this.classifyList.length + 1,
// name: this.inputValue
// })
const flag = await ClassifyModal.isContainName(this.inputValue)
if (flag) {
AlertDialog.show({
title: '提示',
message: `当前分类名称[${this.inputValue}]已存在,请重新输入~`
})
return;
}
await ClassifyModal.addRowData(this.inputValue)
this.updateClassifyList()
console.info('Callback when the accept button is clicked', this.inputValue)
}
existApp() {
console.info('Click the callback in the blank area')
}
/**
* 更新 分类列表数据
*/
async updateClassifyList(){
const result = await ClassifyModal.getAllRows() // 获取分类信息
const defaultData: Array<ClassifyInfo> = [{id: -1, name: '全部'}]
if (Array.isArray(result) && result.length > 0) {
this.classifyList = [...defaultData, ...result]
} else {
this.classifyList = [...defaultData]
}
console.log('testTag classify result', JSON.stringify(result))
}
/**
* 更新分类选中索引
* @param index
*/
updateClassifyActive(index: number){
this.classifyActive = index
}
aboutToAppear(): void {
this.updateClassifyList() // 获取分类数据
}
build() {
Row(){
Column(){
// 非搜索状态下显示内容
if(!this.isSearch) {
Row(){
Text('笔记').fontSize(20).fontWeight(FontWeight.Bold)
Blank()
Row(){
Button(){
Image($rawfile('search.png')).width(24)
}.backgroundColor(Color.Transparent).width(36).height(36)
Text('搜索').fontSize(15)
}
.onClick(() => {
this.isSearch = !this.isSearch
})
}.width('100%')
// 显示当前笔记数量
Row(){
Text('15篇笔记').fontSize(12).fontColor(Color.Gray)
}.width('100%')
Row(){
// 分类信息
Scroll(){
Row({ space: 5 }){
ForEach(this.classifyList, (item: ClassifyInfo, index) => {
if(index === this.classifyActive) {
Button(item.name).classifyNormalStyle().classifyActiveStyle().onClick(() => {
this.updateClassifyActive(index)
})
} else {
Button(item.name).classifyNormalStyle().onClick(() => {
this.updateClassifyActive(index)
})
}
})
}.padding({top: 10, bottom: 0}).justifyContent(FlexAlign.Start)
}.height(40).scrollable(ScrollDirection.Horizontal).layoutWeight(1)
// 添加分类按钮
Button(){
Image($rawfile('add.png')).width(20).height(20)
}.backgroundColor(Color.Transparent).margin({left: 10}).onClick(() => {
this.dialogController.open()
})
// 管理界面按钮
Button(){
Image($rawfile('manage.png')).width(20).height(20)
}.backgroundColor(Color.Transparent).margin({left: 15}).onClick(() => {
router.pushUrl({
url: 'pages/ClassifyPage'
})
})
}.justifyContent(FlexAlign.Start)
}
// 搜索状态下显示内容
else {
Row(){
Image($rawfile('search.png')).width(24).margin({right: 10})
TextInput({placeholder: '请输入搜索内容'})
.type(InputType.Normal)
// .width(230)
.height(36)
.layoutWeight(1)
Blank()
Button('取消').fontSize(15).fontColor(Color.Orange)
.width(70)
.height(36)
.backgroundColor(Color.Transparent)
.stateEffect(false)
.align(Alignment.End)
.onClick(() => {
this.isSearch = !this.isSearch
})
}.width('100%').justifyContent(FlexAlign.SpaceAround)
}
}.width('100%')
}
.width('100%')
.padding({top: '10vp', bottom: '10vp', left: '20vp', right: '20vp'})
}
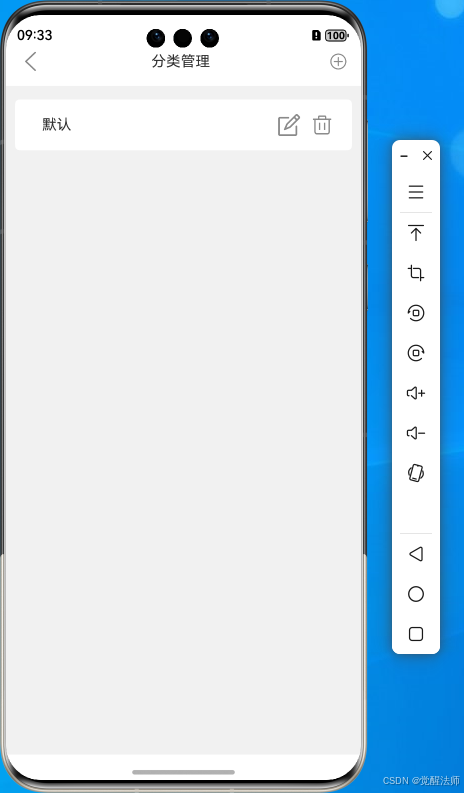
}4.2 分类管理界面
在分类管理界面中,对分类信息进行完整的增、删、改、查等操作。文件路径:src/main/ets/pages/ClassifyPage.ets。
4.2.1 查询分类信息
分类查询方法和主界面写法一样,将其移入分类信息管理界面即可。同样是在周期函数aboutToAppear()回调时,执行updateClassifyList()获取分类信息。 代码如下:
import { ClassifyInfo } from '../types/types'
import { router } from '@kit.ArkUI'
import { ClassifyModal } from '../model/Classify'
import { ClassifyAddDialog } from '../components/classifyAddDialog'

@Entry
@Component
struct ClassifyPage {
  // 分类信息
  @State classifyList: Array<ClassifyInfo> = []
  @State textValue: string = ''   // 文本信息
  @State inputValue: string = ''  // 输入信息
  private selectedTextId: number = -1 // 选中修改项id

  dialogController: CustomDialogController = new CustomDialogController({
    builder: ClassifyAddDialog({
      cancel: this.onCancel.bind(this),
      confirm: this.onAccept.bind(this),
      textValue: $textValue,
      inputValue: $inputValue
    }),
    cancel: this.existApp,
    autoCancel: true,
    alignment: DialogAlignment.Default,
    gridCount: 4,
    customStyle: false
  })
  // 取消事件回调函数
  onCancel() {
    this.textValue = ''
    this.selectedTextId = -1
    console.info('Callback when the cancel button is clicked', this.inputValue)
  }
  // 确认完成回调函数,追加分类信息到classifyList容器中
  async onAccept() {
    this.textValue = ''
    console.info('Callback when the accept button is clicked', this.inputValue)
  }

  existApp() {
    this.selectedTextId = -1
    console.info('Click the callback in the blank area')
  }

  /**
   * 更新 分类列表数据
   */
  async updateClassifyList(){
    const result = await ClassifyModal.getAllRows() // 获取分类信息
    if (Array.isArray(result) && result.length > 0) {
      this.classifyList = result
    } else {
      this.classifyList = []
    }
    console.log('testTag classify result', JSON.stringify(result))
  }

  aboutToAppear(): void {
    this.updateClassifyList()
  }

  build() {
    RelativeContainer() {
      // 略...
    }
    .height('100%')
    .width('100%')
  }

}
4.2.2 新增分类信息
当用户点击弹框中保存按钮时,在onAccept()函数执行中,获取新增名称并判断数据表中是否已存在,不存在执行addRowData()函数新增一条数据。
import { ClassifyInfo } from '../types/types'
import { router } from '@kit.ArkUI'
import { ClassifyModal } from '../model/Classify'
import { ClassifyAddDialog } from '../components/classifyAddDialog'
@Entry
@Component
struct ClassifyPage {
// 分类信息
@State classifyList: Array<ClassifyInfo> = []
@State textValue: string = '' // 文本信息
@State inputValue: string = '' // 输入信息
private selectedTextId: number = -1 // 选中修改项id
dialogController: CustomDialogController = new CustomDialogController({
builder: ClassifyAddDialog({
cancel: this.onCancel.bind(this),
confirm: this.onAccept.bind(this),
textValue: $textValue,
inputValue: $inputValue
}),
cancel: this.existApp,
autoCancel: true,
alignment: DialogAlignment.Default,
gridCount: 4,
customStyle: false
})
// 取消事件回调函数
onCancel() {
this.textValue = ''
this.selectedTextId = -1
console.info('Callback when the cancel button is clicked', this.inputValue)
}
// 确认完成回调函数,追加分类信息到classifyList容器中
async onAccept() {
this.textValue = ''
// 判断当前输入内容是否存在
const flag = await ClassifyModal.isContainName(this.inputValue)
if (flag) {
AlertDialog.show({
title: '提示',
message: `当前分类名称[${this.inputValue}]已存在,请重新输入~`
})
return;
}
// 添加数据
await ClassifyModal.addRowData(this.inputValue)
// 重新获取行数据
this.updateClassifyList()
console.info('Callback when the accept button is clicked', this.inputValue)
}
existApp() {
this.selectedTextId = -1
console.info('Click the callback in the blank area')
}
/**
* 更新 分类列表数据
*/
async updateClassifyList(){
const result = await ClassifyModal.getAllRows() // 获取分类信息
if (Array.isArray(result) && result.length > 0) {
this.classifyList = result
} else {
this.classifyList = []
}
console.log('testTag classify result', JSON.stringify(result))
}
aboutToAppear(): void {
this.updateClassifyList()
}
build() {
RelativeContainer() {
// 略...
}
.height('100%')
.width('100%')
}
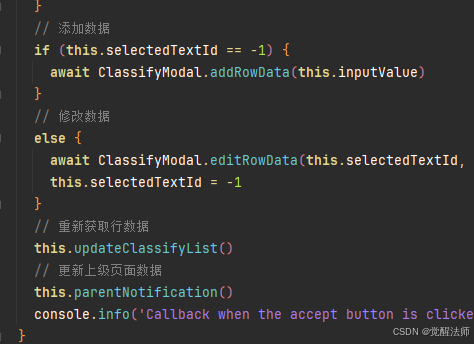
}4.2.3 修改分类信息
修改分类名称需实现以下几个步骤:
- 点击修改图标,打开修改弹框并填充要修改的分类名称
- 点击取消关闭弹框,并将selectedTextId重置为-1
- 点击保存按钮时,调用onAccept()函数,先判断分类名称是否存在;不存在则可以继续执行保存操作,这里需要注意的是selectedTextId为-1时,则为“新增”操作;不为-1时为“修改”操作。
代码如下:
import { ClassifyInfo } from '../types/types'
import { router } from '@kit.ArkUI'
import { ClassifyModal } from '../model/Classify'
import { ClassifyAddDialog } from '../components/classifyAddDialog'

@Entry
@Component
struct ClassifyPage {
  // 分类信息
  @State classifyList: Array<ClassifyInfo> = []
  @State textValue: string = ''   // 文本信息
  @State inputValue: string = ''  // 输入信息
  private selectedTextId: number = -1 // 选中修改项id

  dialogController: CustomDialogController = new CustomDialogController({
    builder: ClassifyAddDialog({
      cancel: this.onCancel.bind(this),
      confirm: this.onAccept.bind(this),
      textValue: $textValue,
      inputValue: $inputValue
    }),
    cancel: this.existApp,
    autoCancel: true,
    alignment: DialogAlignment.Default,
    gridCount: 4,
    customStyle: false
  })
  // 取消事件回调函数
  onCancel() {
    this.textValue = ''
    this.selectedTextId = -1
    console.info('Callback when the cancel button is clicked', this.inputValue)
  }
  // 确认完成回调函数,追加分类信息到classifyList容器中
  async onAccept() {
    this.textValue = ''
    // 判断当前输入内容是否存在
    const flag = await ClassifyModal.isContainName(this.inputValue)
    if (flag) {
      AlertDialog.show({
        title: '提示',
        message: `当前分类名称[${this.inputValue}]已存在,请重新输入~`
      })
      return;
    }
    // 添加数据
    if (this.selectedTextId == -1) {
      await ClassifyModal.addRowData(this.inputValue)
    }
    // 修改数据
    else {
      await ClassifyModal.editRowData(this.selectedTextId, this.inputValue)
      this.selectedTextId = -1
    }
    // 重新获取行数据
    this.updateClassifyList()
    console.info('Callback when the accept button is clicked',  this.inputValue)
  }

  existApp() {
    this.selectedTextId = -1
    console.info('Click the callback in the blank area')
  }

  /**
   * 更新 分类列表数据
   */
  async updateClassifyList(){
    const result = await ClassifyModal.getAllRows() // 获取分类信息
    if (Array.isArray(result) && result.length > 0) {
      this.classifyList = result
    } else {
      this.classifyList = []
    }
    console.log('testTag classify result', JSON.stringify(result))
  }

  aboutToAppear(): void {
    this.updateClassifyList()
  }

  build() {
    RelativeContainer() {
      Row({space: 20}){
        Column(){
          Row(){
            Image($rawfile('back.png')).width(24).height(24)
              .onClick(() => {
                router.back()
              })
            Blank()
            Text('分类管理')
            Blank()
            Button(){
              Image($rawfile('add.png')).width(20).height(20)
            }.backgroundColor(Color.Transparent).margin({left: 10}).onClick(() => {
              this.dialogController.open()
            })
          }.width('100%')
		   .justifyContent(FlexAlign.SpaceAround)
		   .margin({bottom: 15})
		   .padding({left: 15, right: 15})
          // List容器
          List(){
            // 循环输出笔记列表内容
            ForEach(this.classifyList, (item: ClassifyInfo) => {
              ListItem(){
                Row(){
                  // Text('ID:' + item.id).width(50)
                  Text(item.name).margin({left: 15})
                  Blank()
                  Row(){
                    Button(){
                      Image($rawfile('edit.png')).width(24)
                    }.backgroundColor(Color.Transparent).width(36).height(36)
                      .onClick(() => {
                        this.selectedTextId = item.id
                        this.textValue = item.name
                        this.dialogController.open()
                      })
                    Button(){
                      Image($rawfile('delete.png')).width(24)
                    }.backgroundColor(Color.Transparent).width(36).height(36)
                  }
                }.width('100%')
				 .padding({ left: 15, right: 15, top: 10, bottom: 10 })
				 .backgroundColor(Color.White)
				 .borderRadius(5)
              }.border({color: Color.Gray, style: BorderStyle.Dashed})
              .padding({ top: 5, bottom: 5 })
            })
          }.width('100%')
          .layoutWeight(1)
          .padding({ left: 10, right: 10, top: 10, bottom: 10 })
          .backgroundColor('#f1f1f1')

        }.height('100%')
      }
      // end
    }
    .height('100%')
    .width('100%')
  }

}
将“私密”修改为“默认”分类,示例如下图:

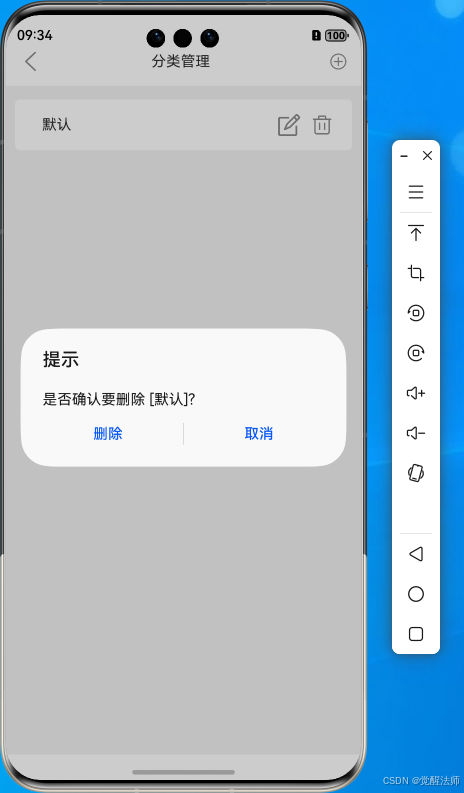
4.2.4 删除分类信息
在上一篇静态页面讲解时,在删除操作中使用到了AlertDialog.show()确认弹框,这里代码由于过长,为简化且方便维护,将提示框部分提取出来,定义到deleteClassifyInfo()函数中。代码如下:
import { ClassifyInfo } from '../types/types'
import { router } from '@kit.ArkUI'
import { ClassifyModal } from '../model/Classify'
import { ClassifyAddDialog } from '../components/classifyAddDialog'

@Entry
@Component
struct ClassifyPage {
  // 分类信息
  @State classifyList: Array<ClassifyInfo> = []
  @State textValue: string = ''   // 文本信息
  @State inputValue: string = ''  // 输入信息
  private selectedTextId: number = -1 // 选中修改项id

  dialogController: CustomDialogController = new CustomDialogController({
    builder: ClassifyAddDialog({
      cancel: this.onCancel.bind(this),
      confirm: this.onAccept.bind(this),
      textValue: $textValue,
      inputValue: $inputValue
    }),
    cancel: this.existApp,
    autoCancel: true,
    alignment: DialogAlignment.Default,
    gridCount: 4,
    customStyle: false
  })
  // 取消事件回调函数
  onCancel() {
    this.textValue = ''
    this.selectedTextId = -1
    console.info('Callback when the cancel button is clicked', this.inputValue)
  }
  // 确认完成回调函数,追加分类信息到classifyList容器中
  async onAccept() {
    this.textValue = ''
    // 判断当前输入内容是否存在
    const flag = await ClassifyModal.isContainName(this.inputValue)
    if (flag) {
      AlertDialog.show({
        title: '提示',
        message: `当前分类名称[${this.inputValue}]已存在,请重新输入~`
      })
      return;
    }
    // 添加数据
    if (this.selectedTextId == -1) {
      await ClassifyModal.addRowData(this.inputValue)
    }
    // 修改数据
    else {
      await ClassifyModal.editRowData(this.selectedTextId, this.inputValue)
      this.selectedTextId = -1
    }
    // 重新获取行数据
    this.updateClassifyList()
    console.info('Callback when the accept button is clicked',  this.inputValue)
  }

  existApp() {
    this.selectedTextId = -1
    console.info('Click the callback in the blank area')
  }

  /**
   * 更新 分类列表数据
   */
  async updateClassifyList(){
    const result = await ClassifyModal.getAllRows() // 获取分类信息
    if (Array.isArray(result) && result.length > 0) {
      this.classifyList = result
    } else {
      this.classifyList = []
    }
    console.log('testTag classify result', JSON.stringify(result))
  }

  aboutToAppear(): void {
    this.updateClassifyList()
  }

  build() {
    RelativeContainer() {
      Row({space: 20}){
        Column(){
          Row(){
            Image($rawfile('back.png')).width(24).height(24)
              .onClick(() => {
                router.back()
              })
            Blank()
            Text('分类管理')
            Blank()
            Button(){
              Image($rawfile('add.png')).width(20).height(20)
            }.backgroundColor(Color.Transparent).margin({left: 10}).onClick(() => {
              this.dialogController.open()
            })
          }.width('100%')
		   .justifyContent(FlexAlign.SpaceAround)
		   .margin({bottom: 15})
		   .padding({left: 15, right: 15})
          // List容器
          List(){
            // 循环输出笔记列表内容
            ForEach(this.classifyList, (item: ClassifyInfo) => {
              ListItem(){
                Row(){
                  // Text('ID:' + item.id).width(50)
                  Text(item.name).margin({left: 15})
                  Blank()
                  Row(){
                    Button(){
                      Image($rawfile('edit.png')).width(24)
                    }.backgroundColor(Color.Transparent).width(36).height(36)
                      .onClick(() => {
                        this.selectedTextId = item.id
                        this.textValue = item.name
                        this.dialogController.open()
                      })
                    Button(){
                      Image($rawfile('delete.png')).width(24)
                    }.backgroundColor(Color.Transparent).width(36).height(36)
                      .onClick(() => this.deleteClassifyInfo(item))
                  }
                }.width('100%')
				 .padding({ left: 15, right: 15, top: 10, bottom: 10 })
				 .backgroundColor(Color.White)
				 .borderRadius(5)
              }.border({color: Color.Gray, style: BorderStyle.Dashed})
              .padding({ top: 5, bottom: 5 })
            })
          }.width('100%')
          .layoutWeight(1)
          .padding({ left: 10, right: 10, top: 10, bottom: 10 })
          .backgroundColor('#f1f1f1')

        }.height('100%')
      }
      // end
    }
    .height('100%')
    .width('100%')
  }
  /**
   * 删除分类信息
   */
  deleteClassifyInfo(item: ClassifyInfo){
    AlertDialog.show({
      title: '提示',
      message: `是否确认要删除 [${item.name}]?`,
      alignment: DialogAlignment.Center,
      buttons: [
        {
          value: '删除',
          action: async () => {
            await ClassifyModal.deleteRowData(item.id)  // 删除数据
            this.updateClassifyList() // 重新获取数据
            console.log('testTag delete', item.id)
          }
        },
        {
          value: '取消',
          action: () => {
            this.dialogController.close()
          }
        }
      ]
    })
  }
}
这里将“默认”分类删除后,分类管理界面的信息则被移除,示例如下图:

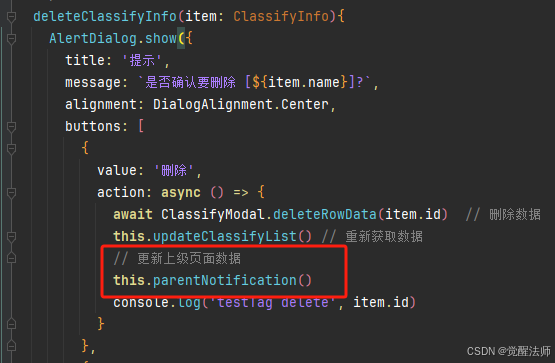
4.2.5 通知其他页面
当分类信息管理界面中,对分类信息进行增、删、改等操作后,需要通知主界面分类信息有更新;由于在两个不同页面,可以使用之前讲过的eventHub事件,完成跨界面信息传递。
4.2.5.1 发送通知
在Header.ets文件中,定义parentNotification()函数,用于向主界面或其他界面发送通知。代码如下:
/**
 * 通知父界面,分类信息发生改变
 */
parentNotification(){
  getContext(this).eventHub.emit('classifyChange')
}
在onAccept()函数被执行后,完成新增或修改操作,调用 parentNotification()函数,通知主界面分类信息有更新。
在执行删除操作成功后,调用 parentNotification()函数,通知主界面分类信息有更新。
4.2.5.2 接收信息
在src/main/ets/components/Header.ets文件的aboutToAppear()周期回调函数中,添加eventHub监听事件,监听到分类信息发生变更,立即执行updateClassifyList()函数重新获取分类信息列表。
  aboutToAppear(): void {
    this.updateClassifyList() // 获取分类数据
    // 当分类信息变化时,更新数据
    getContext(this).eventHub.on('classifyChange', () => {
      this.updateClassifyList()
      console.log('testTag classify Change')
    })
  }
4.2.6 记录选中的分类ID
注意的是,主界面顶部的分类信息选择项,是放在Header.ets组件中的,所以当它切换分类项时,需要将其选中的ID同步到主界面中,以便主界面能根据分类ID筛选出对应的记事本内容的数据。
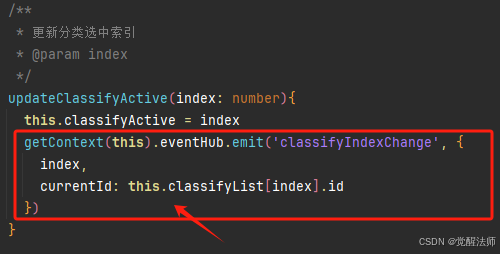
首先,打开src/main/ets/components/Header.ets文件,找到updateClassifyActive()函数,在其添加EventHub事件。代码如下:
/**
* 更新分类选中索引
* @param index
*/
updateClassifyActive(index: number){
this.classifyActive = index
getContext(this).eventHub.emit('classifyIndexChange', {
index,
currentId: this.classifyList[index].id
})
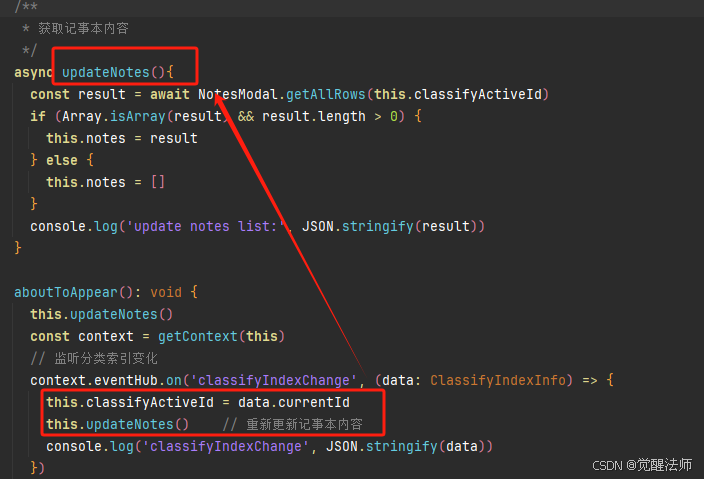
}再打开主界面,路径:src/main/ets/pages/Index.ets,在aboutToAppear()周期函数中添加监听事件,当收到分类ID改变消息后,立即修改分类ID,以及更新记事本内容数据。代码如下:
aboutToAppear(): void {
  this.updateNotes()
  const context = getContext(this)
  // 监听分类索引变化
  context.eventHub.on('classifyIndexChange', (data: ClassifyIndexInfo) => {
    this.classifyActiveId = data.currentId
    this.updateNotes()    // 重新更新记事本内容
    console.log('classifyIndexChange', JSON.stringify(data))
  })
}
这里的classifyActiveId分类ID,在记事本行数据筛选,以及新增和修改记事本内容的操作中,起到至关重要的作用。
当然,主界面和Header是父子组件关系,最合理的方法是通过组件间的通信方式来完成。这里就先使用eventHub,有兴趣朋友可以通过自己的方式完成信息传递。
五、记事本信息
记事本App可以记录日常生活中点滴、工作任务、学习计划、代办事项等,上述已完成分类信息的增删改查等操作,下面则继续讲记事本内容的增、删、改、查等操作。
5.1 查询记事本信息
在主界面(路径:src/main/ets/pages/Index.ets)中,通过NotesModal类中定义getAllRows()函数,获取所有记事本内容信息。同样,在aboutToAppear()周期回调函数中执行行数据获取操作。代码如下:
import Header from '../components/Header'
import { ClassifyIndexInfo, NotesInfo } from '../types/types'
import { formatDate } from '../utils/utils'
import router from '@ohos.router'
import { NotesModal } from '../model/Notes'

@Entry
@Component
struct Index {
  @State notes: Array<NotesInfo> = []
  private classifyActiveId: number = -1
  /**
   * 获取记事本内容
   */
  async updateNotes(){
    const result = await NotesModal.getAllRows(this.classifyActiveId)
    if (Array.isArray(result) && result.length > 0) {
      this.notes = result
    } else {
      this.notes = []
    }
    console.log('update notes list:', JSON.stringify(result))
  }

  aboutToAppear(): void {
    this.updateNotes()
  }

  // 自定义面板panel item
  @Builder listItem(item: NotesInfo){
    // 略...
  }

  build() {
    // 略...
  }
}
此时还没有记事本内容数据,同样,须待新增功能完成后,再来查看列表信息读取效果。
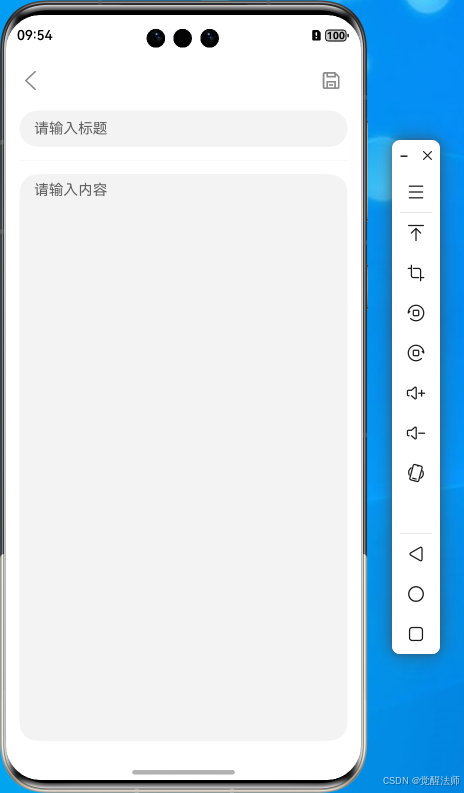
5.2 新增记事本信息
在主界面,点击右下角的新增记事本按钮,跳转到记事本内容编辑界面,完成内容新增。
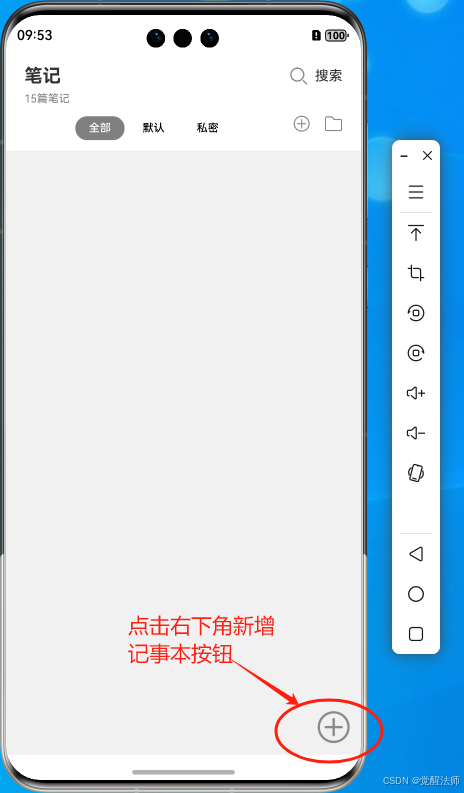
在点击“新增”按钮时,将分类ID通过路由参数传递到编辑界面。点击事件代码如下图:
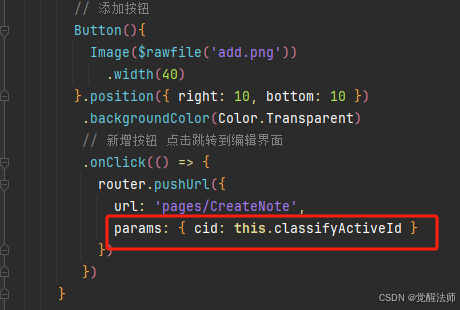
记事本新增代码如下:
import router from '@ohos.router'
import { NotesModal } from '../model/Notes'
import { NotesInfo } from '../types/types'

interface paramsType {
  item?: NotesInfo
  cid: number
}

@Entry
@Component
struct CreateNote {
  @State title: string = ''   // 标题
  @State content: string = '' // 内容
  @State isShowEditButton: boolean = false  // 是否显示编辑按钮
  @State isEditor: boolean = true          // 是否为编辑模式
  private classifyActiveId: number = -1     // 分类选择ID

  // 获取详情数据ID
  aboutToAppear(): void {
    const params = router.getParams() as paramsType
    // 获取分类ID
    if (!('undefined' === typeof params || 'undefined' === typeof params.cid)) {
      this.classifyActiveId = params.cid
    }
    console.log('params', JSON.stringify(params))
  }
  /**
   * 保存内容
   */
  async saveContent(){
    if (!this.title) {
      AlertDialog.show({
        title: '提示',
        message: '请输入标题',
        alignment: DialogAlignment.Center
      })
      return;
    }
    if (!this.content) {
      AlertDialog.show({
        title: '提示',
        message: '请输入内容',
        alignment: DialogAlignment.Center
      })
      return;
    }
    const data: NotesInfo = {
      title: this.title,
      content: this.content,
      classify_id: this.classifyActiveId
    }
    // 保存 新增数据
    await NotesModal.addRowData(data)
    // 通知父级页面更新数据
    this.parentNotification(data)
    // 返回上一级页面
    router.back()
  }
  /**
   * 通知其他页面内容发生变化
   * @param data
   */
  parentNotification(data?: NotesInfo) {
    getContext(this).eventHub.emit('contentChange', data ? data : null)
  }

  build() {
    RelativeContainer() {
        // 略...
    }
  }
}
当保存成功时,同样需要向主界面发送消息,通知主界面记事本内容有更新,打开文件src/main/ets/pages/Index.ets,在aboutToAppear()周期回调函数中,添加记事本内容变更监听事件。代码如下:
aboutToAppear(): void {
  this.updateNotes()
  const context = getContext(this)
  // 监听分类索引变化
  context.eventHub.on('classifyIndexChange', (data: ClassifyIndexInfo) => {
    this.classifyActiveId = data.currentId
    this.updateNotes()    // 重新更新记事本内容
    console.log('classifyIndexChange', JSON.stringify(data))
  })
  // 监听内容变化
  context.eventHub.on('contentChange', () => {
    this.updateNotes()   // 重新更新记事本内容
    console.log('update content', JSON.stringify(this.notes))
  })
}
下面使用新增功能,添加一条数据后,返回主界面则刚刚新增的数据,就在主界面中展现出来了。如下图:


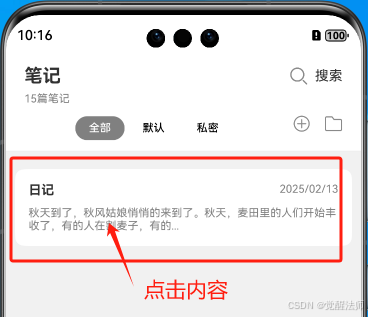
5.3 修改记事本信息
点击“日记”这一篇内容,先是打开预览效果,当点击右上角“编辑”图标时,再切换为编辑模式。如下图:


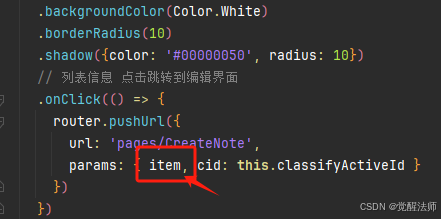
在跳转到编辑界面前,将行数据添加到路由参数中,传递到编辑界面。如下图:
编辑界面代码如下:
import router from '@ohos.router'
import { NotesModal } from '../model/Notes'
import { NotesInfo } from '../types/types'

interface paramsType {
  item?: NotesInfo
  cid: number
}

@Entry
@Component
struct CreateNote {
  @State title: string = ''   // 标题
  @State content: string = '' // 内容
  @State isShowEditButton: boolean = false  // 是否显示编辑按钮
  @State isEditor: boolean = true          // 是否为编辑模式
  private _id: number = -1                  // 编辑ID
  private classifyActiveId: number = -1     // 分类选择ID
  private sourceInfo: NotesInfo | null = null // 源数据,修改失败或取消,还原输入框内容

  // 还原数据
  initialInfo(){
    if (this.sourceInfo) {
      this.title = this.sourceInfo.title       // 赋值标题
      this.content = this.sourceInfo.content   // 赋值内容
    }
  }

  // 获取详情数据ID
  aboutToAppear(): void {
    const params = router.getParams() as paramsType
    const item = params.item as NotesInfo
    this.sourceInfo = item
    if (!('undefined' === typeof params || 'undefined' === typeof item)) {
      this._id = item.id || -1  // 编辑ID
      this.initialInfo()
      this.isShowEditButton = true    // 显示编辑按钮
      this.isEditor = false
    }
    if (!('undefined' === typeof params || 'undefined' === typeof params.cid)) {
      this.classifyActiveId = params.cid
    }
    console.log('params', JSON.stringify(params))
  }
  /**
   * 保存内容
   */
  async saveContent(){
    if (!this.title) {
      AlertDialog.show({
        title: '提示',
        message: '请输入标题',
        alignment: DialogAlignment.Center
      })
      return;
    }
    if (!this.content) {
      AlertDialog.show({
        title: '提示',
        message: '请输入内容',
        alignment: DialogAlignment.Center
      })
      return;
    }
    const data: NotesInfo = {
      title: this.title,
      content: this.content,
      classify_id: this.classifyActiveId
    }
    // 保存 编辑数据
    if (this._id != -1) {
      await NotesModal.editRowData(this._id, data)
    }
    // 保存 新增数据
    else {
      await NotesModal.addRowData(data)
    }
    // 通知父级页面更新数据
    this.parentNotification(data)
    // 返回上一级页面
    router.back()
  }
  /**
   * 通知其他页面内容发生变化
   * @param data
   */
  parentNotification(data?: NotesInfo) {
    getContext(this).eventHub.emit('contentChange', data ? data : null)
  }

  build() {
    RelativeContainer() {
      Row({space: 20}){
        Column(){
          Row(){
            Image($rawfile('back.png')).width(24).height(24)
              .onClick(() => {
                router.back()
              })
            // 判断是否需要显示编辑按钮
            if (this.isShowEditButton) {
              Row(){
                if (this.isEditor) {
                  // 保存按钮
                  Button(){
                    Image($rawfile('save.png')).width(24).height(24)
                  }.backgroundColor(Color.Transparent)
				   .width(36)
				   .height(36)
				   .margin({right: 15})
                   .onClick(() => this.saveContent())
                }
                Button(){
                  // 当isEditor为false时,为预览模式显示编辑按钮图标,
				  // 当为true时,为编辑模式显示取消编辑图标
                  Image(!this.isEditor?$rawfile('edit.png'):$rawfile('edit_cancel.png'))
				   .width(24)
				   .height(24)
                }.backgroundColor(Color.Transparent)
                .onClick(() => {
                  this.isEditor = !this.isEditor
                  // 如果取消,还原数据
                  if (!this.isEditor) {
                    this.initialInfo()
                  }
                })
                // 删除按钮
                if (this._id != -1) {
                  Button(){
                    Image($rawfile('delete.png')).width(24).height(24)
                  }.backgroundColor(Color.Transparent)
				  .width(36)
				  .height(36)
				  .margin({left: 15})
                }
                // delete button end
              }
            } else if(this.isEditor){
              // 保存按钮
              Button(){
                Image($rawfile('save.png')).width(24).height(24)
              }.backgroundColor(Color.Transparent)
			   .width(36)
			   .height(36)
			   .margin({left: 15})
               .onClick(() => this.saveContent())
            }
          }.width('100%')
		   .justifyContent(FlexAlign.SpaceBetween)
		   .margin({bottom: 15})
          // 预览模式
          if (!this.isEditor) {
            Text(this.title).align(Alignment.Start)
            Divider().margin({top: 15, bottom: 15})
            Text(this.content).width('100%')
          }
          // 编辑模式
          else {
            // 标题
            TextInput({placeholder: '请输入标题', text: this.title})
              .onChange((e) => {
                // 更新标题部分信息
                this.title = e
              })
            // 分割线
            Divider().margin({top: 15, bottom: 15})
            // 内容输入框,(layoutWeight 比重为1,表示剩余空间分配给 内容输入框)
            TextArea({placeholder: '请输入内容', text: this.content}).layoutWeight(1)
              .onChange((e) => {
                // 更新内容部分
                this.content = e
              })
          }
        }.height('100%')
      }.width('100%').height('100%')
       .padding(15)
    }
    .height('100%')
    .width('100%')
  }
}
修改记事本信息需实现几下几个步骤:
- 在周期函数aboutToAppear()中完成主界面中传递过来的编辑内容,并且将内容备份赋值给sourceInfo变量,以备还原内容。
- 先进入预览页面,当点击编辑时修改为编辑模式
- 进入编辑模式后,可“取消”编辑,也可以点击“保存”修改内容。取消编辑还原修改过的内容,保存内容执行saveContent()函数进行保存操作。
- 修改完成后,立即向外发送消息,通知外界记事本信息有更新。
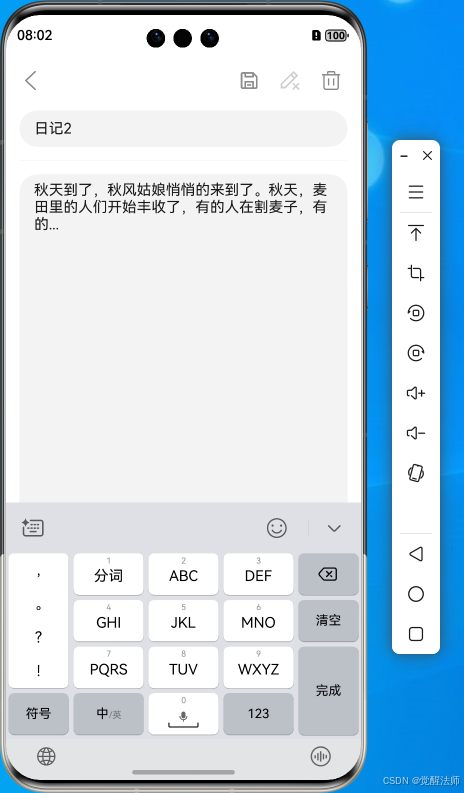
例如,将“日记”修改为“日记2”,点击保存后返回主界面,标题显示已修改为最新的了。

5.4 删除记事本信息
这里同样将删除功能抽离出来,在执行删除功能时,待deleteRowData()函数执行完毕,向外发送消息,提示记事本信息有更新, 并返回主界面。
 /**
   * 删除记事本内容
   */
  deleteNotesInfo() {
    AlertDialog.show({
      title: '提示',
      message: `是否确认要删除 [${this.title}]?`,
      alignment: DialogAlignment.Center,
      buttons: [
        {
          value: '删除',
          action: async () => {
            await NotesModal.deleteRowData(this._id)  // 删除数据
            // 通知父级页面更新数据
            this.parentNotification()
            // 返回上一级页面
            router.back()
            console.log('testTag delete', this._id)
          }
        },
        {
          value: '取消',
          action: () => {}
        }
      ]
    })
  }
如下图,在删除按钮上添加点击事件,绑定删除函数deleteNotesInfo()。

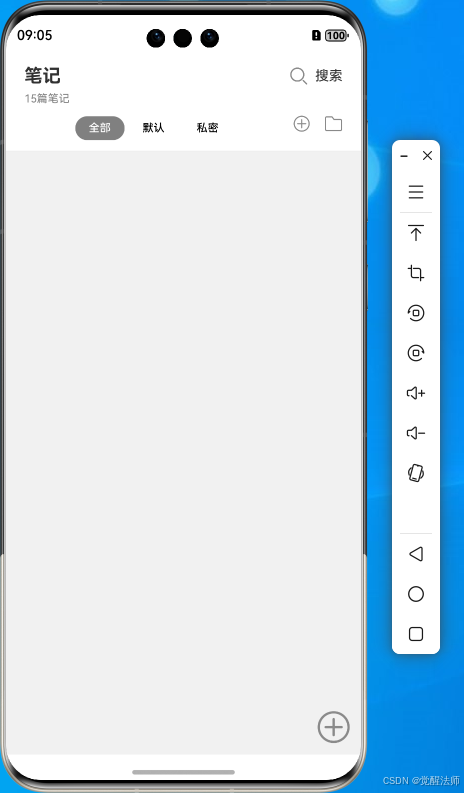
进入记事本内容编辑界面,点击删除按钮,删除“日记2”这篇内容。如下图:

5.5 分类查询记事本信息
分类查询,主要以主界面上方的分类列表点击切换,实现不同分类下的记事本内容筛选及显示。
完成这一功能,主要有以下几个步骤:
1、在3.4.1中讲过的,Model定义的记事本数据获取的函数,函数中的形参传入了一个分类ID;当分类ID存在时,追加到条件查询中,查询关联分类ID的记事本数据。如下图:
2、在Header.ets文件中,当分类选中项发生改变后,都会执行updateClassifyActive()函数,并且向外界发送消息,告知分类信息有变更。如下图:
3、在主界面中,当接收到选中的分类ID有更新,立即调用updateNotes()函数,重新获取记事本内容信息。如下图:
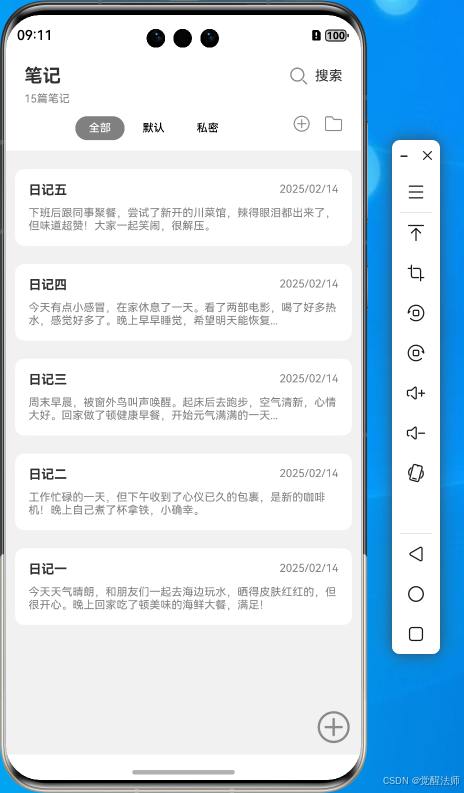
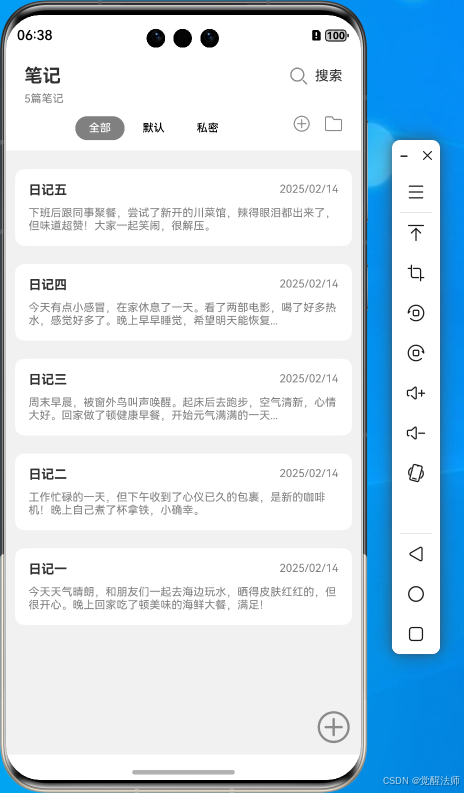
分类筛选功能实现后,接下来,我们将创建五篇内容,用于演示分类切换效果。例句如下:
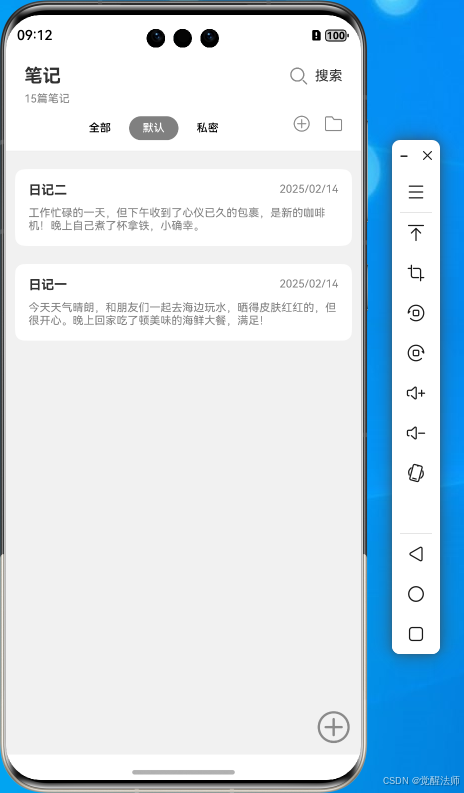
日记一
今天天气晴朗,和朋友们一起去海边玩水,晒得皮肤红红的,但很开心。晚上回家吃了顿美味的海鲜大餐,满足!日记二
工作忙碌的一天,但下午收到了心仪已久的包裹,是新的咖啡机!晚上自己煮了杯拿铁,小确幸。日记三
周末早晨,被窗外鸟叫声唤醒。起床后去跑步,空气清新,心情大好。回家做了顿健康早餐,开始元气满满的一天。日记四
今天有点小感冒,在家休息了一天。看了两部电影,喝了好多热水,感觉好多了。晚上早早睡觉,希望明天能恢复活力。日记五
下班后跟同事聚餐,尝试了新开的川菜馆,辣得眼泪都出来了,但味道超赞!大家一起笑闹,很解压。
分别将上述几篇内容创建在“全部”、“默认”、“私密”三个分类中,然后点击分类进行切换查询。

5.6 搜索查询记事本信息
最后,实现搜索功能要使用到谓词RdbPredicates中的like()方法,对记事本内容的标题进行模糊查询。
5.6.1 like方法
配置谓词以匹配数据表的field列中值类似于value的字段。
语法:
like(field: string, value: string): RdbPredicates参数:
| 参数名 | 类型 | 必填 | 说明 |
|---|---|---|---|
| field | string | 是 | 数据库表中的列名 |
| value | string | 是 | 指示要与谓词匹配的值 |
示例:
// 匹配数据表的"NAME"列中值类似于"os"的字段,如"Rose"
let predicates = new relationalStore.RdbPredicates("EMPLOYEE");
predicates.like("NAME", "%os%");
5.6.1 实现搜索功能
打开src/main/ets/model/Notes.ets文件,修改记事本行数据获取函数,增加关键记事模拟查询关键词。代码如下:
/**
 * 获取行数据
 * @param classType -1 分类ID
 * @param keyword '' 搜索关系司
 * @returns
 */
async getAllRows(classType: number = -1, keyword: string = ''){
  const predicates = new relationalStore.RdbPredicates(this.tableName)
  predicates.orderByDesc(this._UPDATE_TIME)
  // 如果分类ID存在,追加分类ID关联条件
  if (classType > 0) {
    predicates.equalTo(this._CLASSIFY_ID, classType)
  }
  // 如果搜索关键记事存在,追加名称模糊查询
  if (keyword) {
    predicates.like(this._NAME, `%${keyword}%`)
  }
  const result = await store.query(predicates,
    [this._ID, this._NAME, this._CONTENT, this._CLASSIFY_ID, this._CREATE_TIME, this._UPDATE_TIME]
  )
  const list: NotesInfo[] = []
  while (!result.isAtLastRow) {
    // 指针移动到下一行数据
    result.goToNextRow()
    // 根据字段读取index,从而获取对应字段的值
    const id = result.getLong(result.getColumnIndex(this._ID))
    const title = result.getString(result.getColumnIndex(this._NAME))
    const content = result.getString(result.getColumnIndex(this._CONTENT))
    const classify_id = result.getLong(result.getColumnIndex(this._CLASSIFY_ID))
    const create_time = result.getLong(result.getColumnIndex(this._CREATE_TIME))
    const update_time = result.getLong(result.getColumnIndex(this._UPDATE_TIME))
    list.push({ id, title, content, classify_id, create_time, update_time })
  }
  return list
}
打开src/main/ets/components/Header.ets文件,找到搜索框位置,添加onChange()和onSubmit()事件,当用户点击“完成”或“搜索”时,向主界面发送搜索关键词。这里需要完成以下几个步骤:
- 定义keyword关键词变量
- 在onChange()事件中记录修改的内容
- 在onSubmit()事件执行后,提交搜索内容,查询对应的记事本数据。

打开 src/main/ets/pages/Index.ets,添加keyword搜索关键词变量,用于记录搜索内容。在aboutToAppear()周期函数中,增加搜索关键词更新的监听事件。
代码如下:
import Header from '../components/Header'
import { ClassifyIndexInfo, NotesInfo } from '../types/types'
import { formatDate } from '../utils/utils'
import router from '@ohos.router'
import { NotesModal } from '../model/Notes'
@Entry
@Component
struct Index {
@State notes: Array<NotesInfo> = []
private classifyActiveId: number = -1 //分类ID
private keyword: string = '' // 搜索关键词
/**
* 获取记事本内容
*/
async updateNotes(){
const result = await NotesModal.getAllRows(this.classifyActiveId, this.keyword)
if (Array.isArray(result) && result.length > 0) {
this.notes = result
} else {
this.notes = []
}
console.log('update notes list:', JSON.stringify(result))
}
aboutToAppear(): void {
this.updateNotes()
const context = getContext(this)
// 监听分类索引变化
context.eventHub.on('classifyIndexChange', (data: ClassifyIndexInfo) => {
this.classifyActiveId = data.currentId
this.keyword = ''
this.updateNotes() // 重新更新记事本内容
console.log('classifyIndexChange', JSON.stringify(data))
})
// 监听内容变化
context.eventHub.on('contentChange', () => {
this.keyword = ''
this.updateNotes() // 重新更新记事本内容
console.log('update content', JSON.stringify(this.notes))
})
// 监听搜索关键词
context.eventHub.on('searchChange', (e: string) => {
this.keyword = e
this.updateNotes()
})
}
// 自定义面板panel item
@Builder listItem(item: NotesInfo){
// 略...
}
build() {
// 略...
}
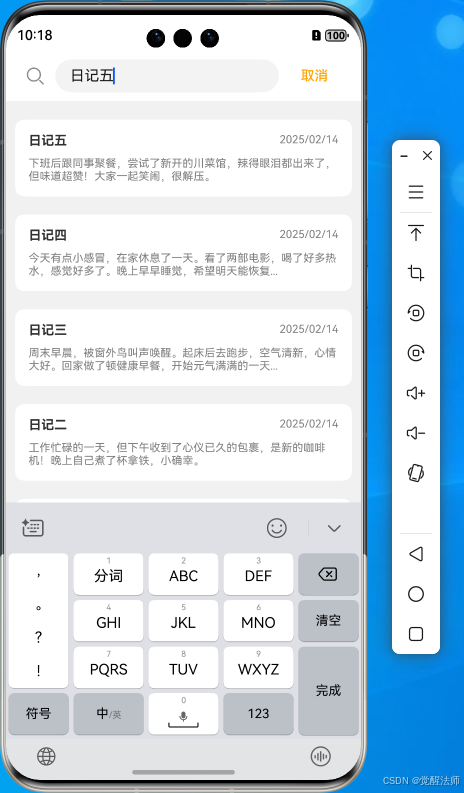
}打开搜索框,搜索出“日记五”对应的标题内容,如下图:

5.7 读取总篇数
最后,使用获取的ResultSet对象,来读取笔记的总数量;ResultSet对象不光可以提取出查询结果的行数据,也可以通过其对象自身属性,获取列数量,行数量等。具体可以查看官方文档,地址:文档中心。
首先,打开src/main/ets/model/Notes.ets文件,添加获取总篇数的getRowCount()函数。代码如下:
/**
 * 获取记事本内容总数量
 */
async getRowCount(): Promise<number>{
  const predicates = new relationalStore.RdbPredicates(this.tableName)
  const result = await store.query(predicates, [this._ID])
  return Promise.resolve(result.rowCount)
}
然后,打开src/main/ets/components/Header.ets文件,定义记录记事本内容数量变量,且在周期函数aboutToAppear()执行时,通过NotesModal.getRowCount()获取。代码如下:
// 略...
@Component
export default struct Header {
private keyword: string = ''
@State documentCount: number = 0
// 略...
/**
* 获取记事本内容数量
*/
async updateNotesCount(){
this.documentCount = await NotesModal.getRowCount() // 获取文档总数量
}
aboutToAppear(): void {
this.updateNotesCount() // 获取记事本内容数量
this.updateClassifyList() // 获取分类数据
// 当分类信息变化时,更新数据
getContext(this).eventHub.on('classifyChange', () => {
this.updateClassifyList()
console.log('testTag classify Change')
})
}
// 略...
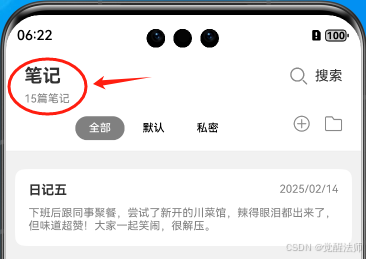
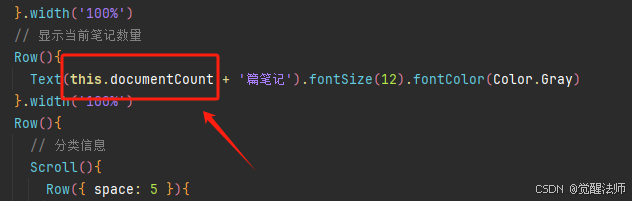
}最后将获取到的数量,动态绑定到显示组件上,如下图:
页面效果如下图:
综上所述,本文旨在探讨HarmonyOS App开发以及实践性方法,希望所述内容能给大家提供帮助。感谢阅读,期待能有更多关于HarmonyOS的探索和新的总结经验。