1、安装依赖(切记不是vue-i18n)
npm install --save nuxt-i18n2、在nuxt.config.js中加入配置
 modules: [
    'nuxt-i18n',
  ],
语言根据自己需要配置
i18n: {
  locales: [
    {
      code: 'en',
      iso: 'en-US',
      name: 'English',
    },
    {
      code: 'zh',
      iso: 'zh-CN',
      name: '中文',
    },
    {
      code: 'vi',
      iso: 'vi-VN',
      name: 'Tiếng Việt',
    },
  ],
  defaultLocale: 'en',
  vueI18n: {
    fallbackLocale: 'en',
    messages: {
      en,
      vi,
      zh
    }
  },
  vueI18nLoader: true,
},
import en from "./locales/en.json"
import vi from "./locales/vi.json"
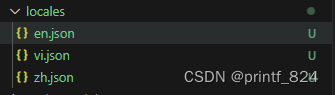
import zh from "./locales/zh.json"3、创建语言包
根目录创建locales文件夹,创建所需语言包
格式如下:
{
    "hello": "Hello",
    "welcome": "Welcome to our website!"
  }
{
"hello": "Xin chào",
"welcome": "Chào mừng bạn đến với trang web của chúng tôi!"
}{
"hello": "您好",
"welcome": "Welcome to our website!"
}4、使用
<template>
  <div>
    <button @click="switchLocale('en')">英语</button>
    <button @click="switchLocale('zh')">中文</button>
    <button @click="switchLocale('vi')">越南语</button>
    <div>{

   { $t('hello') }}</div>
   <NuxtPage/>
  </div>
</template>

<script>
export default {
  name: 'IndexPage',
  methods: {
    switchLocale(locale) {
      console.log( this.$i18n.locale);
      this.$i18n.locale = locale;
    },
  },
}
</script>

<style lang="sass" scoped>

</style>