需要一台ansible服务端,安装 Zabbix Agent 客户端。
1.创建脚本存放目录
mkdir -p /usr/local/script/zabbix_agentd_install/setup
2.配置脚本文件
编写 zabbix_agent_install.sh 脚本文件,内容如下:
#!/bin/bash
# Zabbix Agent 6.4.15 Install
#
zbxa_name=$(hostname)
zbxa_file="/tmp/zabbix_agent-6.4.15.zip"
zbxa_srvfile="/tmp/zabbix_agentd.service"
zbxa_insdir="/usr/local/zabbix_agent"
zbxa_pskfile="${zbxa_insdir}/etc/zabbix_agentd.psk"
zbxa_cfg="${zbxa_insdir}/etc/zabbix_agentd.conf"

if [ -f ${zbxa_file} ] && [ -f ${zbxa_srvfile} ]; then

  mv ${zbxa_srvfile} /usr/lib/systemd/system/

  id zabbix >/dev/null 2>&1
  if [ $? -ne 0 ]; then
    useradd zabbix -s /sbin/nologin -M
  fi

  unzip ${zbxa_file} -d /usr/local/
  chmod -R 755 ${zbxa_insdir}
  chmod 600 ${zbxa_pskfile}
  chown -R zabbix:zabbix ${zbxa_insdir}

  sed -i "s@Hostname=Zabbix_agent@Hostname=${zbxa_name}@g" ${zbxa_cfg}

  systemctl daemon-reload
  pkill -kill zabbix_agentd
  systemctl start zabbix_agentd
  systemctl enable zabbix_agentd
  systemctl status zabbix_agentd

elif [ ! -f ${zbxa_file} ]; then
  echo "Error: file ${zbxa_file} no exist!"
elif [ ! -f ${zbxa_srvfile} ]; then
  echo "Error: file ${zbxa_srvfile} no exist!"
else
  echo "Error: file ${zbxa_file} and ${zbxa_srvfile} no exist!"
fi
3.配置Playbook文件
编写 zabbix_agentd_install.yaml Playbook文件,内容如下:
- hosts: zabbix
  remote_user: root
  tasks:
  - name: copy zabbix-agent file
    copy:
      src: /root/zabbix_agentd_install/setup/
      dest: /tmp/
  - name: execute shell scripts install zabbix-agent
    command: "sh /tmp/zabbix_agent_install.sh"
  - name: delete file
    file:
      dest: "{

    { item }}"
      state: absent
    with_items:
      - /tmp/zabbix_agent-6.4.15.zip
      - /tmp/zabbix_agent_install.sh
解释说明:
file: 使用file模块来管理文件状态。
dest: "{
       { item }}"
:要删除的文件路径。这里使用了 Ansible 的循环结构with_items来逐个删除列出的文件。state: absent:state参数定义文件或目录的目标状态。absent表示文件或目录应该不存在,即被删除。
4.配置hosts文件
在 /etc/ansible/hosts 文件中,需要配置要远程的主机IP:
vim /etc/ansible/hosts

# 添加以下内容
[zabbix]
10.22.51.65 ansible_ssh_user=root ansible_ssh_pass=<password>
5.查看文件所在目录结构
使用 tree 命令查看:
[root@jumpserver01 /usr/local/script/zabbix_agentd_install]# tree
.
├── setup
│   ├── zabbix_agent-6.4.15.zip
│   ├── zabbix_agentd.service
│   └── zabbix_agent_install.sh
└── zabbix_agentd_install.yaml

1 directory, 4 files
6.执行ansible
执行 ansible-playbook 命令,对客户端 10.22.51.65 进行Zabbix Agent的安装操作:
cd /usr/local/script/zabbix_agentd_install
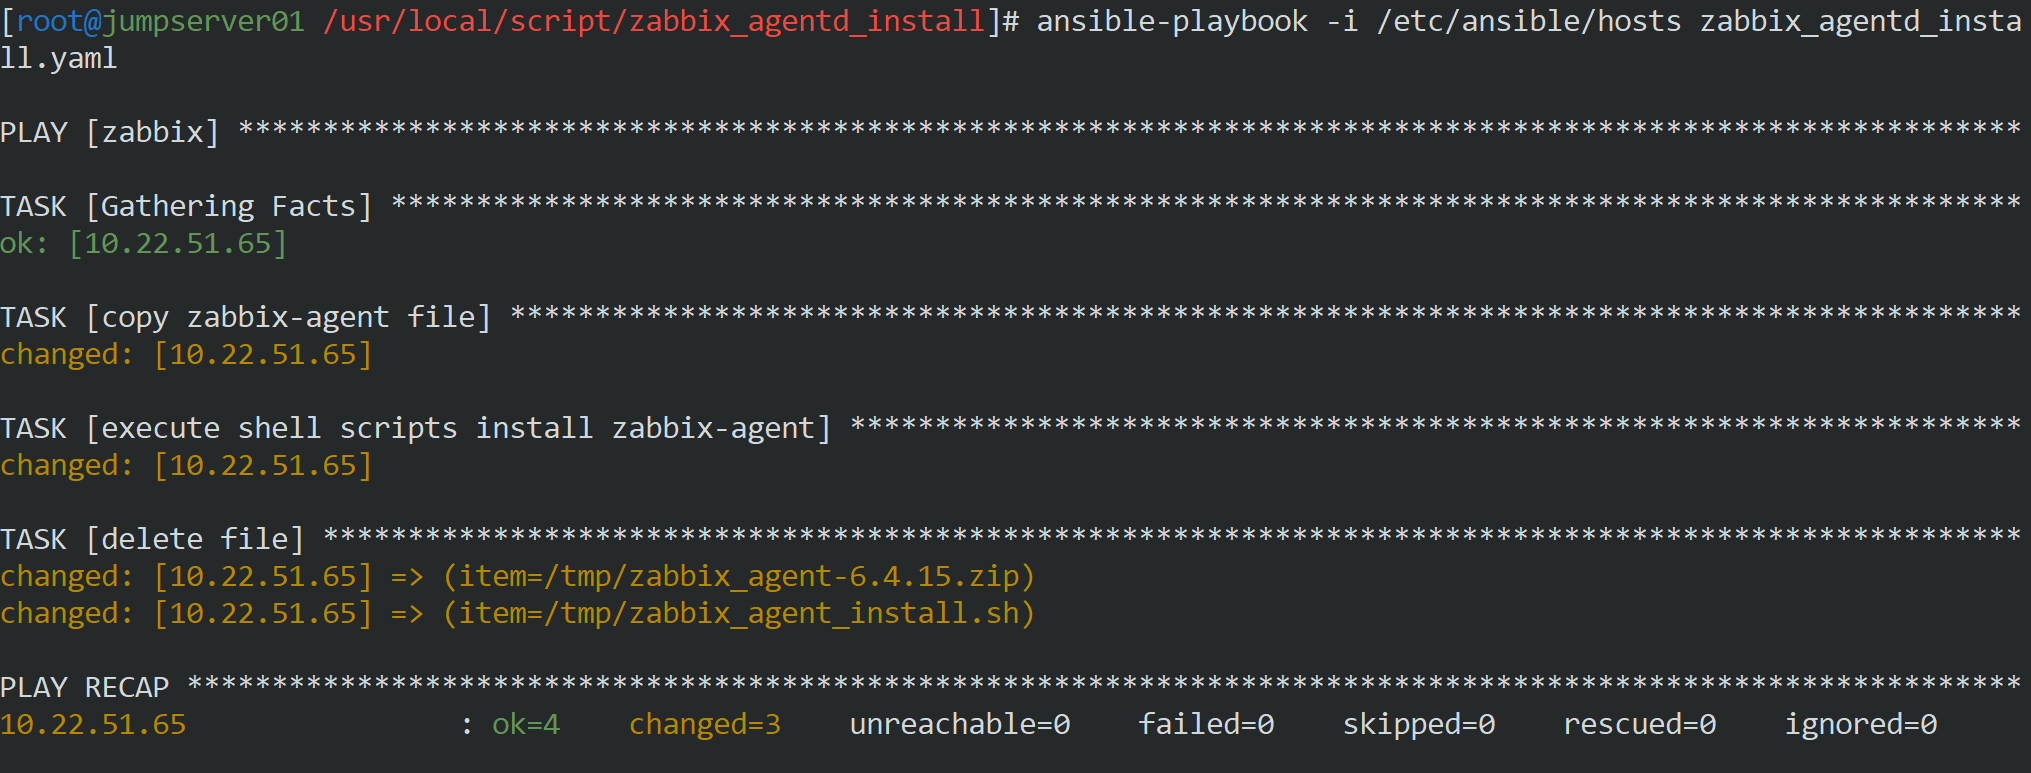
ansible-playbook -i /etc/ansible/hosts zabbix_agentd_install.yaml
执行结果如下:
7.查看Zabbix Agent配置文件
在客户端上,进入Zabbix Agent目录,通过egrep命令查看zabbix_agentd.conf 配置文件内容是否有误:
cd /usr/local/zabbix_agent/etc
egrep -v '#|^$' zabbix_agentd.conf
显示配置内容:
PidFile=/tmp/zabbix_agentd.pid
LogFile=/usr/local/zabbix_agent/logs/zabbix_agentd.log
LogFileSize=0
Server=10.22.51.51
ServerActive=10.22.51.51
Hostname=zhongjl-51-65
AllowRoot=1
Include=/usr/local/zabbix_agent/etc/zabbix_agentd.conf.d/*.conf
UnsafeUserParameters=1
TLSConnect=psk
TLSAccept=psk
TLSPSKIdentity=psk01
TLSPSKFile=/usr/local/zabbix_agent/etc/zabbix_agentd.psk
8.Zabbix Web配置客户端主机
同样地,在Zabbix Web界面上添加客户端的主机。添加完成后,等待【可用性】的状态显示 可用,说明Zabbix客户端与服务端已成功建立:
