版权声明:本文为博主原创文章,未经博主允许不得转载。
本文纯个人学习笔记,由于水平有限,难免有所出错,有发现的可以交流一下。
一、虚拟机的启动
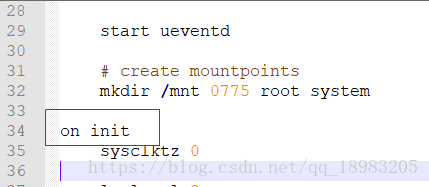
Android 是一个 Linux 的虚拟机,当虚拟机启动的时候,会执行手机根目录下的 init.rc(实际上就是 .sh 文件) 这个可执行文件。
在 init.rc 中,有一行 on init 执行命令。这是调用 init.rc 同级文件 init ,init 是所有安卓手机的入口执行文件,无法打开查看,是乱码。
xpose 的强大功能,就是对 init 进行 hook,然后修改。但是替换 init 这个文件是需要 root 权限的,所以使用 xpose 这个框架,是需要进行 root 的。
1.init 源码
inti 文件的源码是在 \system\core\init 这个文件夹下,会把里面所有的东西编译成 init 这个可执行文件,各个手机厂商会对这块文件进行修改。

init 的唯一入口是改文件夹下的 init.cpp 这个文件,里面有一个 main 函数,处理环境变量,开启服务,渲染等。

main 部分代码:
    // If we're in the kernel domain, re-exec init to transition to the init domain now
    // that the SELinux policy has been loaded.
    if (is_first_stage) {
        if (restorecon("/init") == -1) {
            ERROR("restorecon failed: %s\n", strerror(errno));
            security_failure();
        }
        char* path = argv[0];
        char* args[] = { path, const_cast<char*>("--second-stage"), nullptr };
        if (execv(path, args) == -1) {
            ERROR("execv(\"%s\") failed: %s\n", path, strerror(errno));
            security_failure();
        }
    }
代码中的 path 是指系统定义好的一些环境变量,这些路径是 \frameworks\base\cmds 下的所有东西。
所以在这里是判断是否是第一次启动,如果是第一次启动,则会执行 \frameworks\base\cmds 下所有的可执行文件,包括开启虚拟机的文件 app_process。
2.app_process 源码
\frameworks\base\cmds\app_process 下有个 app_main.cpp 文件,里面就是 app_process 源码。
app_process 部分代码:
    if (zygote) {
        runtime.start("com.android.internal.os.ZygoteInit", args, zygote);
    } else if (className) {
        runtime.start("com.android.internal.os.RuntimeInit", args, zygote);
    } else {
        fprintf(stderr, "Error: no class name or --zygote supplied.\n");
        app_usage();
        LOG_ALWAYS_FATAL("app_process: no class name or --zygote supplied.");
        return 10;
    }
在 app_main 里面的 main 方法最后,调用了 runtime.start(“com.android.internal.os.ZygoteInit”, args, zygote);
点击查看 run 是第一 AppRuntime。
所以 app_process 调用了 com.android.internal.os.ZygoteInit 这个类,这是第一个被调用的 java 类。对应源码位置是 \frameworks\base\core\java\com\android\internal\os
3.AndroidRuntime
AppRuntime 继承于 AndroidRuntime,AndroidRuntime 位于\frameworks\base\core\jni。
start 部分代码:
    if (startVm(&mJavaVM, &env, zygote) != 0) {
        return;
    }
在 AndroidRuntime 的 start 方法中,调用了 startVm,这个方法,这个方法才是真正的去开启虚拟机。手机启动的时候只是开启 Linux 系统,当执行到这里的时候,Linux 系统开启安卓运行的虚拟机。
startVm 部分代码:
    /*
     * Initialize the VM.
     *
     * The JavaVM* is essentially per-process, and the JNIEnv* is per-thread.
     * If this call succeeds, the VM is ready, and we can start issuing
     * JNI calls.
     */
    if (JNI_CreateJavaVM(pJavaVM, pEnv, &initArgs) < 0) {
        ALOGE("JNI_CreateJavaVM failed\n");
        return -1;
    }
在 startVm 末尾调用 JNI_CreateJavaVM,去创建一个虚拟机。
4.JNI_CreateJavaVM
JNI_CreateJavaVM 方法位于 \art\runtime\jni_internal.cc 文件中。
JNI_CreateJavaVM :
// JNI Invocation interface.

extern "C" jint JNI_CreateJavaVM(JavaVM** p_vm, JNIEnv** p_env, void* vm_args) {
  const JavaVMInitArgs* args = static_cast<JavaVMInitArgs*>(vm_args);
  if (IsBadJniVersion(args->version)) {
    LOG(ERROR) << "Bad JNI version passed to CreateJavaVM: " << args->version;
    return JNI_EVERSION;
  }
  Runtime::Options options;
  for (int i = 0; i < args->nOptions; ++i) {
    JavaVMOption* option = &args->options[i];
    options.push_back(std::make_pair(std::string(option->optionString), option->extraInfo));
  }
  bool ignore_unrecognized = args->ignoreUnrecognized;
  if (!Runtime::Create(options, ignore_unrecognized)) {
    return JNI_ERR;
  }
  Runtime* runtime = Runtime::Current();
  bool started = runtime->Start();
  if (!started) {
    delete Thread::Current()->GetJniEnv();
    delete runtime->GetJavaVM();
    LOG(WARNING) << "CreateJavaVM failed";
    return JNI_ERR;
  }
  *p_env = Thread::Current()->GetJniEnv();
  *p_vm = runtime->GetJavaVM();
  return JNI_OK;
}
其中最主要的最后两行代码,实例化了 p_env 和 p_vm ,p_env 就是我们编写 jni 方法的第一个参数 JNIEnv *env ,p_vm 就是虚拟机。
//JNIEnv *env 实例化
*p_env = Thread::Current()->GetJniEnv();
//实例化虚拟机的地方
*p_vm = runtime->GetJavaVM();
注:虚拟机在 Linux 就是一个结构体的方式保存着。
5.p_env
GetJniEnv() 这个函数定义在文件 \art\runtime 下的 thread.h 中。
* thread.h *
  // Every thread may have an associated JNI environment
  JNIEnvExt* jni_env_;

  // JNI methods
  JNIEnvExt* GetJniEnv() const {
    return jni_env_;
  }
JNI 方法的第一个参数是 JNIEnv,JNIEnv 是一个接口, JNIEnvExt 是 JNIEnv子类。
二、加载 java 文件
在 \frameworks\base\core\jni\AndroidRuntime 中继续往下,会发现加载 java 类,实际上是调用 env->FindClass(slashClassName) 进行加载的。(java 中 双亲委托机制 ClassLoader 进行加载 java 文件,最底层的实现也是使用 FindClass 这个方法)
1.FindClass
FindClass 是在 libnativehelper\include\nativehelper\jni.h 中,
jni.h 下 FindClass :
    jclass FindClass(const char* name)
    { return functions->FindClass(this, name); }
这里的 functions 是 JNINativeInterface,最终调用的是 \art\runtime\jni_internal.cc 下的 FindClass 。
\jni_internal.cc 下 FindClass:
  static jclass FindClass(JNIEnv* env, const char* name) {
    CHECK_NON_NULL_ARGUMENT(name);
    Runtime* runtime = Runtime::Current();
    ClassLinker* class_linker = runtime->GetClassLinker();
    std::string descriptor(NormalizeJniClassDescriptor(name));
    ScopedObjectAccess soa(env);
    mirror::Class* c = nullptr;
    //判断虚拟机是否开启
    if (runtime->IsStarted()) {
      StackHandleScope<1> hs(soa.Self());
      Handle<mirror::ClassLoader> class_loader(hs.NewHandle(GetClassLoader(soa)));
      c = class_linker->FindClass(soa.Self(), descriptor.c_str(), class_loader);
    } else {
      //还没开启虚拟机,即加载的是系统的类
      c = class_linker->FindSystemClass(soa.Self(), descriptor.c_str());
    }
    return soa.AddLocalReference<jclass>(c);
  }
最终程序调用到 class_linker 的 FindClass 方法进行加载类。
2. class_linker 的 FindClass
class_linker 所在目录 \art\runtime 下有一个 class_linker.cc 文件,找到里面的 FindClass 方法。
FindClass 部分代码:
    if (pair.second != nullptr) {
      return DefineClass(self,
                         descriptor,
                         hash,
                         ScopedNullHandle<mirror::ClassLoader>(),
                         *pair.first,
                         *pair.second);
    }
在这边调用了 DefineClass。
DefineClass 部分代码:
  // Add the newly loaded class to the loaded classes table.
  mirror::Class* existing = InsertClass(descriptor, klass.Get(), hash);
  if (existing != nullptr) {
    // We failed to insert because we raced with another thread. Calling EnsureResolved may cause
    // this thread to block.
    return EnsureResolved(self, descriptor, existing);
  }

  // Load the fields and other things after we are inserted in the table. This is so that we don't
  // end up allocating unfree-able linear alloc resources and then lose the race condition. The
  // other reason is that the field roots are only visited from the class table. So we need to be
  // inserted before we allocate / fill in these fields.
  LoadClass(self, dex_file, dex_class_def, klass);
这是调用了两个比较重要的方法, InsertClass 和 LoadClass。
InsertClass(descriptor, klass.Get(), hash); 有一个参数是 hash,这样会把类进行缓存,在 DefineClass 执行 InsertClass 之前,会先进行这个判断,如果已经加载的就不再进行加载。
LoadClass(self, dex_file, dex_class_def, klass); 是真正的去进行加载 Class。
LoadClass:
void ClassLinker::LoadClass(Thread* self,
                            const DexFile& dex_file,
                            const DexFile::ClassDef& dex_class_def,
                            Handle<mirror::Class> klass) {
  const uint8_t* class_data = dex_file.GetClassData(dex_class_def);
  if (class_data == nullptr) {
    return;  // no fields or methods - for example a marker interface
  }
  bool has_oat_class = false;
  if (Runtime::Current()->IsStarted() && !Runtime::Current()->IsAotCompiler()) {
    OatFile::OatClass oat_class = FindOatClass(dex_file, klass->GetDexClassDefIndex(),
                                               &has_oat_class);
    if (has_oat_class) {
      LoadClassMembers(self, dex_file, class_data, klass, &oat_class);
    }
  }
  if (!has_oat_class) {
    LoadClassMembers(self, dex_file, class_data, klass, nullptr);
  }
}
最开始是通过 DexFile 去获取到 ClassData。因为在类还没加载的时候,class 是以 dex格式 存在在 磁盘 文件下,这时候需要先把 dex 转为 class,再把 class 加载到内存中。
然后通过 LoadClassMembers 进行加载类的信息,分配内存。LoadClassMembers 中分别对 ArtField 和 ArtMethod 进行初始化。