前言
正文之前先小唠几句,距离上次写博客已经快小半年了,之前的博客都是以记录为学习笔记为主,而这小半年没有产出,是需要反思的。反思的结果就是,这小半年我没多少进步,无论是在RN还是安卓原生开发的知识技术方面,都没有实质上的突破,以至于没有新的值得我记录为博客的干货。
俗话说,学海无涯,不进则退。因为这大半年基本上都从事着RN的相关开发,以至于把很多安卓原生的知识技能都落下了,之前关注的大佬博客公众号也很少看了。更悲哀的是,之前非常熟练的知识开发技能有些也生疏了。这几天之前的同事求教我一个问题,我了解过后,感觉这太小case了,之前开发过很多相似的功能,太熟练了。但是真正帮着写代码时却尴尬了,只隔了大半年而已,却硬是想不出这关键的几个步骤该怎么实现,这也是我写这篇博客的原因,同样作为笔记记录下来,以方便今后查阅。闲话扯完,下面开始正文。。。。
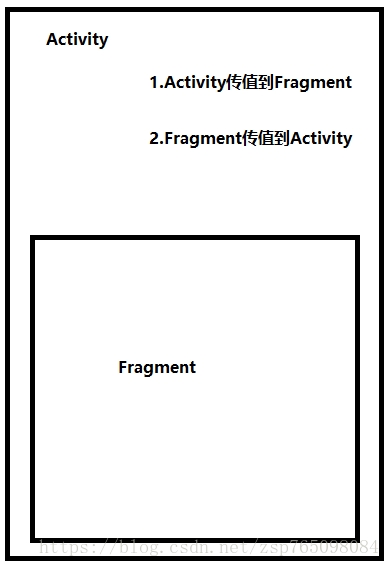
常进行Android原生开发的同学都知道,Activity与Fragment之间、Fragment与Fragment之间的交互都是常规操作,是为进行开发的常规技能。首先看个简略图看几种情形:
我们先搭建基本页面:
新建工程,创建Activity
...

public class FragmentsTalkActivity extends AppCompatActivity implements View.OnClickListener {

    private SimpleFragment testFragment;
    private Button mBtn_AToF;

    @Override
    protected void onCreate(Bundle savedInstanceState) {
        super.onCreate(savedInstanceState);
        initView();
    }
    private void initView() {
        setContentView(R.layout.activity_fragments_talk);
        FragmentManager fm = getSupportFragmentManager();
        testFragment = (SimpleFragment) fm.findFragmentById(R.id.fragment2);
        mBtn_AToF = (Button)findViewById(R.id.btn_atof);
        mBtn_AToF.setOnClickListener(this);
    }
}
Activity对应布局:
<?xml version="1.0" encoding="utf-8"?>
<LinearLayout
    xmlns:android="http://schemas.android.com/apk/res/android"
    android:layout_width="match_parent"
    android:layout_height="match_parent"
    android:gravity="center_horizontal"
    android:orientation="vertical">
    <Button
        android:id="@+id/btn_atof"
        android:layout_width="wrap_content"
        android:layout_height="wrap_content"
        android:layout_marginTop="20dp"
        android:textAllCaps="false"
        android:text="从Activity到Fragment传值"/>
    <fragment
        android:id="@+id/fragment2"
        android:name="com.zhusp.androiddemo.fragment.SimpleFragment"
        android:layout_width="match_parent"
        android:layout_marginTop="20dp"
        android:layout_height="194dp"
        android:layout_margin="10dp"/>

</LinearLayout>
创建Fragment
...

...
public class SimpleFragment extends Fragment{

    private static final String KEY_TITLE = "title";
    private String mTitle;
    private TextView mTv_msgFromActivity;
    private Button mBtn_sendToActivity;

    @Nullable
    @Override
    public View onCreateView(LayoutInflater inflater, @Nullable ViewGroup container, @Nullable Bundle savedInstanceState) {
        return initView();
    }

    private View initView(){
        LinearLayout rootView = (LinearLayout) LayoutInflater.from(this.getContext()).inflate(R.layout.fragment_simple_layout,null);
        mTv_msgFromActivity = (TextView) rootView.findViewById(R.id.tv_fragment_msg);
        mBtn_sendToActivity = (Button) rootView.findViewById(R.id.btn_in_fragment);
        return rootView;
    }

    public static SimpleFragment newInstance(String title){
        Bundle bundle = new Bundle();
        bundle.putString(KEY_TITLE,title);
        SimpleFragment fragment = new SimpleFragment();
        fragment.setArguments(bundle);
        return fragment;
    }
}
对应fragment布局:
<?xml version="1.0" encoding="utf-8"?>
<LinearLayout
    xmlns:android="http://schemas.android.com/apk/res/android"
    android:layout_width="match_parent"
    android:layout_height="match_parent"
    android:gravity="center_horizontal"
    android:background="@color/colorAccent"
    android:padding="20dp"
    android:orientation="vertical">
    <Button
        android:id="@+id/btn_in_fragment"
        android:layout_width="wrap_content"
        android:layout_height="wrap_content"
        android:textAllCaps="false"
        android:text="点击传值到Activity"/>

    <TextView
        android:id="@+id/tv_fragment_msg"
        android:layout_width="wrap_content"
        android:layout_height="wrap_content"
        android:layout_marginTop="10dp"
        android:textColor="#000000"
        android:text="这是Fragment"/>
</LinearLayout>
接下来分别实现上图情景
1.Activity传值到Fragment
这里的传值应该包含两种情况:
1) Fragment创建时传值
这属于一次性传值,我们在Activity创建Fragment同时可以把一些数据通过setArgument()传递到Fragment。这是最基本的传值方式了,示例代码如下:
testFragment = new SimpleFragment();
Bundle sendBundle = new Bundle();
sendBundle.putString("sendMessage","来自Activity首次创建Fragment传来的数据");
testFragment.setArguments(sendBundle);然后在Fragment中通过getArgument()获取bundle数据
Bundle b = getArgument();
if(null != b){
    String message = b.getString("sendMessage");
}
特别注意:这中传值方式需要在Fragment没有被添加到FragmentManager之前使用,否则会报错误IllegalStateException: Fragment already active。因此这种传值方式不适合这里直接在xml文件里声明定义fragment的情况,因为这里在testFragment = (SimpleFragment) fm.findFragmentById(R.id.fragment2);这就代码执行后该Fragment已经被激活加入到FragmentManager上(即already active),因为这不是本文记录重点,就不再做细说
2) Fragment已经被创建实时动态传值
这类情景我们经常遇到,比如,我们在Activity点击一个按钮后更新Fragment上的某些数据,这里我们就以这种情况为例。我使用接口回调的方式,具体步骤如下:
创建一个接口
...
public interface ToFragmentListener {
    void onTypeClick(String message);
}
在Fragment中实现该接口
...
public class SimpleFragment extends Fragment implements ToFragmentListener{

...
    //实现接口方法
    @Override
    public void onTypeClick(String message) {
        mTv_msgFromActivity.setText(message);//更新该组件上内容
    }
}
在Activity中获取接口实例调用方法
...

public class FragmentsTalkActivity extends AppCompatActivity implements View.OnClickListener {

    private SimpleFragment testFragment;
    private ToFragmentListener mFragmentListener;
    private Button mBtn_AToF;
    private int tapCounts = 0;

    @Override
    protected void onCreate(Bundle savedInstanceState) {
        super.onCreate(savedInstanceState);
        initView();
        initData();
    }

    private void initView() {
        setContentView(R.layout.activity_fragments_talk);
        FragmentManager fm = getSupportFragmentManager();
        testFragment = (SimpleFragment) fm.findFragmentById(R.id.fragment2);
        mBtn_AToF = (Button)findViewById(R.id.btn_atof);
        mBtn_AToF.setOnClickListener(this);
    }

    private void initData() {
        //这步是关键,因为Fragment实现了该接口,所以可以直接把Fragment实例赋值给接口引用
        mFragmentListener = testFragment;
    }


    @Override
    public void onClick(View v) {
        switch (v.getId()){
            case R.id.btn_atof:
                if(null != mFragmentListener){
                    tapCounts ++;
                    mFragmentListener.onTypeClick("来自Activity的实时数据"+tapCounts);
                }
                break;
        }
    }

}
搞定,下面看下效果:

录制的时候不知道是丢帧还是咋滴了,“实时数据2”没有展示出来╮(╯▽╰)╭,不管了,效果就这样。
接下来是通过控制Fragment更新Activity上的数据
2.Fragment传值到Activity
这个功能相信大多小伙伴也都能自己实现,同样的使用接口的方式,只不过跟前面反着来就是了
同样的先写一个接口(当然也可以复用上面的接口),为了区分,我重写一个
...
public interface ToFragmentListener {
    void onTypeClick(String message);
}
在Fragment中设置获取接口实例调用方法
...
public class SimpleFragment extends Fragment implements ToFragmentListener,View.OnClickListener{

    private static final String KEY_TITLE = "title";
    private String mTitle;
    private TextView mTv_msgFromActivity;
    private Button mBtn_sendToActivity;
    private ToActivityListener toActivityListener;
    private int tapCounts = 0;

    @Nullable
    @Override
    public View onCreateView(LayoutInflater inflater, @Nullable ViewGroup container, @Nullable Bundle savedInstanceState) {
        ...
        return initView();
    }

    private View initView(){
        LinearLayout rootView = (LinearLayout) LayoutInflater.from(this.getContext()).inflate(R.layout.fragment_simple_layout,null);
        mTv_msgFromActivity = (TextView) rootView.findViewById(R.id.tv_fragment_msg);
        mTv_msgFromActivity.setText(mTitle);
        mBtn_sendToActivity = (Button) rootView.findViewById(R.id.btn_in_fragment);
        mBtn_sendToActivity.setOnClickListener(this);
        return rootView;
    }

    public void setToActivityListener(ToActivityListener listener){
        this.toActivityListener = listener;
    }

    @Override
    public void onTypeClick(String message) {
        mTv_msgFromActivity.setText(message);
    }

    @Override
    public void onClick(View v) {
        switch (v.getId()){
            case R.id.btn_in_fragment:
                if(null != toActivityListener){
                    tapCounts++;
                    toActivityListener.toActivityClick("来自Fragment的数据"+tapCounts);
                }
                break;
        }
    }
}
在Activity中设置实例化该接口
...

public class FragmentsTalkActivity extends AppCompatActivity implements View.OnClickListener {

    private SimpleFragment testFragment;
    private ToFragmentListener mFragmentListener;
    private Button mBtn_AToF;
    private int tapCounts = 0;
    private TextView mTv_fragmentMsg;

    @Override
    protected void onCreate(Bundle savedInstanceState) {
        super.onCreate(savedInstanceState);
        initView();
        initData();
    }

    private void initView() {
        setContentView(R.layout.activity_fragments_talk);
        FragmentManager fm = getSupportFragmentManager();
        testFragment = (SimpleFragment) fm.findFragmentById(R.id.fragment2);
        mBtn_AToF = (Button)findViewById(R.id.btn_atof);
        mBtn_AToF.setOnClickListener(this);
        mTv_fragmentMsg = (TextView)findViewById(R.id.tv_from_fragment);
    }

    private void initData() {
        mFragmentListener = testFragment;
        //Fragment设置接口回调
        testFragment.setToActivityListener(new ToActivityListener() {
            @Override
            public void toActivityClick(String message) {
                mTv_fragmentMsg.setText(message);
            }
        });
    }

    ...

}
搞定,下面看效果
好了,今天的博客笔记就先写到这,细心的朋友可以发现,关于Activity与Fragment之间的交互,我并没有用到安卓sdk提供的API,完全是纯Java基本手段实现的。
当然还有Fragment与Fragment之间的交互,其实差不多,可以用上面两种情况的结合使用(Fragment-Activity-Fragment),当然安卓也给我提供了更方便的API,后边有时间再记录下