实验机克隆部署
依据《CentOS6实验机模板搭建部署》克隆实验机
hostname blog
echo "$(grep -E '127|::1' /etc/hosts)">/etc/hosts
echo "$(ifconfig eth0|grep inet|awk -F'[ :]' '{print $13}') $(hostname)">>/etc/hosts
sed -i "s/^HOSTNAME.*$/HOSTNAME=$(hostname)/g" /etc/sysconfig/network
ping -c 3 $(hostname)
使用Yum部署安装Mariadb
依据《CentOS6u9 使用Mariadb官方yum源安装最新Stable版本命令简录》安装Mariadb,并继续部署:
PASS=vincent
echo "create database blog;"| mysql -uroot -p"$PASS"
echo "flush privileges;"| mysql -uroot -p"$PASS"
使用Yum部署安装Nginx
依据《CentOS6u9 使用Nginx官方yum源安装最新Stable版本命令简录》安装Nginx,并继续部署:
chkconfig nginx
/etc/init.d/nginx start
使用Yum部署安装PHP
# 安装PHP的yum源
rpm -Uvh https://mirror.webtatic.com/yum/el6/latest.rpm
# 安装epel的yum源
rpm -Uvh http://dl.fedoraproject.org/pub/epel/6/x86_64/epel-release-6-8.noarch.rpm
# 安装PHP
yum -y install libmcrypt libmcrypt-devel \
  php70w-fpm php70w-opcache \
  php70w-common php70w-pear \
  php70w-pecl-imagick php70w-gd \
  php70w-process php70w-mcrypt \
  php70w-intl php70w-mbstring \
  php70w-recode php70w-tidy php70w-xml \
  php70w-soap php70w-xmlrpc php70w-mysqlnd \
  php70w-pdo php70w-pecl-redis php70w-pgsql php70w-ldap
# 启动
/etc/init.d/php-fpm start
chkconfig php-fpm on
Nginx和PHP联调
# 设置测试页面
echo '<?php phpinfo();' > /usr/share/nginx/html/info.php
# 调整nginx配置
sed -i 's|# pass the PHP.*$|&\
    location ~ \\.php$ {\
        root           /usr/share/nginx/html;\
        fastcgi_pass   127.0.0.1:9000;\
        fastcgi_index  index.php;\
        fastcgi_param  SCRIPT_FILENAME  $document_root$fastcgi_script_name;\
        include        fastcgi_params;\
    }|g' /etc/nginx/conf.d/default.conf
# 生效nginx配置
/etc/init.d/nginx configtest
/etc/init.d/nginx reload
# 测试,或者使用浏览器打开查看
curl http://127.0.0.1:80/info.php|grep 'PHP Version'
部署安装PHP的包管理工具composer
# 下载安装最新版本的composer
cd /tmp
php -r "copy('https://install.phpcomposer.com/installer', 'composer-setup.php');"
php composer-setup.php
php -r "unlink('composer-setup.php');"
mv composer.phar /usr/local/bin/composer
chmod u+x /usr/local/bin/composer
composer -V

# 镜像加速
composer config -g repo.packagist composer https://packagist.phpcomposer.com
composer config -l -g|grep 'http'
下载安装WordPress
下载网址:https://cn.wordpress.org/txt-download/ 相关安装文档,参见安装包下的readme.html文件
# 下载安装包
cd /tmp
wget https://cn.wordpress.org/wordpress-4.9.4-zh_CN.tar.gz
# 解压安装包
cd /usr/share/nginx/html/
tar -xf /tmp/wordpress-4.9.4-zh_CN.tar.gz
chown -R nginx: /usr/share/nginx/html/
# 配置nginx
cd /etc/nginx/conf.d/
rm -rf default.conf
cat >wordpress.conf<<EOF
server {
listen 80;
server_name 127.0.0.1;
set \$root_path '/usr/share/nginx/html/wordpress';
root \$root_path;
access_log /var/log/nginx/wordpress.access.log main;
index index.php index.html index.htm;
try_files \$uri \$uri/ @rewrite;
location @rewrite {
rewrite ^/(.*)\$ /index.php?_url=/\$1;
}
location ~ \.php {
fastcgi_pass 127.0.0.1:9000;
fastcgi_index /index.php;
fastcgi_split_path_info ^(.+\.php)(/.+)\$;
fastcgi_param PATH_INFO \$fastcgi_path_info;
fastcgi_param PATH_TRANSLATED \$document_root\$fastcgi_path_info;
fastcgi_param SCRIPT_FILENAME \$document_root\$fastcgi_script_name;
include fastcgi_params;
}
}
EOF
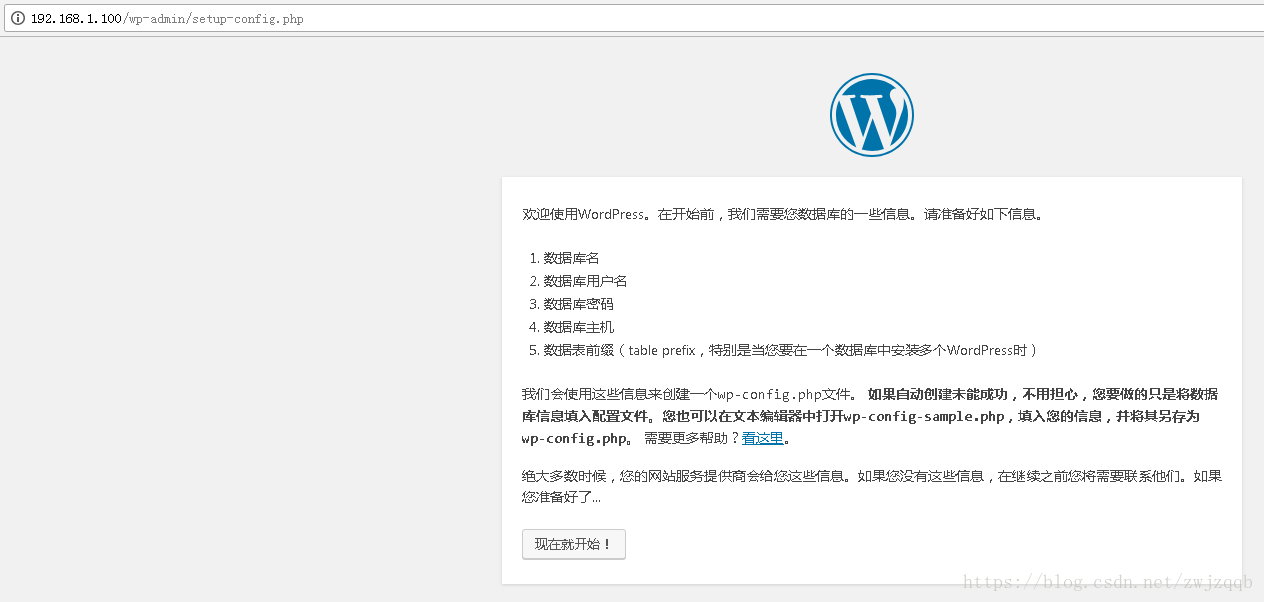
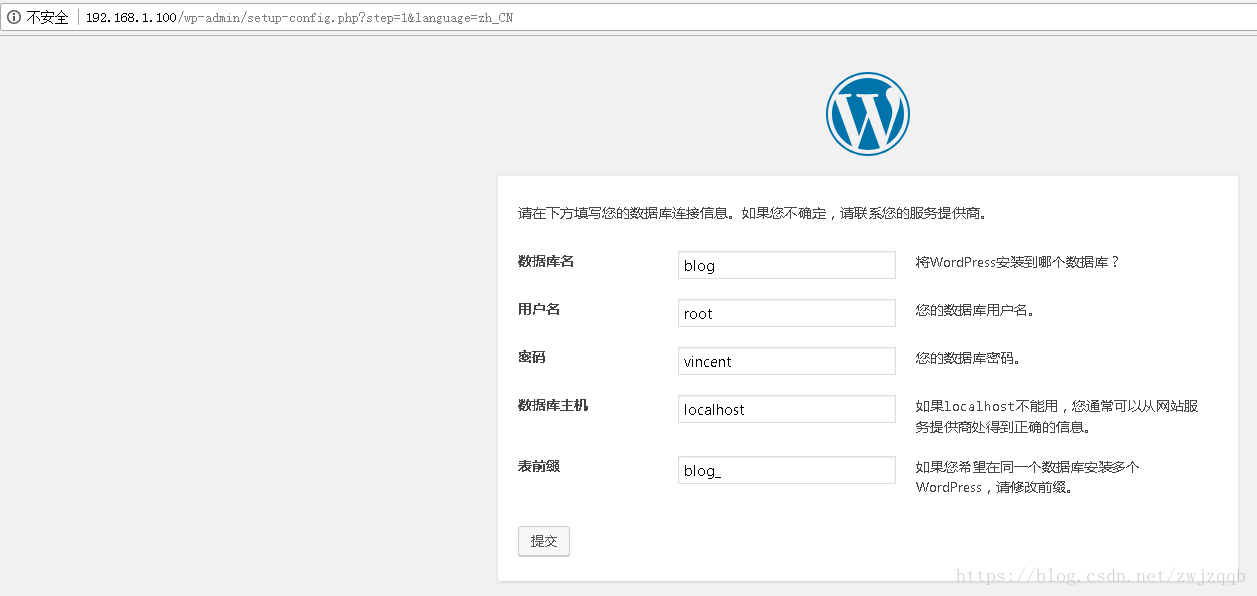
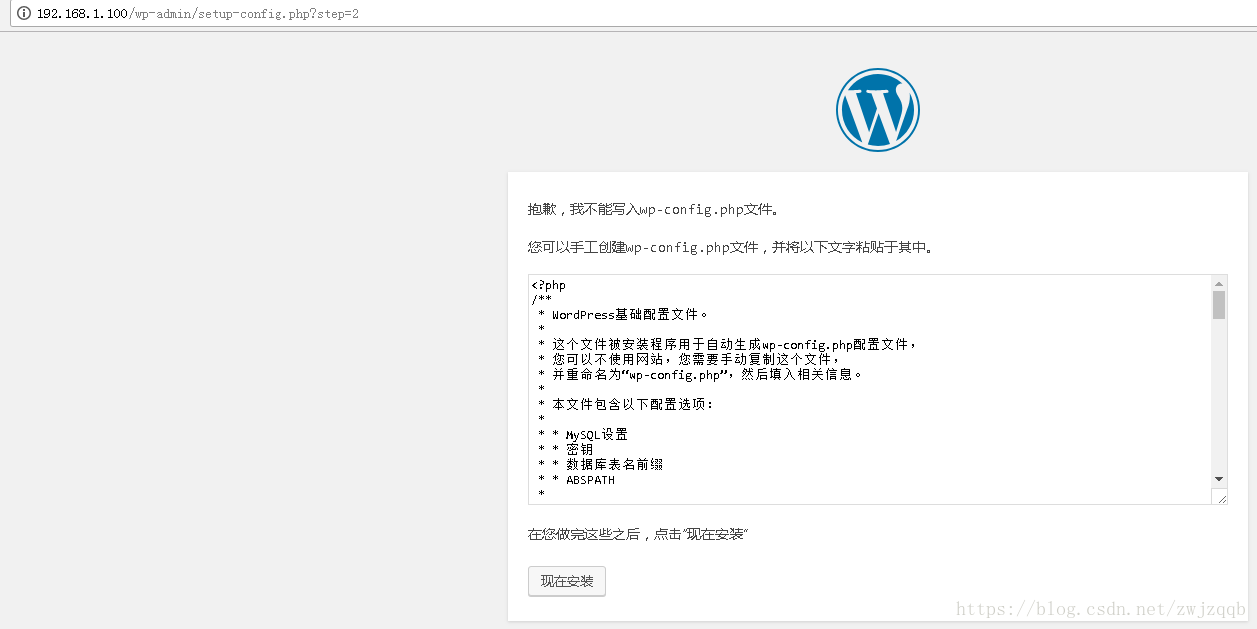
/etc/init.d/nginx restart浏览器访问 http://IP/wp-admin/setup-config.php 进行配置,配置报错,无法写入wp-config.php,手动编辑写入:
cd /usr/share/nginx/html/wordpress
vi wp-config.php
# 将网页生成的信息复制粘贴到该文件并保存退出
# 注意,有一些随机生成的身份认证密钥与盐信息
# 并不是每次的信息都是一模一样的
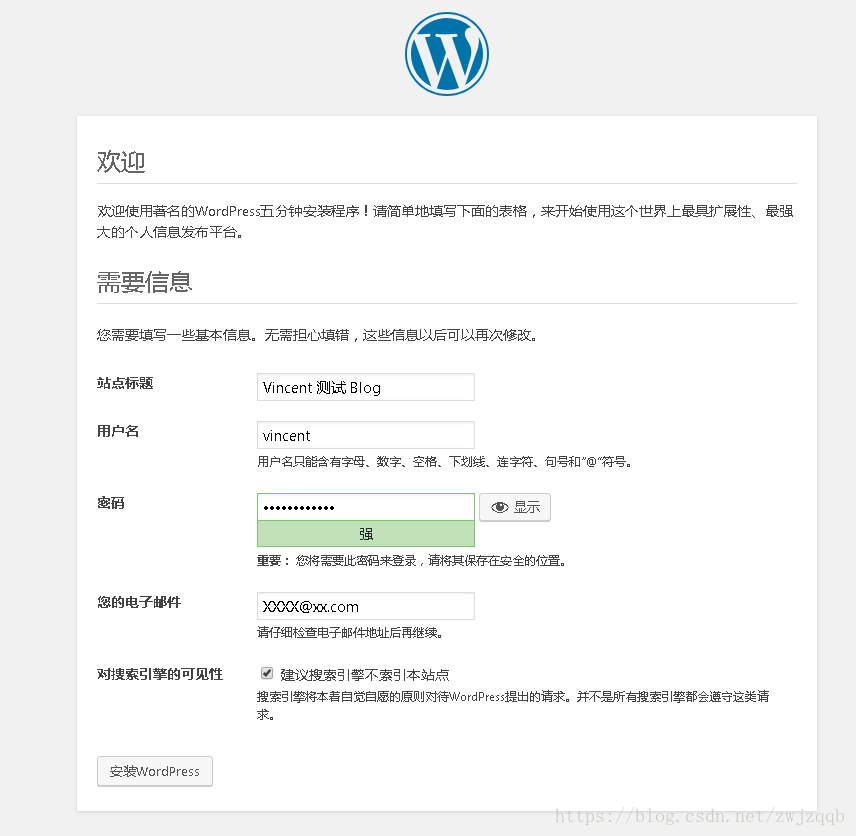
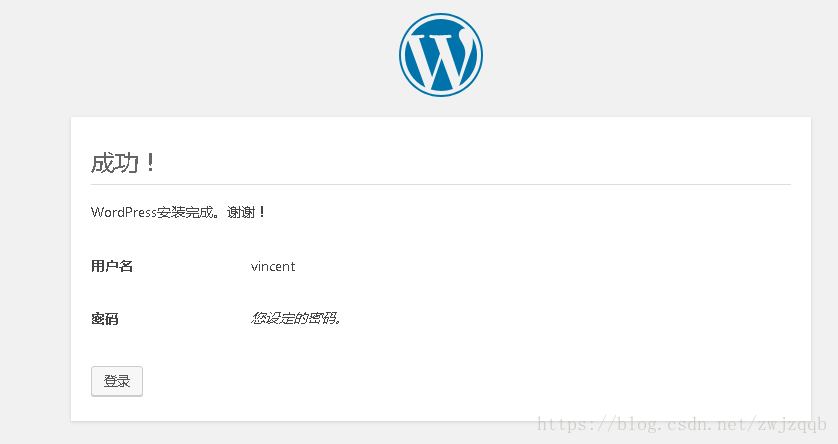
chown -R nginx: /usr/share/nginx/html/继续网页配置,点击现在安装

[TOC]