理论难啃,不如动手实践

emmm接下来就是给项目命名了,我偷懒了选择默认吧 (=v=)
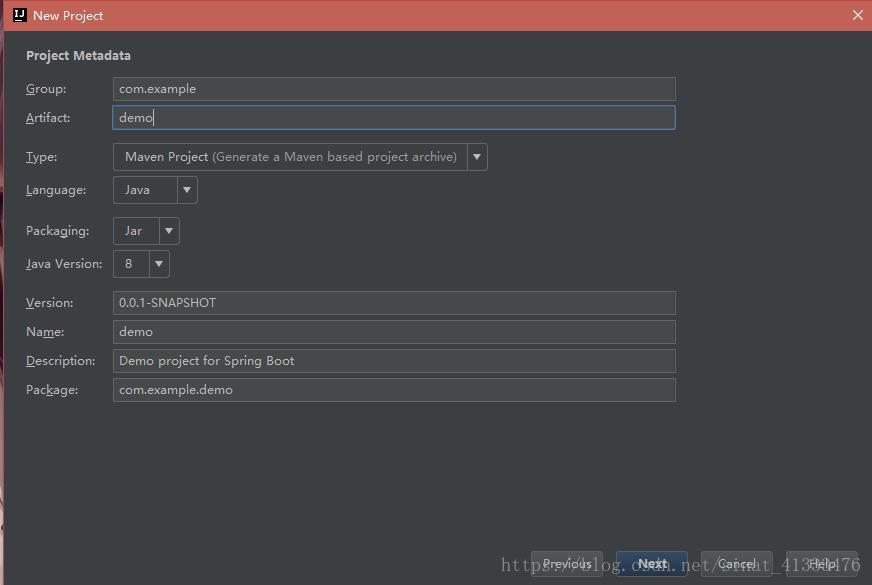
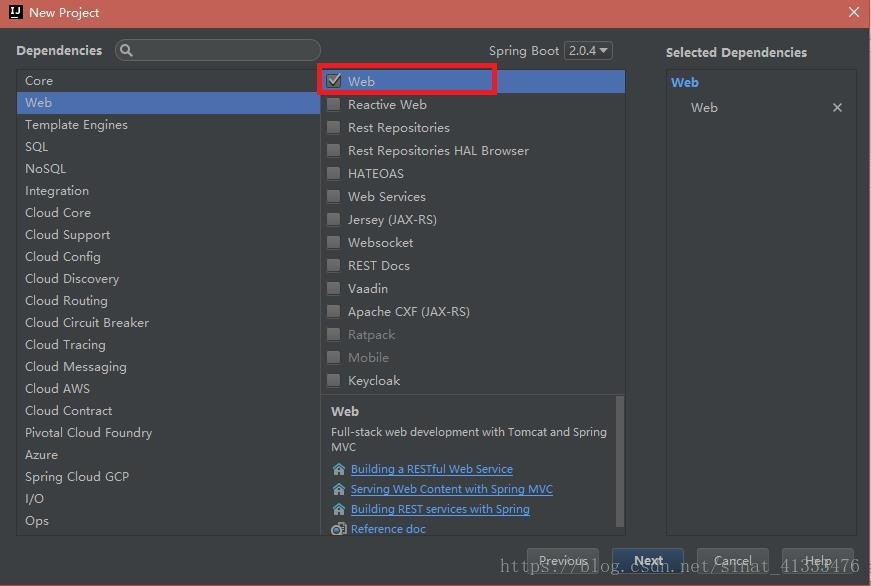
web项目开发就少不了它啦
项目名称、项目位置

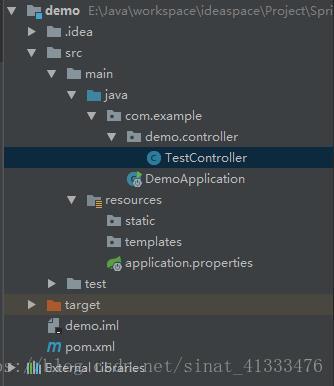
点击Finish后,idea就帮我们创建项目

目录结构
java ----源码,要注意的是Application要放在当前工程groupId下,举个栗子(=.=)
<groupId>com.example</groupId>
所以上面的 DemoApplication 位置是要放在 com.example 目录下
resource
-----static :web的静态资源
-----templates :页面模板(.html / .ftl)
-----application.properties :配置文件 ,不过常用的是以 .yml 为后缀,application.yml
接下来写一个简单的测试代码
package com.example.demo.controller;

import org.springframework.web.bind.annotation.RequestMapping;
import org.springframework.web.bind.annotation.RestController;

@RestController
public class TestController {

    @RequestMapping("/test")
    public String hello(){
        System.out.println("TestController的方法被调用了");
        return "welcome to the new age !";
    }
}
因为Springboot 内嵌 web 服务器(有很多,可根据情况所需配置),默认是 Tomcat,因此直接运行 Application类
package com.example;

import org.springframework.boot.SpringApplication;
import org.springframework.boot.autoconfigure.EnableAutoConfiguration;
import org.springframework.boot.autoconfigure.SpringBootApplication;

//@SpringBootApplication(scanBasePackages = "com.example.demo.controller")
@SpringBootApplication
@EnableAutoConfiguration
public class DemoApplication {

	public static void main(String[] args) {
		SpringApplication.run(DemoApplication.class, args);
	}
}
打开浏览器,在地址栏输入请求URL

控制台输出

没有spring繁琐的配置,也不用部署到Tomcat,开发也可以如此快捷方便。