首先我们先去mybatis官网上下载generator的jar包 https://github.com/mybatis/generator/releases
然后准备数据库的驱动jar包,以及配置generatorConfig.xml,目录如下:
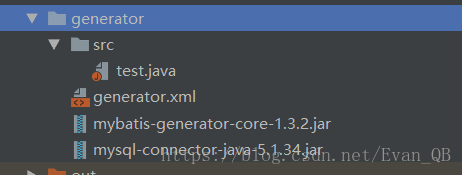
generatorConfig.xml的配置如下:
<?xml version="1.0" encoding="UTF-8"?>
<!DOCTYPE generatorConfiguration PUBLIC "-//mybatis.org//DTD MyBatis Generator Configuration 1.0//EN" "http://mybatis.org/dtd/mybatis-generator-config_1_0.dtd">
<generatorConfiguration>
	<!-- 数据库驱动包位置 -->
	<classPathEntry location="/soft/java/workspace/permission/generator/mysql-connector-java-5.1.34.jar" /> <!-- 1 -->
	<context id="DB2Tables" targetRuntime="MyBatis3">
		<commentGenerator>
			<property name="suppressAllComments" value="true" />
		</commentGenerator>
		<!-- 数据库链接URL、用户名、密码 -->
		<jdbcConnection driverClass="com.mysql.jdbc.Driver" connectionURL="jdbc:mysql://127.0.0.1:3306/authorization?characterEncoding=utf8" userId="root" password="*****">  <!-- 2 -->
		</jdbcConnection>
		<javaTypeResolver>
			<property name="forceBigDecimals" value="false" />
		</javaTypeResolver>
		<!-- 生成模型的包名和位置 --> <!-- 3 -->
		<javaModelGenerator targetPackage="cn.qblank.model" targetProject="/soft/java/workspace/permission/generator/src">
			<property name="enableSubPackages" value="true" />
			<property name="trimStrings" value="true" />
		</javaModelGenerator>
		<!-- 生成的映射文件包名和位置 --> <!-- 4 -->
		<sqlMapGenerator targetPackage="cn.qblank.mapper" targetProject="/soft/java/workspace/permission/generator/src">
			<property name="enableSubPackages" value="true" />
		</sqlMapGenerator>
		<!-- 生成DAO的包名和位置 --> <!-- 5 -->
		<javaClientGenerator type="XMLMAPPER" targetPackage="cn.qblank.dao" targetProject="/soft/java/workspace/permission/generator/src">
			<property name="enableSubPackages" value="true" />
		</javaClientGenerator>
		<!-- 要生成那些表(更改tableName和domainObjectName就可以) --><!-- 6 -->
		<table tableName="sys_user" domainObjectName="SysUser" enableCountByExample="false" enableUpdateByExample="false" enableDeleteByExample="false" enableSelectByExample="false" selectByExampleQueryId="false" />
		<table tableName="sys_dept" domainObjectName="SysDept" enableCountByExample="false" enableUpdateByExample="false" enableDeleteByExample="false" enableSelectByExample="false" selectByExampleQueryId="false" />
		<table tableName="sys_acl" domainObjectName="SysAcl" enableCountByExample="false" enableUpdateByExample="false" enableDeleteByExample="false" enableSelectByExample="false" selectByExampleQueryId="false" />
		<table tableName="sys_acl_module" domainObjectName="SysAclModule" enableCountByExample="false" enableUpdateByExample="false" enableDeleteByExample="false" enableSelectByExample="false" selectByExampleQueryId="false" />
		<table tableName="sys_role" domainObjectName="SysRole" enableCountByExample="false" enableUpdateByExample="false" enableDeleteByExample="false" enableSelectByExample="false" selectByExampleQueryId="false" />
		<table tableName="sys_role_acl" domainObjectName="SysRoleAcl" enableCountByExample="false" enableUpdateByExample="false" enableDeleteByExample="false" enableSelectByExample="false" selectByExampleQueryId="false" />
		<table tableName="sys_role_user" domainObjectName="SysRoleUser" enableCountByExample="false" enableUpdateByExample="false" enableDeleteByExample="false" enableSelectByExample="false" selectByExampleQueryId="false" />
		<table tableName="sys_log" domainObjectName="SysLog" enableCountByExample="false" enableUpdateByExample="false" enableDeleteByExample="false" enableSelectByExample="false" selectByExampleQueryId="false" />
	</context>
</generatorConfiguration>
根据提示,修改对应的配置,例如用户名,密码,数据库名和表名等等
接下来打开终端输入命令:
java -jar mybatis-generator-core-1.3.2.jar -configfile generator.xml -overwrite即可生成对应的文件
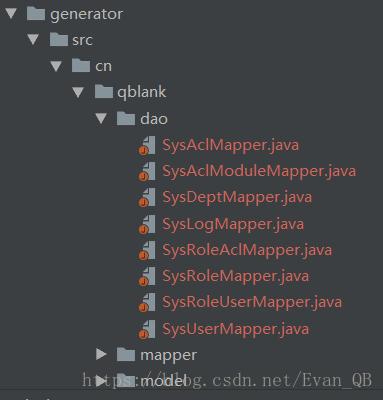
测试如下: