1、前言
Android Studio在2.2版本更新之后加入了CMAKE方式配置NDK的方法,这大大简化了之前通过Android.mk和Application.mk两个本地配置文件进行NDK开发的方式。这种方法在后续更新的版本中不断增强,越来越好用,越来越不会出问题。本文基于Android Studio3.1的版本进行配置,使用CMAKE的配置方式配置OpenCV最新版(截止发文时间是OpenCV 3.4.1),并在最后给出一个灰度转换的测试Demo。
如果你想通过Android NDK开发配置OpenCV,本文或许对你有用。
2、开发环境
Android Studio 3.0
OpenCV for Android 3.4.1
Android NDK 16
CMAKE
注意:如果直接使用AS下载的NDK,则为测试版17,可能会出现以下问题:
Execution failed for task ':app:transformNativeLibsWithStripDebugSymbolForDebug'主要是ndk版本问题,重新下载一个低一点的版本就好了。
3、opencv for android的配置
注意:这里是在一个旧项目上添加c++支持,我们需要在app目录下自己建立一个CMakeLists.txt文件,而且需要在src/main文件夹下新建一个cpp的文件夹
3.1. opencv的配置:
- include文件
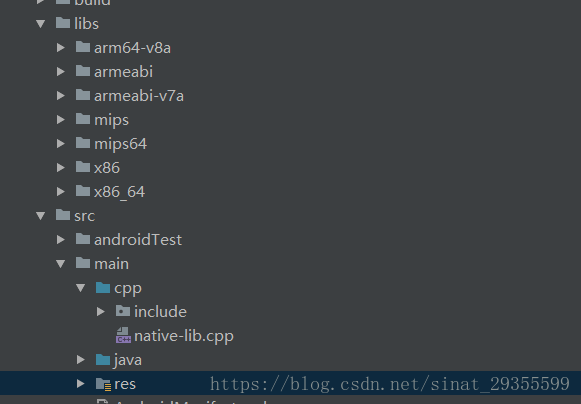
在下载好的OpenCV压缩包中,打开路径下的.\opencv-3.4.1-android-sdk\OpenCV-android-sdk\sdk\native\jni 有一个include文件夹,把这个文件夹复制粘贴至我们的OpenCVTest项目中,路径为src/main/cpp
- jni文件
然后是动态库(.so文件),打开路径下的.\opencv-3.4.1-android-sdk\OpenCV-android-sdk\sdk\native ,有一个libs 文件夹,这个文件夹里面是所有版本的abi的so文件。复制粘贴到我们的项目中,路径为app目录下的libs。
注意:
1. 无论是include还是libs的路径都可以自定义,习惯上是这样放,但其实只要在之后的CMakeList配置文件里面设置正确就没有问题。
2. 值得一提的是,OpenCV在最新版本中把动态库和静态库分开了,分别放在libs和staticlbs两个文件夹中,之前是放在一个文件夹里的。我们测试Demo仅需要动态库和头文件即可。
目录如下图所示:
3.2. gradle的配置
在android 节点中添加如下代码:
sourceSets{
        main{
            jniLibs.srcDirs = ['libs']
            jni.srcDirs = []
        }
}
这一步设置了动态链接库的路径地址,用于项目构建时,Native寻找和链接相关的so文件。
最终的build.gradle如下:
apply plugin: 'com.android.application'

android {
    compileSdkVersion 26

    defaultConfig {
        applicationId "com.example.myapplication"
        minSdkVersion 15
        targetSdkVersion 26
        versionCode 1
        versionName "1.0"

        testInstrumentationRunner "android.support.test.runner.AndroidJUnitRunner"

//        externalNativeBuild {
//            cmake {
//                cppFlags "-std=c++11", "-frtti", "-fexceptions"
//                abiFilters 'x86', 'x86_64', 'armeabi', 'armeabi-v7a', 'arm64-v8a', 'mips', 'mips64'
//            }
//        }

    }

    buildTypes {
        release {
            minifyEnabled false
            proguardFiles getDefaultProguardFile('proguard-android.txt'), 'proguard-rules.pro'
        }
    }

    sourceSets.main {
        jniLibs.srcDirs = ['libs']
        jni.srcDirs = []
    }

    externalNativeBuild {

        // Encapsulates your CMake build configurations.
        cmake {

            // Provides a relative path to your CMake build script.
            path "CMakeLists.txt"
        }
    }


}

dependencies {
    implementation fileTree(dir: 'libs', include: ['*.jar'])

    implementation 'com.android.support:appcompat-v7:26.1.0'
    implementation 'com.android.support.constraint:constraint-layout:1.1.2'
    testImplementation 'junit:junit:4.12'
    androidTestImplementation 'com.android.support.test:runner:1.0.2'
    androidTestImplementation 'com.android.support.test.espresso:espresso-core:3.0.2'

    androidTestCompile('com.android.support:support-annotations:26.1.0') {
        force = true
    }
}
注意externalNativeBuild和SourseSets这两个节点。
3.3、CMakeList.txt文件的配置
这个文件也是NDK开发最最最关键的文件,AS采用CMake脚本语法配置C编译器的环境,如果你之前有过使用CMAKE的经验,或许这并非难题,但对于初学者而言,CMAKE的脚本语法,还是略过于生涩,而且AS对该文件的配置并不友好,居然没有代码提示,于是不得不查很多文档。但好在,NDK的开发大多不是大型的C++项目,也不太需要过于复杂的设置(比如OpenCV源代码的CMAKE文件,大约有几千行的样子 Orz~)
OpenCV配置CMakeList文件的方式如下:
# For more information about using CMake with Android Studio, read the
# documentation: https://d.android.com/studio/projects/add-native-code.html

# 设置CMAKE的版本号
cmake_minimum_required(VERSION 3.4.1)

# 设置include文件夹的地址
include_directories(${CMAKE_SOURCE_DIR}/src/main/cpp/include)

# 设置opencv的动态库
add_library(libopencv_java3 SHARED IMPORTED)
set_target_properties(libopencv_java3 PROPERTIES IMPORTED_LOCATION
            ${CMAKE_SOURCE_DIR}/libs/${ANDROID_ABI}/libopencv_java3.so)

add_library( # Sets the name of the library.
             native-lib

             # Sets the library as a shared library.
             SHARED

             # Provides a relative path to your source file(s).
             src/main/cpp/native-lib.cpp )

find_library( # Sets the name of the path variable.
              log-lib

              # Specifies the name of the NDK library that
              # you want CMake to locate.
              log )

target_link_libraries( # Specifies the target library.
                       native-lib libopencv_java3

                       # Links the target library to the log library
                       # included in the NDK.
                       ${log-lib} )
include_directories 函数设置了include文件夹的路径 ;
add_library 函数设置库名和类型,其中libopencv_java3 是用户自定义的变量名,前后保持一致即可,SHARE 表示引入的库是动态链接库 ;
set_target_properties 设置了OpenCV的动态链接库的路径 ;
target_link_libraries 具有依赖关系的动态库链接到指定目标上,链接顺序需符合gcc链接规则,这里我们把libopencv_java3和log链接到了native-lib上。
至此,所有的配置完成,简而言之,就是将so文件加入到libs文件夹下,在gradle中配置第三方库路径,最后在CMakelist.txt中设置链接库路径。
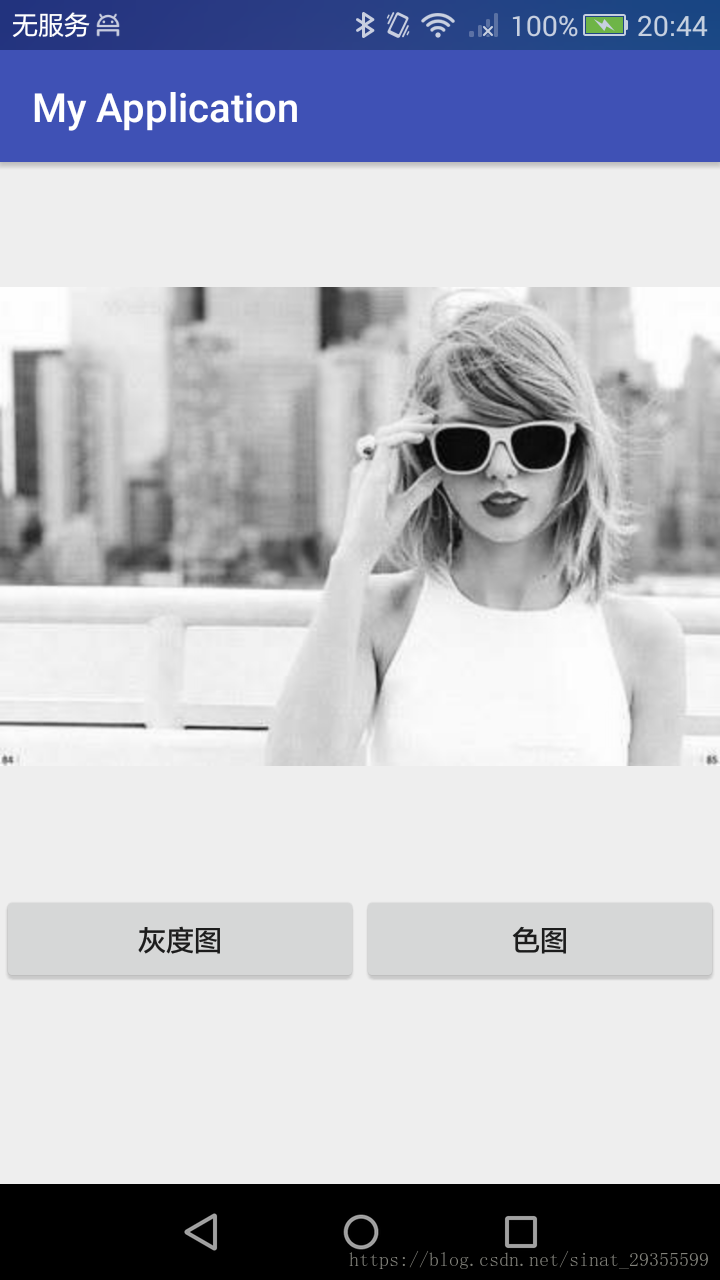
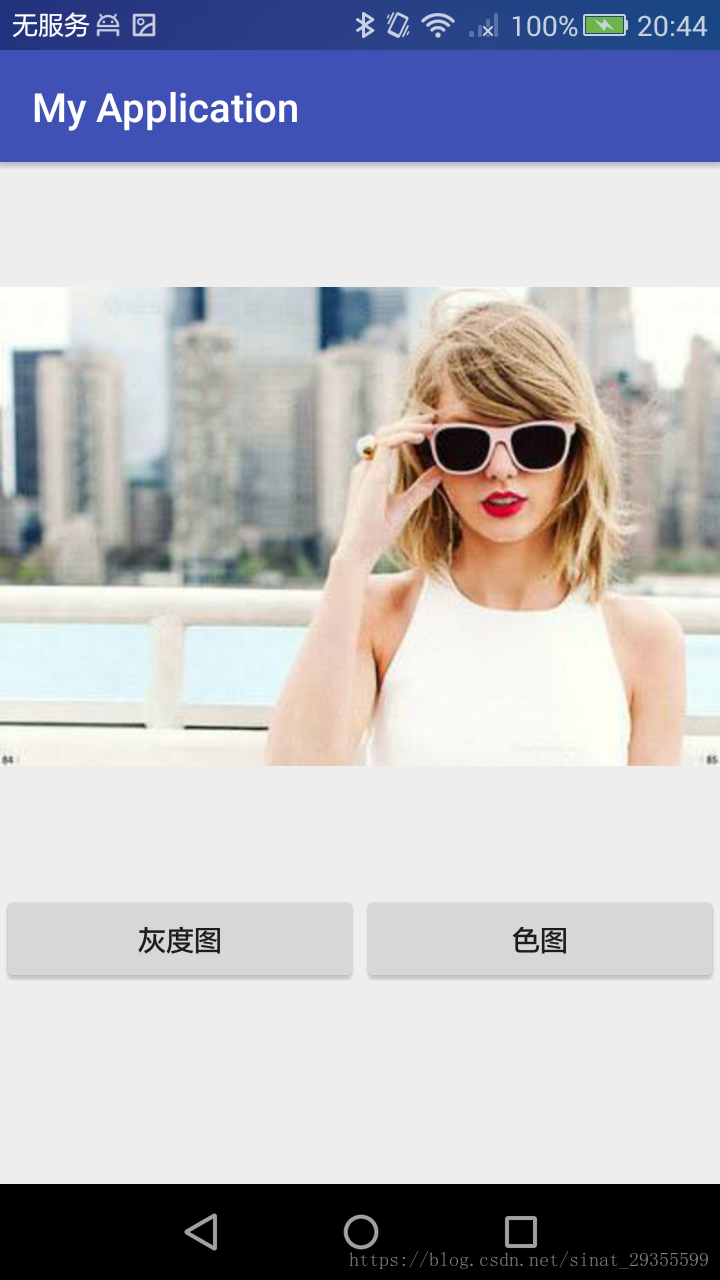
4、测试demo(灰度化一张图片)
首先选定一张测试图片放入到src/main/res/drawable 下;
1、 MainActivity.java文件
package com.example.myapplication;

import android.graphics.Bitmap;
import android.graphics.BitmapFactory;
import android.support.v7.app.AppCompatActivity;
import android.os.Bundle;
import android.view.View;
import android.widget.Button;
import android.widget.ImageView;
import android.widget.TextView;

public class MainActivity extends AppCompatActivity implements View.OnClickListener{

    // Used to load the 'native-lib' library on application startup.
    static {
        System.loadLibrary("native-lib");
    }

    private Button btn_1;
    private Button btn_2;
    private ImageView imageView;
    private Bitmap bitmap;

    @Override
    protected void onCreate(Bundle savedInstanceState) {
        super.onCreate(savedInstanceState);
        setContentView(R.layout.activity_main);
        btn_1 = (Button)findViewById(R.id.button_1);
        imageView = (ImageView)findViewById(R.id.image);
        bitmap = BitmapFactory.decodeResource(getResources(),R.drawable.ts);
        imageView.setImageBitmap(bitmap);
        btn_1.setOnClickListener(this);

        btn_2 = (Button)findViewById(R.id.button_2);
        btn_2.setOnClickListener(this);
    }
    public void showImage(){
        bitmap = BitmapFactory.decodeResource(getResources(),R.drawable.ts);
        imageView.setImageBitmap(bitmap);
    }

    public void gray(){
        int w = bitmap.getWidth();
        int h = bitmap.getHeight();
        int[] piexls = new int[w*h];
        bitmap.getPixels(piexls,0,w,0,0,w,h);
        int[] resultData =Bitmap2Grey(piexls,w,h);
        Bitmap resultImage = Bitmap.createBitmap(w,h, Bitmap.Config.ARGB_8888);
        resultImage.setPixels(resultData,0,w,0,0,w,h);
        imageView.setImageBitmap(resultImage);
    }

    @Override
    public void onClick(View view){
        switch(view.getId()){
            case R.id.button_1:showImage();break;
            case R.id.button_2:gray();break;
        }
    }

    /**
     * A native method that is implemented by the 'native-lib' native library,
     * which is packaged with this application.
     */
    public native int[] Bitmap2Grey(int[] pixels,int w,int h);

    @Override
    public void onResume(){
        super.onResume();
    }
}
2、native-lib.cpp文件(在cpp文件下新建的)
注意:一定要与java中的native方法相对应,为了方便,可以用javah -jni命令生成头文件,直接复制里面的方法以免出错。不然可能会出现No implementation found for native 以及 java.lang.UnsatisfiedLinkError。
#include <jni.h>
#include<opencv2/opencv.hpp>
#include<iostream>
using namespace cv;
using namespace std;

extern "C"
JNIEXPORT jintArray JNICALL
Java_com_example_myapplication_MainActivity_Bitmap2Grey(JNIEnv *env, jobject mobject/* this */,jintArray buf,jint w,jint h) {
    jint *cbuf;
    jboolean ptfalse = false;
    cbuf = env->GetIntArrayElements(buf, &ptfalse);
    if(cbuf == NULL){
        return 0;
    }

    Mat imgData(h, w, CV_8UC4, (unsigned char*)cbuf);
    // 注意,Android的Bitmap是ARGB四通道,而不是RGB三通道
    cvtColor(imgData,imgData,CV_BGRA2GRAY);
    cvtColor(imgData,imgData,CV_GRAY2BGRA);

    int size=w * h;
    jintArray result = env->NewIntArray(size);
    env->SetIntArrayRegion(result, 0, size, (jint*)imgData.data);
    env->ReleaseIntArrayElements(buf, cbuf, 0);
    return result;
}
3、 activity_main.xml
<?xml version="1.0" encoding="utf-8"?>
<LinearLayout xmlns:android="http://schemas.android.com/apk/res/android"
    xmlns:app="http://schemas.android.com/apk/res-auto"
    xmlns:tools="http://schemas.android.com/tools"
    android:layout_width="match_parent"
    android:layout_height="match_parent"
    android:orientation="vertical"
    tools:context=".MainActivity">

    <LinearLayout
        android:layout_width="match_parent"
        android:layout_height="wrap_content"
        android:layout_weight="1"
        android:orientation="vertical">

        <ImageView
            android:id="@+id/image"
            android:layout_width="match_parent"
            android:layout_height="match_parent"
            android:layout_weight="1"
            app:srcCompat="@drawable/ts" />
    </LinearLayout>

    <LinearLayout
        android:layout_width="match_parent"
        android:layout_height="wrap_content"
        android:layout_weight="1"
        android:orientation="horizontal">

        <Button
            android:id="@+id/button_2"
            android:layout_width="match_parent"
            android:layout_height="wrap_content"
            android:layout_weight="1"
            android:text="灰度图" />

        <Button
            android:id="@+id/button_1"
            android:layout_width="match_parent"
            android:layout_height="wrap_content"
            android:layout_weight="1"
            android:text="色图" />
    </LinearLayout>

</LinearLayout>