一、安装
$ npm install -g create-react-app
或者
$ npm install -g create-react-app yarn
二、创建react应用
create-react-app是全局命令来创建react项目
$ create-react-app react-cli-demo
$ create-react-app react-cli-demo
Creating a new React app in G:\GitHub\React-demo\react-cli-demo.

Installing packages. This might take a couple of minutes.
Installing react, react-dom, and react-scripts...
1、主要依赖react,react-dom,react-scripts
2、生成目录结构

create-react-app生成项目目录结构
3、package.json

package.json
没有配置文件(webpack.config.js)
三、npm 命令
1、npm start / yarn start
"start": "react-scripts start"
不是熟悉的"node scripts/start.js"
2、react-scripts 是什么?
react-scripts是create-react-app生成项目所有的依赖。
通常情况下,我们创建spa应用时是使用npm安装项目依赖,在通过配置webpack.config.js进行配置,搭建好环境后在src编写源代码。而create-react-app是自动构建,在package.json中只有react-scripts作为依赖,而在reacr-scripts中已经配置好了项目所有需要的。
有一下支持:
React, JSX, ES6, and Flow syntax support.
Language extras beyond ES6 like the object spread operator.
Import CSS and image files directly from JavaScript.
Autoprefixed CSS, so you don’t need -webkit or other prefixes.
A build script to bundle JS, CSS, and images for production, with sourcemaps.
A dev server that lints for common errors.
从react,es6,babel,webpack编辑到打包,react-scripts都做了。
3、react-scripts源码
打开mode-modules\react-scripts\bin \react-scripts.js
'use strict';

const spawn = require('react-dev-utils/crossSpawn');
const args = process.argv.slice(2);

const scriptIndex = args.findIndex(
  x => x === 'build' || x === 'eject' || x === 'start' || x === 'test'
);
const script = scriptIndex === -1 ? args[0] : args[scriptIndex];
const nodeArgs = scriptIndex > 0 ? args.slice(0, scriptIndex) : [];

switch (script) {
  case 'build':
  case 'eject':
  case 'start':
  case 'test': {
    const result = spawn.sync(
      'node',
      nodeArgs
        .concat(require.resolve('../scripts/' + script)) //根据npm命令引用不同文件
        .concat(args.slice(scriptIndex + 1)),
      { stdio: 'inherit' }
    );
    if (result.signal) {
      if (result.signal === 'SIGKILL') {
        console.log(
          'The build failed because the process exited too early. ' +
            'This probably means the system ran out of memory or someone called ' +
            '`kill -9` on the process.'
        );
      } else if (result.signal === 'SIGTERM') {
        console.log(
          'The build failed because the process exited too early. ' +
            'Someone might have called `kill` or `killall`, or the system could ' +
            'be shutting down.'
        );
      }
      process.exit(1);
    }
    process.exit(result.status);
    break;
  }
  default:
    console.log('Unknown script "' + script + '".');
    console.log('Perhaps you need to update react-scripts?');
    console.log(
      'See: https://github.com/facebookincubator/create-react-app/blob/master/packages/react-scripts/template/README.md#updating-to-new-releases'
    );
    break;
}

-------------------------scripts文件---------------
// start.js
'use strict';

// Do this as the first thing so that any code reading it knows the right env.
process.env.BABEL_ENV = 'development';
process.env.NODE_ENV = 'development';

// Makes the script crash on unhandled rejections instead of silently
// ignoring them. In the future, promise rejections that are not handled will
// terminate the Node.js process with a non-zero exit code.
process.on('unhandledRejection', err => {
  throw err;
});

// Ensure environment variables are read.
require('../config/env');

const fs = require('fs');
const chalk = require('chalk');
const webpack = require('webpack'); //引入webpack
const WebpackDevServer = require('webpack-dev-server'); // 引入webpack-dev-server
const clearConsole = require('react-dev-utils/clearConsole');
const checkRequiredFiles = require('react-dev-utils/checkRequiredFiles');
const {
  choosePort,
  createCompiler,
  prepareProxy,
  prepareUrls,
} = require('react-dev-utils/WebpackDevServerUtils');
const openBrowser = require('react-dev-utils/openBrowser');
const paths = require('../config/paths'); //文件路径
const config = require('../config/webpack.config.dev');
const createDevServerConfig = require('../config/webpackDevServer.config');

const useYarn = fs.existsSync(paths.yarnLockFile);
const isInteractive = process.stdout.isTTY;

// Warn and crash if required files are missing
if (!checkRequiredFiles([paths.appHtml, paths.appIndexJs])) {
  process.exit(1);
}

// Tools like Cloud9 rely on this.
const DEFAULT_PORT = parseInt(process.env.PORT, 10) || 3000; // 端口3000,可以修改在执行npm run start
const HOST = process.env.HOST || '0.0.0.0';

if (process.env.HOST) {
  console.log(
    chalk.cyan(
      `Attempting to bind to HOST environment variable: ${chalk.yellow(
        chalk.bold(process.env.HOST)
      )}`
    )
  );
  console.log(
    `If this was unintentional, check that you haven't mistakenly set it in your shell.`
  );
  console.log(`Learn more here: ${chalk.yellow('http://bit.ly/2mwWSwH')}`);
  console.log();
}

// We attempt to use the default port but if it is busy, we offer the user to
// run on a different port. `choosePort()` Promise resolves to the next free port.
choosePort(HOST, DEFAULT_PORT)
  .then(port => {
    if (port == null) {
      // We have not found a port.
      return;
    }
    const protocol = process.env.HTTPS === 'true' ? 'https' : 'http';
    const appName = require(paths.appPackageJson).name;
    const urls = prepareUrls(protocol, HOST, port);
    // Create a webpack compiler that is configured with custom messages.
    const compiler = createCompiler(webpack, config, appName, urls, useYarn);
    // Load proxy config
    const proxySetting = require(paths.appPackageJson).proxy;
    const proxyConfig = prepareProxy(proxySetting, paths.appPublic);
    // Serve webpack assets generated by the compiler over a web sever.
    const serverConfig = createDevServerConfig(
      proxyConfig,
      urls.lanUrlForConfig
    );
    const devServer = new WebpackDevServer(compiler, serverConfig);
    // Launch WebpackDevServer.
    devServer.listen(port, HOST, err => {
      if (err) {
        return console.log(err);
      }
      if (isInteractive) {
        clearConsole();
      }
      console.log(chalk.cyan('Starting the development server...\n'));
      openBrowser(urls.localUrlForBrowser);
    });

    ['SIGINT', 'SIGTERM'].forEach(function(sig) {
      process.on(sig, function() {
        devServer.close();
        process.exit();
      });
    });
  })
  .catch(err => {
    if (err && err.message) {
      console.log(err.message);
    }
    process.exit(1);
  });
4、npm run eject命令
单向操作不可逆,npm eun eject命令暴露项目的配置,可以自由配置项目所需的依赖,不使用的版本零配置即可开发。

npm run eject后文件目录

npm run eject / yarn eject 后package.json文件。
执行eject后,整个项目结构和配置和平时开发就没什么区别了。eject英文是“逐出”。
注意:使用eject后,必须要执行一次命令
$ yarn
因为“逐出”后,包可能不全,需要重新下载。
5、build 打包
1、执行打包命令
$ yarn build

打包后,直接点击index.html是不可以正常显示的,必须放到server的根目录下运行。
根目录是指:http://ip地址:port(端口号)/index.html
2、homepage 属性。
应用场景:本地访问,不限制目录访问。
例如多层目录:http://ip地址:port(端口号)/XXXX/index.html
那么需要在package.json里添加 homepage 属性。
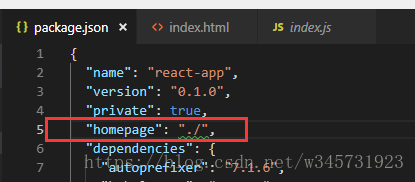
执行打包命令后,双击index.html就可以打开访问了。
作者:芒果加奶
链接:https://www.jianshu.com/p/c6040430b18d
來源:简书
简书著作权归作者所有,任何形式的转载都请联系作者获得授权并注明出处。
本文转载了大部分内容,也补充了一些自己的东西,留作参考。