一 :由于 npm 安装速度慢,本教程使用了淘宝的镜像及其命令 cnpm,安装使用介绍参照:使用淘宝 NPM 镜像。
npm 版本需要大于 3.0,如果低于此版本需要升级它:
# 查看版本
$ npm -v
2.3.0

#升级 npm
cnpm install npm -g
在用 Vue.js 构建大型应用时推荐使用 NPM 安装:
# 最新稳定版
$ cnpm install vue
命令行工具
Vue.js 提供一个官方命令行工具,可用于快速搭建大型单页应用。
# 全局安装 vue-cli
$ cnpm install --global vue-cli
# 创建一个基于 webpack 模板的新项目
$ vue init webpack my-project
# 这里需要进行一些配置,默认回车即可
This will install Vue 2.x version of the template.

For Vue 1.x use: vue init webpack#1.0 my-project

? Project name my-project
? Project description A Vue.js project
? Author runoob <[email protected]>
? Vue build standalone
? Use ESLint to lint your code? Yes
? Pick an ESLint preset Standard
? Setup unit tests with Karma + Mocha? Yes
? Setup e2e tests with Nightwatch? Yes

   vue-cli · Generated "my-project".

   To get started:

     cd my-project
     npm install
     npm run dev

   Documentation can be found at https://vuejs-templates.github.io/webpack
进入项目,安装并运行:
$ cd my-project
$ cnpm install
$ cnpm run dev
 DONE  Compiled successfully in 4388ms

> Listening at http://localhost:8080
成功执行以上命令后访问 http://localhost:8080/,输出结果如下所示:

二:引用组件
在前面我们打开 APP.vue 文件,代码如下(解释在注释中):
src/APP.vue
<template>
  <div id="app">
    <img src="./assets/logo.png">
    <hello></hello>
  </div>
</template>

<script>
// 导入组件
import Hello from './components/Hello'

export default {
  name: 'app',
  components: {
    Hello
  }
}
</script>
<!-- 样式代码 -->
<style>
#app {
  font-family: 'Avenir', Helvetica, Arial, sans-serif;
  -webkit-font-smoothing: antialiased;
  -moz-osx-font-smoothing: grayscale;
  text-align: center;
  color: #2c3e50;
  margin-top: 60px;
}
</style>
接下来我们可以尝试修改下初始化的项目,将 Hello.vue 修改为以下代码:
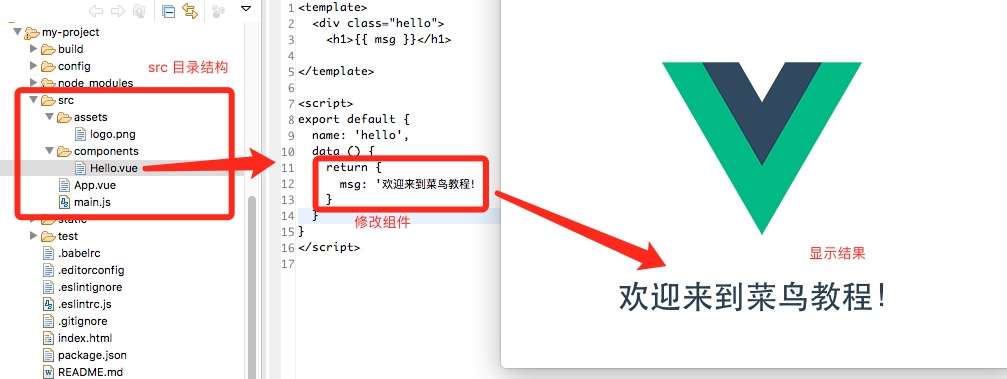
src/components/Hello.vue
<template>
  <div class="hello">
    <h1>{{ msg }}</h1>
  </div>
</template>

<script>
export default {
  name: 'hello',
  data () {
    return {
      msg: '欢迎来到菜鸟教程!'
    }
  }
}
</script>
重新打开页面 http://localhost:8080/,一般修改后会自动刷新,显示效果如下所示: