1 在pom.xml中添加依赖,
1.1 在dependencies中配置:
<dependency>
      <groupId>org.apache.avro</groupId>
      <artifactId>avro</artifactId>
      <version>1.8.2</version>
    </dependency>
    <dependency>
      <groupId>org.apache.avro</groupId>
      <artifactId>avro-tools</artifactId>
      <version>1.8.2</version>
    </dependency>
    <dependency>
      <groupId>org.apache.avro</groupId>
      <artifactId>avro-maven-plugin</artifactId>
      <version>1.8.2</version>
    </dependency>
    <dependency>
      <groupId>org.apache.avro</groupId>
      <artifactId>avro-compiler</artifactId>
      <version>1.8.2</version>
    </dependency>
1.2 在<build>中配置,注意不要加<pluginManagement></pluginManagement>:
<build>
      <plugins>
        <plugin>
          <groupId>org.apache.avro</groupId>
          <artifactId>avro-maven-plugin</artifactId>
          <version>1.8.2</version>
          <executions>
            <execution>
              <phase>generate-sources</phase>
              <goals>
                <goal>schema</goal>
              </goals>
              <configuration>
                <sourceDirectory>${project.basedir}/src/main/avro/</sourceDirectory>
                <outputDirectory>${project.basedir}/src/main/java/</outputDirectory>
              </configuration>
            </execution>
          </executions>
        </plugin>
        <plugin>
          <groupId>org.apache.maven.plugins</groupId>
          <artifactId>maven-compiler-plugin</artifactId>
          <configuration>
            <source>1.8</source>
            <target>1.8</target>
          </configuration>
        </plugin>
      </plugins>
  </build>
2 定义avro的scheme
2.1 Avro scheme是通过JSON形式来定义的,一般以.avsc结尾(maven插件会去指定目录下获取.avsc结尾的文件并生成成java文件)。
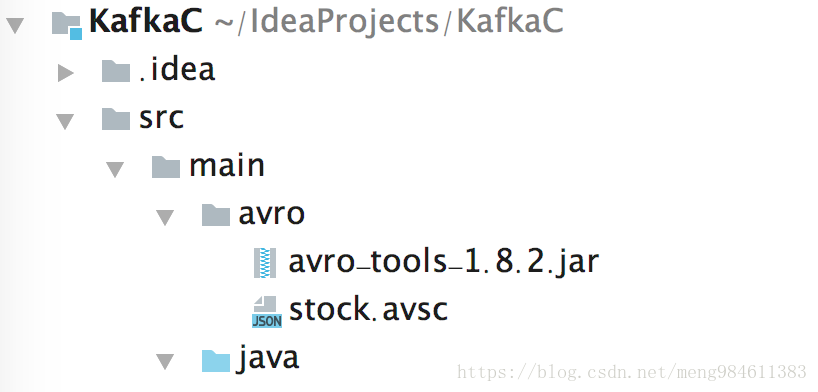
stock.avsc内容如下:
namespace —— 生成的java文件的包
type —— record
name —— 生成类的名字
fields —— 字段名和类型
{
"namespace":"org.sunny.avroDAO",
"type":"record",
"name":"StockAvroBean",
"fields":[
{"name":"stockCode","type":"string"},
{"name":"stockName","type":"string"},
{"name":"tradeTime","type":"long"},
{"name":"preclosePrice","type":"float"},
{"name":"openPrice","type":"float"},
{"name":"currentPrice","type":"float"}
]
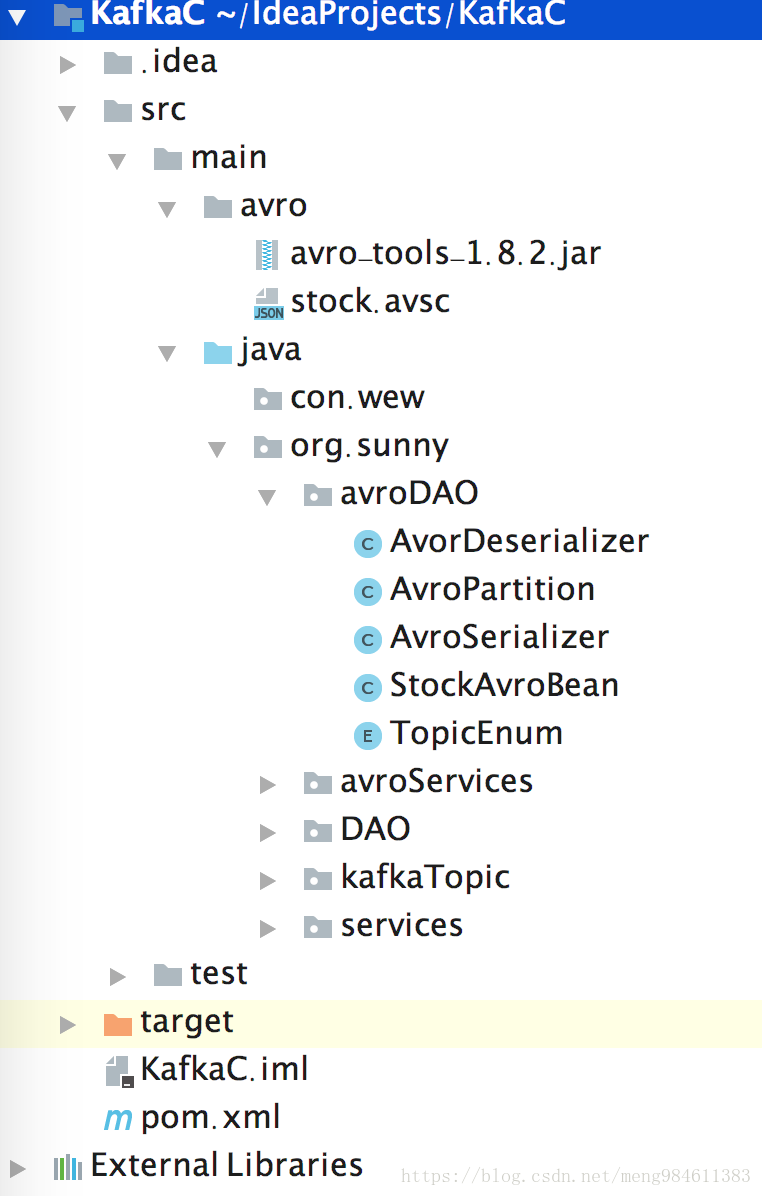
}2.2 利用*.avsc文件生成.java文件,IDEA->Tool Window->Maven Projects-> compile或者install都可以,在namespace的包下生成name.java文件(StockAvroBean.java)。
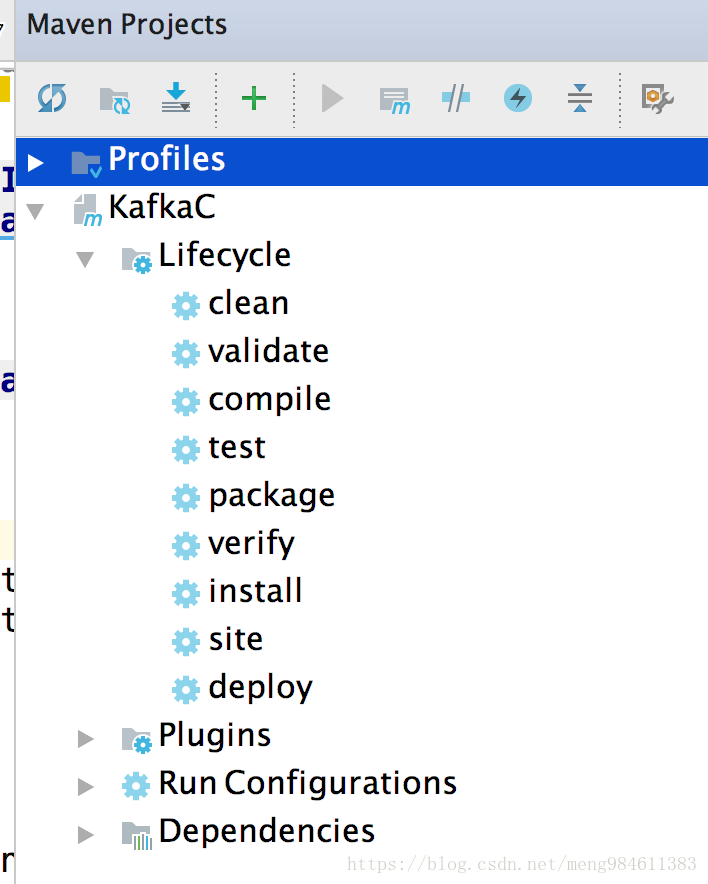
StockAvroBean.java是org.apache.avro.specific.SpecificRecordBase的子类。
另外,avro提供了一个avro-tools包来生成java文件,可以通过下面命令:
java -jar /path/to/avro-tools-1.8.0.jar compile schema <schema file> <destination>这也是为什么没有avro/avro-tools-1.8.2.jar出现在avro文件夹中的原因。
3 实现序列化.class、反序列化.class,同时,为了方便起见,定义TopicEnum枚举类实现topic和value的class之间的映射。
3.1 序列化:
import org.apache.avro.io.BinaryEncoder;
import org.apache.avro.io.DatumWriter;
import org.apache.avro.io.EncoderFactory;
import org.apache.avro.specific.SpecificDatumWriter;
import org.apache.avro.specific.SpecificRecordBase;
import org.apache.kafka.common.serialization.Serializer;

import java.io.ByteArrayOutputStream;
import java.io.IOException;
import java.util.Map;

/**
 * 序列化
 * @param <T>
 */
public class AvroSerializer<T extends SpecificRecordBase> implements Serializer<T> {
    @Override
    public void configure(Map<String, ?> map, boolean b) {}

    @Override
    public byte[] serialize(String topic, T data) {
        if (data == null){
            return null;
        }
        DatumWriter<T> writer = new SpecificDatumWriter<>(data.getSchema());  //将data的schema装进去
        ByteArrayOutputStream outputStream = new ByteArrayOutputStream();
        BinaryEncoder encoder = EncoderFactory.get().directBinaryEncoder(outputStream,null);
        try {
            writer.write(data,encoder);
        }catch (IOException e){
            e.printStackTrace();
        }
        return outputStream.toByteArray();
    }

    @Override
    public void close() {}
}
3.2 反序列化:
import org.apache.avro.io.*;
import org.apache.avro.specific.SpecificDatumReader;
import org.apache.avro.specific.SpecificRecordBase;
import org.apache.kafka.common.serialization.Deserializer;

import java.io.ByteArrayInputStream;
import java.io.IOException;
import java.util.Map;

/**
 * 反序列化
 */
public class AvorDeserializer<T extends SpecificRecordBase> implements Deserializer<T> {

    @Override
    public void configure(Map<String, ?> map, boolean b) {}

    @Override
    public T deserialize(String topic, byte[] data) {
        if (data == null){
            return null;
        }
        try {
            //得到主题对应的数据类型
            TopicEnum topicEnum = TopicEnum.getTopicEnum(topic);
            if (topicEnum == null){
                return null;
            }

            SpecificRecordBase record = topicEnum.getRecord();
            DatumReader<T> datumReader = new SpecificDatumReader<>(record.getSchema());
            ByteArrayInputStream byteArrayInputStream = new ByteArrayInputStream(data);
            BinaryDecoder decoder = DecoderFactory.get().directBinaryDecoder(byteArrayInputStream,null);
            return  datumReader.read(null,decoder);

        }catch (IOException e){
            e.printStackTrace();
        }
        return null;
    }

    @Override
    public void close() {}
}
3.3 TopicEnum:将topic和value对应的class文件进行关联:
import org.apache.avro.specific.SpecificRecordBase;
import org.apache.commons.lang.StringUtils;

/**
 * 将topic和value对应的类对应起来
 */
public enum TopicEnum {
    STOCK_AVOR("avro-kafka",new StockAvroBean()); //实例

    private String topic;
    private SpecificRecordBase record;

    private TopicEnum(String topic,SpecificRecordBase record){
        this.topic = topic;
        this.record = record;
    }
    ...Getter and Setter...
    public static TopicEnum getTopicEnum(String topicName){
        if (topicName.isEmpty()){
            return null;
        }

        for (TopicEnum topicEnum : values()){
            if (StringUtils.equalsIgnoreCase(topicEnum.getTopic(),topicName)){
                return topicEnum;
            }
        }
        return null;
    }
}
4 在Producer和Consumer中配置属性
消费者的配置部分:
public class AvroConsumer {
    private static final String BOOTSTRAP_SERVER = "LOCALHOST:9092";

    private Properties initConfig(){
        Properties config = new Properties();
        config.put(ConsumerConfig.BOOTSTRAP_SERVERS_CONFIG,BOOTSTRAP_SERVER);
        config.put(ConsumerConfig.ENABLE_AUTO_COMMIT_CONFIG,false);
        config.put(ConsumerConfig.GROUP_ID_CONFIG,"avro-group");
        config.put(ConsumerConfig.KEY_DESERIALIZER_CLASS_CONFIG, StringDeserializer.class.getName());
        config.put(ConsumerConfig.VALUE_DESERIALIZER_CLASS_CONFIG, AvorDeserializer.class.getName());
        return config;
    }
}
生产者的配置部分:
public class AvroProducer {
    private static final String BROKER_LIST = "localhost:9092";

    public AvroProducer(String[] topics){
        this.topics = topics;
    }

    private static Properties initconfig(){
        Properties config = new Properties();
        config.put(ProducerConfig.BOOTSTRAP_SERVERS_CONFIG,BROKER_LIST);//broker_list
        config.put(ProducerConfig.KEY_SERIALIZER_CLASS_CONFIG, StringSerializer.class.getName());
        config.put(ProducerConfig.VALUE_SERIALIZER_CLASS_CONFIG, AvroSerializer.class.getName());
        config.put(ProducerConfig.PARTITIONER_CLASS_CONFIG,AvroPartition.class.getName()); //自定义的分区准则
        return config;
    }
}
题外话,上面自定义的分区准则,是通过继承org.apache.kafka.client.producer.Partition实现的,下面提供一种实现方法:
import org.apache.kafka.clients.producer.Partitioner;
import org.apache.kafka.common.Cluster;
import java.util.Map;

/**
 * 实现自己的分区逻辑
 */
public class AvroPartition implements Partitioner {
    @Override
    public int partition(String topic, Object key, byte[] keybytes, Object value, byte[] valuebytes, Cluster cluster) {
        if (key==null){
            return 0;
        }
        String partitionKey = key.toString();
        try {
            //根据key的最后一位和partitions取模,设置分区
           int partitionID = Integer.valueOf(partitionKey.substring(partitionKey.length()-2)) % 6;
           System.out.println(partitionID);

           return partitionID;
        }catch (Exception e){
            e.printStackTrace();
        }
        return 0;
    }

    @Override
    public void close() {}

    @Override
    public void configure(Map<String, ?> map) {}
}
参考文章: