openvpn 2.2 /2.4
转: https://my.oschina.net/Ysolin/blog/889375 安装openvpn篇 (最好是以用户/密码的方式登陆)
OpenVPN生产环境中实战部署及客户端使用


OpenVPN生产环境中实战部署及客户端使用
OpenVPN环境部署
1、环境需求
| 设备 |
IP |
| 个人PC,VPN客户端 |
eth0:192.168.119.0/24 |
| OpenVPN Server |
eth0:192.168.239.167;eth1:192.168.119.83 |
| 局域网服务器 |
eth0:192.168.239.165 |
| 实现需求 |
在远端通过VPN客户端对VPN Server后端多个servers直接访问,管理维护 |
2、查看系统环境
| 1 2 3 4 5 6 |
|

4、配置VPN服务器时间同步
(1)安装ntp
| 1 |
|

(2)手动同步时间
| 1 2 |
|

(3)加入定时任务
| 1 2 3 4 5 |
|

安装OpenVPN相关依赖软件
1、建立OpenVPN软件目录
| 1 2 |
|
2、下载所需要的包
(1)下载依赖包
选择下载的版本:http://www.oberhumer.com/opensource/lzo/download/
我这里选择了lzo-2.06:http://www.oberhumer.com/opensource/lzo/download/lzo-2.06.tar.gz
| 1 2 |
|

(2)下载OpenVPN
选择下载版本:https://build.openvpn.net/downloads/releases/
openvpn-2.4.0:https://build.openvpn.net/downloads/releases/openvpn-2.4.0.tar.gz
这里选择了
| 1 |
|

3、安装
(1)编译安装vpn依赖
| 1 2 3 4 5 6 7 8 9 10 11 12 13 |
|

(2)编译安装VPN
| 1 2 3 4 5 6 7 8 9 10 11 12 13 14 15 16 17 18 19 20 21 22 23 |
|

配置OpenVPN server建立CA(Certificate Authority)证书
1、初始化配置
| 1 2 3 4 5 6 7 8 9 10 11 12 13 14 15 16 17 18 19 20 21 22 23 24 25 26 27 28 29 30 31 32 33 34 |
|

2、创建一个新的CA
| 1 2 3 4 5 6 7 8 9 10 11 12 13 14 15 16 17 18 19 20 21 22 23 24 25 26 27 28 |
|

生成服务器端证书和秘钥key文件
1、生成一个服务端的证书
| 1 2 3 4 5 6 7 8 9 10 11 12 13 14 15 16 17 18 19 20 21 22 23 24 25 26 27 28 29 30 31 32 33 34 35 36 37 38 39 40 41 42 |
|

查看生成的CA证书
| 1 2 3 4 5 6 7 8 9 10 11 12 13 |
|

生成客户端证书和key文件
(1)生成客户端证书秘钥
| 1 2 3 4 5 6 7 8 9 10 11 12 13 14 15 16 17 18 19 20 21 22 23 24 25 26 27 28 29 30 31 32 33 34 35 36 37 38 39 40 41 42 43 44 45 46 47 48 49 50 51 52 53 54 55 56 57 58 59 60 |
|

(2)生成客户端拨号需要密码的证书秘钥
| 1 2 3 4 5 6 7 8 9 10 11 12 13 14 15 16 17 18 19 20 21 22 23 24 25 26 27 28 29 30 31 32 33 34 35 36 37 38 39 40 41 42 43 44 |
|
生成generate diffie hellman parameter
生成传输进行秘钥交换时用到的交换秘钥协议文件
| 1 2 3 4 |
|

查看生成的证书
| 1 2 3 4 5 6 7 8 9 10 11 12 13 14 15 16 17 18 19 20 21 22 23 24 25 |
|

配置服务端VPN配置文件server.conf(服务端模板配置文件)
1、把所有的keys和配置文件拷贝到/etc/openvpn目录下
| 1 2 3 |
|
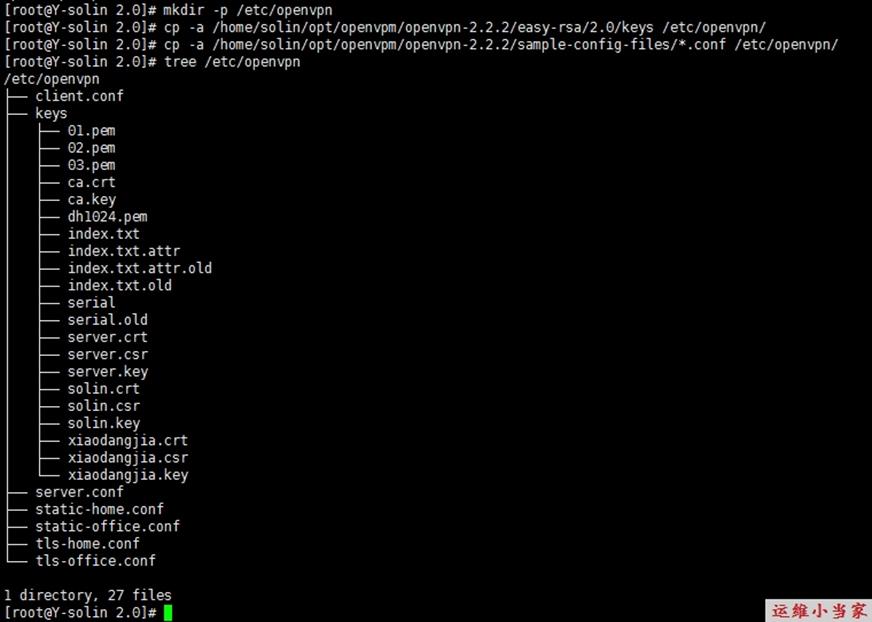
2、进入/etc/openvpn目录
备份server.conf文件
| 1 2 3 4 5 6 7 8 9 10 11 |
|
过滤出默认开启的配置
| 1 2 3 4 5 6 7 8 9 10 11 12 13 14 15 16 17 18 |
|
过滤内容追加到新文件
| 1 2 3 4 5 6 7 8 9 10 11 12 13 14 15 16 17 |
|

修改生成的配置文件
| 1 2 3 4 5 6 7 8 9 10 11 12 13 14 15 16 17 18 19 20 21 |
|

启动服务端的VPN服务
0、取消防火墙对VPN(1194,52115)的拦截
1、开启内核转发功能
(1)修改sysctl.conf
| 1 2 3 4 5 |
|

(2)配置生效
| 1 2 3 4 5 6 7 8 9 10 11 |
|

2、启动OpenVPN服务
| 1 2 |
|
3、检查VPN服务端口
| 1 2 3 4 5 |
|

4、设置开机自启动(两种方式)
方式一:修改rc.local配置文件
| 1 2 3 4 5 |
|
方式二:加入init.d目录下
注:solin-vpn.conf必须修改为server.conf才可实现
| 1 2 3 4 5 |
|

到这里服务端完全配置完毕!
安装WindowsVPN客户端配置VPN连接
1、下载安装客户端
官网下载:https://openvpn.net/index.php/download/58-open-source/downloads.html
下载与OpenVPN服务端版本一致的Windows客户端,如果版本不一致可能会导致连接失败。
我这里下载好了

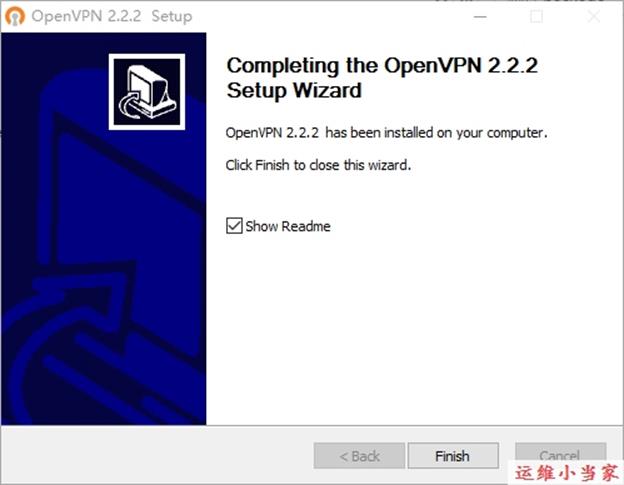
2、openvpn-2.2.2Windows客户端安装
(1)双加开始安装

(2)按默认配置安装就可以了
3、客户端配置
(1)备份client.conf配置文件
| 1 2 3 4 5 6 7 8 9 10 11 12 13 14 15 16 |
|
(2)过滤配置文件
| 1 2 3 4 5 6 7 8 9 10 11 12 13 14 15 |
|
(3)过滤内容追加为新的文件
| 1 2 3 4 5 6 7 8 9 10 11 12 13 14 15 16 |
|
(4)生产环境下配置
| 1 2 3 4 5 6 7 8 9 10 11 12 13 14 15 16 17 18 19 20 |
|

4、从服务器导出修改好的配置文件和证书文件
在OpenVPN安装目录(我的OpenVPN安装目录:D:\Tools\OpenVPN\config)的config文件夹下,新建client-solin文件夹,把配置好的配置文件和证书文件放在该目录中
| 1 |
|

5、修改配置文件client-solin.conf和证书文件client-solin.ovpn

6、同样的方式导出xiaodangjia配置文件和认证文件
(1)在我的安装目录D:\Tools\OpenVPN\config下,创建client-xiaodangjia文件夹,导入配置文件和认证文件

(2)连接拨号client-xiaodangjia,需要输入密码,连接成功

7、连接拨号
(1)双加打开VPN (2)拨号连接
 (3)连接成功显示绿色
下面贴出openvpn启动的配置文件 这个配置是用用户密码的形式来登陆的
local 172.17.10.12

port 52115

proto tcp

dev tun

ca /etc/openvpn/keys/ca.crt

key /etc/openvpn/keys/server.key

cert /etc/openvpn/keys/server.crt

dh /etc/openvpn/keys/dh1024.pem
tls-auth  /etc/openvpn/keys/ta.key  0

###client-cert-not-required
server 10.8.0.0 255.255.255.0

ifconfig-pool-persist ipp.txt

keepalive 10 120

comp-lzo

persist-key

persist-tun

status openvpn-status.log

verb 3

push "route 172.17.10.0 255.255.230.0"

client-to-client

log /var/log/openvpn.log
script-security 3  system
auth-user-pass-verify /etc/openvpn/checkpsw.sh via-env    #指定用户认证脚本
username-as-common-name
client-cert-not-required
/etc/openvpn/checkpsw.sh内容,后面的参数是固定的,我也不知道,就是参考这篇文章做的,http://www.89cool.com/811.html,但是这篇文章用的是2.4的版本;所以下面的参数是按照 https://blog.csdn.net/gcqcc848/article/details/54380788来做的
#!/bin/sh
###########################################################
# checkpsw.sh (C) 2004 Mathias Sundman <[email protected]>
#
# This script will authenticate OpenVPN users against
# a plain text file. The passfile should simply contain
# one row per user with the username first followed by
# one or more space(s) or tab(s) and then the password.

PASSFILE="/etc/openvpn/psw-file"
LOG_FILE="/etc/openvpn/openvpn-password.log"
TIME_STAMP=`date "+%Y-%m-%d %T"`

###########################################################

if [ ! -r "${PASSFILE}" ]; then
  echo "${TIME_STAMP}: Could not open password file \"${PASSFILE}\" for reading." >> ${LOG_FILE}
  exit 1
fi

CORRECT_PASSWORD=`awk '!/^;/&&!/^#/&&$1=="'${username}'"{print $2;exit}' ${PASSFILE}`

if [ "${CORRECT_PASSWORD}" = "" ]; then
  echo "${TIME_STAMP}: User does not exist: username=\"${username}\", password=\"${password}\"." >> ${LOG_FILE}
  exit 1
fi

if [ "${password}" = "${CORRECT_PASSWORD}" ]; then
  echo "${TIME_STAMP}: Successful authentication: username=\"${username}\"." >> ${LOG_FILE}
  exit 0
fi

echo "${TIME_STAMP}: Incorrect password: username=\"${username}\", password=\"${password}\"." >> ${LOG_FILE}
exit 1
/etc/openvpn/psw-file 这是给openvpn登陆时要输入的用户名密码。 格式如下
user1 passwd1
user2 passwd2