首先导入spring的jar包

1、创建web项目,创建spring.xml文件

注:base-package即是包名
spring.xml详情:
<?xml version="1.0" encoding="UTF-8"?>
<!-- 查找最新的schemaLocation 访问 http://www.springframework.org/schema/ -->
<beans xmlns="http://www.springframework.org/schema/beans"
xmlns:aop="http://www.springframework.org/schema/aop"
xmlns:context="http://www.springframework.org/schema/context"
xmlns:mvc="http://www.springframework.org/schema/mvc"
xmlns:tx="http://www.springframework.org/schema/tx"
xmlns:xsi="http://www.w3.org/2001/XMLSchema-instance"
xsi:schemaLocation="http://www.springframework.org/schema/aop
http://www.springframework.org/schema/aop/spring-aop-4.0.xsd
http://www.springframework.org/schema/beans
http://www.springframework.org/schema/beans/spring-beans-4.0.xsd
http://www.springframework.org/schema/context
http://www.springframework.org/schema/context/spring-context-4.0.xsd
http://www.springframework.org/schema/mvc
http://www.springframework.org/schema/mvc/spring-mvc-4.0.xsd
http://www.springframework.org/schema/tx
http://www.springframework.org/schema/tx/spring-tx-4.0.xsd">
<!-- 启用MVC注解 -->
<mvc:annotation-driven />
<!-- 静态资源文件,不会被Spring MVC拦截 -->
<mvc:resources location="/resources/" mapping="/resources/**"/>
<!-- 指定Sping组件扫描的基本包路径 -->
<context:component-scan base-package="com.trouller" >
<!-- 这里只扫描Controller,不可重复加载Service -->
<context:include-filter type="annotation" expression="org.springframework.stereotype.Controller"/>
</context:component-scan>
<!-- JSP视图解析器-->
<bean class="org.springframework.web.servlet.view.InternalResourceViewResolver">
<property name="prefix" value="/WEB-INF/views/" />
<property name="suffix" value=".jsp" />
<!-- 定义其解析视图的order顺序为1 -->
<property name="order" value="1" />
</bean>
</beans>
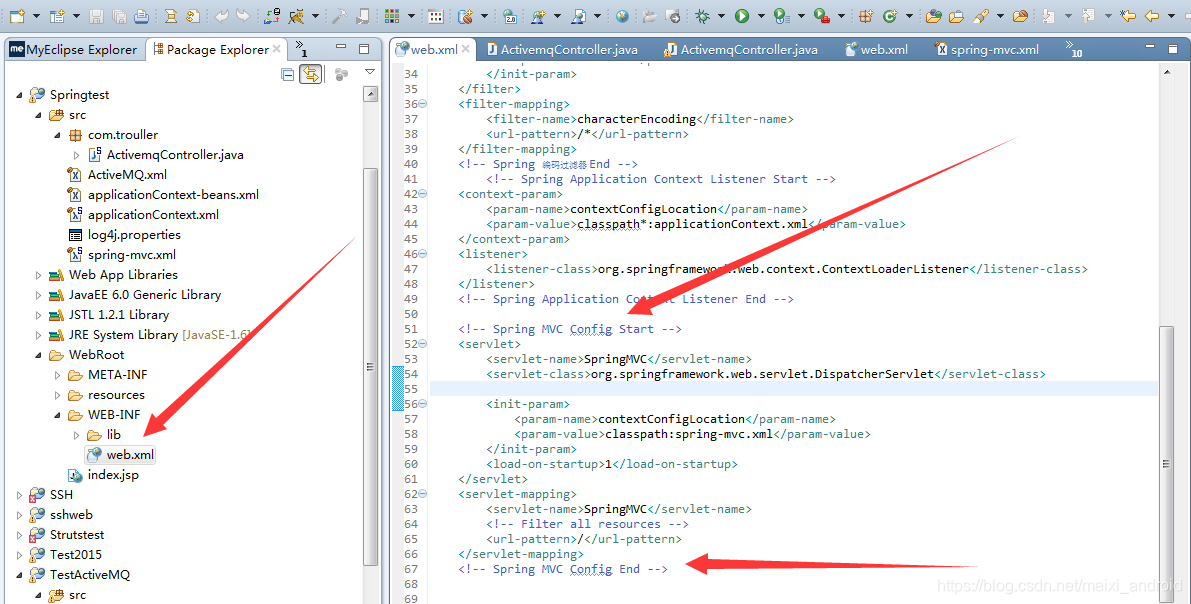
2、配置spring文件到web.xml文件下面
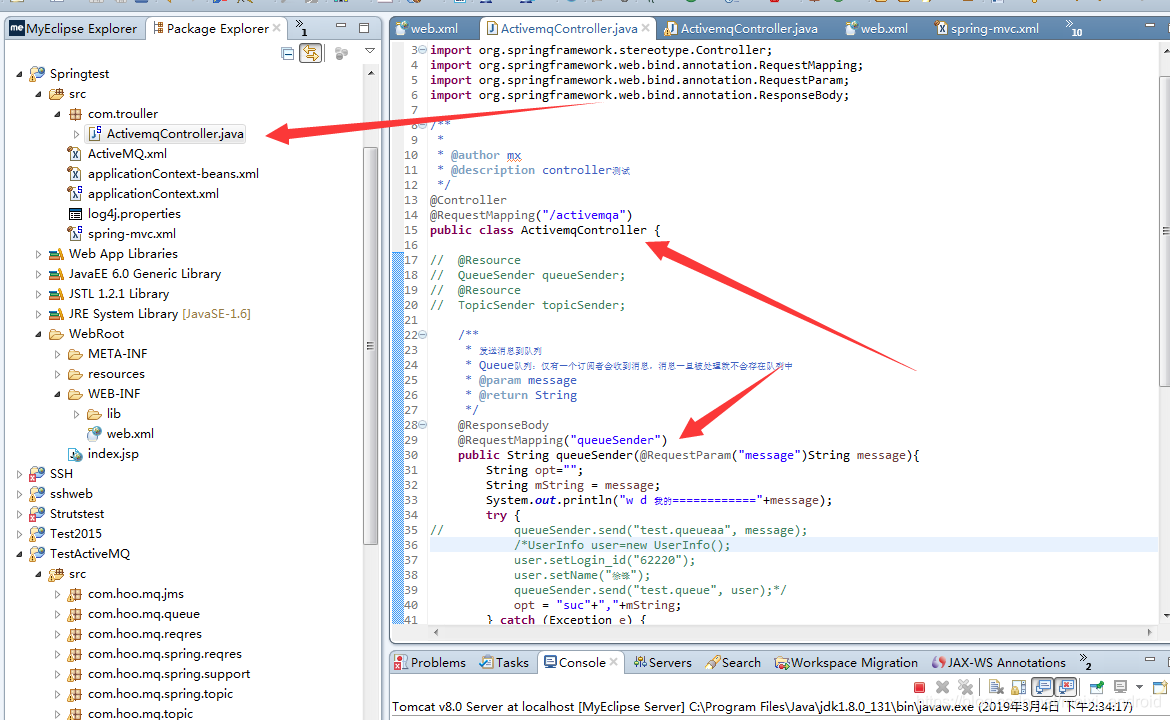
3、创建Controller类
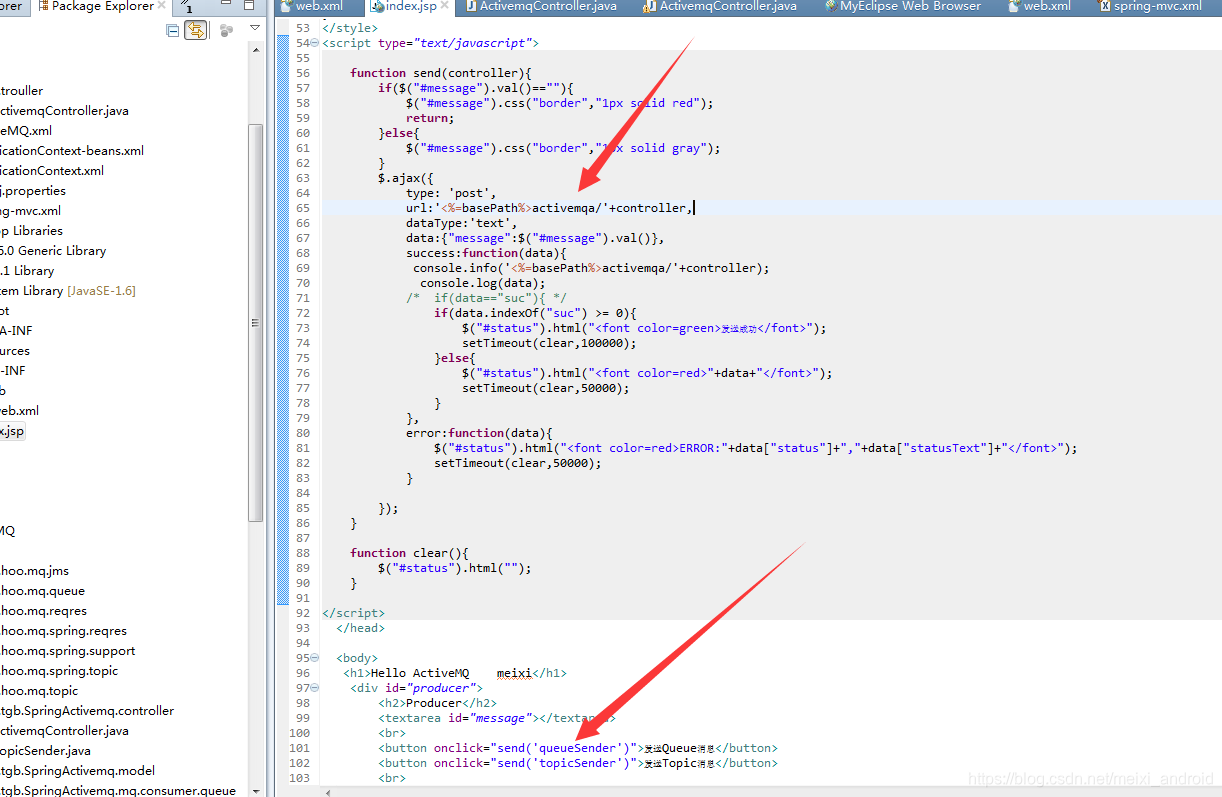
4、开始调用,通过映射直接调用到具体方法
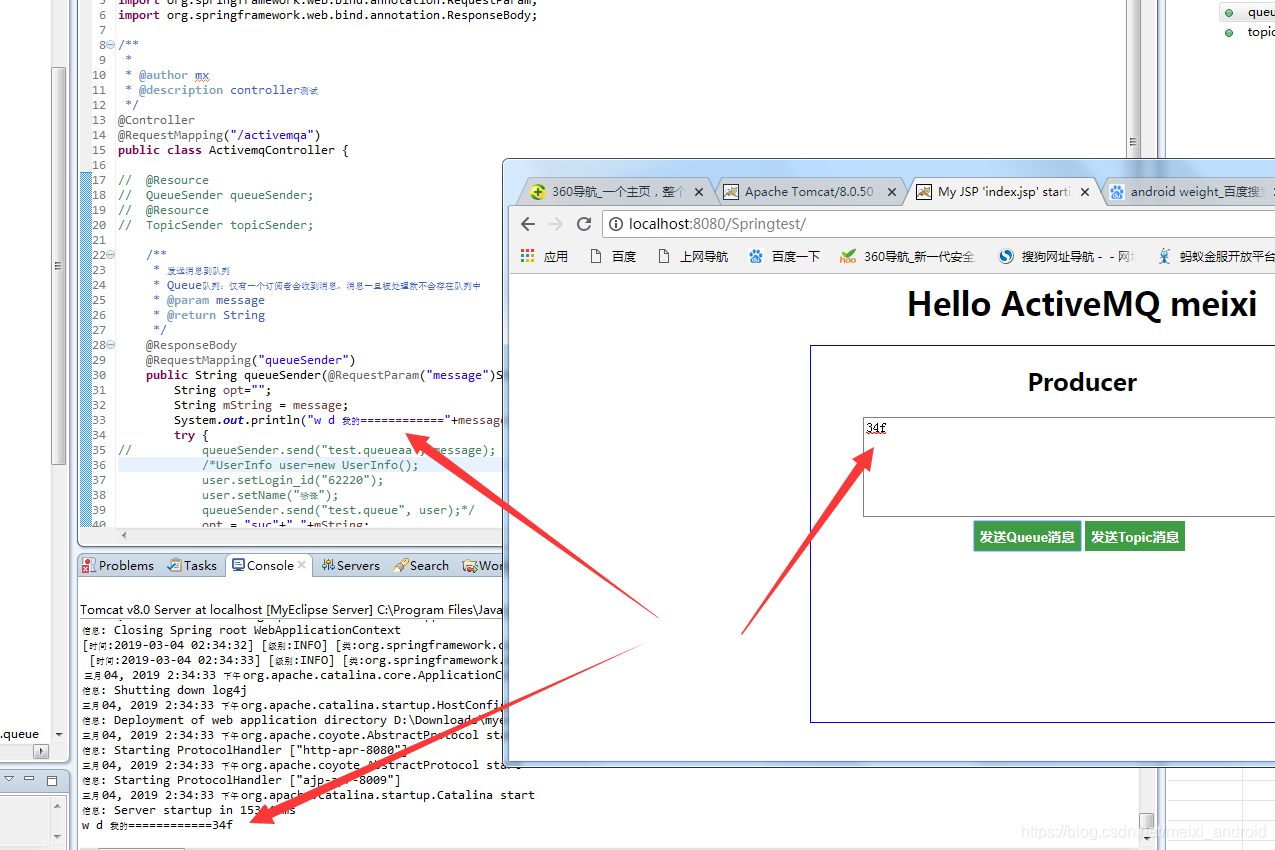
5、。运行结果
demo链接:https://download.csdn.net/download/meixi_android/10992622
在线回复bug:QQ1085220040