一、安装apache
安装
# yum install httpd -y
# rpm -qa httpd- 1
- 2
- 1
- 2
操作步骤:
[root@centos7-1 httpd]# cat /etc/centos-release
CentOS Linux release 7.2.1511 (Core)
[root@centos7-1 ~]# yum install httpd -y
Loaded plugins: fastestmirror
…………………………………………………………………………
Dependency Installed:
  httpd-tools.x86_64 0:2.4.6-45.el7.centos                         mailcap.noarch 0:2.1.41-2.el7

Complete!
[root@centos7-1 ~]# rpm -qa httpd
httpd-2.4.6-45.el7.centos.x86_64- 1
- 2
- 3
- 4
- 5
- 6
- 7
- 8
- 9
- 10
- 11
- 1
- 2
- 3
- 4
- 5
- 6
- 7
- 8
- 9
- 10
- 11
二、启动测试apache
1、启动apache
[root@centos7-1 ~]# systemctl start httpd.service- 1
- 1
2、查看是否启动成功
[root@centos7-1 ~]# ps -ef|grep httpd
root      1739     1  0 18:34 ?        00:00:00 /usr/sbin/httpd -DFOREGROUND
apache    1740  1739  0 18:34 ?        00:00:00 /usr/sbin/httpd -DFOREGROUND
apache    1741  1739  0 18:34 ?        00:00:00 /usr/sbin/httpd -DFOREGROUND
apache    1742  1739  0 18:34 ?        00:00:00 /usr/sbin/httpd -DFOREGROUND
apache    1743  1739  0 18:34 ?        00:00:00 /usr/sbin/httpd -DFOREGROUND
apache    1744  1739  0 18:34 ?        00:00:00 /usr/sbin/httpd -DFOREGROUND
root      1749  1112  0 18:37 pts/0    00:00:00 grep --color=auto httpd
[root@centos7-1 ~]# netstat -lntup|grep httpd
tcp6 0 0 :::80 :::* LISTEN 1739/httpd - 1
- 2
- 3
- 4
- 5
- 6
- 7
- 8
- 9
- 10
- 1
- 2
- 3
- 4
- 5
- 6
- 7
- 8
- 9
- 10
[root@centos7-1 ~]# echo "192.168.56.101 centos7-1.com www.centos7-1.com bbs.centos7-1.com blog.centos7-1.com">>/etc/hosts
[root@centos7-1 ~]# tail -1 /etc/hosts
192.168.56.101 centos7-1.com www.centos7-1.com bbs.centos7-1.com blog.centos7-1.com- 1
- 2
- 3
- 1
- 2
- 3
使用curl命令测试
[root@centos7-1 ~]# echo "http://www.$HOSTNAME">/var/www/html/index.html
[root@centos7-1 ~]# cat /var/www/html/index.html
http://www.centos7-1.com
[root@centos7-1 ~]# curl www.centos7-1.com
http://www.centos7-1.com- 1
- 2
- 3
- 4
- 5
- 1
- 2
- 3
- 4
- 5
三、配置apache
1、修改前备份文件
[root@centos7-1 ~]# cp /etc/httpd/conf/httpd.conf /etc/httpd/conf/httpd.conf.$(date +%F)
[root@centos7-1 ~]# ll /etc/httpd/conf/httpd.conf /etc/httpd/conf/httpd.conf.$(date +%F)
-rw-r--r-- 1 root root 11753 Nov 15 00:53 /etc/httpd/conf/httpd.conf
-rw-r--r-- 1 root root 11753 Jan 10 18:42 /etc/httpd/conf/httpd.conf.2017-01-10
[root@centos7-1 ~]# - 1
- 2
- 3
- 4
- 5
- 1
- 2
- 3
- 4
- 5
2、配置httpd文件
因为在apache2.4中变化挺大,和nginx一样,可以自定义.conf文件。
在主配置文件中启用虚拟主机
[root@centos7-1 httpd]# mkdir /etc/httpd/vhost.d/
[root@centos7-1 httpd]# echo "include vhost.d/*.conf"
[root@centos7-1 httpd]# tail -1 /etc/httpd/conf/httpd.conf
include vhost.d/*.conf- 1
- 2
- 3
- 4
- 1
- 2
- 3
- 4
虚拟主机配置文件
[root@centos7-1 httpd]# cat ./vhost.d/name.conf
<VirtualHost *:80>
    ServerAdmin admin@amsilence.com
    DocumentRoot "/var/html/www"
    ServerName www.centos7-1.com
    ErrorLog "/var/httpd/logs/www-error_log"
    CustomLog "/var/httpd/logs/www-access_log" common
</VirtualHost>

<Directory /var/html/www/>
Require all granted
</Directory>

<VirtualHost *:80>
    ServerAdmin admin@amsilence.com
    DocumentRoot "/var/html/bbs"
    ServerName bbs.centos7-1.com
    ErrorLog "/var/httpd/logs/bbs-error_log"
    CustomLog "/var/httpd/logs/bbs-access_log" common
</VirtualHost>

<Directory /var/html/bbs/>
Require all granted
</Directory>

<VirtualHost *:80>
    ServerAdmin admin@amsilence.com
    DocumentRoot "/var/html/blog"
    ServerName blog.centos7-1.com
    ErrorLog "/var/httpd/logs/blog-error_log"
    CustomLog "/var/httpd/logs/blog-access_log" common
</VirtualHost>

<Directory /var/html/blog/>
Require all granted
</Directory>- 1
- 2
- 3
- 4
- 5
- 6
- 7
- 8
- 9
- 10
- 11
- 12
- 13
- 14
- 15
- 16
- 17
- 18
- 19
- 20
- 21
- 22
- 23
- 24
- 25
- 26
- 27
- 28
- 29
- 30
- 31
- 32
- 33
- 34
- 35
- 36
- 1
- 2
- 3
- 4
- 5
- 6
- 7
- 8
- 9
- 10
- 11
- 12
- 13
- 14
- 15
- 16
- 17
- 18
- 19
- 20
- 21
- 22
- 23
- 24
- 25
- 26
- 27
- 28
- 29
- 30
- 31
- 32
- 33
- 34
- 35
- 36
测试配置文件是否正确
[root@centos7-1 httpd]# /sbin/service httpd configtest
Syntax OK- 1
- 2
- 1
- 2
重新启动apache服务
[root@centos7-1 httpd]# systemctl restart httpd.service
[root@centos7-1 httpd]# ps -ef|grep httpd
root      1129     1  2 20:40 ?        00:00:00 /usr/sbin/httpd -DFOREGROUND
apache    1131  1129  0 20:40 ?        00:00:00 /usr/sbin/httpd -DFOREGROUND
apache    1132  1129  0 20:40 ?        00:00:00 /usr/sbin/httpd -DFOREGROUND
apache    1133  1129  0 20:40 ?        00:00:00 /usr/sbin/httpd -DFOREGROUND
apache    1134  1129  0 20:40 ?        00:00:00 /usr/sbin/httpd -DFOREGROUND
apache    1135  1129  0 20:40 ?        00:00:00 /usr/sbin/httpd -DFOREGROUND
root 1138 1112 0 20:40 pts/0 00:00:00 grep --color=auto httpd- 1
- 2
- 3
- 4
- 5
- 6
- 7
- 8
- 9
- 1
- 2
- 3
- 4
- 5
- 6
- 7
- 8
- 9
四、测试web服务
curl测试
[root@centos7-1 httpd]# for name in www bbs blog;do curl $name.centos7-1.com;done;
http://www.centos7-1.com
http://bbs.centos7-1.com
http://blog.centos7-1.com- 1
- 2
- 3
- 4
- 1
- 2
- 3
- 4
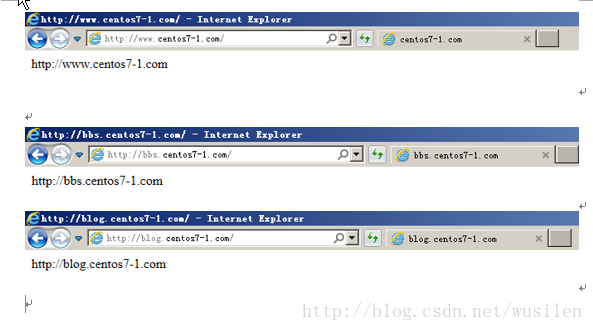
ie浏览器测试
一、安装apache
安装
# yum install httpd -y
# rpm -qa httpd- 1
- 2
- 1
- 2
操作步骤:
[root@centos7-1 httpd]# cat /etc/centos-release
CentOS Linux release 7.2.1511 (Core)
[root@centos7-1 ~]# yum install httpd -y
Loaded plugins: fastestmirror
…………………………………………………………………………
Dependency Installed:
  httpd-tools.x86_64 0:2.4.6-45.el7.centos                         mailcap.noarch 0:2.1.41-2.el7

Complete!
[root@centos7-1 ~]# rpm -qa httpd
httpd-2.4.6-45.el7.centos.x86_64- 1
- 2
- 3
- 4
- 5
- 6
- 7
- 8
- 9
- 10
- 11
- 1
- 2
- 3
- 4
- 5
- 6
- 7
- 8
- 9
- 10
- 11
二、启动测试apache
1、启动apache
[root@centos7-1 ~]# systemctl start httpd.service- 1
- 1
2、查看是否启动成功
[root@centos7-1 ~]# ps -ef|grep httpd
root      1739     1  0 18:34 ?        00:00:00 /usr/sbin/httpd -DFOREGROUND
apache    1740  1739  0 18:34 ?        00:00:00 /usr/sbin/httpd -DFOREGROUND
apache    1741  1739  0 18:34 ?        00:00:00 /usr/sbin/httpd -DFOREGROUND
apache    1742  1739  0 18:34 ?        00:00:00 /usr/sbin/httpd -DFOREGROUND
apache    1743  1739  0 18:34 ?        00:00:00 /usr/sbin/httpd -DFOREGROUND
apache    1744  1739  0 18:34 ?        00:00:00 /usr/sbin/httpd -DFOREGROUND
root      1749  1112  0 18:37 pts/0    00:00:00 grep --color=auto httpd
[root@centos7-1 ~]# netstat -lntup|grep httpd
tcp6 0 0 :::80 :::* LISTEN 1739/httpd - 1
- 2
- 3
- 4
- 5
- 6
- 7
- 8
- 9
- 10
- 1
- 2
- 3
- 4
- 5
- 6
- 7
- 8
- 9
- 10
[root@centos7-1 ~]# echo "192.168.56.101 centos7-1.com www.centos7-1.com bbs.centos7-1.com blog.centos7-1.com">>/etc/hosts
[root@centos7-1 ~]# tail -1 /etc/hosts
192.168.56.101 centos7-1.com www.centos7-1.com bbs.centos7-1.com blog.centos7-1.com- 1
- 2
- 3
- 1
- 2
- 3
使用curl命令测试
[root@centos7-1 ~]# echo "http://www.$HOSTNAME">/var/www/html/index.html
[root@centos7-1 ~]# cat /var/www/html/index.html
http://www.centos7-1.com
[root@centos7-1 ~]# curl www.centos7-1.com
http://www.centos7-1.com- 1
- 2
- 3
- 4
- 5
- 1
- 2
- 3
- 4
- 5
三、配置apache
1、修改前备份文件
[root@centos7-1 ~]# cp /etc/httpd/conf/httpd.conf /etc/httpd/conf/httpd.conf.$(date +%F)
[root@centos7-1 ~]# ll /etc/httpd/conf/httpd.conf /etc/httpd/conf/httpd.conf.$(date +%F)
-rw-r--r-- 1 root root 11753 Nov 15 00:53 /etc/httpd/conf/httpd.conf
-rw-r--r-- 1 root root 11753 Jan 10 18:42 /etc/httpd/conf/httpd.conf.2017-01-10
[root@centos7-1 ~]# - 1
- 2
- 3
- 4
- 5
- 1
- 2
- 3
- 4
- 5
2、配置httpd文件
因为在apache2.4中变化挺大,和nginx一样,可以自定义.conf文件。
在主配置文件中启用虚拟主机
[root@centos7-1 httpd]# mkdir /etc/httpd/vhost.d/
[root@centos7-1 httpd]# echo "include vhost.d/*.conf"
[root@centos7-1 httpd]# tail -1 /etc/httpd/conf/httpd.conf
include vhost.d/*.conf- 1
- 2
- 3
- 4
- 1
- 2
- 3
- 4
虚拟主机配置文件
[root@centos7-1 httpd]# cat ./vhost.d/name.conf
<VirtualHost *:80>
    ServerAdmin admin@amsilence.com
    DocumentRoot "/var/html/www"
    ServerName www.centos7-1.com
    ErrorLog "/var/httpd/logs/www-error_log"
    CustomLog "/var/httpd/logs/www-access_log" common
</VirtualHost>

<Directory /var/html/www/>
Require all granted
</Directory>

<VirtualHost *:80>
    ServerAdmin admin@amsilence.com
    DocumentRoot "/var/html/bbs"
    ServerName bbs.centos7-1.com
    ErrorLog "/var/httpd/logs/bbs-error_log"
    CustomLog "/var/httpd/logs/bbs-access_log" common
</VirtualHost>

<Directory /var/html/bbs/>
Require all granted
</Directory>

<VirtualHost *:80>
    ServerAdmin admin@amsilence.com
    DocumentRoot "/var/html/blog"
    ServerName blog.centos7-1.com
    ErrorLog "/var/httpd/logs/blog-error_log"
    CustomLog "/var/httpd/logs/blog-access_log" common
</VirtualHost>

<Directory /var/html/blog/>
Require all granted
</Directory>- 1
- 2
- 3
- 4
- 5
- 6
- 7
- 8
- 9
- 10
- 11
- 12
- 13
- 14
- 15
- 16
- 17
- 18
- 19
- 20
- 21
- 22
- 23
- 24
- 25
- 26
- 27
- 28
- 29
- 30
- 31
- 32
- 33
- 34
- 35
- 36
- 1
- 2
- 3
- 4
- 5
- 6
- 7
- 8
- 9
- 10
- 11
- 12
- 13
- 14
- 15
- 16
- 17
- 18
- 19
- 20
- 21
- 22
- 23
- 24
- 25
- 26
- 27
- 28
- 29
- 30
- 31
- 32
- 33
- 34
- 35
- 36
测试配置文件是否正确
[root@centos7-1 httpd]# /sbin/service httpd configtest
Syntax OK- 1
- 2
- 1
- 2
重新启动apache服务
[root@centos7-1 httpd]# systemctl restart httpd.service
[root@centos7-1 httpd]# ps -ef|grep httpd
root      1129     1  2 20:40 ?        00:00:00 /usr/sbin/httpd -DFOREGROUND
apache    1131  1129  0 20:40 ?        00:00:00 /usr/sbin/httpd -DFOREGROUND
apache    1132  1129  0 20:40 ?        00:00:00 /usr/sbin/httpd -DFOREGROUND
apache    1133  1129  0 20:40 ?        00:00:00 /usr/sbin/httpd -DFOREGROUND
apache    1134  1129  0 20:40 ?        00:00:00 /usr/sbin/httpd -DFOREGROUND
apache    1135  1129  0 20:40 ?        00:00:00 /usr/sbin/httpd -DFOREGROUND
root 1138 1112 0 20:40 pts/0 00:00:00 grep --color=auto httpd- 1
- 2
- 3
- 4
- 5
- 6
- 7
- 8
- 9
- 1
- 2
- 3
- 4
- 5
- 6
- 7
- 8
- 9
四、测试web服务
curl测试
[root@centos7-1 httpd]# for name in www bbs blog;do curl $name.centos7-1.com;done;
http://www.centos7-1.com
http://bbs.centos7-1.com
http://blog.centos7-1.com- 1
- 2
- 3
- 4
- 1
- 2
- 3
- 4
ie浏览器测试