目录
Spring Boot Actuator 概述
1、本文将以 Spring Boot 2.1.3 版本的文档进行介绍,官网:Part V. Spring Boot Actuator: Production-ready features
2、注意:2.x 以上的版本与之前的老版本细节上可能有许多不同,实际中应该多查看官方文档进行学习和使用,本文将介绍其中常用的一部分进行入门学习与指引。
SpringBoot 包含许多附加功能,帮助您在将应用程序推送到生产环境时监控和管理应用程序。您可以选择使用HTTP端点或使用JMX管理和监视应用程序。
3、spring-boot-actuator 组件的功能就是进行监控和管理应用程序。
Definition of Actuator(执行器的定义)
An actuator is a manufacturing term that refers to a mechanical device for moving or controlling something. Actuators can generate a large amount of motion from a small change.
执行器是一个制造术语,指的是移动或控制某物的机械装置,可以通过一个微小的变化而产生大量的运动。
启用 Actuator 执行器
1、Maven 项目时在 pom.xml 文件导入如下 Actuator 启动器:
<dependencies>
	<dependency>
		<groupId>org.springframework.boot</groupId>
		<artifactId>spring-boot-starter-actuator</artifactId>
	</dependency>
</dependencies>
2、Gradle 项目时:
dependencies {
	compile("org.springframework.boot:spring-boot-starter-actuator")
}
Endpoints(端点)
1、可以启用或禁用某个端点,要远程访问端点,还必须通过JMX或HTTP公开端点(大多数应用程序选择HTTP),其中端点的ID 和默认前缀/actuator 会映射到 URL,例如:默认情况下 health 端点映射到 "/actuator/health",浏览器可以通过:http://ip:port/context-path/actuator/health 访问 health 节点了。
| ID | 描述 | 默认是否启用 |
|---|---|---|
| auditevents | 显示当前应用程序的审计事件信息 | Yes |
| beans | 显示一个应用中所有Spring Beans的完整列表 |
Yes |
| conditions | 显示配置类和自动配置类(configuration and auto-configuration classes)的状态及它们被应用或未被应用的原因 |
Yes |
| configprops | 显示一个所有@ConfigurationProperties的集合列表 |
Yes |
| env | 显示来自Spring的 ConfigurableEnvironment的属性 |
Yes |
| flyway | 显示数据库迁移路径,如果有的话 | Yes |
| health | 显示应用的健康信息(当使用一个未认证连接访问时显示一个简单的’status’,使用认证连接访问则显示全部信息详情) |
Yes |
| info | 显示任意的应用信息 |
Yes |
| liquibase | 展示任何Liquibase数据库迁移路径,如果有的话 | Yes |
| metrics | 展示当前应用的metrics信息 |
Yes |
| mappings | 显示一个所有@RequestMapping路径的集合列表 |
Yes |
| scheduledtasks | 显示应用程序中的计划任务 |
Yes |
| sessions | 允许从Spring会话支持的会话存储中检索和删除(retrieval and deletion)用户会话。使用Spring Session对反应性Web应用程序的支持时不可用。 | Yes |
| shutdown | 允许应用以优雅的方式关闭(默认情况下不启用) | No |
| threaddump | 执行一个线程dump | Yes |
启用端点(Enabling Endpoints)
1、默认情况下除了 shutdown 端点都已经默认启用,启用某个端点:则应用会创建此端点,同时存在于应用上下文中,启用之后不代表从浏览器就可以访问了,还需要将端点暴露/公开出来,web 才可以访问。
2、如果想启用某个端点,可以使用:management.endpoint.<id>.enabled 属性,值为 true 则为启用,false 为禁用,如启用 shutdown 端点:
management.endpoint.shutdown.enabled=true3、如果希望端点启用是选择性加入而不是选择性排除,则可以使用 management.endpoints.enabled-by-default 属性设置为false,此时表示禁用了所有端点,然后再使用 management.endpoint.<id>.enabled 属性为 true 启用需要的端点即可,如下所示为除了 info 端点外的所有端点全部禁用。
management.endpoints.enabled-by-default=false
management.endpoint.info.enabled=true
Exposing Endpoints(公开端点)
1、启用端点后,要远程访问端点,还必须通过JMX或HTTP公开端点(大多数应用程序选择HTTP)
2、由于端点可能包含敏感信息,因此应仔细考虑何时公开它们,下表显示了内置端点的默认曝光情况:
| ID | JMX | Web |
|---|---|---|
|
|
Yes |
No |
|
|
Yes |
No |
|
|
Yes |
No |
|
|
Yes |
No |
|
|
Yes |
No |
|
|
Yes |
No |
|
|
Yes |
No |
|
|
Yes |
Yes |
|
|
N/A |
No |
|
|
Yes |
No |
|
|
Yes |
Yes |
|
|
Yes |
No |
|
|
N/A |
No |
|
|
N/A |
No |
|
|
Yes |
No |
|
|
Yes |
No |
|
|
Yes |
No |
|
|
Yes |
No |
|
|
N/A |
No |
|
|
Yes |
No |
|
|
Yes |
No |
|
|
Yes |
No |
|
|
Yes |
No |
3、如上表所示,默认情况下只公开了 info、health 两个端点,如果想要更改公开/暴露的端点,使用如下的属性:
| Property | Default |
|---|---|
|
|
|
|
|
|
|
|
|
|
|
|
4、include 属性列出了公开的端点的ID,Exclude属性列出不公开的端点的ID。当某个端点同时出现在 include 和 exclude 时,则排除属性优先于包含属性。
例如http上只公开 info 和 health 端点,其余端点全部禁止公开:
management.endpoints.web.exposure.include=health,info例如通过HTTP公开除env和beans端点之外的所有端点:
management.endpoints.web.exposure.include=*    # * 表示所有端点,注意 * 在 YMAL 文件有特殊语义, YMAL 中时必须加单引号 '*'
management.endpoints.web.exposure.exclude=env,beans
配置端点缓存(Configuring Endpoints)
1、端点自动缓存响应,以读取不接受任何参数的操作,要配置端点缓存响应的时间量,请使用 management.endpoint.<ID>.cache.time-to-live 属性。
2、下面的示例将 beans、health 端点缓存时间设置为10秒:
management.endpoint.beans.cache.time-to-live=10s    #默认为0,不缓存
management.endpoint.health.cache.time-to-live=10s   #默认为0,不缓存
#其余端点也是同理
自定义端点访问路径
1、上面已经说过:端点的 ID 与默认前缀 /actuator 会自动映射到应用的 URL ,http 方式公开后浏览器便可以访问,例如:默认情况下访问 health 、info 端点如下:
http://ip:port/context-path/actuator/health
http://ip:port/context-path/actuator/info #其余端点同理2、如果想修改端点的默认前缀 “/actuator”,则可以使用 “management.endpoints.web.base-path” 属性,如下所示将端点默认前缀修改为 manage (实际开发中通常默认即可):
management.endpoints.web.base-path=/manage #默认为 actuator
此时端点的访问路径由默认的 "/actuator/{id}"变成了/manage/{id}(如/manage/info).
3、除了修改端点默认的前缀 "/actuator",还可以修改端点的访问路径(映射),端点默认使用的是它的 <ID> 值,如果想要修改,则可以使用 “management.endpoints.web.path-mapping.<ID>” 属性,如下所示,修改默认的 "/actuator/health"、/actuator/info 分别为 "/healthcheck"、"/appinfo":
management.endpoints.web.base-path=/
management.endpoints.web.path-mapping.health=healthcheck
management.endpoints.web.path-mapping.info=appinfo
CORS Support(跨域支持)
1、跨域资源共享(Cross-origin resource sharing, CORS)是一种 W3C 规范,它允许您以灵活的方式指定授权哪些跨域请求。如果使用 Spring MVC 或 Spring WebFlux,则可以配置 Actuator 的 web 端点支持此类场景。
2、默认情况下禁用了 CORS 支持,只有在设置了 "management.endpoints.web.cors" 属性后才会启用。下面配置允许从htt://example.com 源进行 get 和 post 请求:
management.endpoints.web.cors.allowed-origins=http://example.com  #多个源时使用 "," 分隔,'*' 表示允许所有源进行访问,未设值时将禁用 CORS
management.endpoints.web.cors.allowed-methods=GET,POST  #指定允许访问方式,'*' 表示所有请求方式,默认允许进行 get 请求
3、官方并不只有上面两个配置,关于 cors 跨域配置一共如下所示:官网文档传送。
# ENDPOINTS CORS CONFIGURATION (CorsEndpointProperties)
management.endpoints.web.cors.allow-credentials= # Whether credentials are supported. When not set, credentials are not supported.
management.endpoints.web.cors.allowed-headers= # Comma-separated list of headers to allow in a request. '*' allows all headers.
management.endpoints.web.cors.allowed-methods= # Comma-separated list of methods to allow. '*' allows all methods. When not set, defaults to GET.
management.endpoints.web.cors.allowed-origins= # Comma-separated list of origins to allow. '*' allows all origins. When not set, CORS support is disabled.
management.endpoints.web.cors.exposed-headers= # Comma-separated list of headers to include in a response.
management.endpoints.web.cors.max-age=1800s # How long the response from a pre-flight request can be cached by clients. If a duration suffix is not specified, seconds will be used.
健康信息(Health Information)
1、可以使用健康信息来检查正在运行的应用程序的状态,当生产系统发生故障时,监控软件常常使用它来提醒某人。health 端点公开的信息取决于 management.endpoint.health.show-details 属性,show-details 可用值如下:
| Name(名称) | Description(描述) |
|---|---|
|
|
Details are never shown. (细节从不展示给所有用户)——默认为 never |
|
|
Details are only shown to authorized users. Authorized roles can be configured using |
|
|
Details are shown to all users.(细节展示给所有用户) |
自定义应用信息
1、Custom Application Information(自定义应用信息)。上面已经知道 info 端点默认是启用的,并且是公开的,当浏览器访问 http://ip:port/context-path/actuator/info 时,是可以访问到的,但是默认不会显示任何内容。
2、可以通过设置 info.* 自定义 spring 属性,由 info 端点向外进行公开数据。info key 下的所有环境属性都将自动对外公开,例如可以将以下设置添加到 application.properties 文件中:
# info key 后面的属性自定义即可,它们默认都会对外进行公开
info.app.encoding=UTF-8
info.app.java.source=1.8
info.app.java.target=1.8
3、可以在构建时扩展 info 属性,而不是硬编码这些值,假设您使用 maven,可以将前面的示例重写如下:
# info key 后面的属性自定义即可,它们默认都会对外进行公开
[email protected]@
[email protected]@
[email protected]@
具体使用请参考下面的 “项目实战”部分。
项目实战
1、上面都是通过 Spring Boot 官网 文档查看而来,官网关于 Actuator 的内容还有很多,上面仅仅只是其中一部分,短时间内没办法全部弄完,而且很多内容实际项目中也未必能派上用场,所以入门之后,以后可以根据实际需求再从官网参考即可:
更多详细内容应该参考官网:Spring Boot Actuator 2.1.3 官方文档:https://docs.spring.io/spring-boot/docs/2.1.3.RELEASE/reference/htmlsingle/#production-ready
Spring Boot 2.0 官方文档之 Actuator(博客):https://blog.csdn.net/alinyua/article/details/80009435
2、理论掌握的差不多了,现在来开始实际新建应用检验一下。环境:Java JDK 1.8 + Spring Boot 2.1.3 + IDEA 14.
1)新建应用
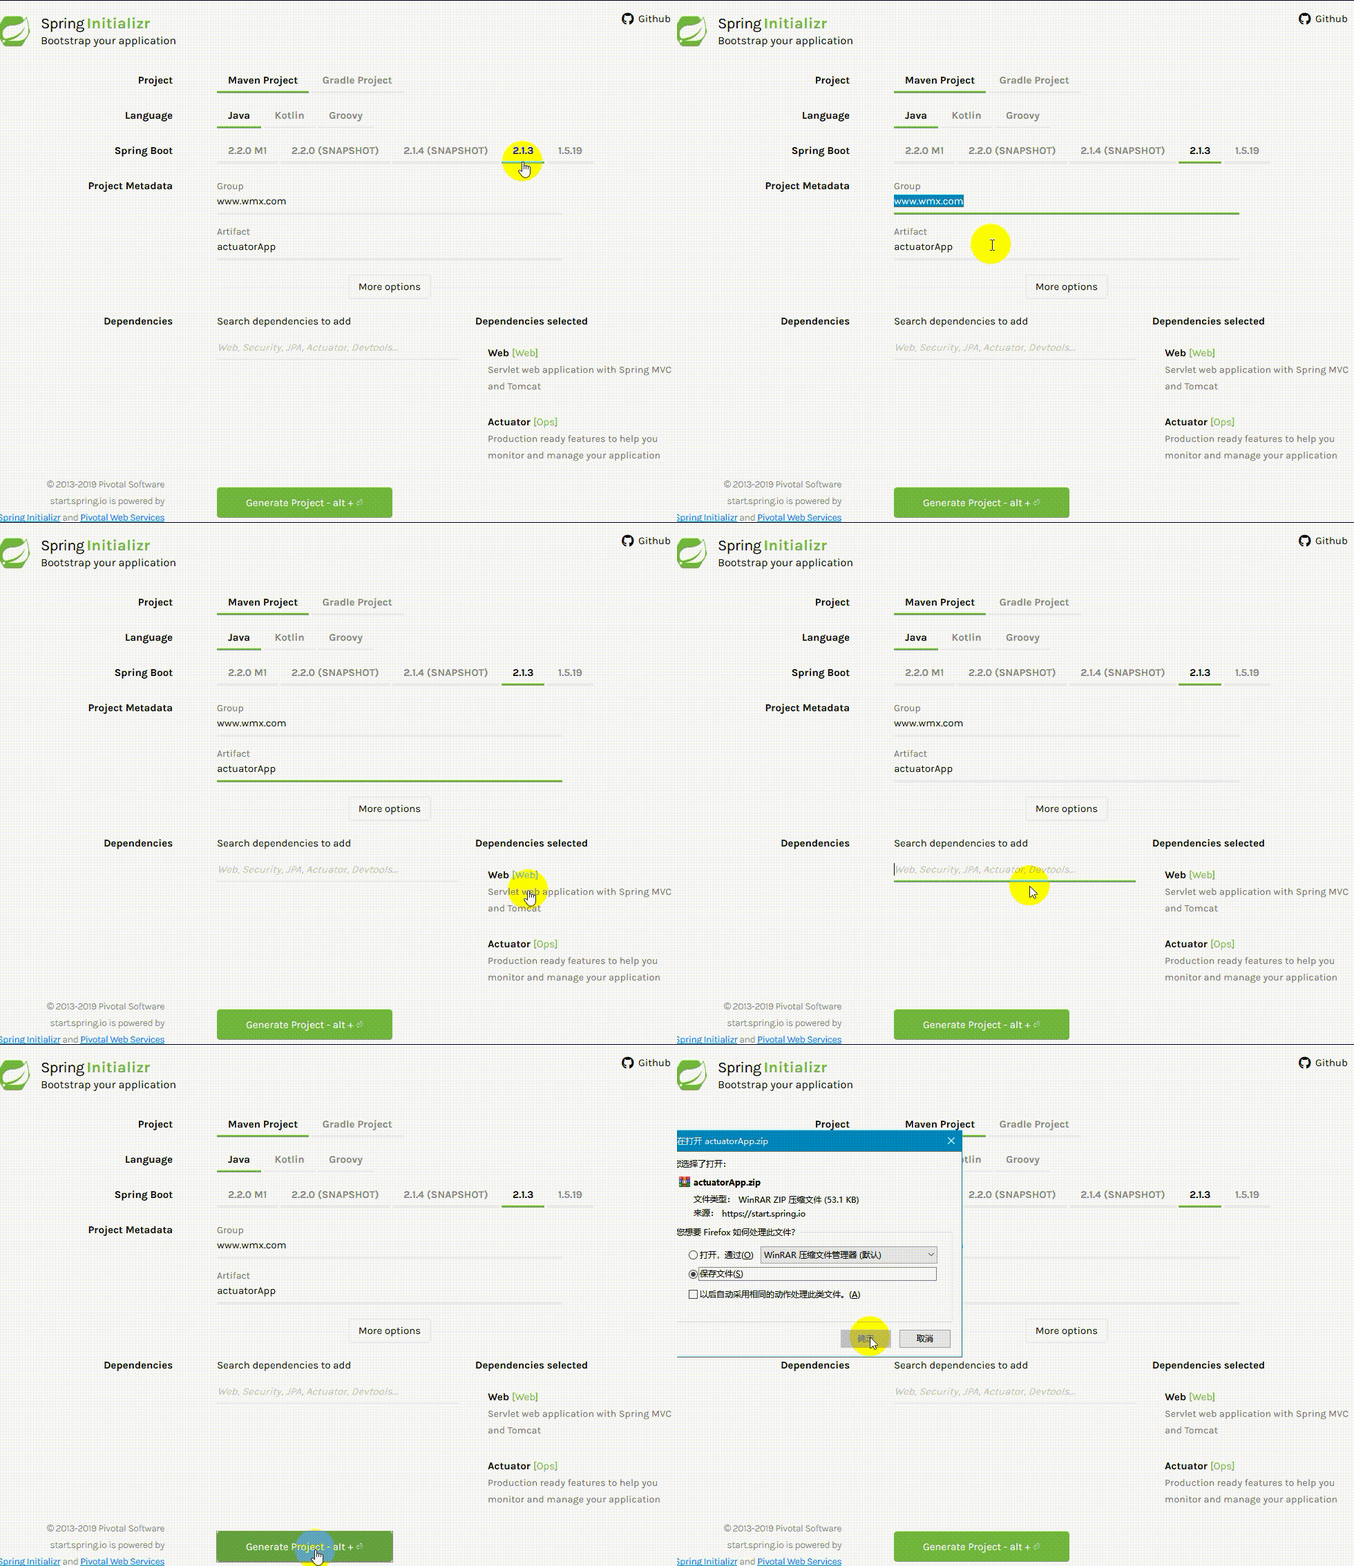
1、直接从 Spring Initializr 网页进行生成项目,Spring Boot 版本为 2.1.3,同时添加了 web 与 actuator 两个依赖。

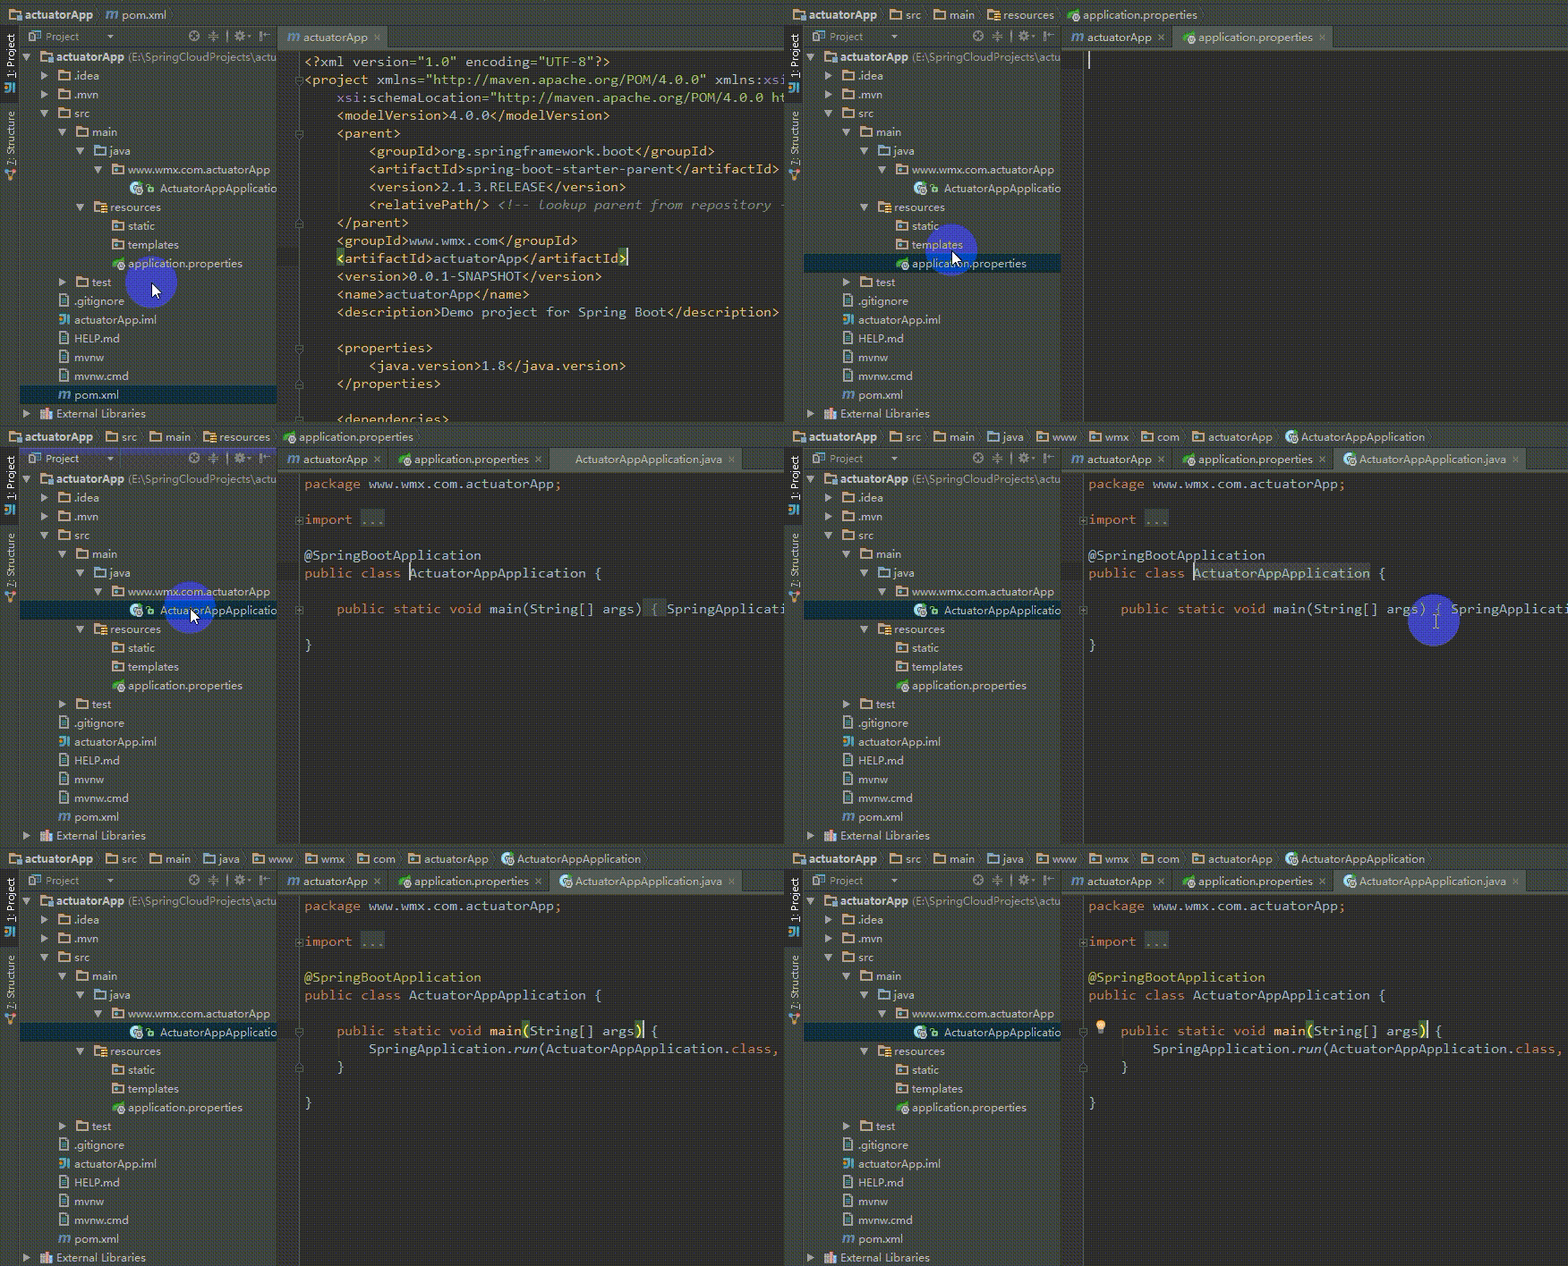
2、然后接着解压之后导入到 IDEA 中,自动联网下载好依赖生成好项目:

3、pom.xml 文件内容如下:
<?xml version="1.0" encoding="UTF-8"?>
<project xmlns="http://maven.apache.org/POM/4.0.0" xmlns:xsi="http://www.w3.org/2001/XMLSchema-instance"
	xsi:schemaLocation="http://maven.apache.org/POM/4.0.0 http://maven.apache.org/xsd/maven-4.0.0.xsd">
	<modelVersion>4.0.0</modelVersion>
	<parent>
		<groupId>org.springframework.boot</groupId>
		<artifactId>spring-boot-starter-parent</artifactId>
		<version>2.1.3.RELEASE</version>
		<relativePath/> <!-- lookup parent from repository -->
	</parent>
	<groupId>www.wmx.com</groupId>
	<artifactId>actuatorApp</artifactId>
	<version>0.0.1-SNAPSHOT</version>
	<name>actuatorApp</name>
	<description>Demo project for Spring Boot</description>

	<properties>
		<java.version>1.8</java.version>
	</properties>

	<dependencies>
		<dependency>
			<groupId>org.springframework.boot</groupId>
			<artifactId>spring-boot-starter-actuator</artifactId>
		</dependency>

		<dependency>
			<groupId>org.springframework.boot</groupId>
			<artifactId>spring-boot-starter-web</artifactId>
		</dependency>

		<dependency>
			<groupId>org.springframework.boot</groupId>
			<artifactId>spring-boot-starter-test</artifactId>
			<scope>test</scope>
		</dependency>
	</dependencies>

	<build>
		<plugins>
			<plugin>
				<groupId>org.springframework.boot</groupId>
				<artifactId>spring-boot-maven-plugin</artifactId>
			</plugin>
		</plugins>
	</build>

</project>
2)application.yml配置
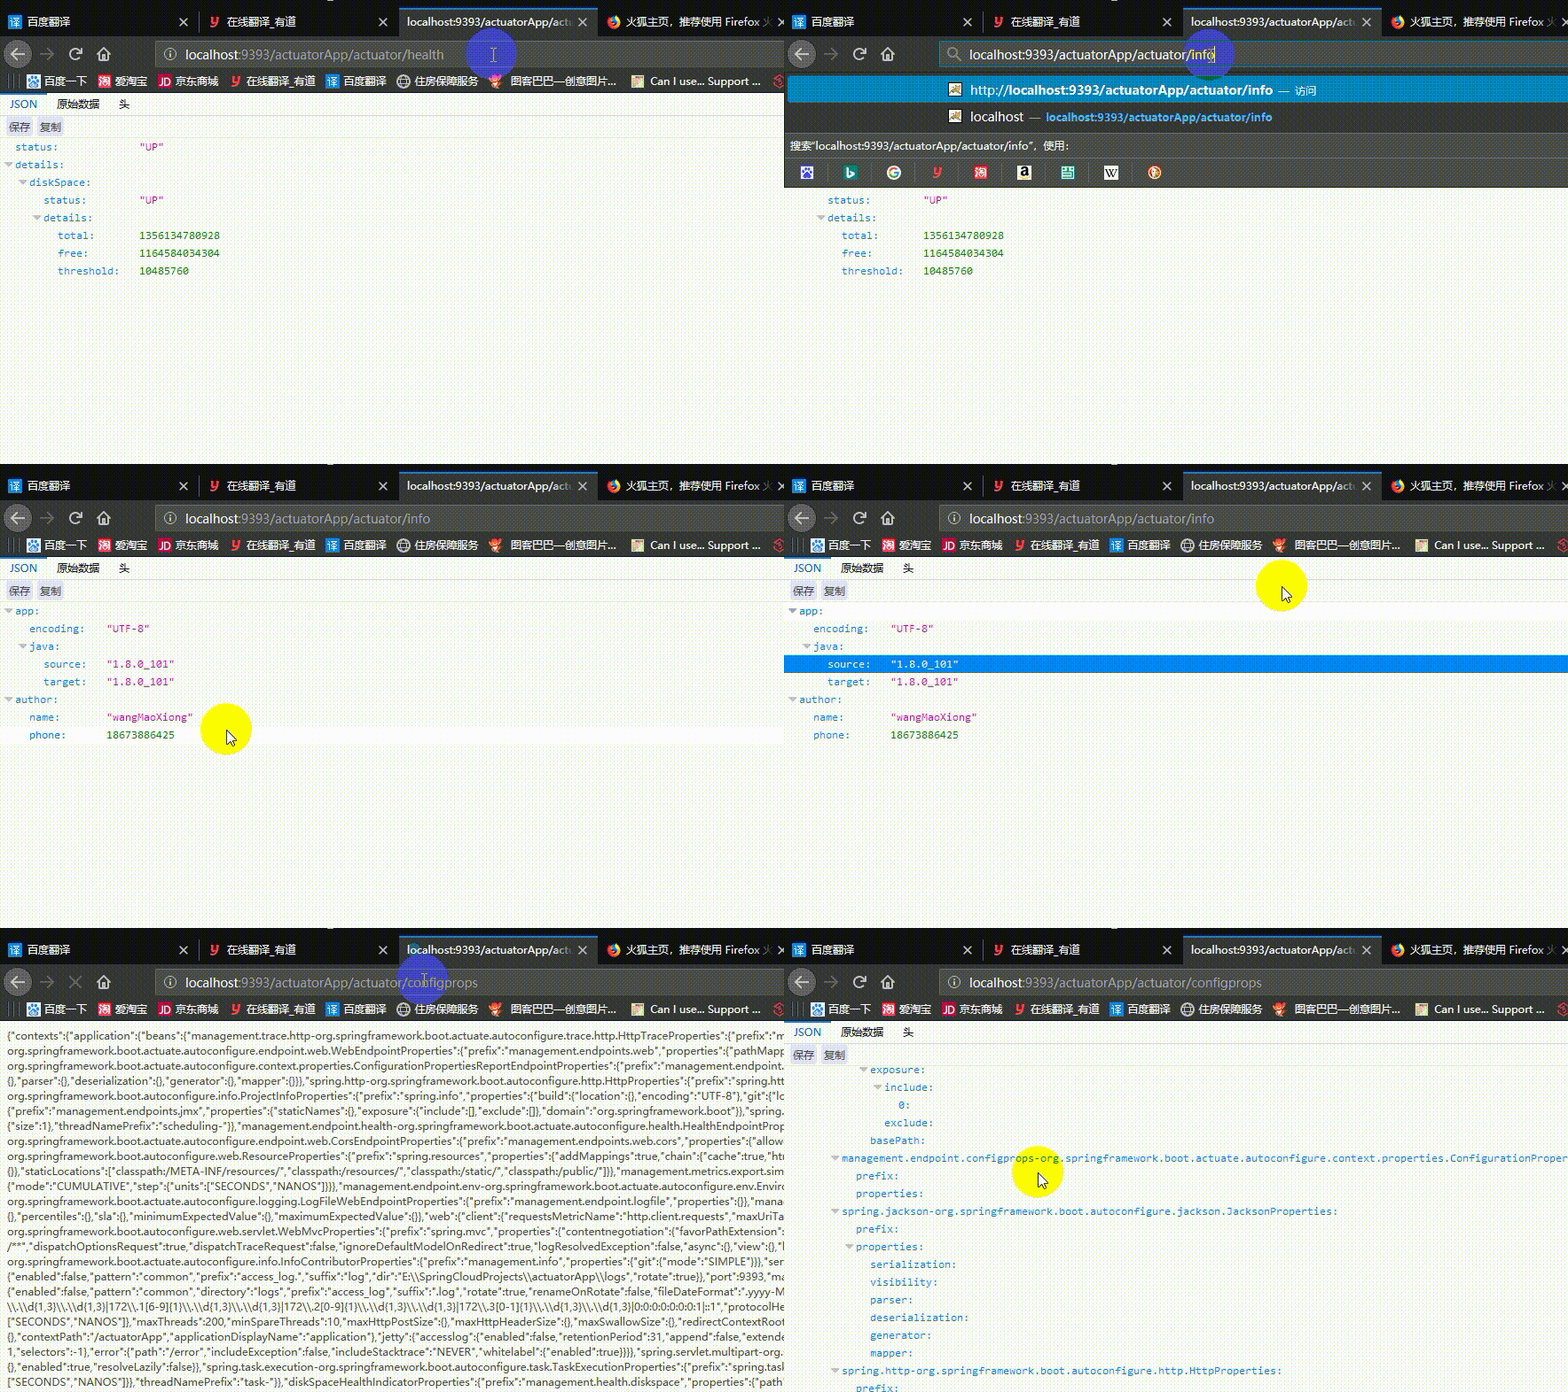
1、如下所示此时只配置服务器的端口与应用上下文,未配置 actuator,启动应用来进行 http 方式访问 actuator 端点。默认情况下此时只公开了 info、health 两个端点,所以只有这两个可以访问,默认前缀为 /actuator。
#服务器配置
server:
  port: 9393
  servlet:
    context-path: /actuatorApp
2、如下所示公开所有端点对外提供访问,并展示细节信息给所有用户查看:
#服务器配置
server:
  port: 9393
  servlet:
    context-path: /actuatorApp

#配置 actuator
management:
  endpoints:
    web:
      exposure:
        include: '*' #公开所有端点,YMAL 文件时,* 必须加单引号,默认只公开了 info、health

  endpoint:
    health:
      show-details: always #将端点细节展示给所有用户查看,默认为 never(不展示细节给所有用户)
3、上面已经说过,info 端点默认是没有内容的,需要自定义属性对外进行展示:
#服务器配置
server:
  port: 9393
  servlet:
    context-path: /actuatorApp

#配置 actuator
management:
  endpoints:
    web:
      exposure:
        include: '*' #公开所有端点,YMAL 文件时,* 必须加单引号,默认只公开了 info、health

  endpoint:
    health:
      show-details: always #将端点细节展示给所有用户查看,默认为 never(不展示细节给所有用户)

info: #下面的值全部自定义即可
  app:
    encoding: @project.build.sourceEncoding@  #应用编码
    java:
      source: @java.version@  #jdk 版本
      target: @java.version@  #jdk 版本
  author:
    name: wangMaoXiong  #作者姓名
    phone: 18673886425  #作者联系方式

其余内容不再一 一进行测试。