一、在项目的根目录下新建一个store文件夹,然后在文件夹下新建一个index.js文件

二、在新建的index.js下引入vue和vuex,具体如下:
//引入vue和vuex
import Vue from 'vue'
import Vuex from 'vuex'
Vue.use(Vuex)

const store = new Vuex.Store({//全局变量定义
    state: {
        forcedLogin: false,//是否需要强制登录
        hasLogin: false,
        userName: "",
        userId:'',
        token:'',
        pointId:'',
    },
    mutations: {
        login(state, user) {
            state.userName = user.username || '';
            state.hasLogin = true;
            state.userId = user.id || '';
            state.token = user.token || '';
            state.pointId = user.pointId || '';
        },
        logout(state) {
           state.userName = "";
           state.hasLogin = false;
           state.userId = '';
           state.token = '';
           state.pointId = '';
        }
    }
})
export default store
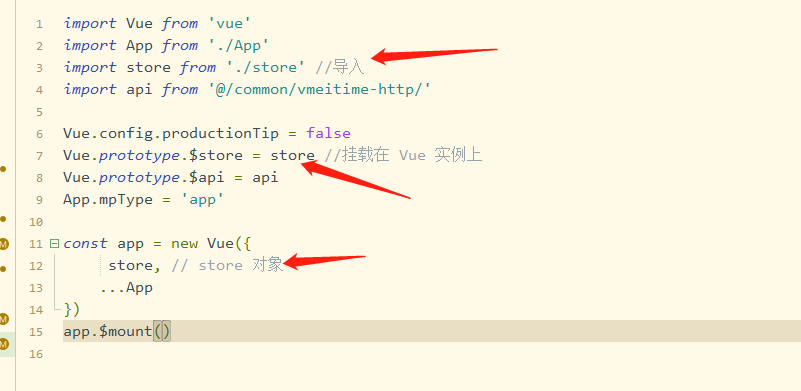
三、在main.js中注册
想要定义的这个 js 文件中的变量和方法能在各个页面使用并生效,需要先在项目目录下的 main.js 文件中导入这个 js 文件并声明方法,如下图所示:
四、在 pages/index/index.vue 使用
1、先在页面导入vuex的方法
2、然后,在 computed 计算属性方法中使用 mapState 对全局变量进行监控。
3、一进来index.vue 页面,在onload()页面加载的时候,判断是否已是登陆状态,不是的话,弹出对话框,提示进行‘登陆操作’

五、登陆页面
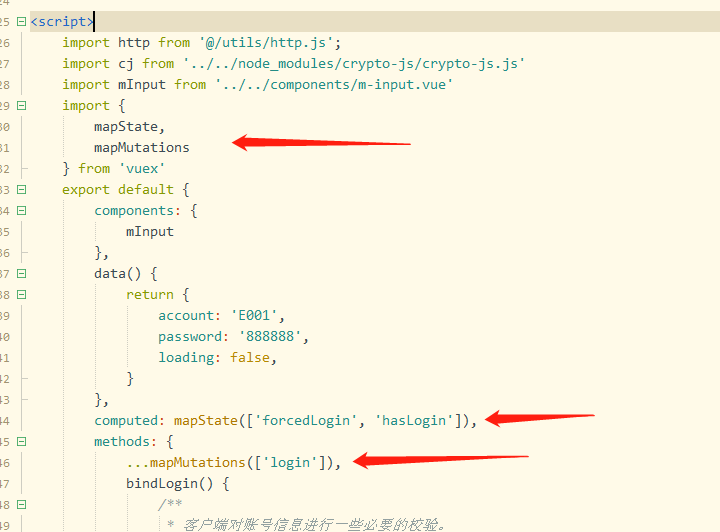
1、先在页面导入vuex的方法,如下:
2、在 computed 计算属性方法中使用 mapState 对全局变量进行监控,在 method中使用 mapMutations 进行全局方法监控,如下所示:
3、网络请求成功后,在回调函数 success 中调用该方法,并把回调函数的返回值数据传给 login 方法
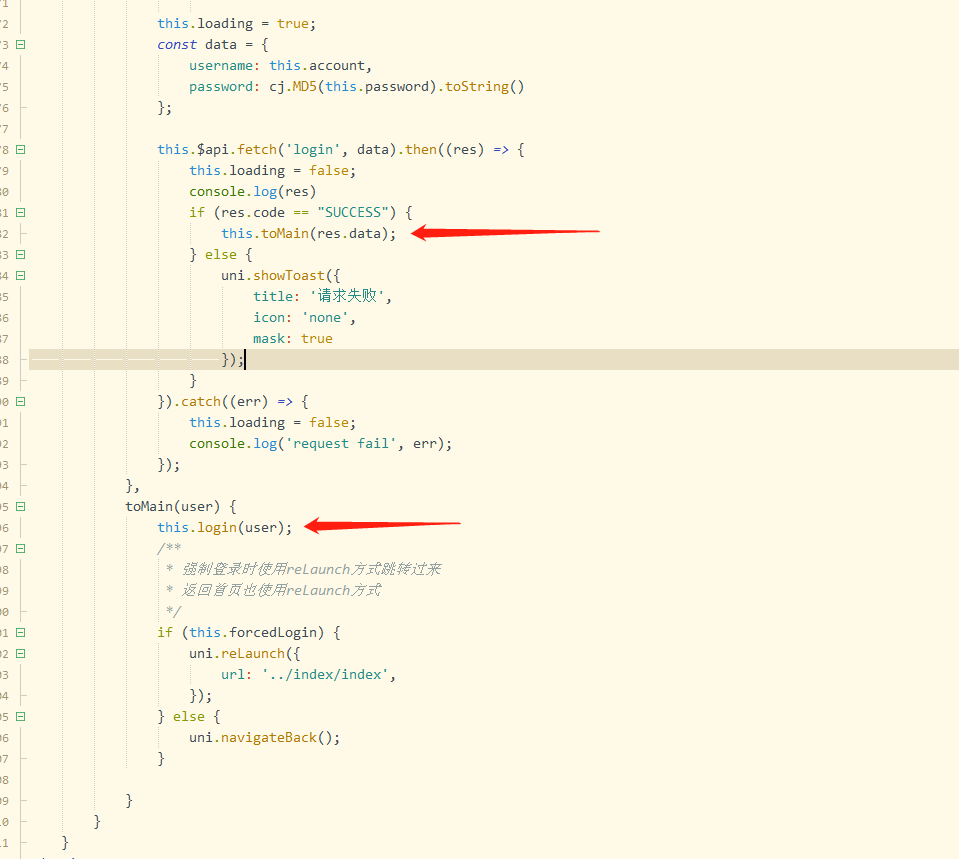
4、随后 store/ index.js 文件中的login方法会把传过来的用户数据保存在vuex。
五、扩展
在vue文件中使用 取值,比如其中的token,可以使用‘this.$store.state.token’这样来取。
在js文件中使用
1、import store from '../../store' 先引用
2、store.state.token 取值
vuex 中的 store 和 $store 的区别
$store 是挂载在 Vue 实例上的(即Vue.prototype),而组件也其实是一个Vue实例,在组件中可使用 this 访问原型上的属性,template 拥有组件实例的上下文,可直接通过 this.$store.state.token。store.state.token , 需声明过 store 才可访问。